Shipium Carrier Selection: Adding Label Augmentations
Overview
Shipium supports custom label augmentations in order to enable minor changes or insertions on carrier labels. For more details about the overall process, see Carrier Shipment Label Custom Label Augmentations which covers it in detail.
This page will walk through the steps of configuring a label augmentation
Make Sure Label Changes Are Approved
There is very little room on most carrier labels and carriers do not like for you to modify them. If you are planning on augmenting a label, you will need to work with the specific carrier to get any changes approved through their process.
Some carriers will require an annual recertification if you are making modifications so keep an eye out for that as well.
When Augmentations are Applied
Label augmentations are applied at the end of the ZPL, just before the ^XZ end format command. This means that augmentations are applied last, so you have the last opportunity to modify the label after all other rendering has been applied.
Adding or Modifying a Label Augmentation
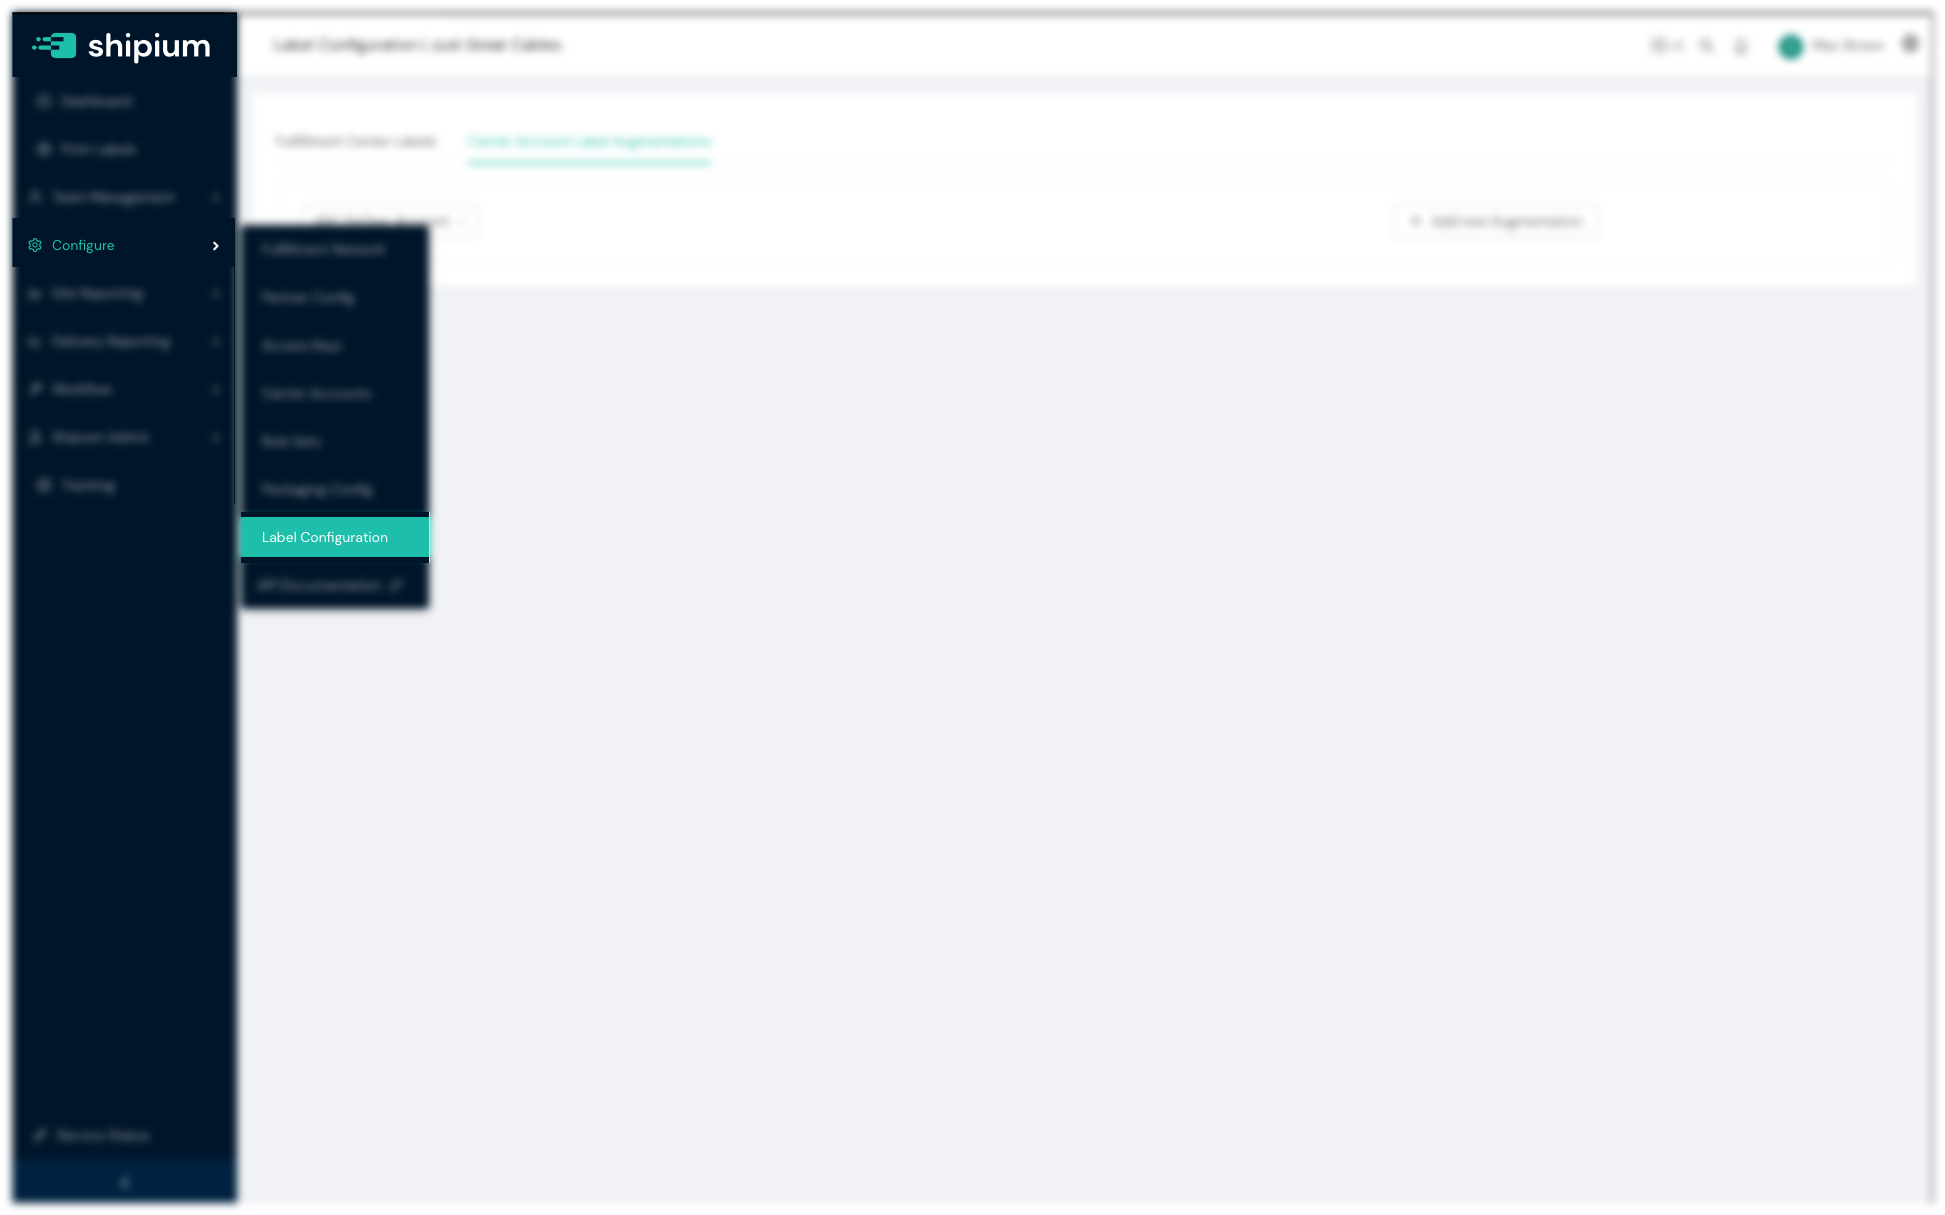
First, log into the Shipium Console and then go to Label Configuration under the Configure menu.

Label configuration menu
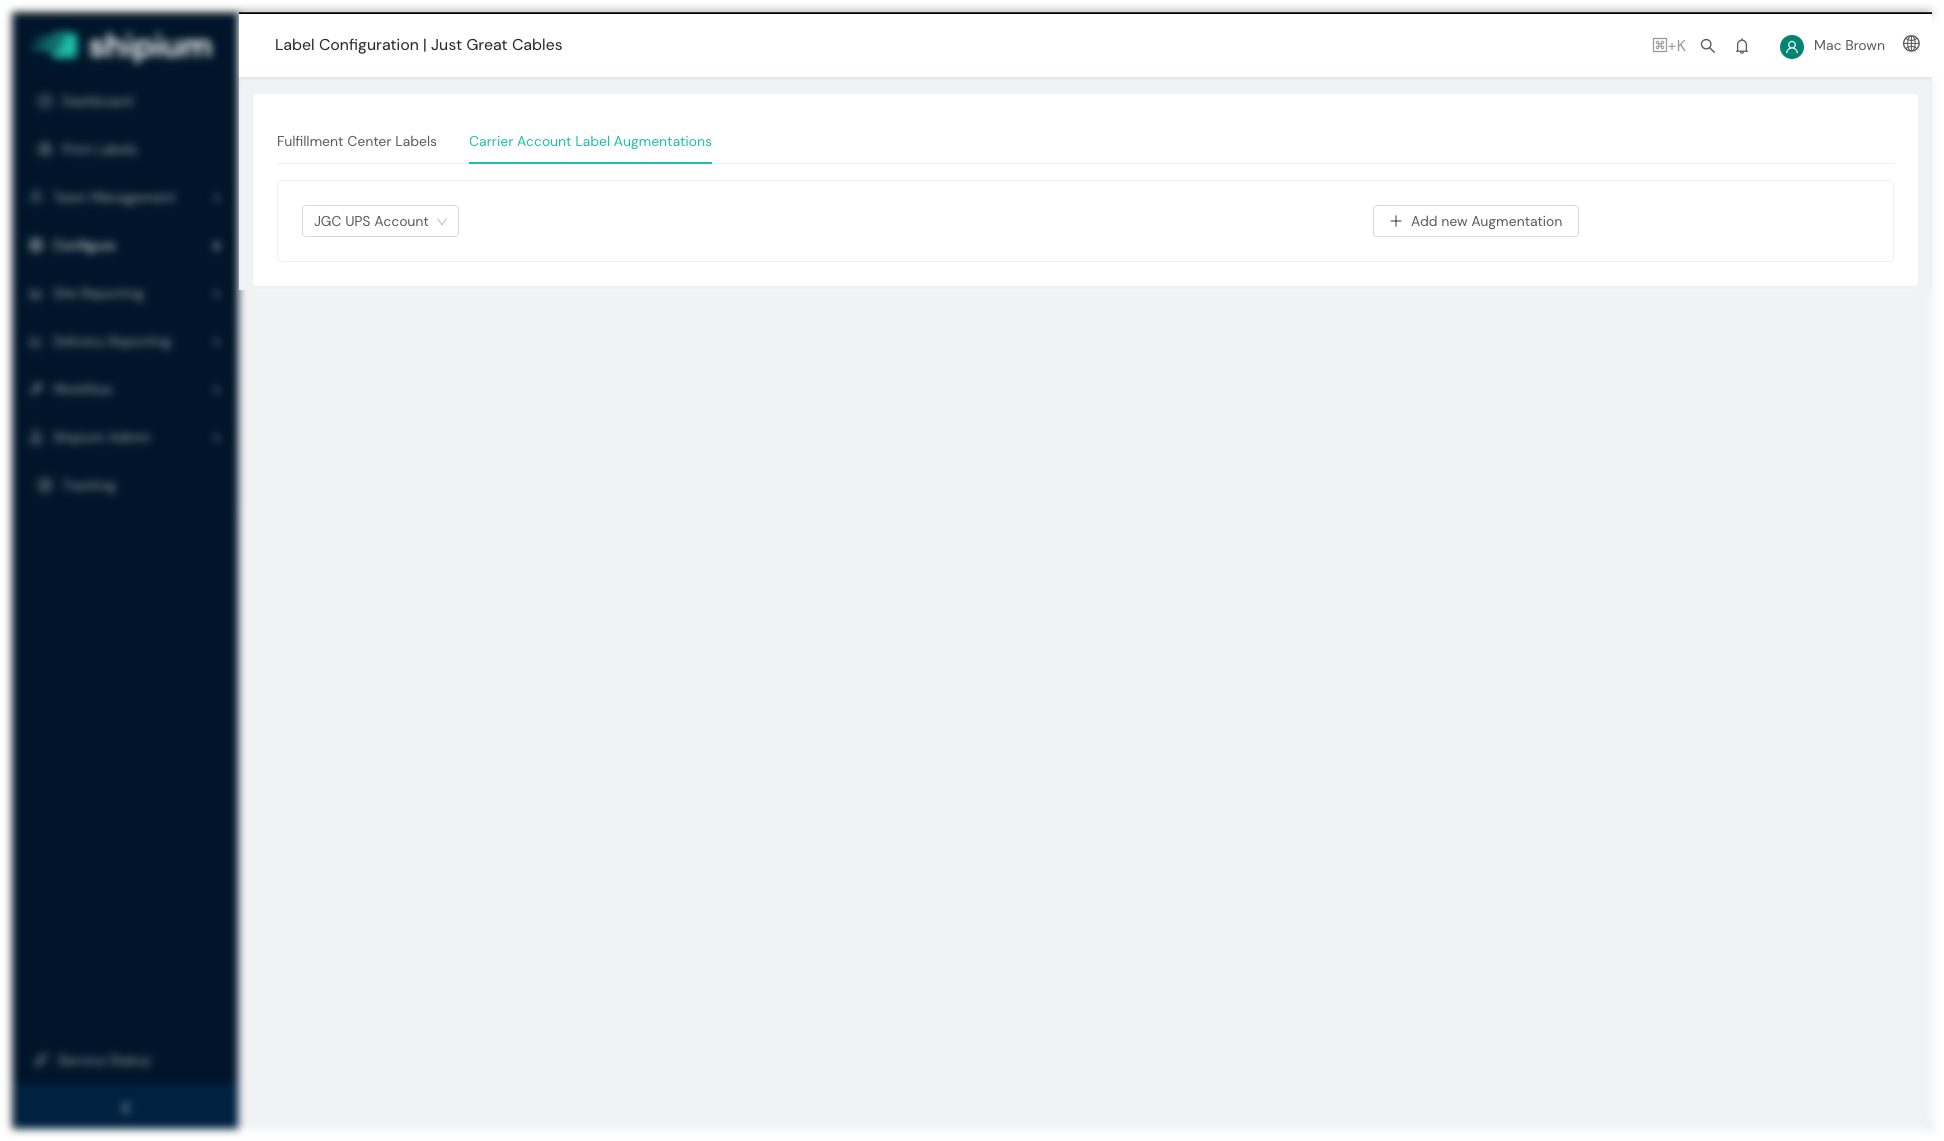
Once you are here, click on the tab titled Carrier Account Label Augmentations. There you will see a list of carrier accounts on the left for which augmentations can be set. Select the carrier for which you are interested in adding or changing a label augmentation.

Carrier Selector and Add Augmentation Button
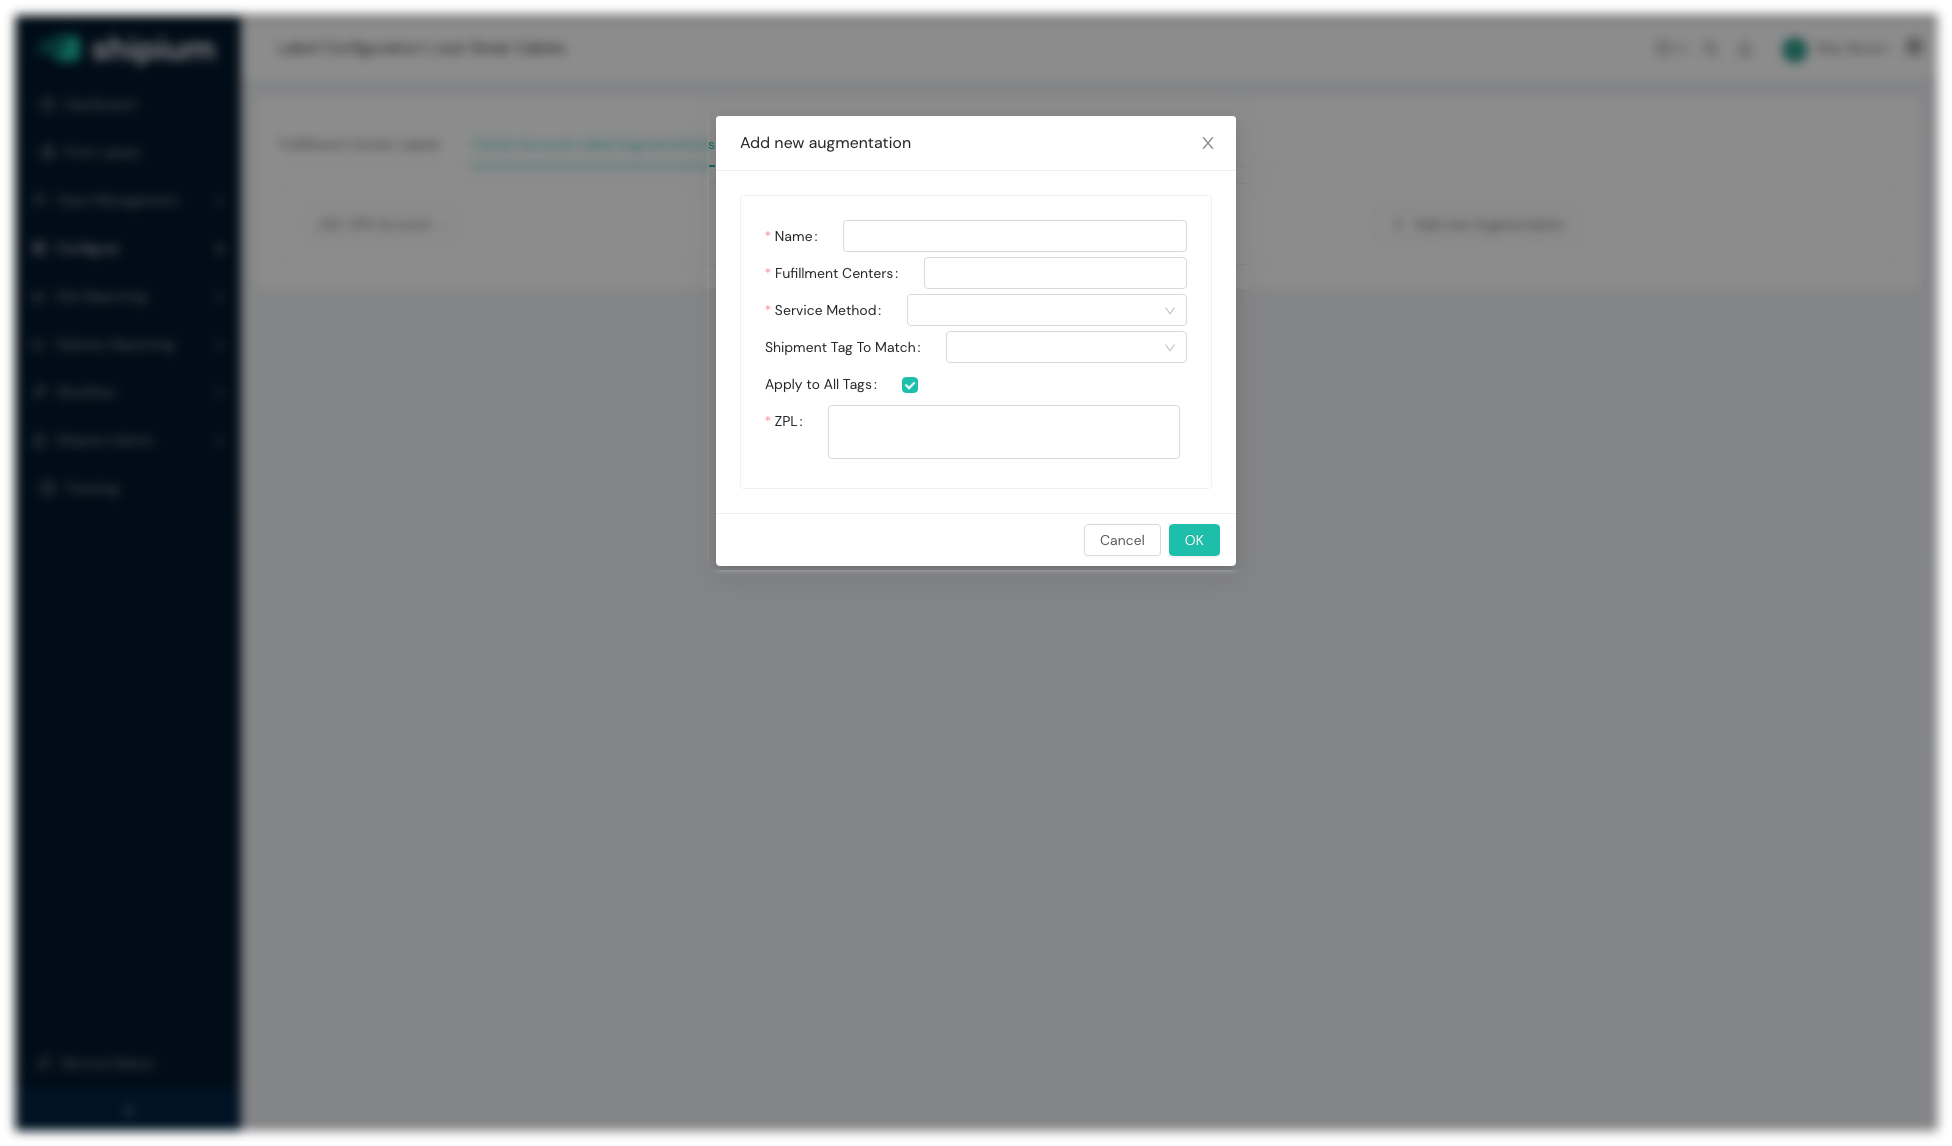
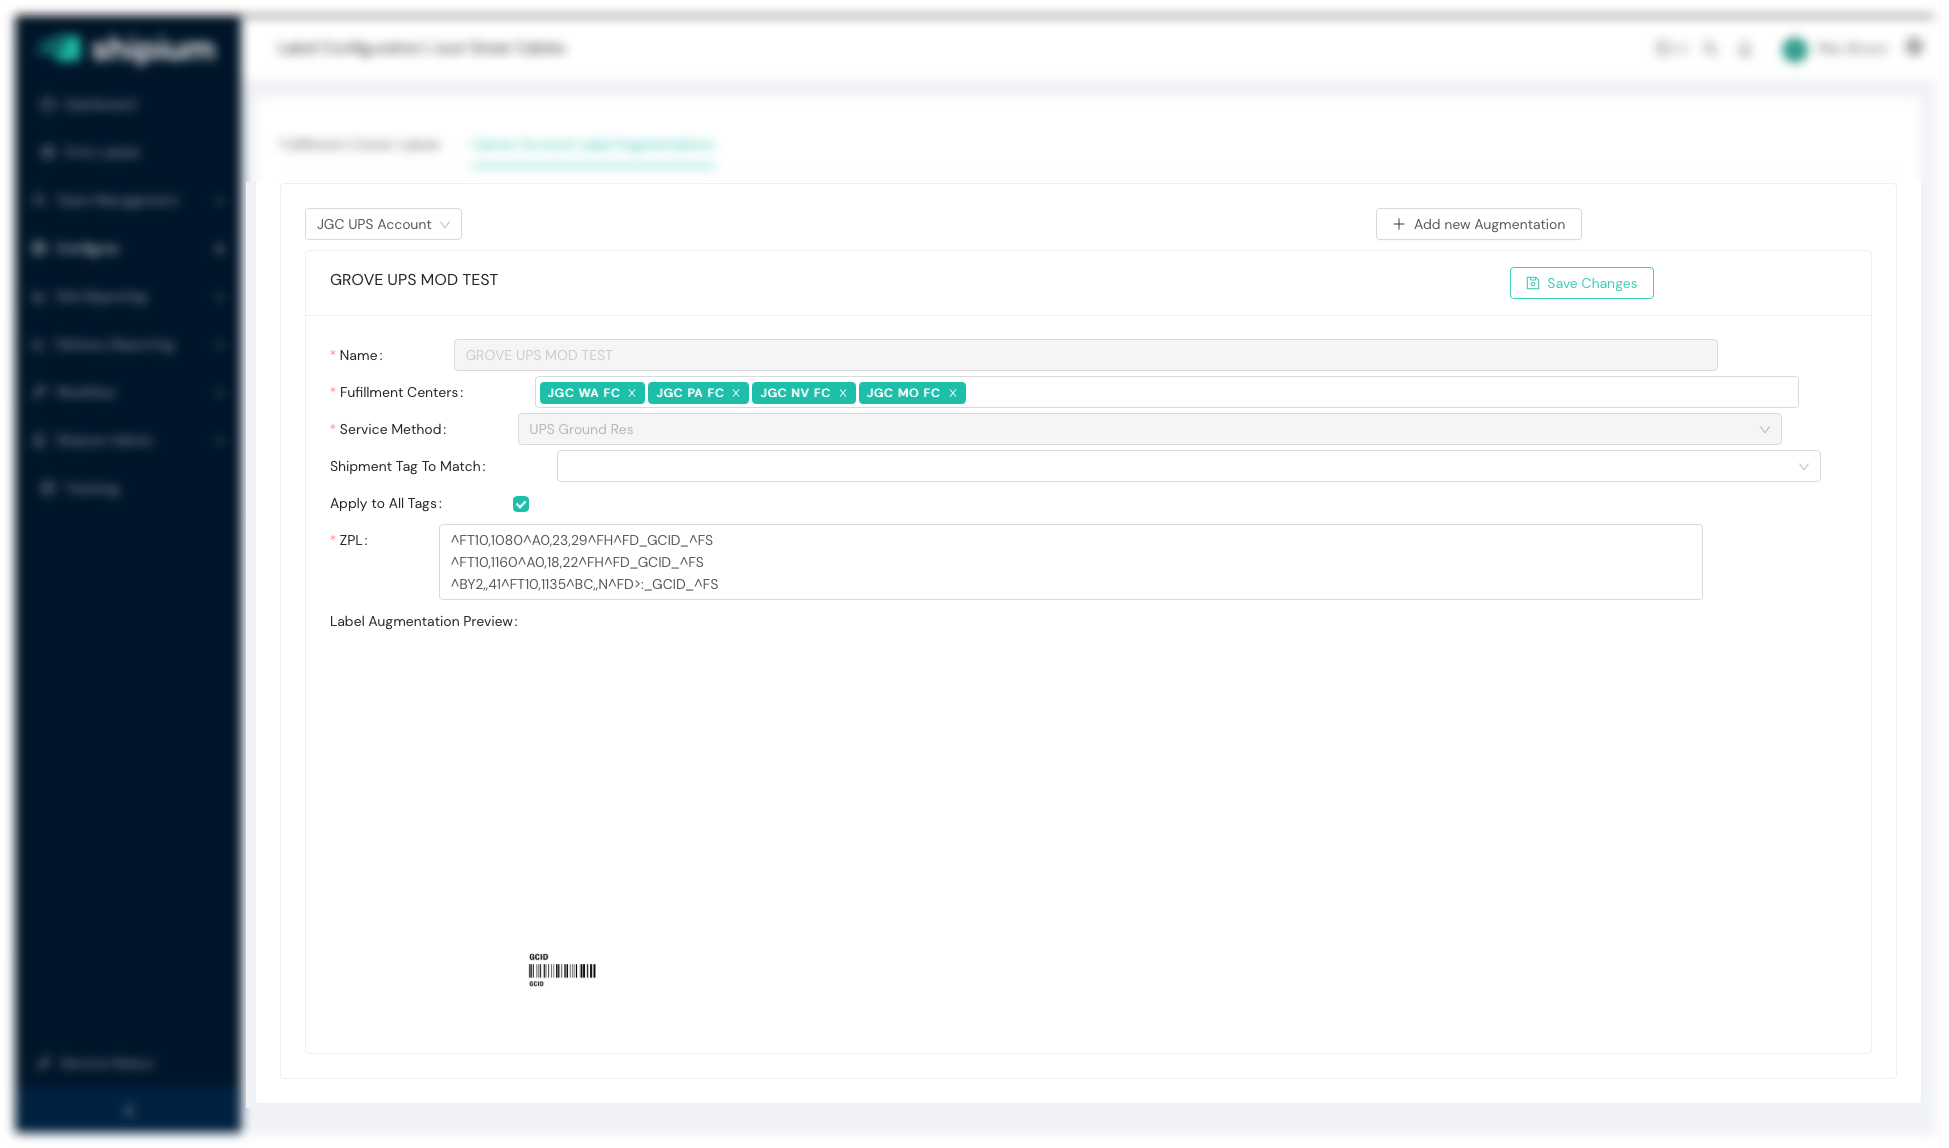
If one or more augmentations already exist for this carrier, you will see them here. By clicking on the Edit button, you can modify an existing augmentation or you can click on + Add New Augmentation to create a new augmentation. In either case, there are six pieces of information to be filled in about each augmentation (only a subset can be modified for existing augmentations).
Label Augmentation: New

Adding a New Label Augmentation
Label Augmentation: Edit Existing

Editing an Existing Label Augmentation
Label Augmentation Settings
In either dialogue, you can set or alter each of the following:
| Value | Description | Can be Updated Later? |
|---|---|---|
| Name | The short name of your label augmentation. Make it specific so that the next person to look at it understands what it is supposed to do. | No. Set at creation time. |
| Fulfillment Centers | Select which fulfillment centers should have this label augmentation applied. Note: Only FCs for which the carrier and method have been configured can be applied. | Yes. |
| Service Method | Select which service method this augmentation will apply to. | No. Set at creation time. |
| Shipment Tag to Match | If you only want this label augmentation to apply to certain shipments, you can use a value in the the shipmentTags field of Shipment as a trigger for augmentations. | Yes. |
| Apply to All Tags | If you want to apply this augmentation to all shipments, regardless of tag value, select this checkbox. This is probably what you want to do. | Yes. |
| ZPL | This is where you enter the ZPL that you would like appended to the labels that meet the criteria you have specified. If you plan on passing custom data as specified in the API documentation, you will include those values in the ZPL as macro values. If you will pass gcid in your API calls, it will be replaced in the ZPL anywhere you have _GCID_. | Yes. |
When you are done editing the above fields, click OK (for new Augmentations) or Save Augmentation (for edited Augmentations).
Updated 6 months ago
