
Configure | Fulfillment Contexts
Set up and maintain your organization's fulfillment contexts within the Shipium Console.
About fulfillment contexts
In order to use Shipium’s APIs, your organization needs to establish your fulfillment network configurations within the Shipium platform. We refer to these configurations as Fulfillment Contexts. Configuring settings for a fulfillment context enables your organization to fulfill shipments according to preset rules, requiring less hands-on maintenance on your part.
A fulfillment context allows you to configure the characteristics for your network origins, carrier contracts, label augmentations, third party billing, injection shipping, and tenants, in addition to other feature settings. To set up and maintain fulfillment contexts, you'll first need to access the Shipium Console.
This document guides you through the general process for creating a fulfillment context. It also includes links to individual pages providing instructions for configuring each fulfillment context component:
- Origin. Required. An origin is the originating physical location to be used when creating a shipment. You must have an origin configured to have a valid fulfillment context. Each context will have only one origin associated with it.
- Carrier Contracts. Required. Carrier contracts define the carrier account, rates, and settings that will be used to cost shipments for a specific location. You must have at least one carrier contract to have a valid fulfillment context.
- Label Configuration. Optional. Label configuration entails setting label properties such as dimensions and orientation as well as any special augmentations.
- Third Party Billing. Optional. Third party billing allows your organization to bill another account, or third party, for the cost of shipping a package.
- Injection. Optional. Injection shipping is the use of an additional mode of transportation, typically long-haul truck, to pick up shipments from a fulfillment center (FC) and transport them to an alternative injection point for delivery by the carrier, which acts as the origin from the last-mile carrier perspective.
- Shipment Lanes. Optional. Your organization may need to manage your fulfillment center shipment lanes to ensure packages are sorted and loaded onto the correct carrier's trailer. Shipium supports configuration of shipment lanes to help you manage which package goes onto which trailer on the same calendar day for the same carrier service method.
Example use case for a fulfillment context
There are many cases in which your organization may need to have different carrier accounts or other behavior changes within the same fulfillment center. For example, you may have multiple carrier accounts in order to simplify accounting if you ship both on your own behalf and for 3PL customers/other partners.
Assume your company ships for two different purposes as described above: your own internal shipments (retail) and shipments you are fulfilling for someone else (3PL). Your accountants have worked with operations to set up two different sets of carrier accounts, one for each of these shipping "contexts", so that they can track the costs independently.
In this case you may have, for example, two different FedEx accounts, one for retail and one for 3PL. You would define two corresponding Fulfillment Contexts, "retail" and "3pl" to enable API calls to refer to the appropriate carrier accounts.
In the future, if you start using the same structure with additional carriers, you just need to label the new accounts with the appropriate Fulfillment Context and the account-switching will take care of itself, no matter which carrier is used.
Configure a fulfillment context
To configure a fulfillment context, you'll first need to create a new context (step 1). Once you've completed the first step, providing details about the context and any applicable tenants and tags, you must add an origin (step 2) and at least one carrier contract (step 3). You won't be able to use the context without those required components.
Next, you can add optional configurations for labels (step 4), third party billing (step 5), and injection shipping (step 6). Steps that follow below for each of these required and optional configurations include a link to the documentation guiding you through each setup step.
The Shipium Console will assign a fulfillment context identification number (fulfillment context ID) that can be used later when making calls to the Shipium APIs.
Step 1. Create a new fulfillment context
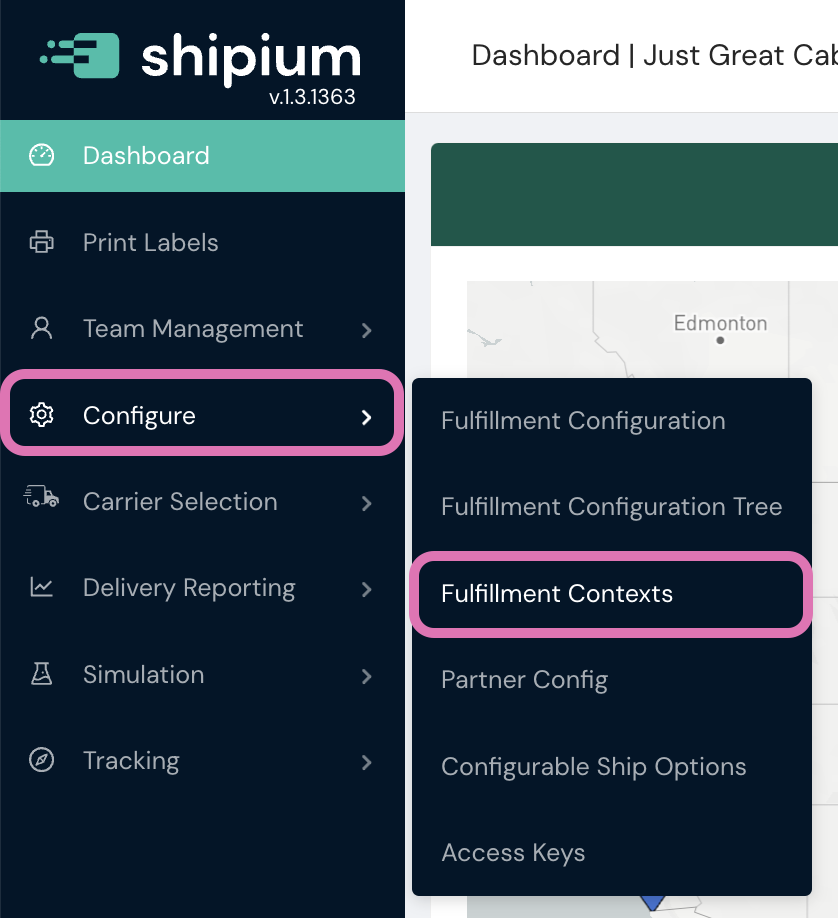
To create a new fulfillment context, you'll need to access the Shipium Console. You'll navigate to Configure and then select Fulfillment Contexts.
Once on the Fulfillment Contexts home screen, you'll select the + Add Fulfillment Context button, as shown in the following screenshot.

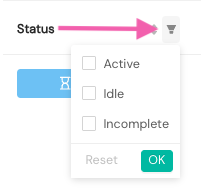
You can filter the list of existing fulfillment contexts by using the Status and Carriers columns. A fulfillment context's status can be Active, Idle, and Incomplete.
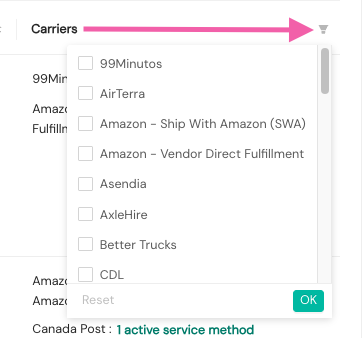
The carrier filter allows viewing of fulfillment contexts configured with selected carriers.
Features of the fulfillment context include Context Details, Return To Address Override Details, and Tenant Details.
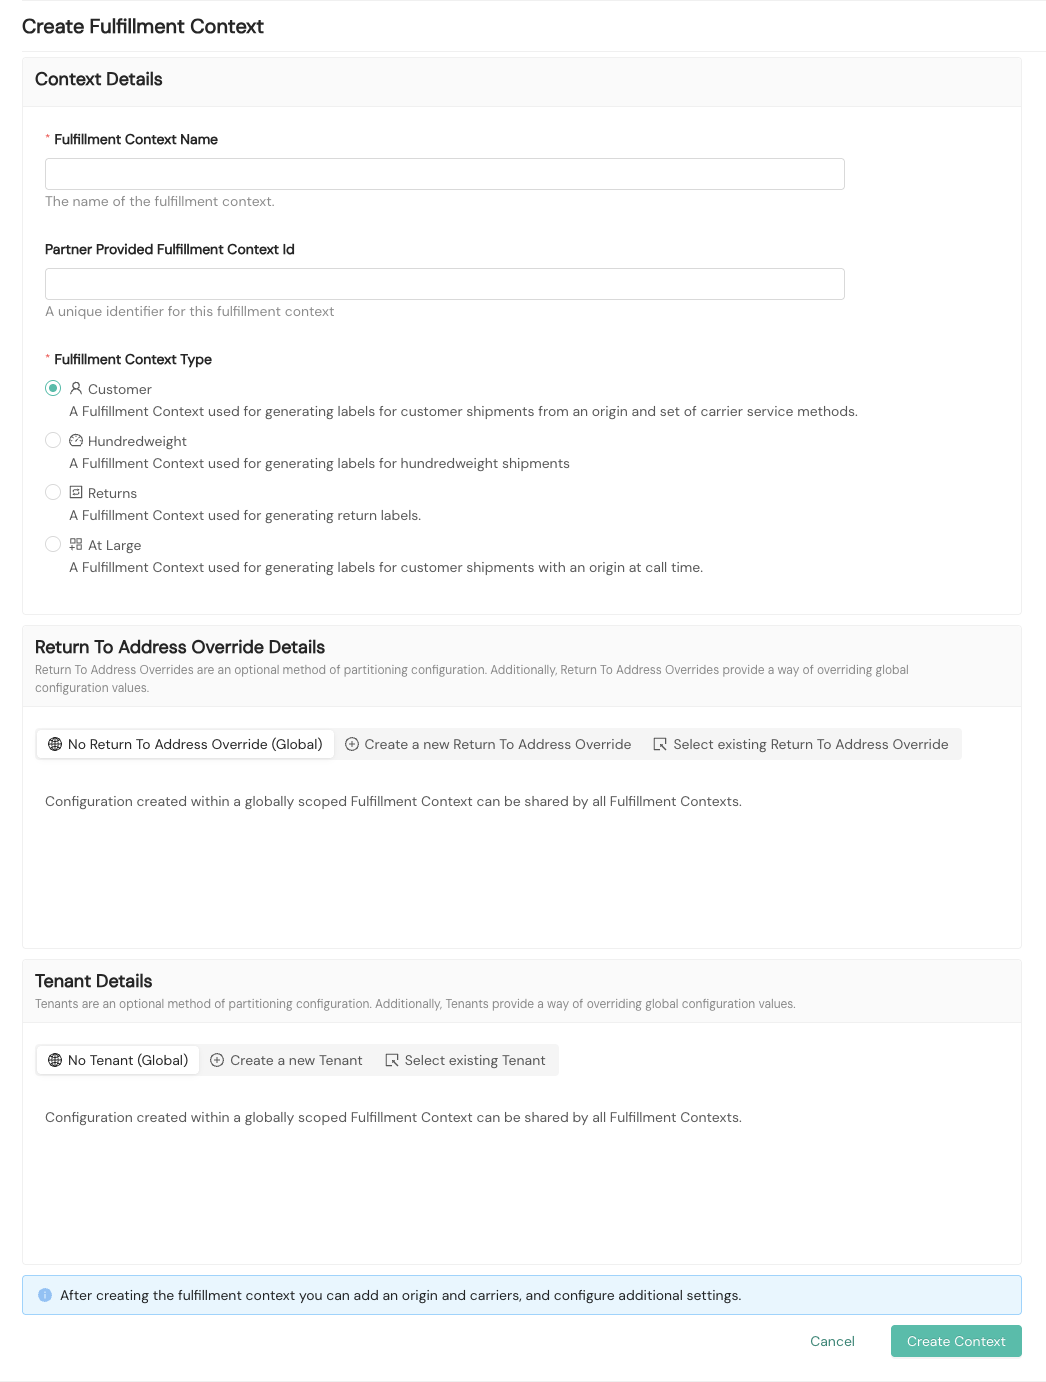
Context details
Fulfillment Context Name
You'll provide a name for the context.
Partner Provided Fulfillment Context ID
You can provide an optional unique identifier that your organization wishes to use to refer to the fulfillment context. This partner fulfillment context ID value can be passed in calls to Shipium's APIs as an alternative to Shipium-generated IDs or tags.
Fulfillment Context Type
Most often, you'll select Customer, which means your fulfillment context will be used for generating labels for customer shipments from a predefined set of origins, carriers, and carrier service methods. If your fulfillment context will be used to generate labels for hundredweight shipping, you'll select Hundredweight.
Additionally, there is a Returns type fulfillment context, which is to be specified for requesting shipment labels for returns. Configuration is required on Shipium's side to enable this type of fulfillment context; your dedicated team member can assist with setup. You can find more information about using a returns fulfillment context in Return Labels. The At Large type fulfillment context is for generating labels for customer shipments with an origin at call time; additional configuration on Shipium's side is required to use this type.
Return to address override details
You may optionally configure a return-to address or multiple return-to addresses at the fulfillment context level. This option allows you to override any global return-to addresses configured in your network. If a return-to address is not provided, the origin address will become its default value. You also can select an existing return-to address from your network.
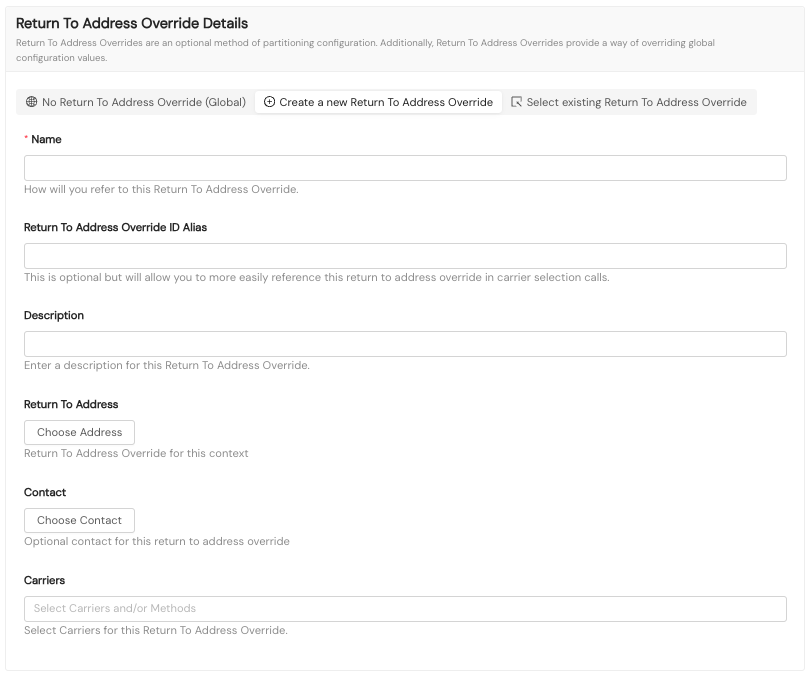
To create a new return-to address override, you'll provide the following details:
- Name. Required. A human-readable name to refer to the return-to address override
- Return To Address Override ID Alias. Optional. An optional ID your organization wishes to use to refer to this return-to address override when calling Shipium's APIs
- Description. Optional. An optional description for the return-to address override
- Return To Address. Required. The physical address for the return-to address override
- Contact. Optional. An optional contact person for the return-to address override
- Carriers. Optional. You can multi-select carriers to associate with this return-to address override. If no carriers are selected, the return-to address override will be applied to all carriers associated with the fulfillment context.
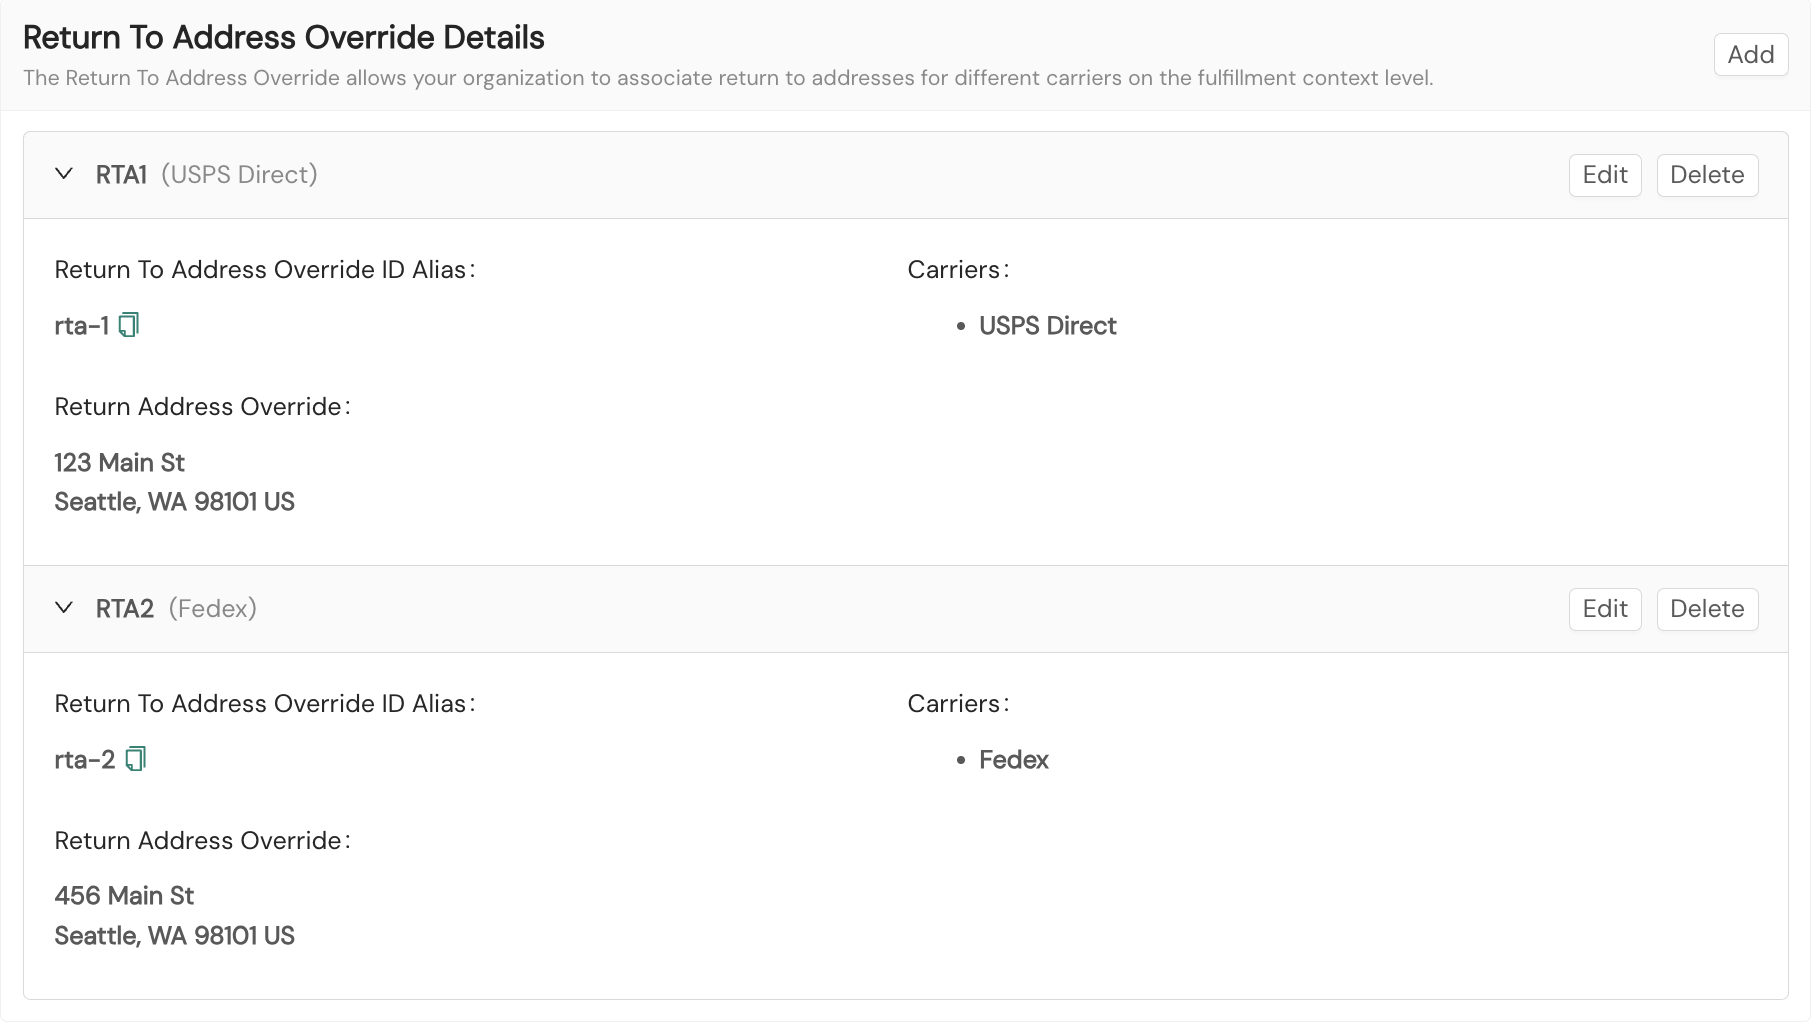
You'll select the Add button each time you wish to create a new return-to address override for the fulfillment context.
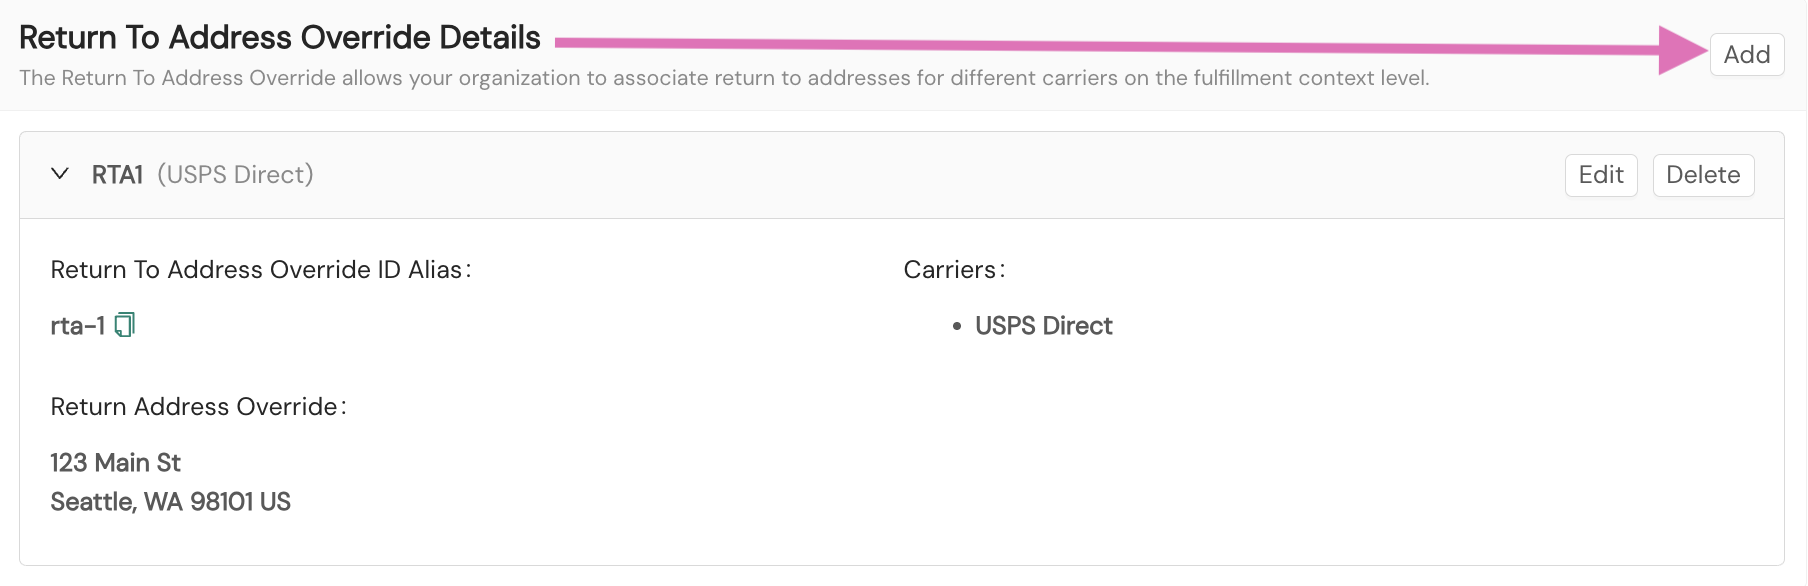
Each return-to address override configured will be displayed in the Return To Address Override Details section of the fulfillment context.
Tenant details
Within Tenant Details, you'll choose the tenant setting for your fulfillment context. If your organization doesn't include tenants, you'll select No Tenant (Global), which indicates that the context's settings, or configurations, can be used globally across your network within other fulfillment contexts.
If you do use tenants in your network and you want to associate one or more with your fulfillment context, you'll choose either Create a New Tenant or Select Existing Tenant, each of which indicates that the context's configuration will be limited to use only with other fulfillment contexts that have the same tenant(s) you select to be associated with the context.
What is a tenant?Within Shipium, tenant refers to an entity that is one of your organization’s customers, typically one that rents storage space at your warehouse, or fulfillment center. As a direct-to-consumer retailer, you may also use the tenant structure in order to divide shipments to your stores from shipments to your customers.
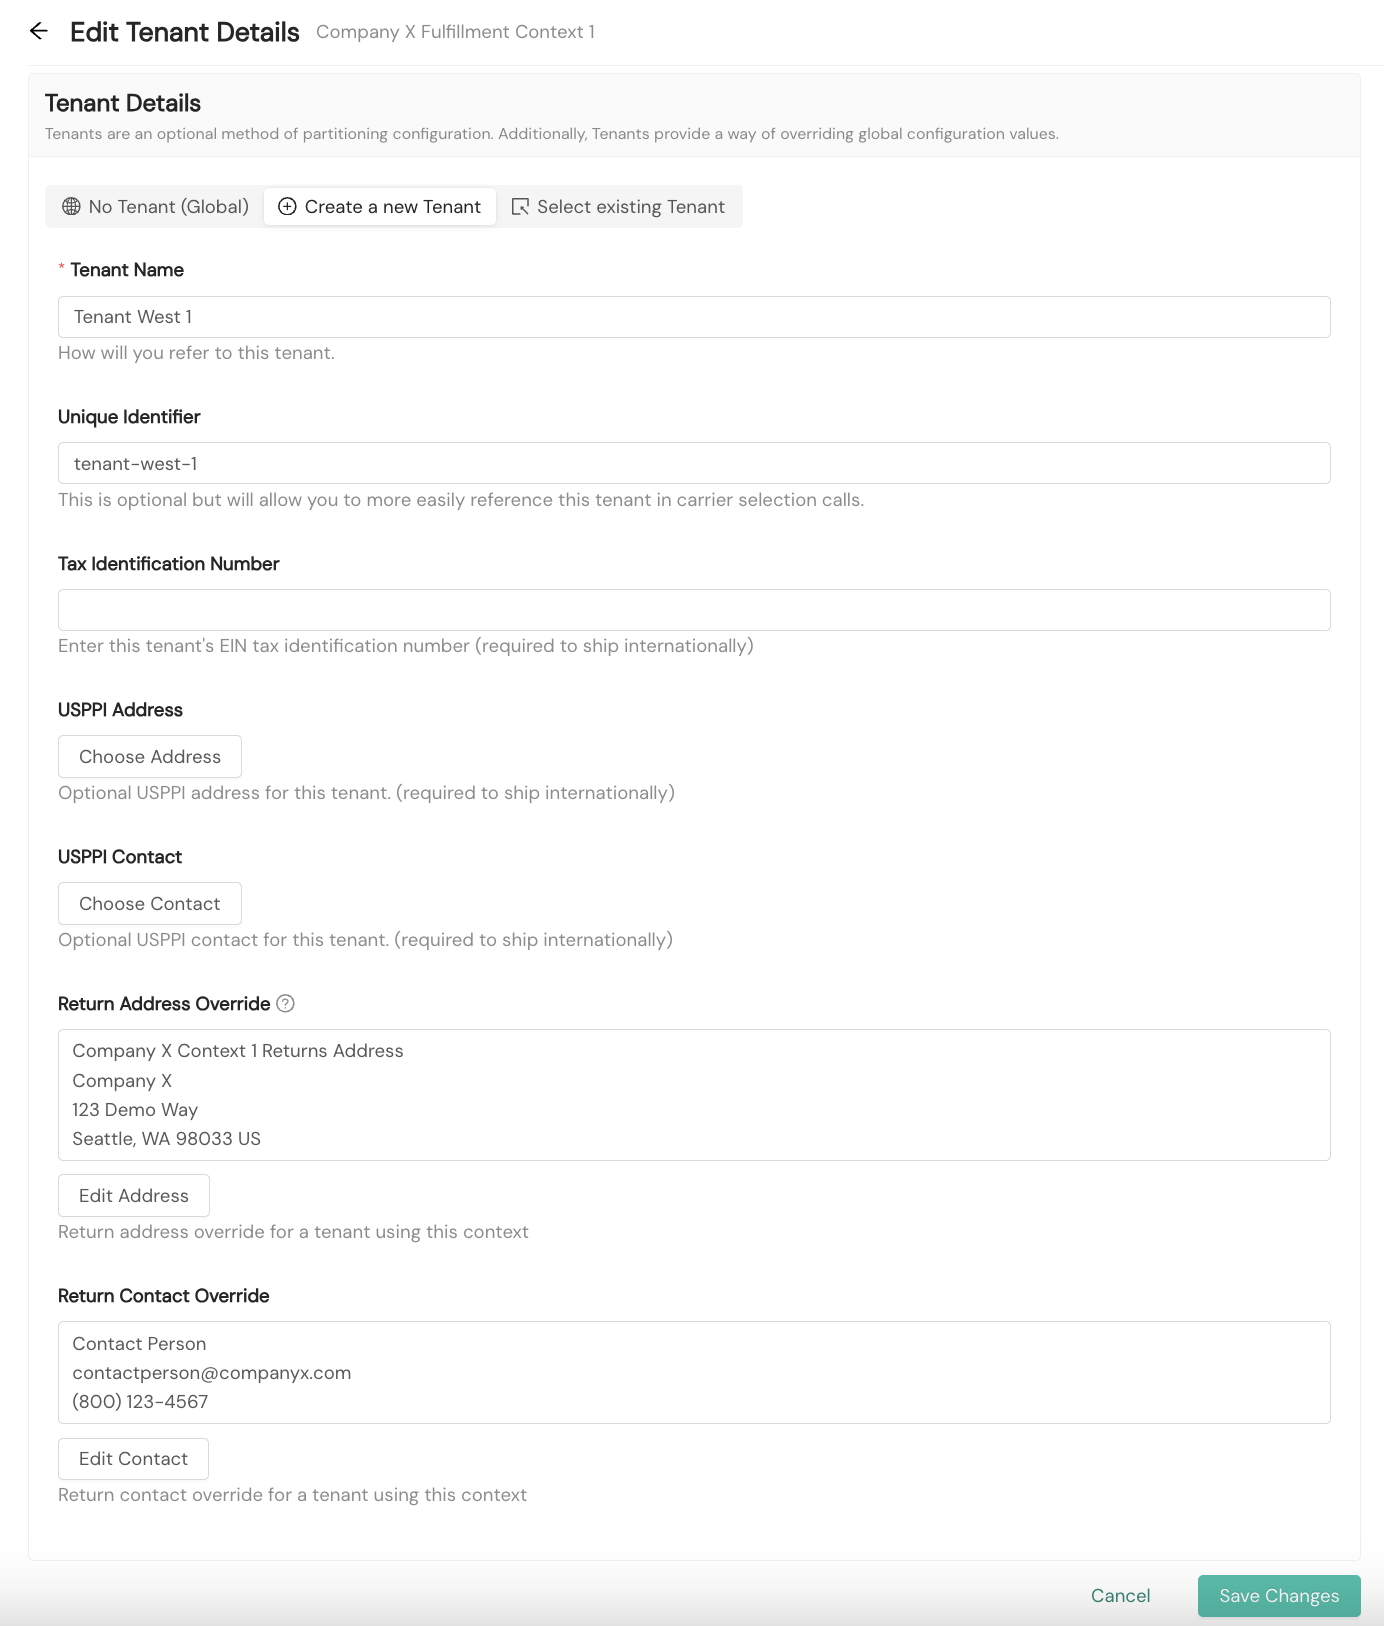
Tenant Details include a Tenant Name, Unique Identifier, and Tax Identification Number.
- The Tenant Name is the name by which your organization wishes to refer to a particular tenant. There are no character limitations for the name you choose.
- The Unique Identifier is an optional field that enables your organization to more easily reference a tenant when making calls to Shipium’s APIs. The unique identifier must be composed of only alphanumeric characters, hyphens, and underscores; otherwise, you'll receive an error warning. This unique ID is case sensitive.
- The tenant Tax Identification Number, also known as an Employer Identification Number or EIN, is required for international shipments. This value can be overridden on a per shipment basis by passing a
taxIdentificationNumbervalue in your API call request. This optional API field is described in the Tax Identification Number documentation. - Other fields required for international shipments include the U.S. Principal Party in Interest (USPPI) address and contact. Finally, you'll need to provide a return address override and return contact override for a newly created tenant, but you must create the origin before setting these overrides. The USPPI and return address overrides also may be set at the carrier account level for the fulfillment context, as detailed in the Carrier Contracts documentation.
Once you've completed context and tenant details and created a fulfillment context, you can configure any of the Carrier Contracts, Label Augmentations, Third Party Billing, and Injection components at any time from the home Fulfillment Contexts screen by selecting the Add button dropdown menu. Since each context only has one origin, the Add an Origin option disappears once a valid origin has been configured.
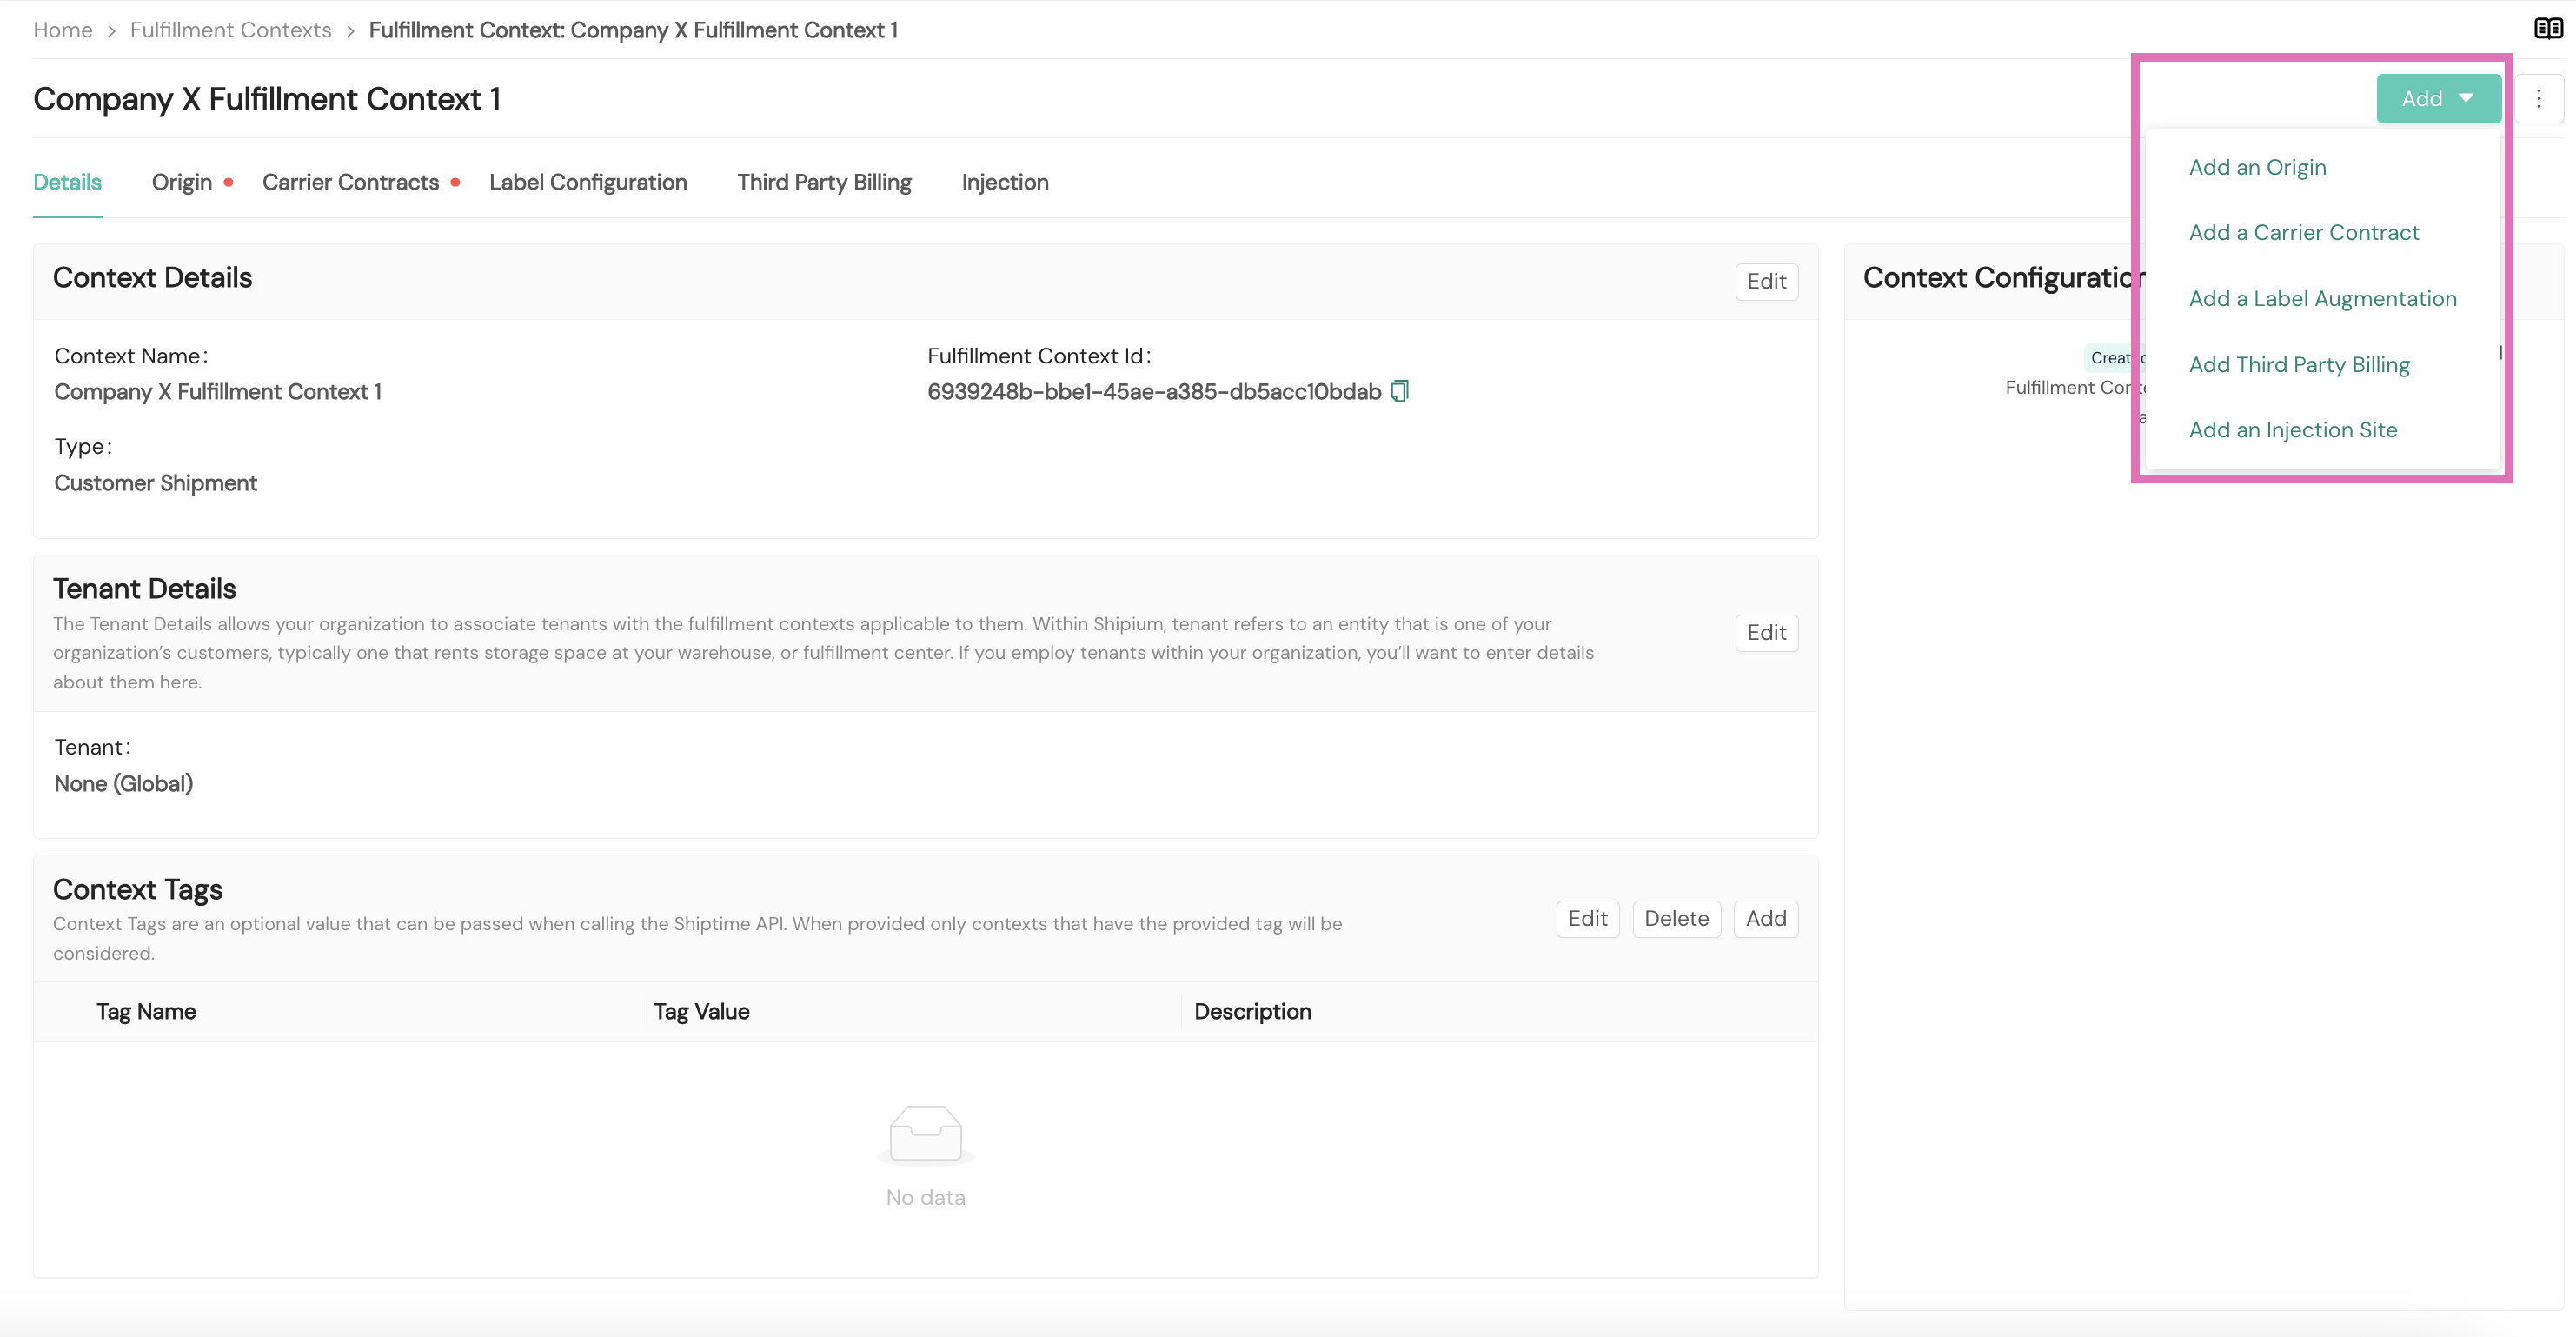
Context Tags are an optional value that can be passed when calling the Shipium APIs. If you enable context tags, only contexts that include the tag provided for the API call will be considered for completing a shipment. You'll supply a name for the tag, one that your organization can use to distinguish easily from other context tags, and the Shipium platform will assign a unique string ID for the tag value.
Any required step that hasn't been configured will be displayed with a red dot next to its tab within the fulfillment context home screen, as shown in the screenshot above.
Step 2. Configure an origin (required)
To begin using a fulfillment context, you must have an Origin associated with it. You can find guidance for origin configuration in the Origins document.
Step 3. Configure at least one carrier contract (required)
To begin using a fulfillment context, you must have at least one Carrier Contract associated with it. You can find guidance for setting up a carrier contract in the Carrier Contracts document.
Step 4. Configure labels (optional)
Label configuration is an optional step. You can establish label properties and augmentations following the Label Configuration guide.
Step 5. Configure third party billing (optional)
Third party billing is an optional configuration. You can set up a third party billing account using the instructions in the Third Party Billing document.
Step 6. Configure injection shipping (optional)
Configuration of injection shipping is optional. If your organization wishes to add an injection shipping site to your network, you can find guidance in the Injection document.
Step 7. Configure shipment lanes (optional)
Configuration of shipment lanes is optional. You can find guidance for setting up shipment lanes in the Shipment Lanes documentation.
Use a fulfillment context in API calls
Once a fulfillment context is configured in the Shipium Console with an origin and at least one carrier contract, you can reference it in your API calls to control which carriers and rules are applied to a shipment. If no fulfillment context is specified, the system will attempt to identify the correct context based on available address and fulfillment data.
There are two fields you can use within the shipmentParameters object to specify a fulfillment context:
-
fulfillmentContext. Use this field to identify a fulfillment context by its alias (also known as a
tag). This is a human-readable identifier you can assign in the Shipium Console. -
fulfillmentContextIds. Use this field to provide an array of one or more fulfillment context IDs. The IDs in the array can be either the Shipium-generated Fulfillment Context ID or a Partner Provided Fulfillment Context ID (an ID your organization has assigned).
Specify fulfillment context in API calls
When making a carrier selection call, you can specify a specific fulfillment context (or contexts).
Using fulfillmentContext
This example uses a tag to identify the fulfillment context.
{
   2   "shipmentParameters": {
   3     "fulfillmentContext": "east-coast-dc",
   4     "destinationAddress": {
   5       "countryCode": "US",
   6       "postalCode": "90210"
   7     }
   8   }
   9 }
Using fulfillmentContextIds
This example uses an array of identifiers, which can include both Shipium-generated IDs and your organization's own partner provided ID.
 {
    2   "shipmentParameters": {
    3     "fulfillmentContextIds": [
    4       "d7e7cda6-9948-43fb-b595-f8b230f6b1a8",
    5       "west-coast-dc-partner-id"
    6     ],
    7     "destinationAddress": {
    8       "countryCode": "US",
    9       "postalCode": "90210"
   10     }
   11   }
   12 }
One account with multiple fulfillment contexts
If you have a single carrier account for which you have specified multiple fulfillment contexts, specifying any of these will include this account for costing purposes.
This pattern supports specific kinds of 3PL use cases and, unless you really need it, you probably want between 0 and 1 fulfillment contexts for any given carrier account.
Maintain and make changes to a fulfillment context
Once you've established a fulfillment context, you'll see details for that context appear on your Fulfillment Contexts landing page, as shown in the following screenshot. The at-a-glance information includes the context's status, name, origin, and carriers.
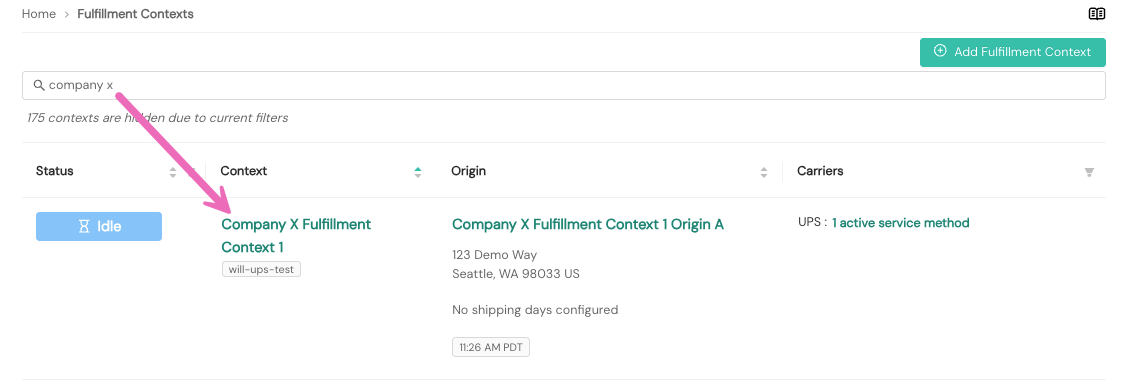
To edit an existing fulfillment context, you'll click on the name of the context in the Context column, as shown in the screenshot above, or you can click on the origin or carriers in the Origin or Carriers column to access the context. You can use the search function to locate a particular context you wish to edit.
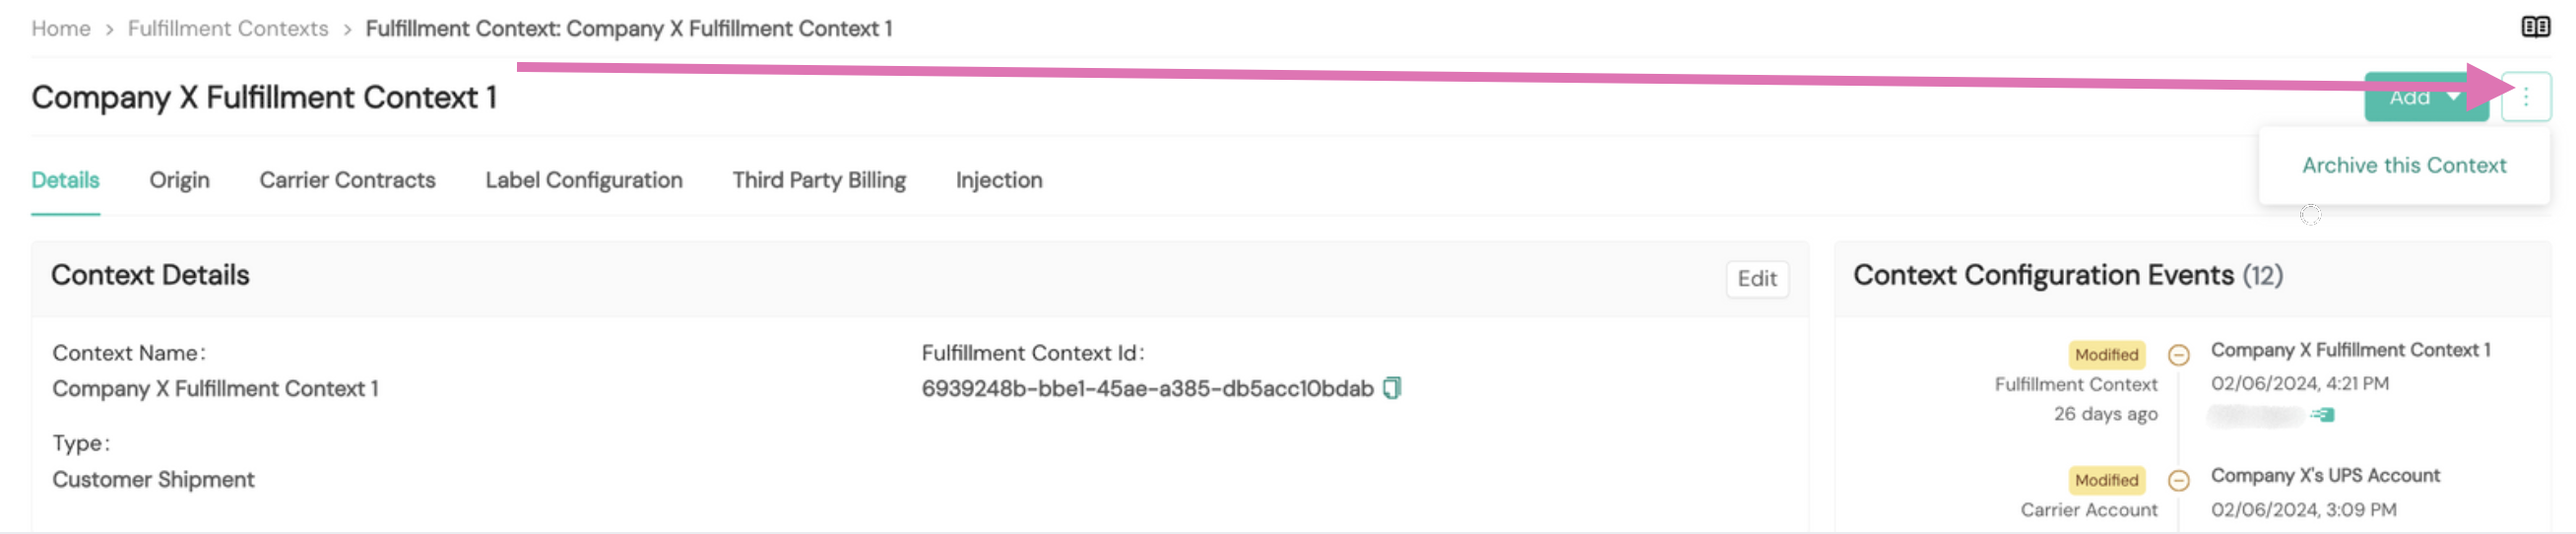
You also may choose to archive a fulfillment context. To do so, you'll select the "kebab" dropdown menu, as shown in the following screenshot, and then choose Archive this Context. Archiving the context is irreversible and only should be selected if you do not plan to use the context again.
Resources
Your Shipium team member is available to help along the way. However, you might find these resources helpful:
Updated 3 months ago