
Configure SSO with Microsoft Azure
Set up single sign-on (SSO) logins with Azure as your identity provider.
About SSO with Microsoft Azure
Shipium supports single sign-on (SSO) using Azure as your SAML identity provider. This document provides guidance for configuring SSO with Azure in the Shipium system. For more general information about SSO requirements and Shipium, see SSO for Your Shipium Account.
Configure SSO for your Shipium account using Azure as the identity provider
Your Shipium team member is available to assist as you set up Microsoft Azure as your SAML identity provider, but the process is outlined in the following steps.
Step 1. Obtain values from Shipium
To start the process, Shipium's IT team will provide your team with a metadata XML file that contains an Entity ID value and sign-in URL.
Step 2. Set up or access a Microsoft Azure account
You'll either sign into your existing Azure account or create a new one by visiting the Azure portal.
Step 3. Create your application
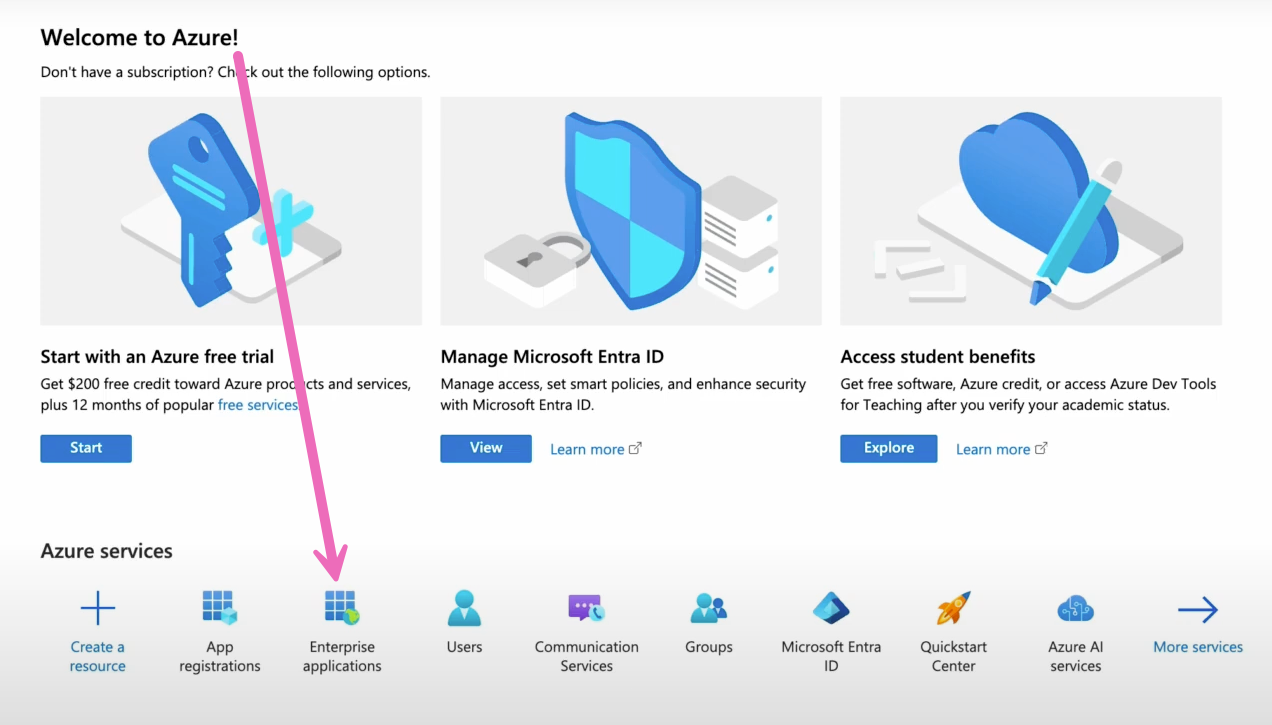
You will need to create your own application in Azure to integrate with Microsoft Entra ID (formerly Azure ID). Once you're logged into your account, you'll navigate to Azure Active Directory and then Enterprise applications.
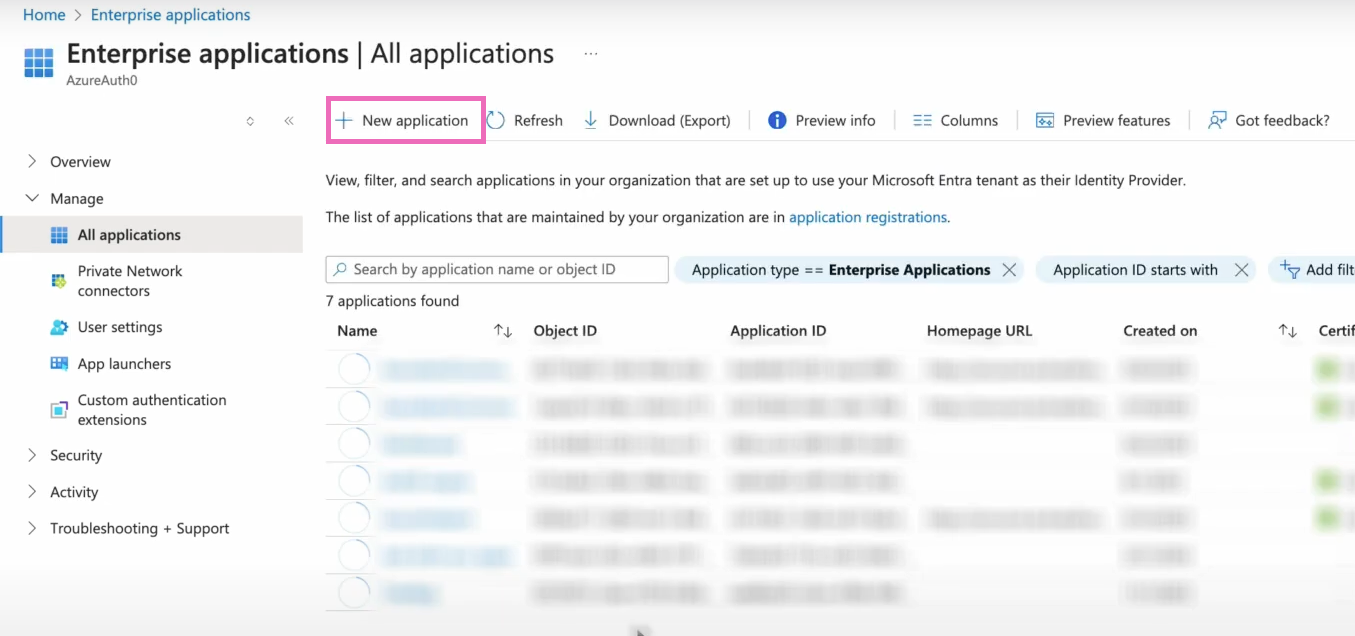
You'll select the + New application tab within the Enterprise Applications screen.
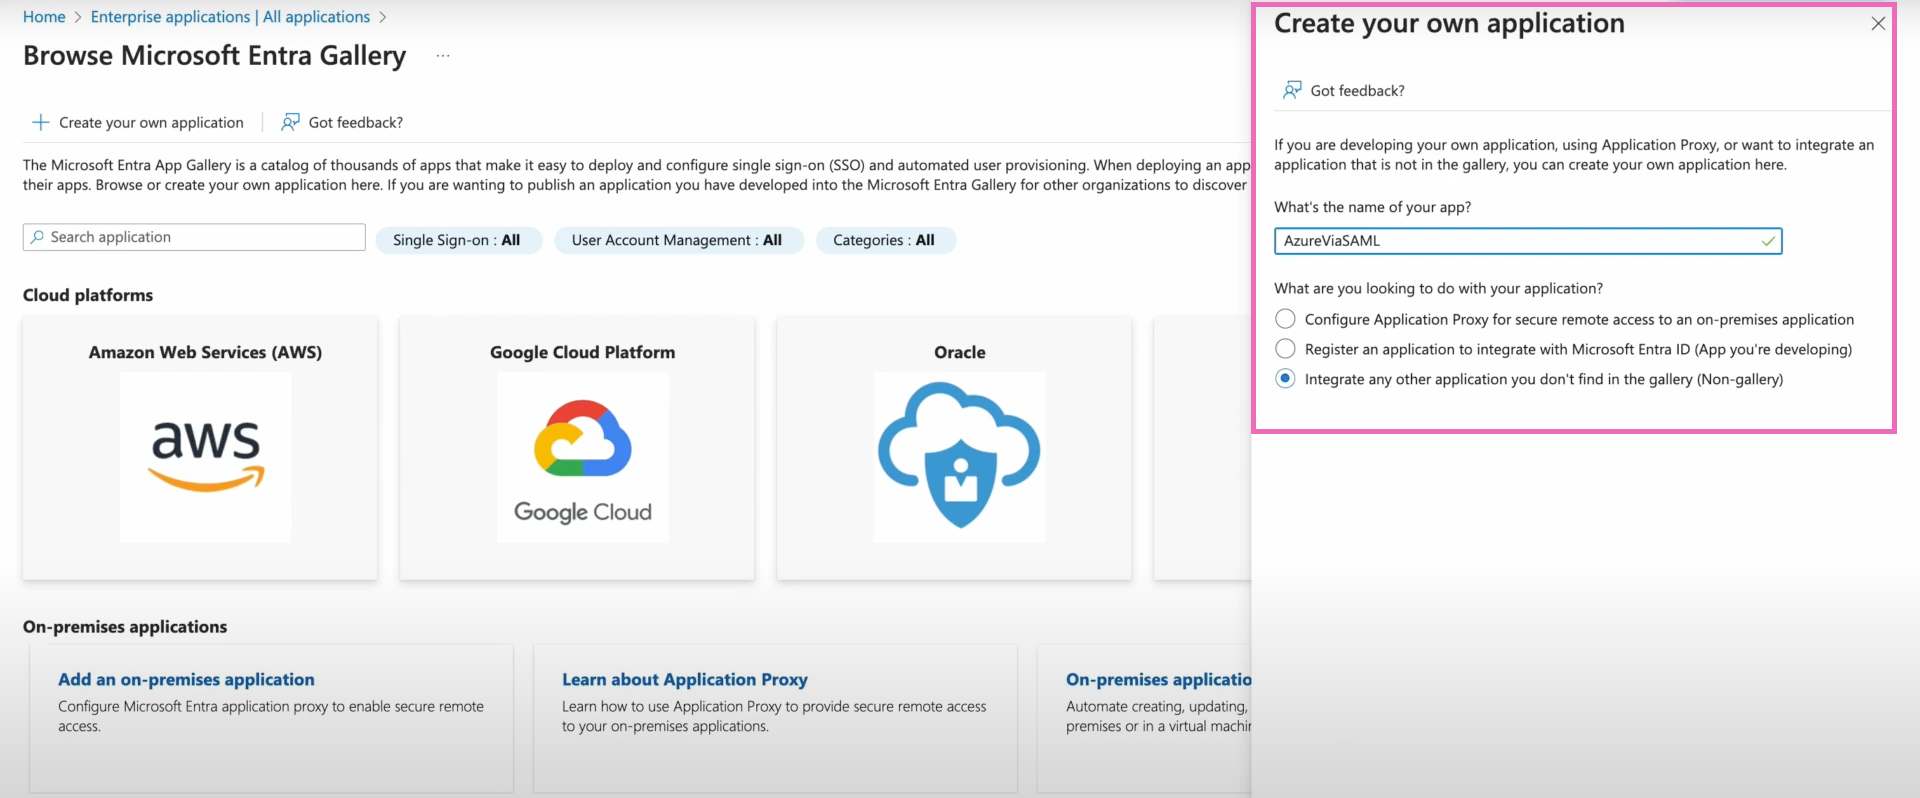
Next, you'll select the + Create your own application tab.
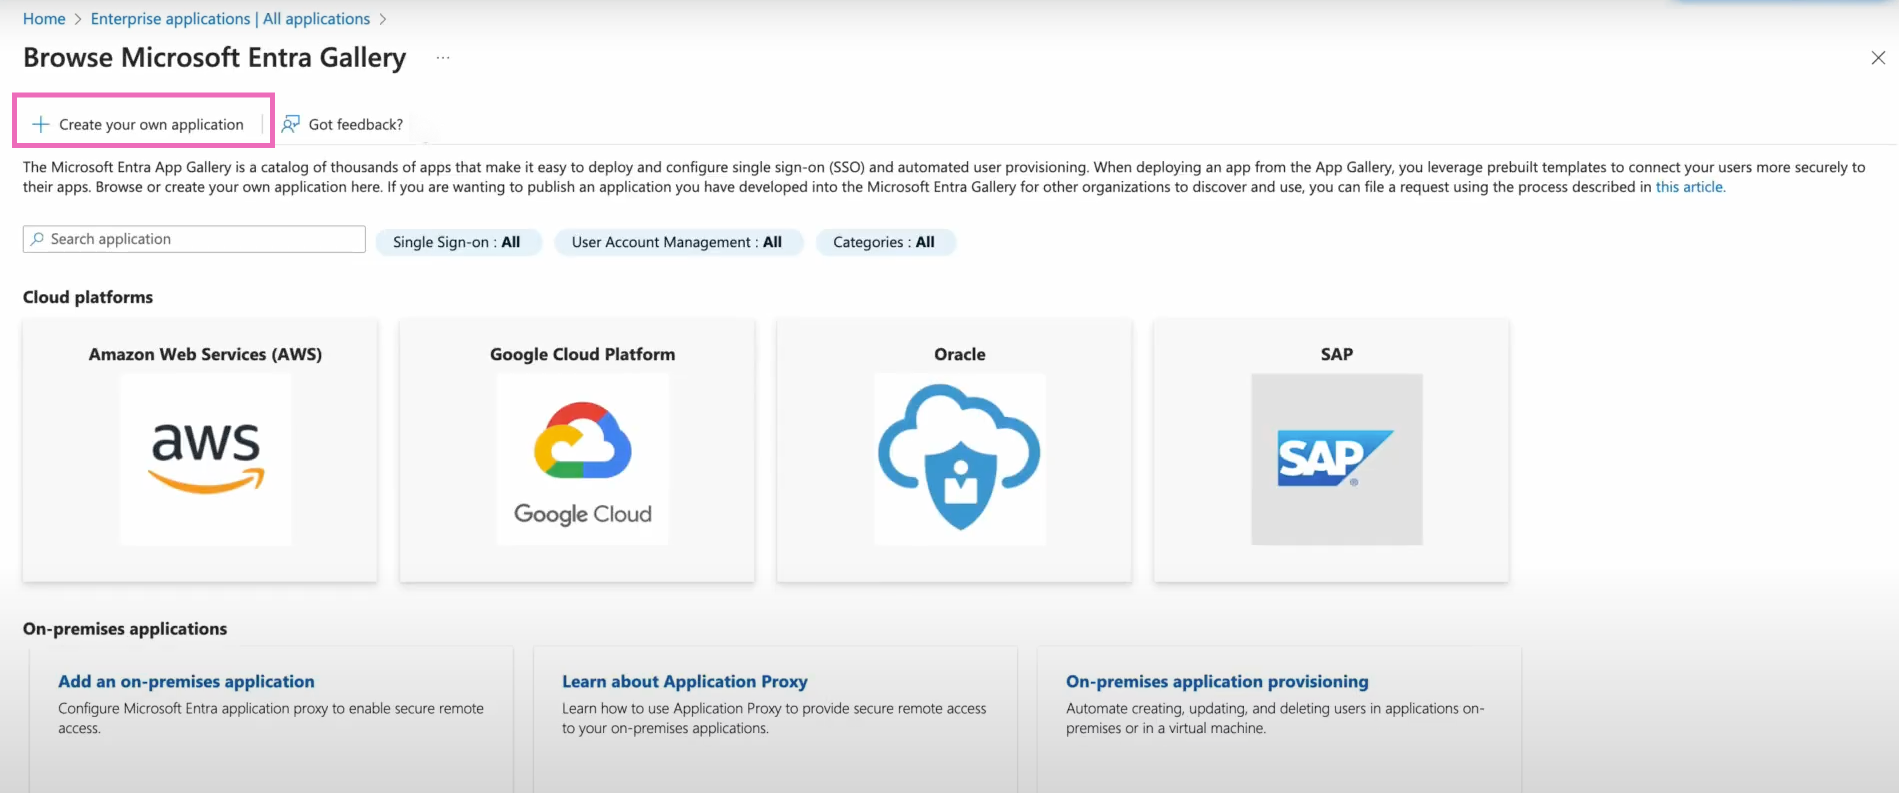
The Create your own application window will appear and prompt you to provide a name, such as AzureViaSAML, for your new app. You'll select the Integrate any other application you don’t find in the gallery (Non-gallery) as your choice for what you are planning to do with the app, and then select Create. The next step guides you through the SAML connection process, which begins on the Overview page that appears after you create your application.
Step 4. Configure Azure SAML integration
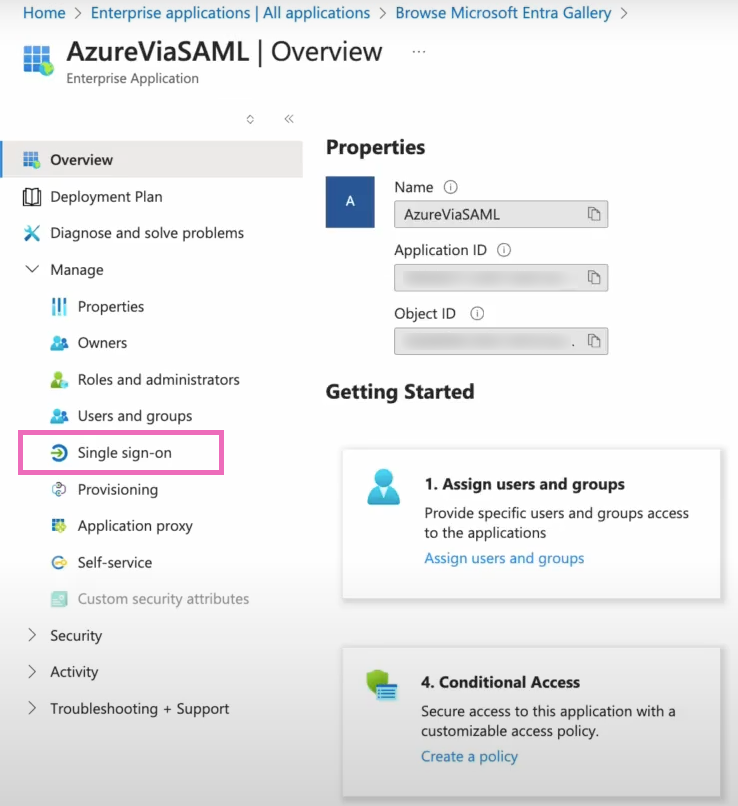
Within the Overview page of your new application, you'll select Single sign-on from the lefthand navigation menu.
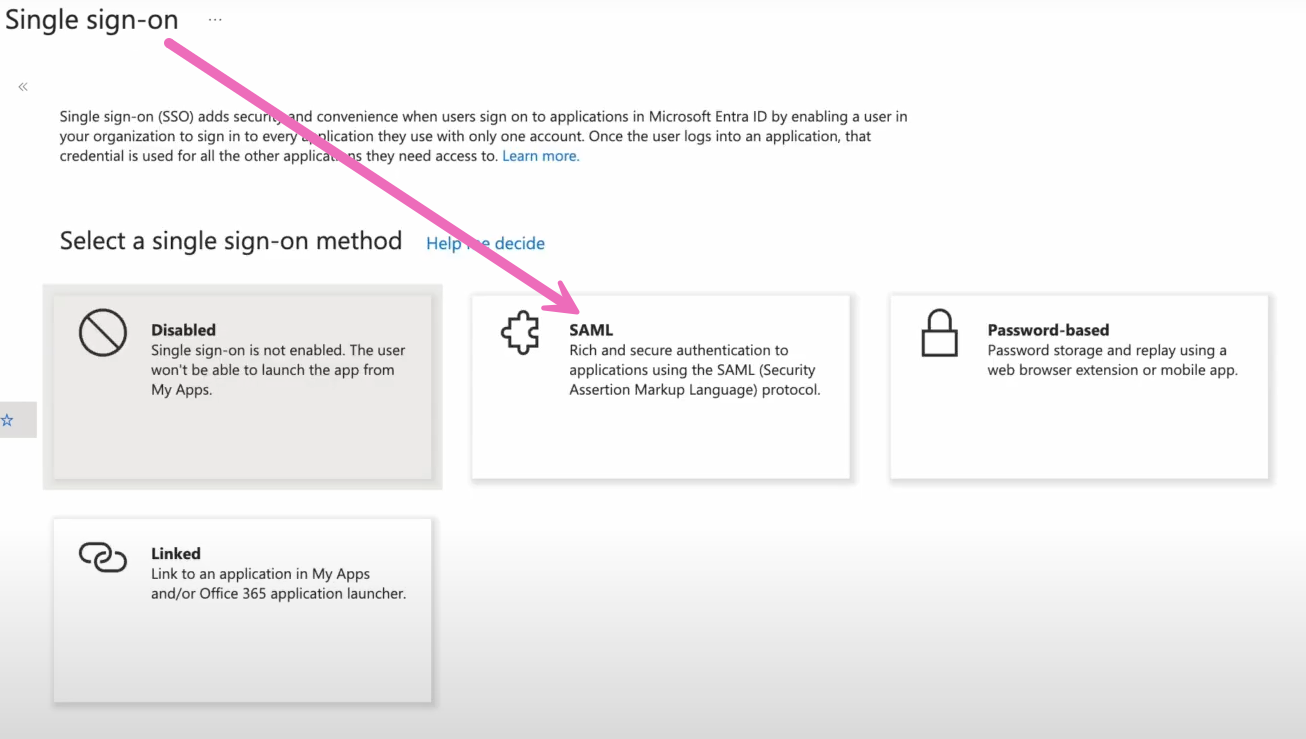
When prompted to select a single sign-on method, you'll choose SAML.
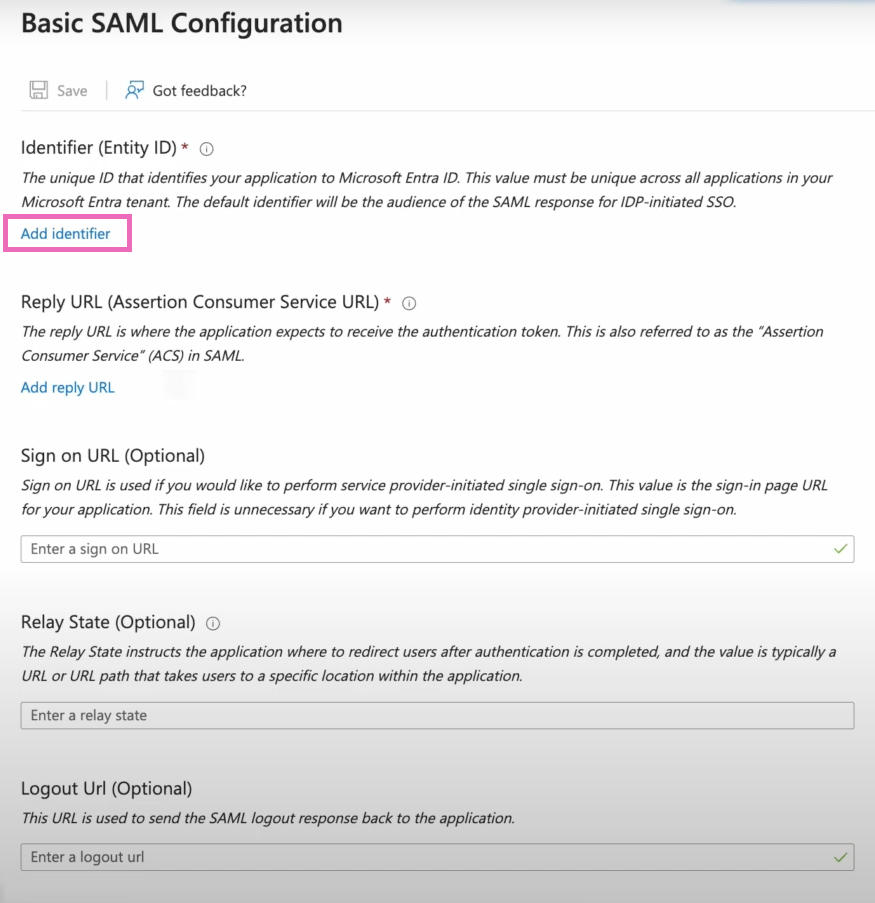
Within the SAML-Based Sign-On page, you'll choose the Edit button within the Basic SAML Configuration section.
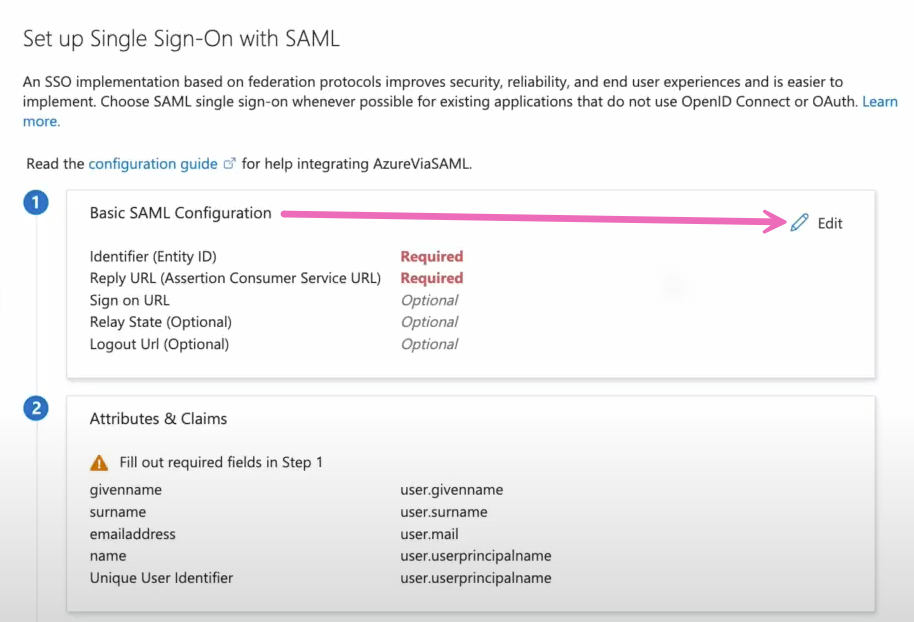
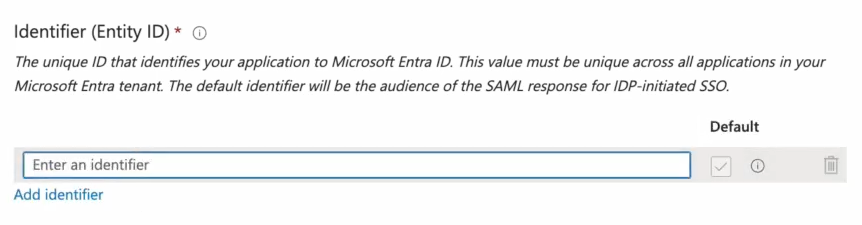
Within the Basic SAML Configuration window, you'll select Add identifier under Identifier (Entity ID).
Next, an identifier for the Entity ID is needed. You'll enter the value of the Entity ID provided to you in the metadata file from Shipium.
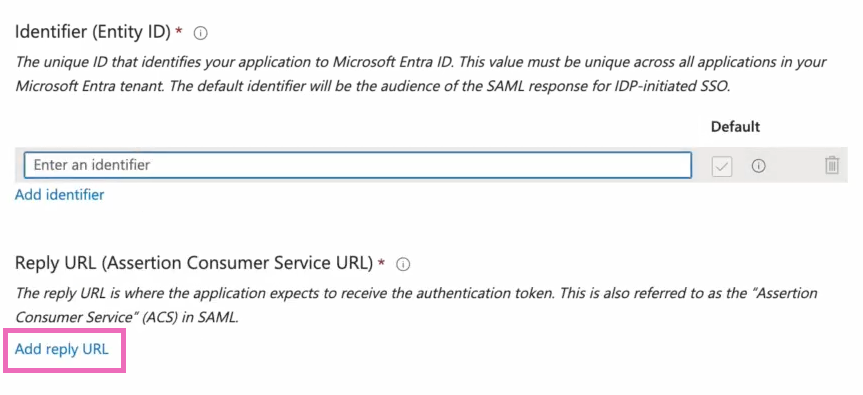
After adding the identifier, you'll add the Reply URL under Reply URL (Assertion Consumer Service URL). The value to enter for the Reply URL is the one supplied in the metadata file from Shipium.
You'll select Save after entering the Entity ID and Reply URL. A success message will indicate you have saved the configuration correctly.
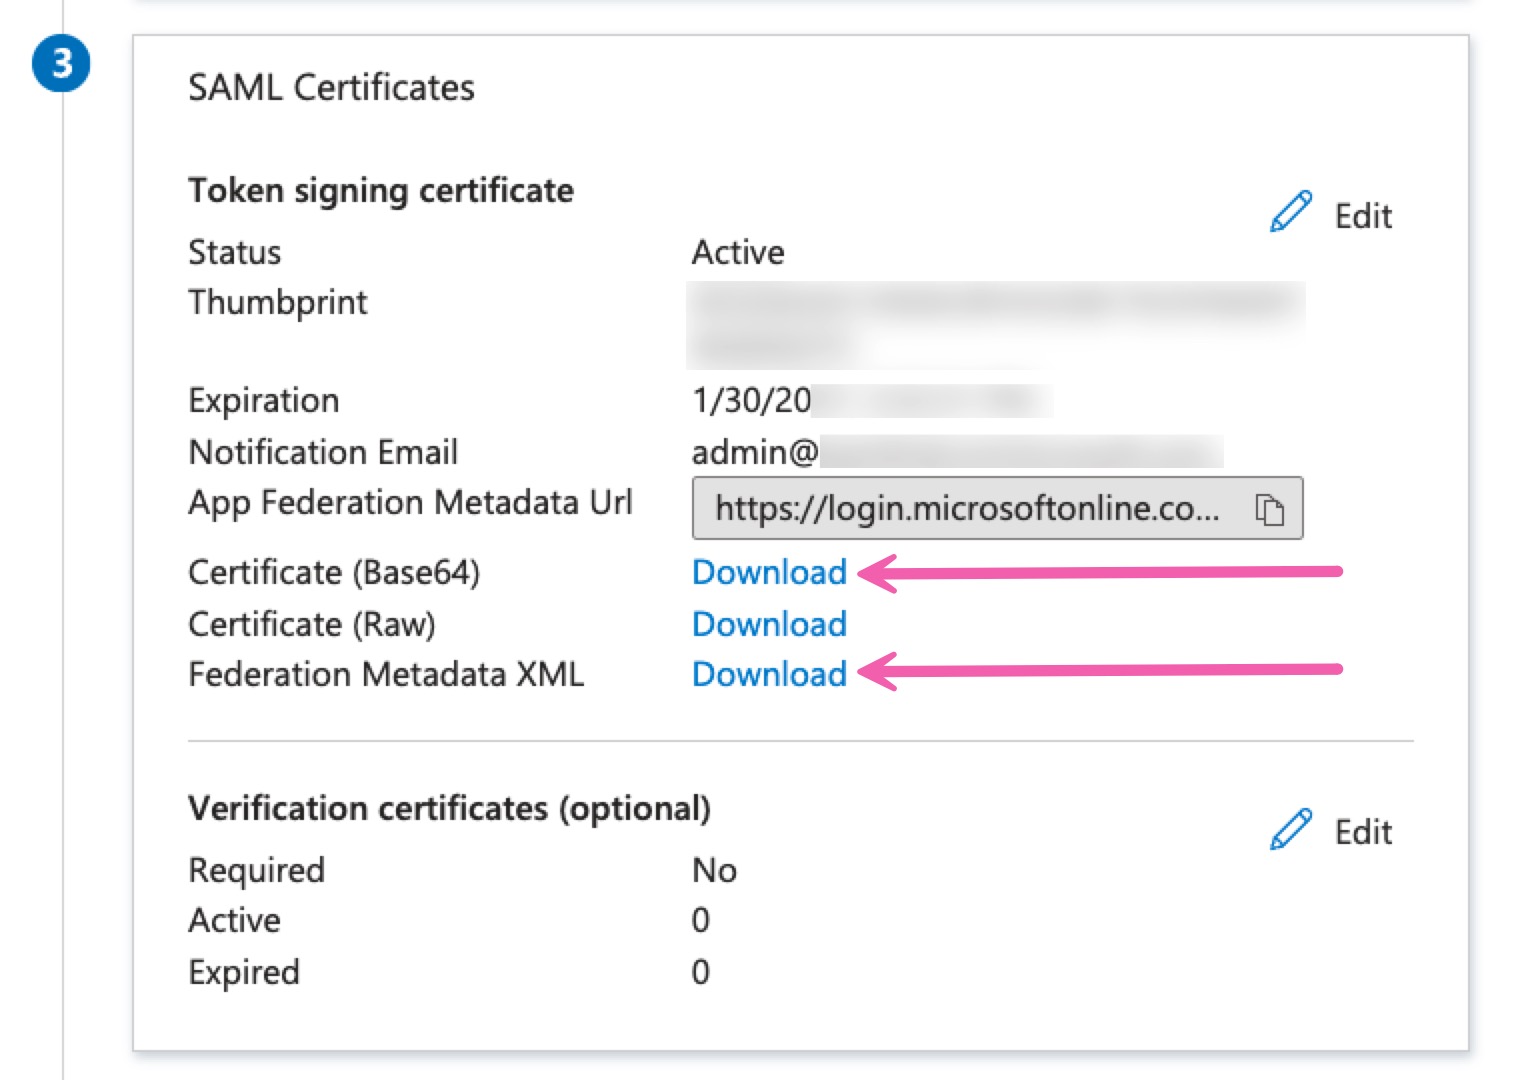
Back in the SAML-Based Sign-On page, you'll select Download next to both the Base64 Certificate option and the Federation Metadata XML option under SAML Certificates. You will need to provide these files to your Shipium IT representative.
Step 5. Set up users and groups
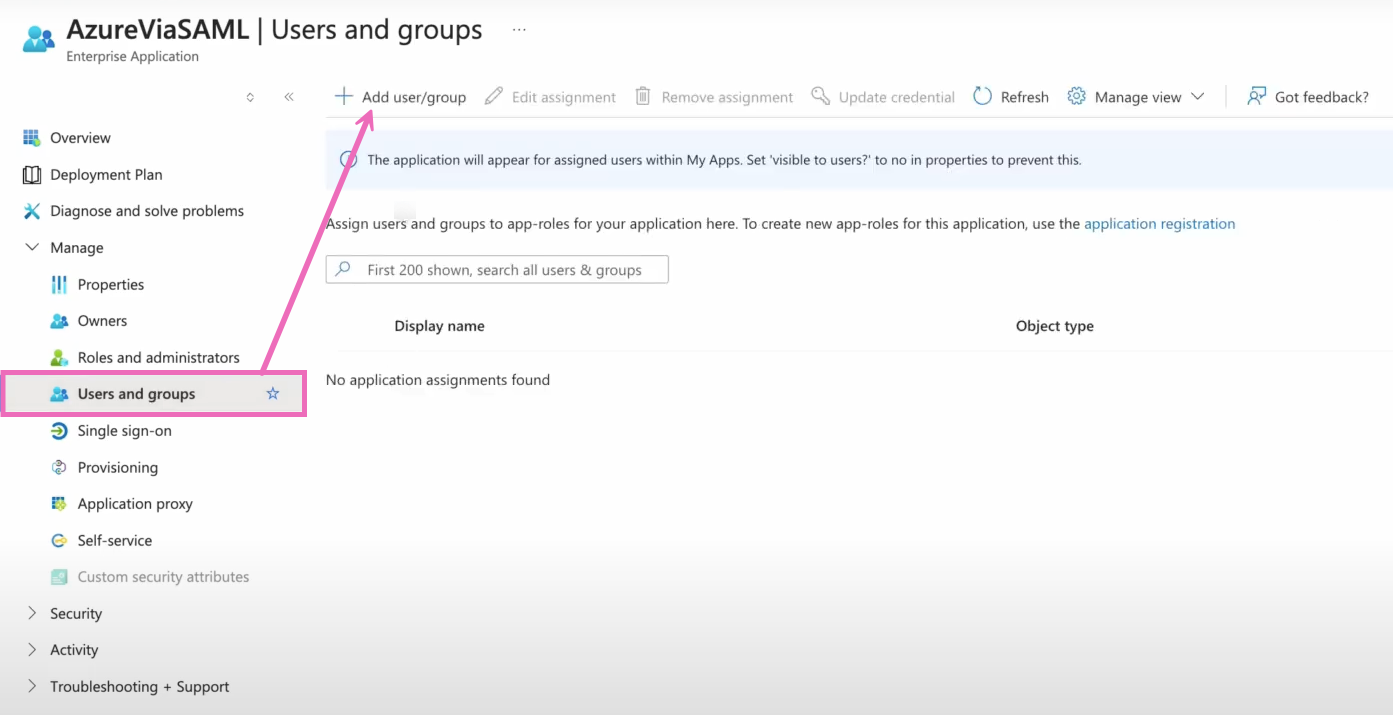
Back within the Azure page for your application, you'll select Users and groups from the lefthand navigation menu under Manage. Within the Users and Groups page, you'll select the + Add user/group tab.
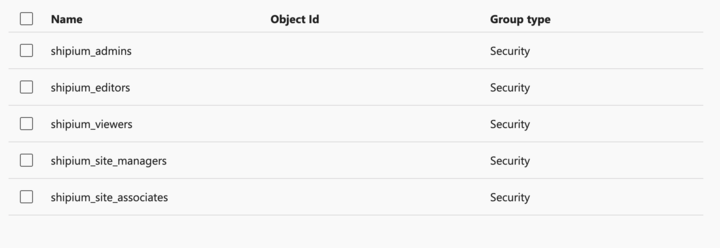
Within Users and Groups, you will add users to their appropriate group, based on user roles in the Shipium Console, by selecting the desired group for each user:
- Admin
- Editor
- Viewer
- Site Manager (specific to the Shipium Pack App)
- Site Associate (specific to the Shipium Pack App)
To assign all users your organization would like to be able to use the Shipium Console to the Shipium application, you'll assign each group to the Shipium application you created earlier. To assign roles to your users, you'll add a group claim to the Shipium SAML application. This group claim tells Shipium which role a user receives when they sign in.
- Within the Enterprise Applications page of Azure, you'll select the application you created to integrate with Shipium's SAML; for that app, you'll select Single sign-on configuration and then User Attributes & Claims.
- Under User Attributes & Claims, you'll select + Add a group claim. When asked which groups associated with the user should be returned in the claim, if you select Groups assigned to the application, you're choosing only those users within your organization in groups that are assigned to the Shipium application.
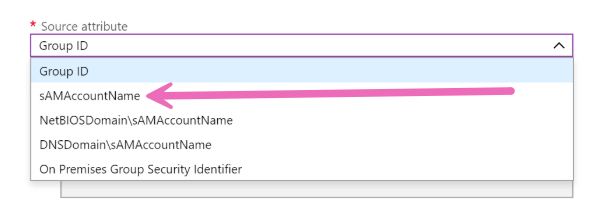
- The source attribute you will select from the dropdown menu is sAMAccountName.
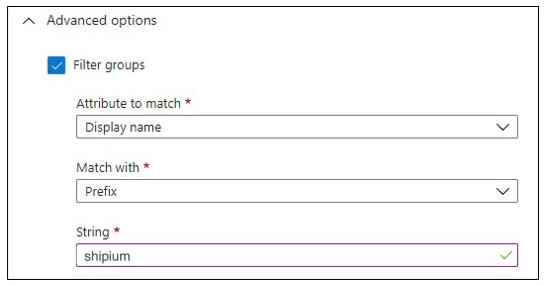
After adding the group claim, you can optionally add filtering to the group. You can configure filters to be applied to the group's display name or sAMAccountName attribute. When a filter is configured, only groups that match the filter will be included in the group's claim that's sent to that application.
- For Attribute to match, you'll select Display name.
- For Match with, you'll select Prefix.
- For String, you'll enter shipium.
Step 6. Provide credentials to Shipium
To configure SSO for your organization's account users, you'll need to provide the following values to Shipium's IT team:
- Sign-in URL
- Sign-out URL
- X.509 signing certificate
- Email address attribute (optional)
You can find details about these requirements in Requirements for Configuring SSO with Shipium.
Resources
Your Shipium team member is available to help along the way. However, you might find these resources helpful:
Updated 8 months ago