Label Configuration
Configure shipping label properties for your fulfillment network.
About label configuration
To be able to print shipping labels, you will need to to configure what kinds of labels are used in your organization's fulfillment network. While label configuration is optional for a fulfillment context, you can establish label properties and any special augmentations as part of the fulfillment context. A fulfillment context can have multiple label configurations.
Fulfillment contexts
In order to use Shipium’s APIs, your organization needs to establish your fulfillment network configurations within the Shipium platform. We refer to these configurations as Fulfillment Contexts. A fulfillment context allows you to configure the characteristics for your network origins, carrier contracts, label augmentations, third party billing, injection shipping, and tenants, in addition to other feature settings. Label configurations are optional but can be established for a fulfillment context.
Configure labels
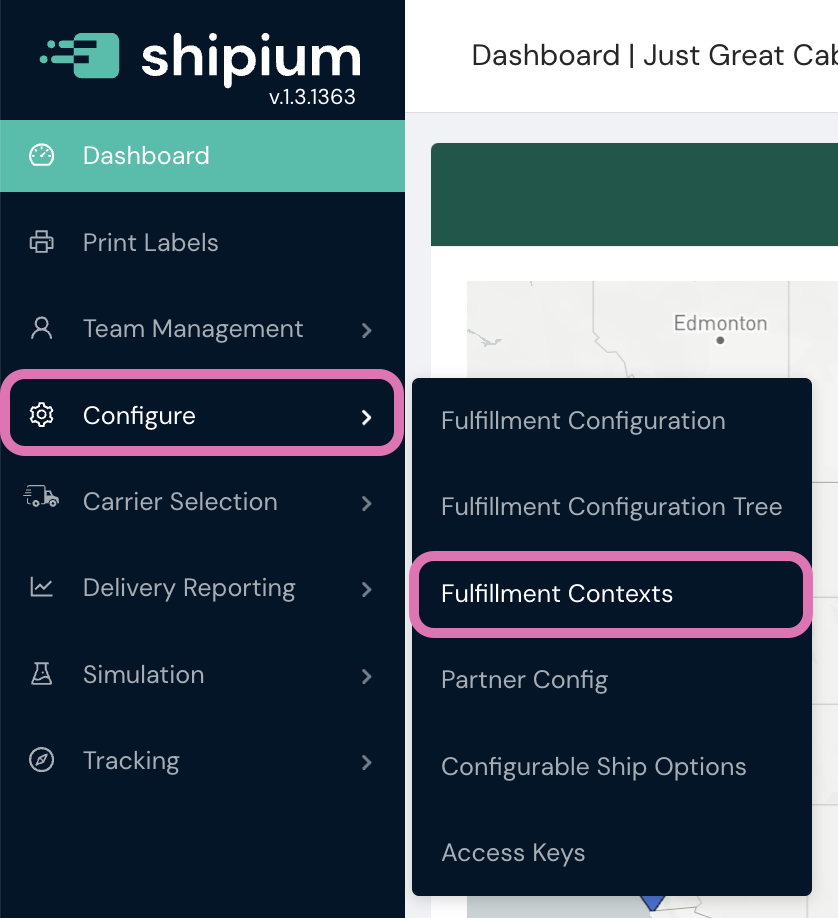
In order to configure labels, you'll need to access Fulfillment Contexts in the Configure section of the lefthand navigation menu within the Shipium Console. These instructions assume you've already established a fulfillment context in the Shipium platform. If you haven't yet set up a fulfillment context, you can find guidance for how to do so in the fulfillment contexts documentation.

To locate the fulfillment context for which you wish to configure a label, you can use the search bar at the top of the Fulfillment Contexts homepage or simply scroll through a list of the available contexts. Once you've located the desired context, you can access it by clicking on its name.

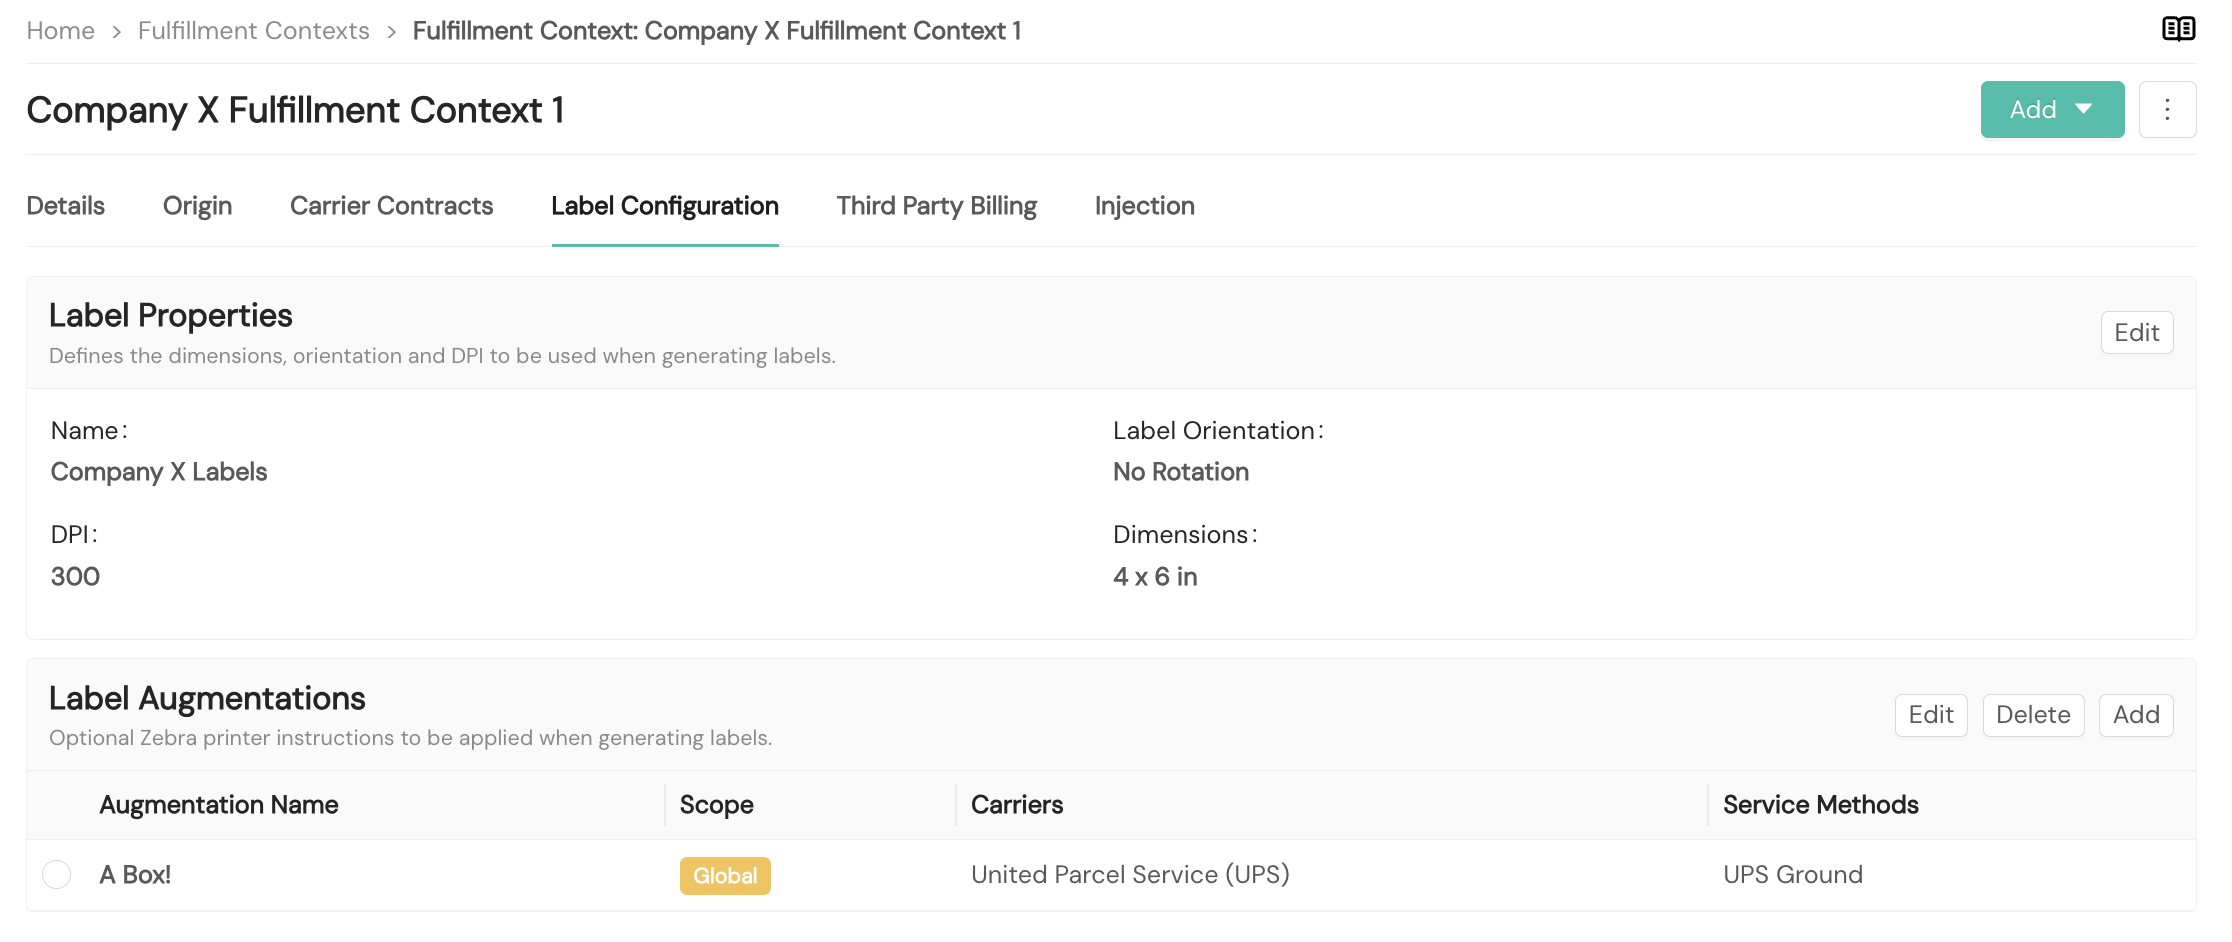
Within the Label Configuration tab of the context, you can configure label properties by selecting the Edit button within the Label Properties section. Label properties include the label's dimensions, orientation, and resolution.

You can add label augmentations by selecting the Add button within the Label Augmentations section or by selecting Add a Label Augmentation from the dropdown menu at the right of the screen. Label augmentations refer to any special printer instructions to be applied when generating a label.


Label properties
You can create a new label properties configuration or select an existing one. Properties of the label refer to its size, orientation, and print resolution.
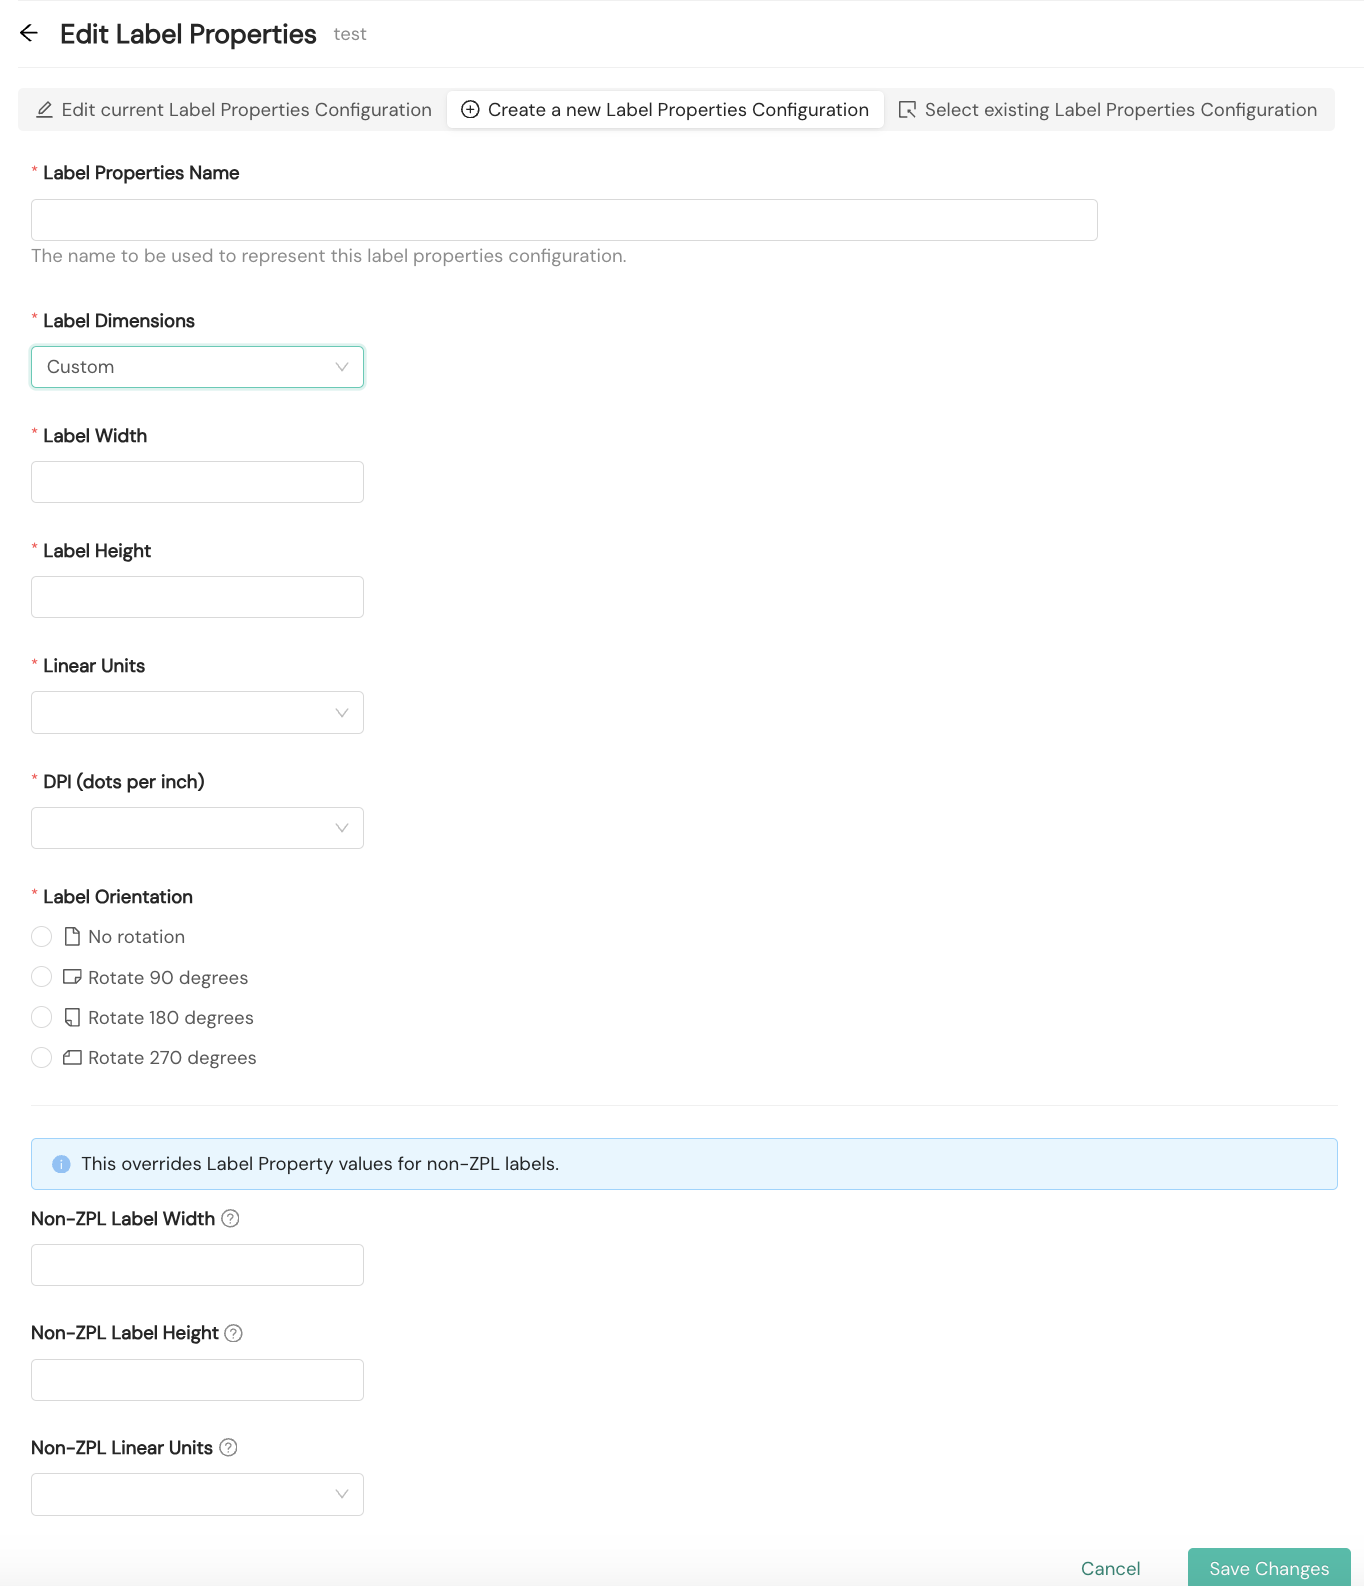
To create a label property configuration, you'll provide details to be associated with it, as shown in the following screenshot and detailed below.

- Label Properties Name. Required. A human-readable name your organization will use to refer to the label properties configuration
- Label Dimensions. Required. The dimensions desired for the label configuration, selected from a dropdown menu. The default value is 4 inches by 6 inches. If you select Custom, you'll need to provide values for the label width, height, linear units, and dots per inch.
- Label Width. Required. The linear width of the label, in inches or centimeters, depending on the linear unit you select
- Label Height. Required. The linear height of the label, in inches or centimeters, depending on the linear unit you select
- Linear Units. Required. The linear units the label dimensions (width and height) are expressed in
- DPI (dots per inch). Required. You'll choose a DPI value of 150, 203, 300, or 600 from a dropdown menu to select the label's printing resolution.
- Label Orientation. Required. You'll select one of four orientation values: No Rotation, Rotate 90 Degrees, Rotate 180 Degrees, or Rotate 270 Degrees.
If you'd like to specify label dimensions for non-ZPL label configurations, you can enter values for Non-ZPL Label Width, Non-ZPL Label Height, and Non-ZPL Linear Units. When provided, these values will override label property values for non-ZPL labels. All three fields are required.
Label augmentations
You can select an existing label augmentation or create a new one. The label augmentation applies special Zebra Programming Language (ZPL) printer instructions when generating a label.
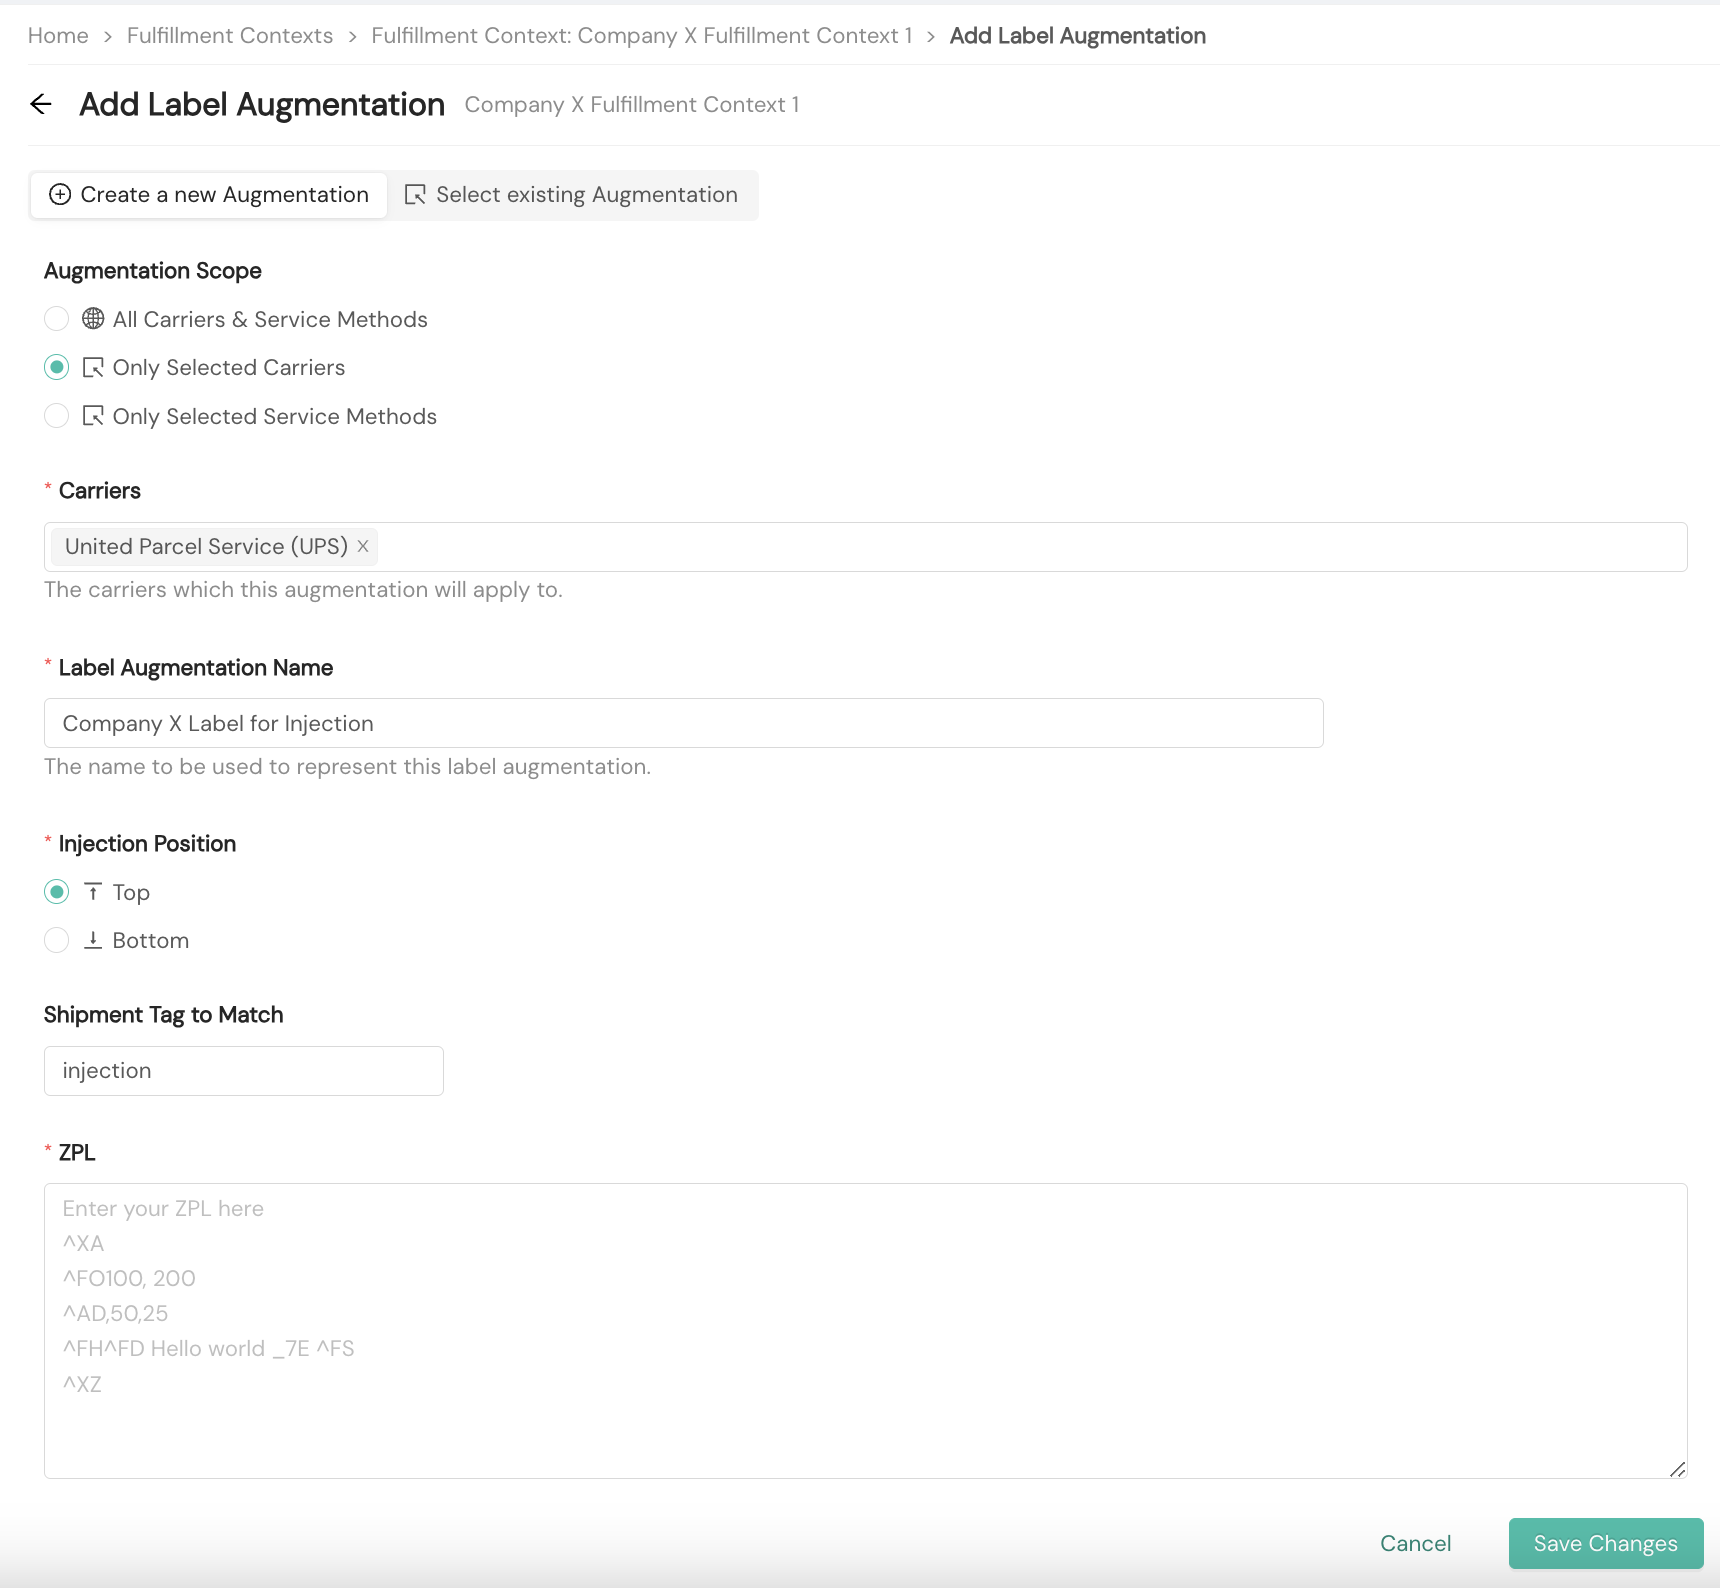
To create a label augmentation, you'll provide details to be associated with it, as shown in the following screenshot and detailed below. The label print preview at the right of the screen is based on the ZPL code entered.

- Augmentation Scope. Required. You'll designate the augmentation's scope in this step, whether applicable to all carriers and service methods within your fulfillment network, to only selected carriers, or to only selected service methods.
- Label Augmentation Name. Required. A human-readable name your organization will use to refer to the label augmentation
- Injection Position. Required. You'll select either Top or Bottom, depending on the desired position for the label printing.
- Shipment Tag to Match. Optional. If you have a shipment tag that you wish to link the label augmentation to, you'll provide it here (e.g., ORDER-ID).
- ZPL. Required. The Zebra Programming Language code is required for a label augmentation. You'll see a print preview to the right of the screen. You can find guidance for frequently used modifications Common Label Augmentations.
Another way of making a label augmentation is via API call including a customLabelEntries array. You can find out how in Label Customization.
Maintain and make changes to label properties and augmentations
You can access the fulfillment context's label properties and augmentations via the Label Configuration tab within the fulfillment context. Each section includes an Edit button that enables editing of the context component.

Browser compatibilityDeleting label augmentations may not work correctly in Safari. If you receive an error when attempting to delete an augmentation, use Chrome or another supported browser.
Resources
Your Shipium team member is available to help along the way. However, you might find these resources helpful:
Updated about 1 month ago
