
Create API Credentials
Set up your organization's credentials to start using Shipium's APIs.
About API credentials
This section describes how to create, activate, and validate your organization's credentials, also known as access keys, to start using Shipium's APIs. You have two options for credentials: API key-based authentication or OAuth 2.0-based authentication.
Admin permission neededYou need administrator permission within the Shipium Console to use the procedures in this section.
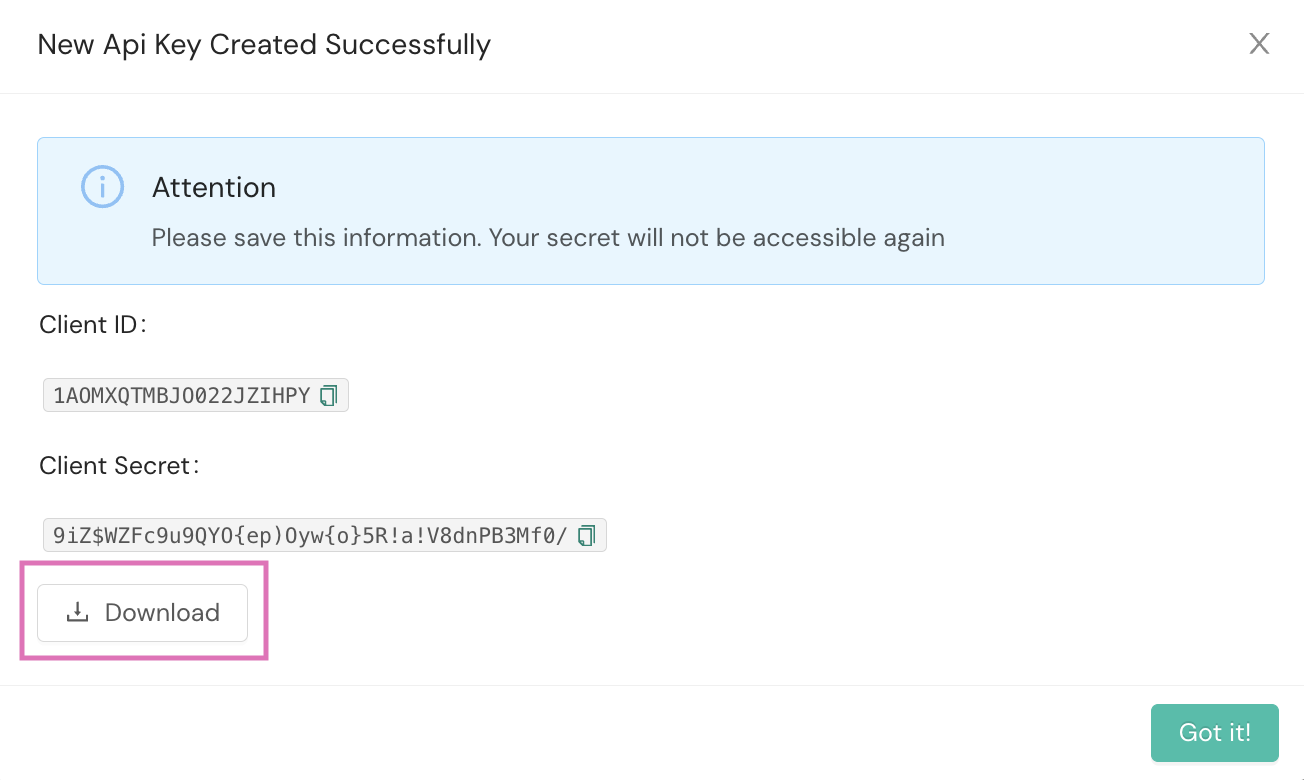
Once you've created your organization's API credentials, you'll need to ensure that you have saved the generated authentication ID (API Key ID or Client ID) and secret (API Key, also known as a password, or Client Secret) securely. Shipium cannot retrieve these credentials for you.
Authentication IDs and secrets cannot be retrieved if lostIn order to keep your organization's data secure, the API Key ID and API Key (secret, or password) or the Client ID and Client Secret created for authentication for each key are displayed once and cannot be retrieved again.
No Shipium employee or system has these values – only the ability to cryptographically validate them.
How to create your access key (credentials)
To create your organization's access key, you'll need to access the Shipium Console. Once logged into the Shipium Console, you should complete the following steps:
- In the lefthand navigation menu, select Configure and then Access Keys.

- You'll see two tabs on the screen: API Keys and Oauth Clients.

- If you want to create an API key-based access key, select the API Keys tab. Then select the Create Key button at the bottom of the page and skip to step 5.

- If you want to create an OAuth 2.0 access key, select the Oauth Clients tab. Then select the Create Oauth Client button at the bottom of the page and proceed to step 5.

The following steps apply to both key types.
- In the Create Key / Create Oauth Client dialog, enter a meaningful name for the key or Oauth client. Then select the Create button. Many companies create multiple keys/clients for different parts of their organization or different software use cases, and these names can help keep track of a key/client's purpose.


- The dialog in the screenshots below is displayed, depending on your selected authorization workflow. The first screenshot shows the API Key ID (ID) and API Key (secret) created in API Keys that you'll use for authentication to access the APIs. It also includes the Basic Auth Token, which is a Base64-encoded value of the combined API Key ID and API Key. The second screenshot shows the Client ID and Client Secret created in OAuth Clients that you'll use for API access. Click the Download button and save these somewhere secure.
What's next?
For API keys. Follow the instructions in API Key-Based Authentication to start making API calls.
For OAuth clients. Follow the instructions in OAuth 2.0-Based Authentication to retrieve your access token and start making API calls.
Your ID and secret are only visible once and cannot be retrieved after this, even by Shipium.

- Click the Got it! button to return to the initial tab.
Validate your newly activated access keyYou can check that your newly activated key is working correctly for accessing Shipium's APIs by following the details for the appropriate type of authentication on the following pages:
Your organization may wish to create multiple keys/clients for different parts of your organization or different software use cases.
Create multiple keysTo create multiple keys for different parts of your organization or different software use cases:
- click Create Key or Create Oauth Client again; and
- repeat steps 5-7 to create further keys.
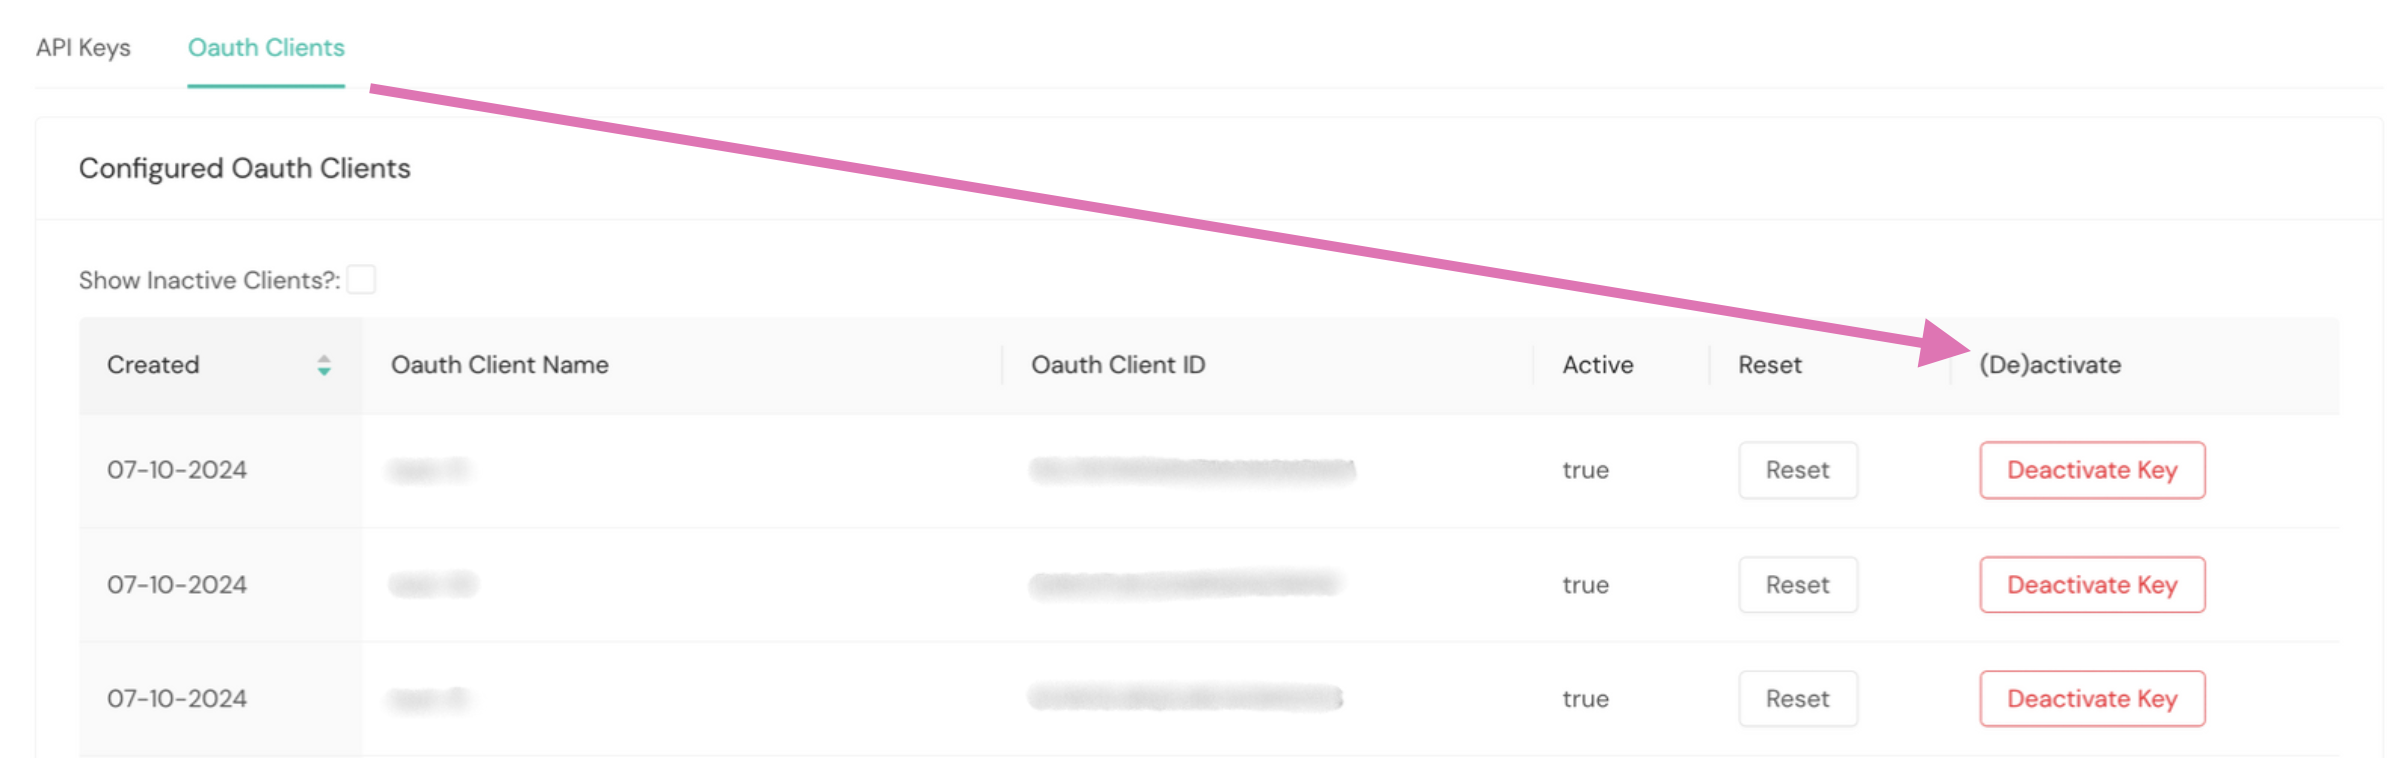
Activate and deactivate your access keys
By default, keys are created in an active state. You can use the Deactivate Key button for each key to update its status from Configured Keys within the API Keys tab or from Configured Oauth Clients within the Oauth Clients tab under the Access Keys page.

Resources
Your Shipium team member is available to help along the way. However, you might find these resources helpful: