
Injection
Configure injection shipping sites within your fulfillment network.
About injection
Injection shipping is the use of an additional mode of transportation, typically long-haul truck, to pick up shipments from a fulfillment center (FC) and transport them to an alternative injection point for delivery by the carrier.
Your organization can use injection shipping to:
- lower shipping costs by injecting a package closer to its final destination;
- increase delivery speed by injecting a shipment closer to its final destination; and
- increase carrier capacity by adding an alternative node in the supply chain delivery process to deliver more packages.
How injection zone mapping works
For any given shipping carrier, the zip code zone mapping is always a one-to-one relationship. A specific origin and a specific destination postal code will only ever resolve to a single zone.
Even if your physical origins have complex routing where packages go to different local hubs, the zone mapping in Shipium is always configured based on the single postal code where the carrier takes possession of the shipment.
Fulfillment contexts
In order to use Shipium’s APIs, your organization needs to establish your fulfillment network configurations within the Shipium platform. We refer to these configurations as Fulfillment Contexts. A fulfillment context allows you to configure the characteristics for your network origins, carrier contracts, label augmentations, third party billing, injection shipping, and tenants, in addition to other feature settings. Injection shipping is optional but can be established for a fulfillment context.
Configure injection shipping
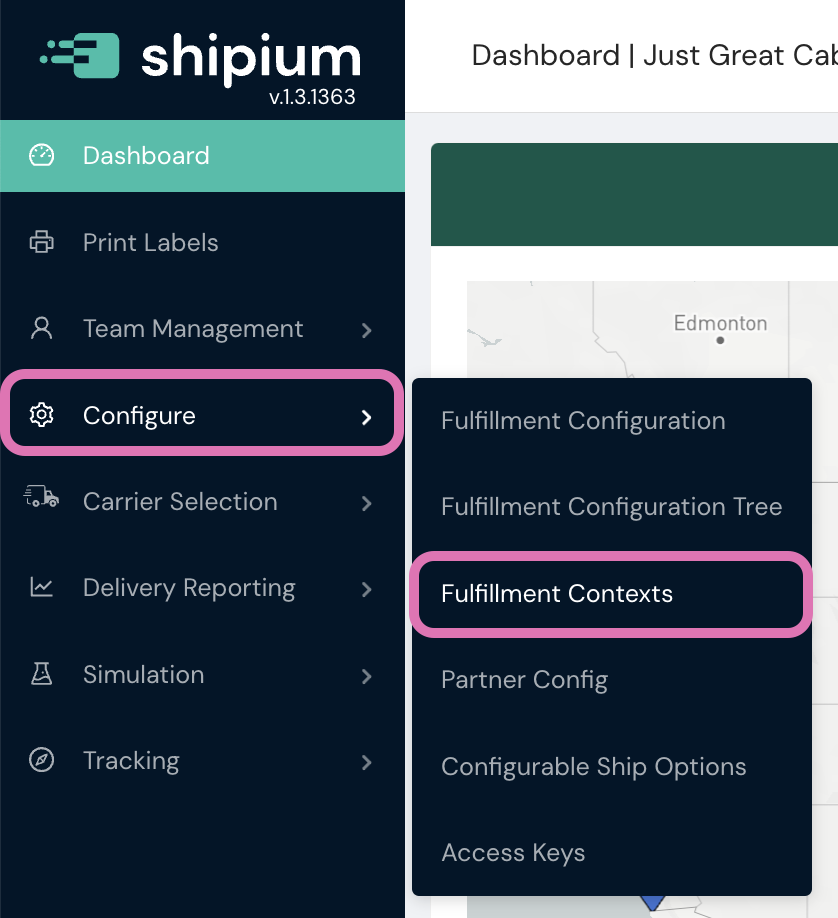
In order to configure injection for a fulfillment context, you'll need to access Fulfillment Contexts in the Configure section of the lefthand navigation menu within the Shipium Console. These instructions assume you've already established a fulfillment context in the Shipium platform. If you haven't yet set up a fulfillment context, you can find guidance for how to do so in the fulfillment contexts documentation.
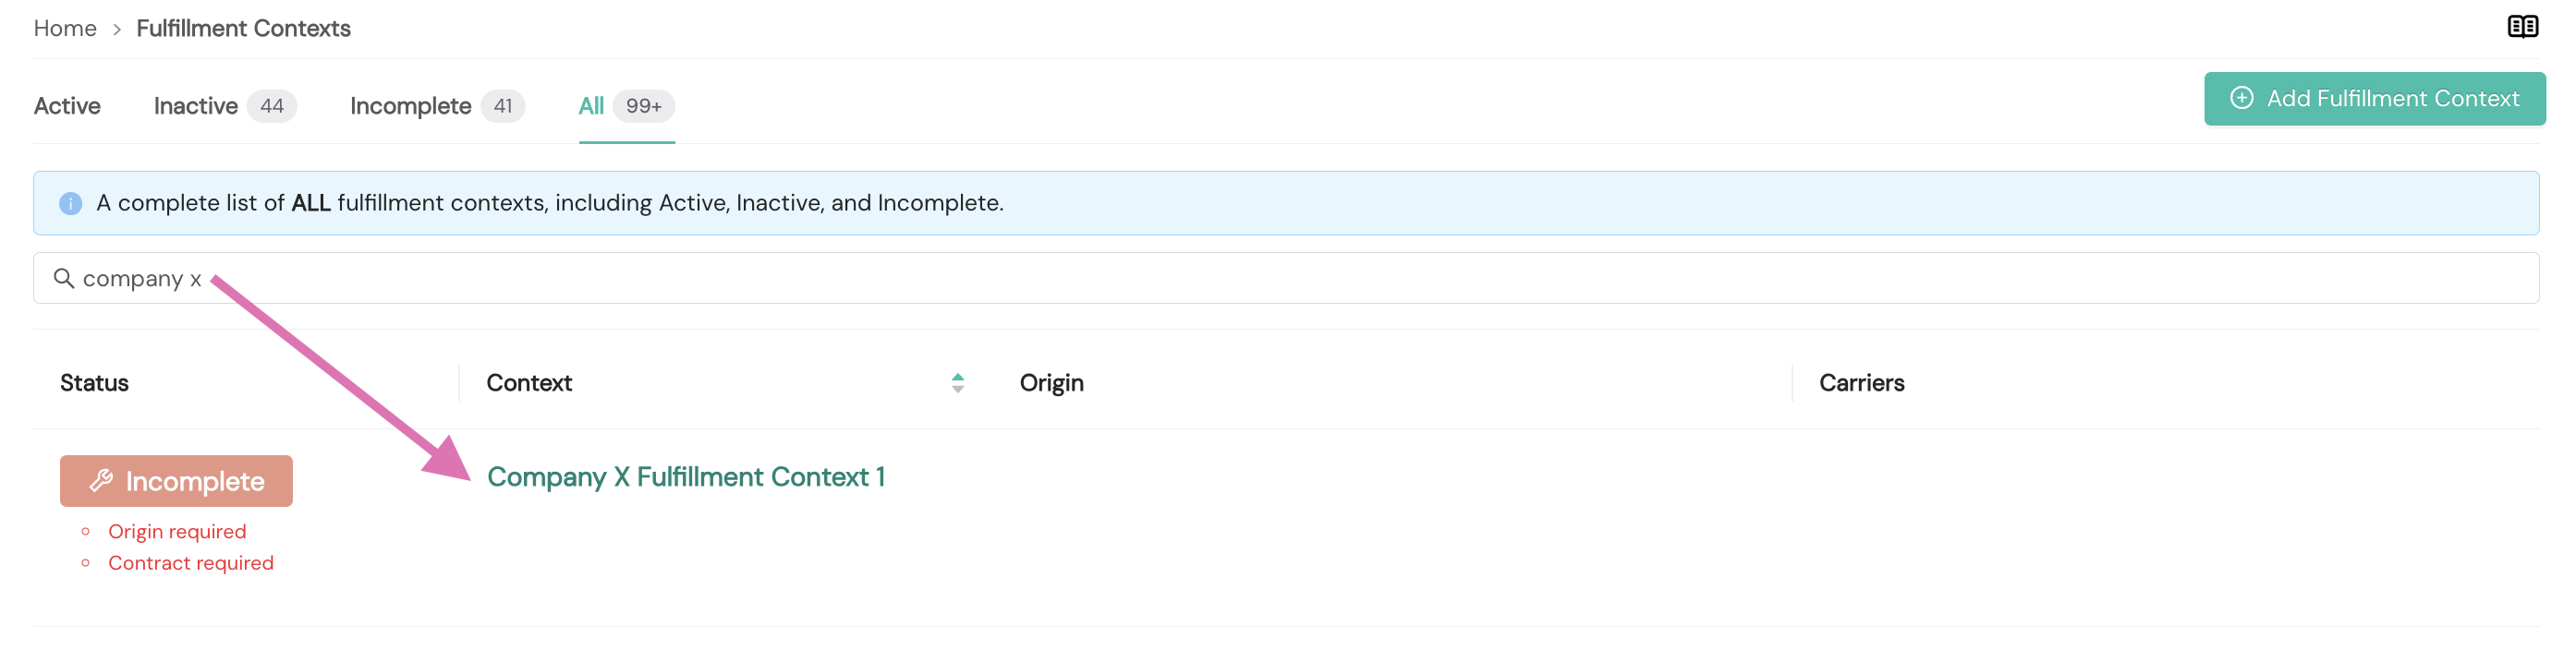
To locate the fulfillment context for which you wish to configure injection shipping, you can use the search bar at the top of the Fulfillment Contexts homepage or simply scroll through a list of the available contexts. Once you've located the desired context, you can access it by clicking on its name.
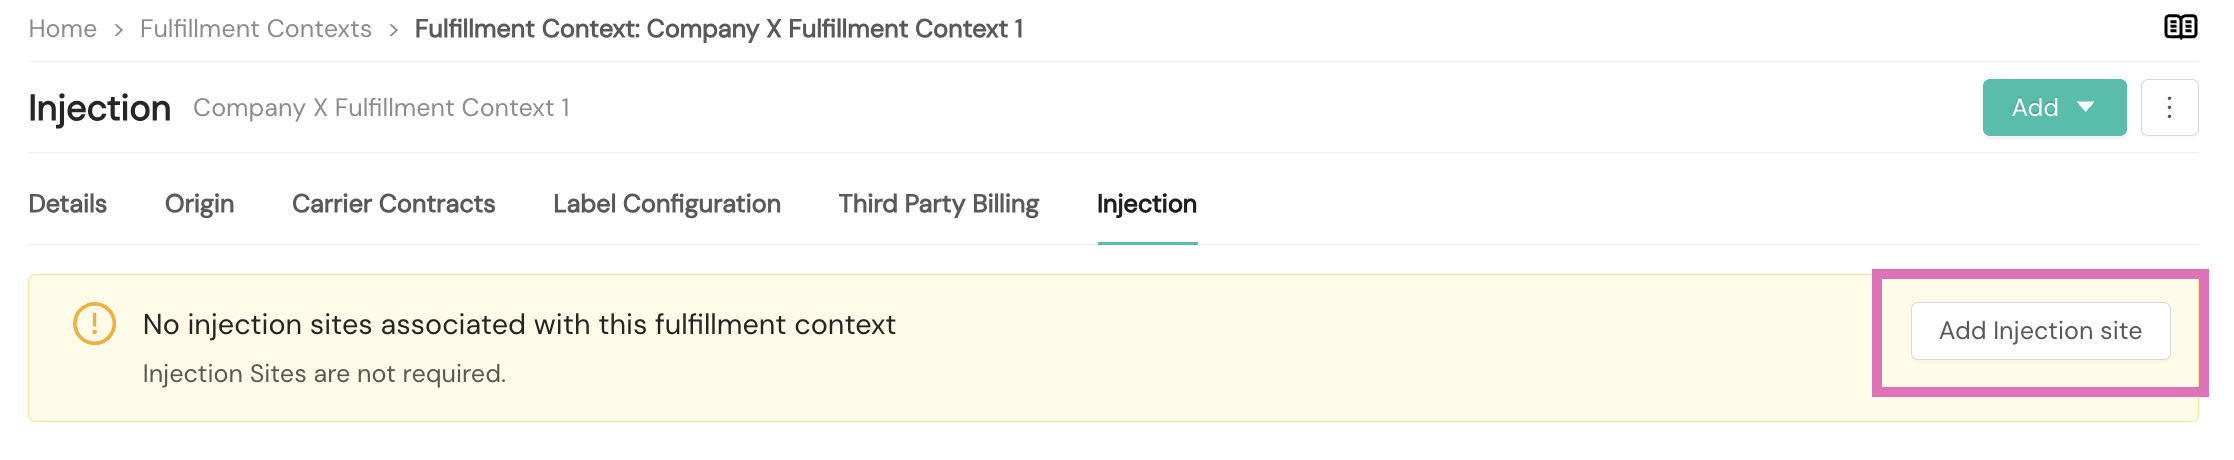
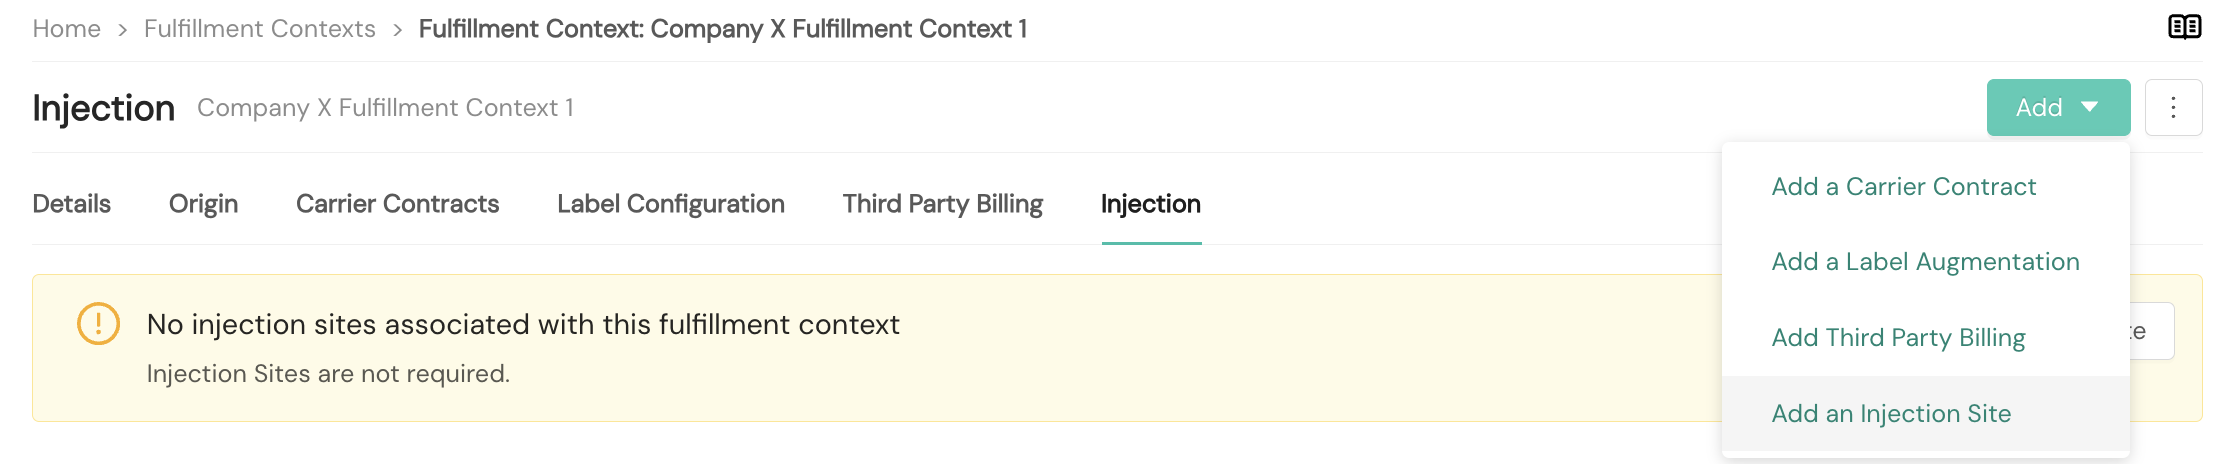
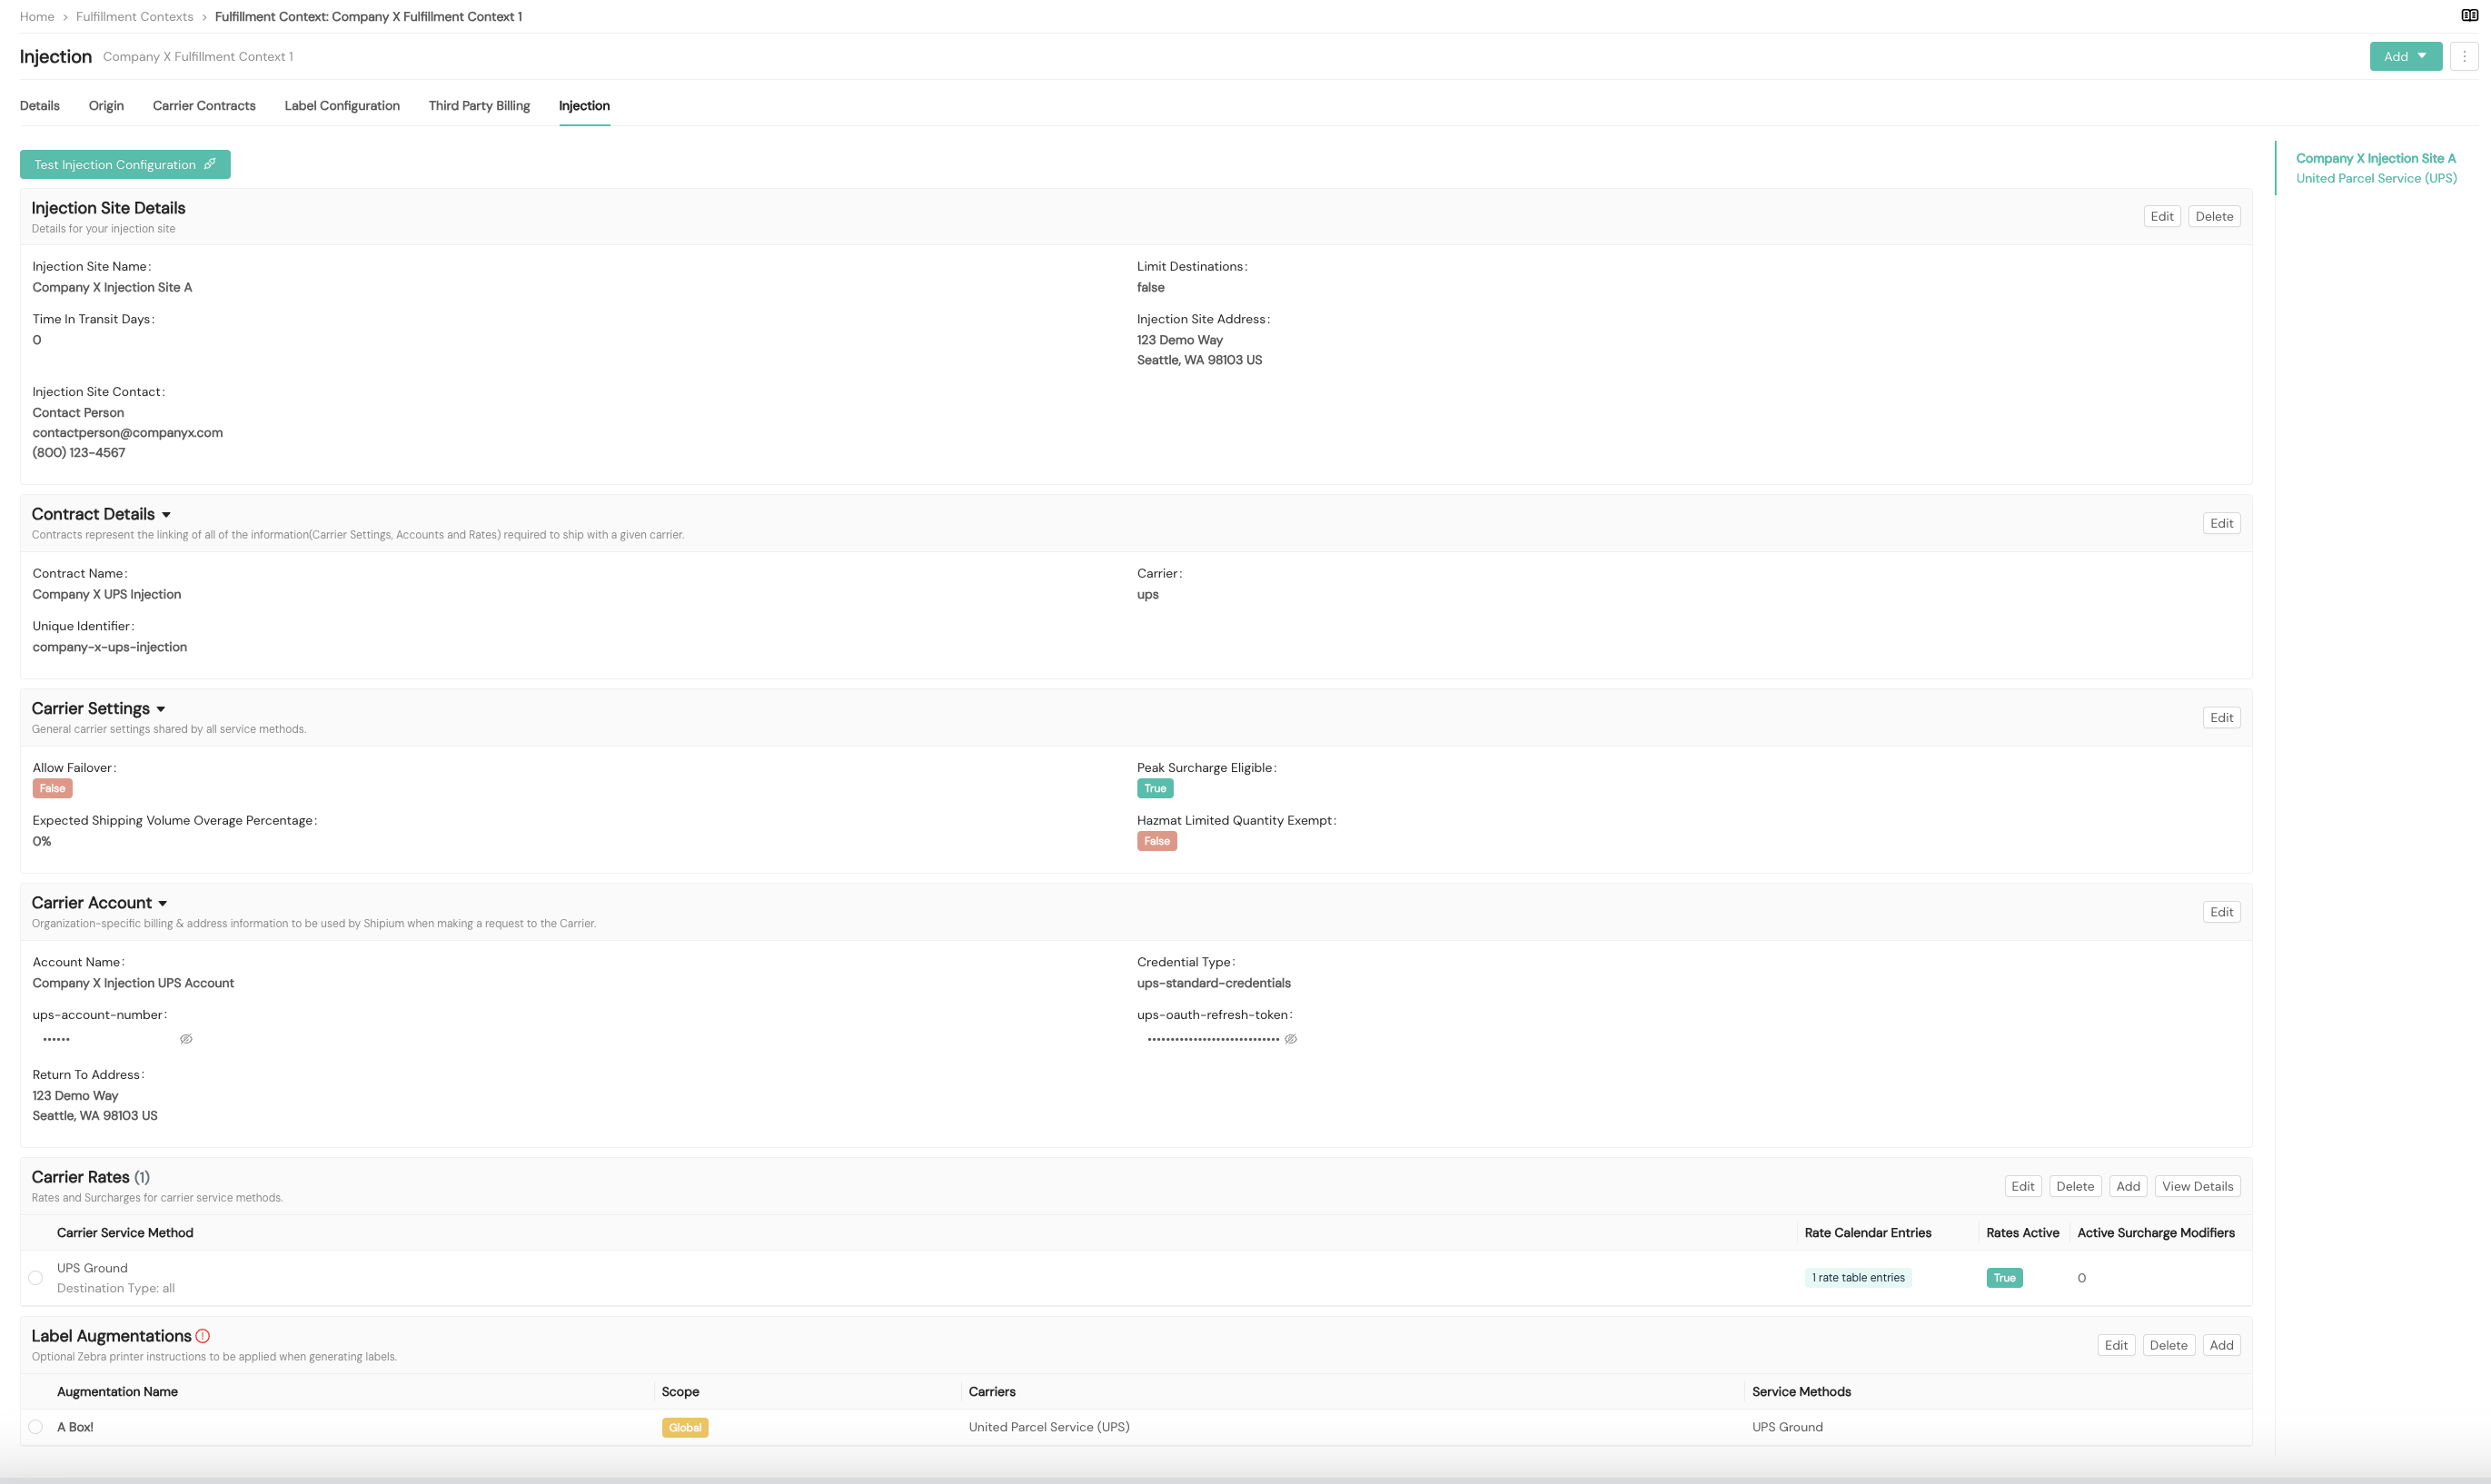
Within the Injection tab of the context, you can add an injection site by selecting the Add Injection Site button within the message that there are no injection sites associated with the fulfillment context or by selecting Add an Injection Site from the dropdown menu at the right of the screen.
To create an injection site, you'll provide details to be associated with it, as shown in the following screenshot and detailed below. Some fields do not appear until the desired carrier is selected from the dropdown menu.
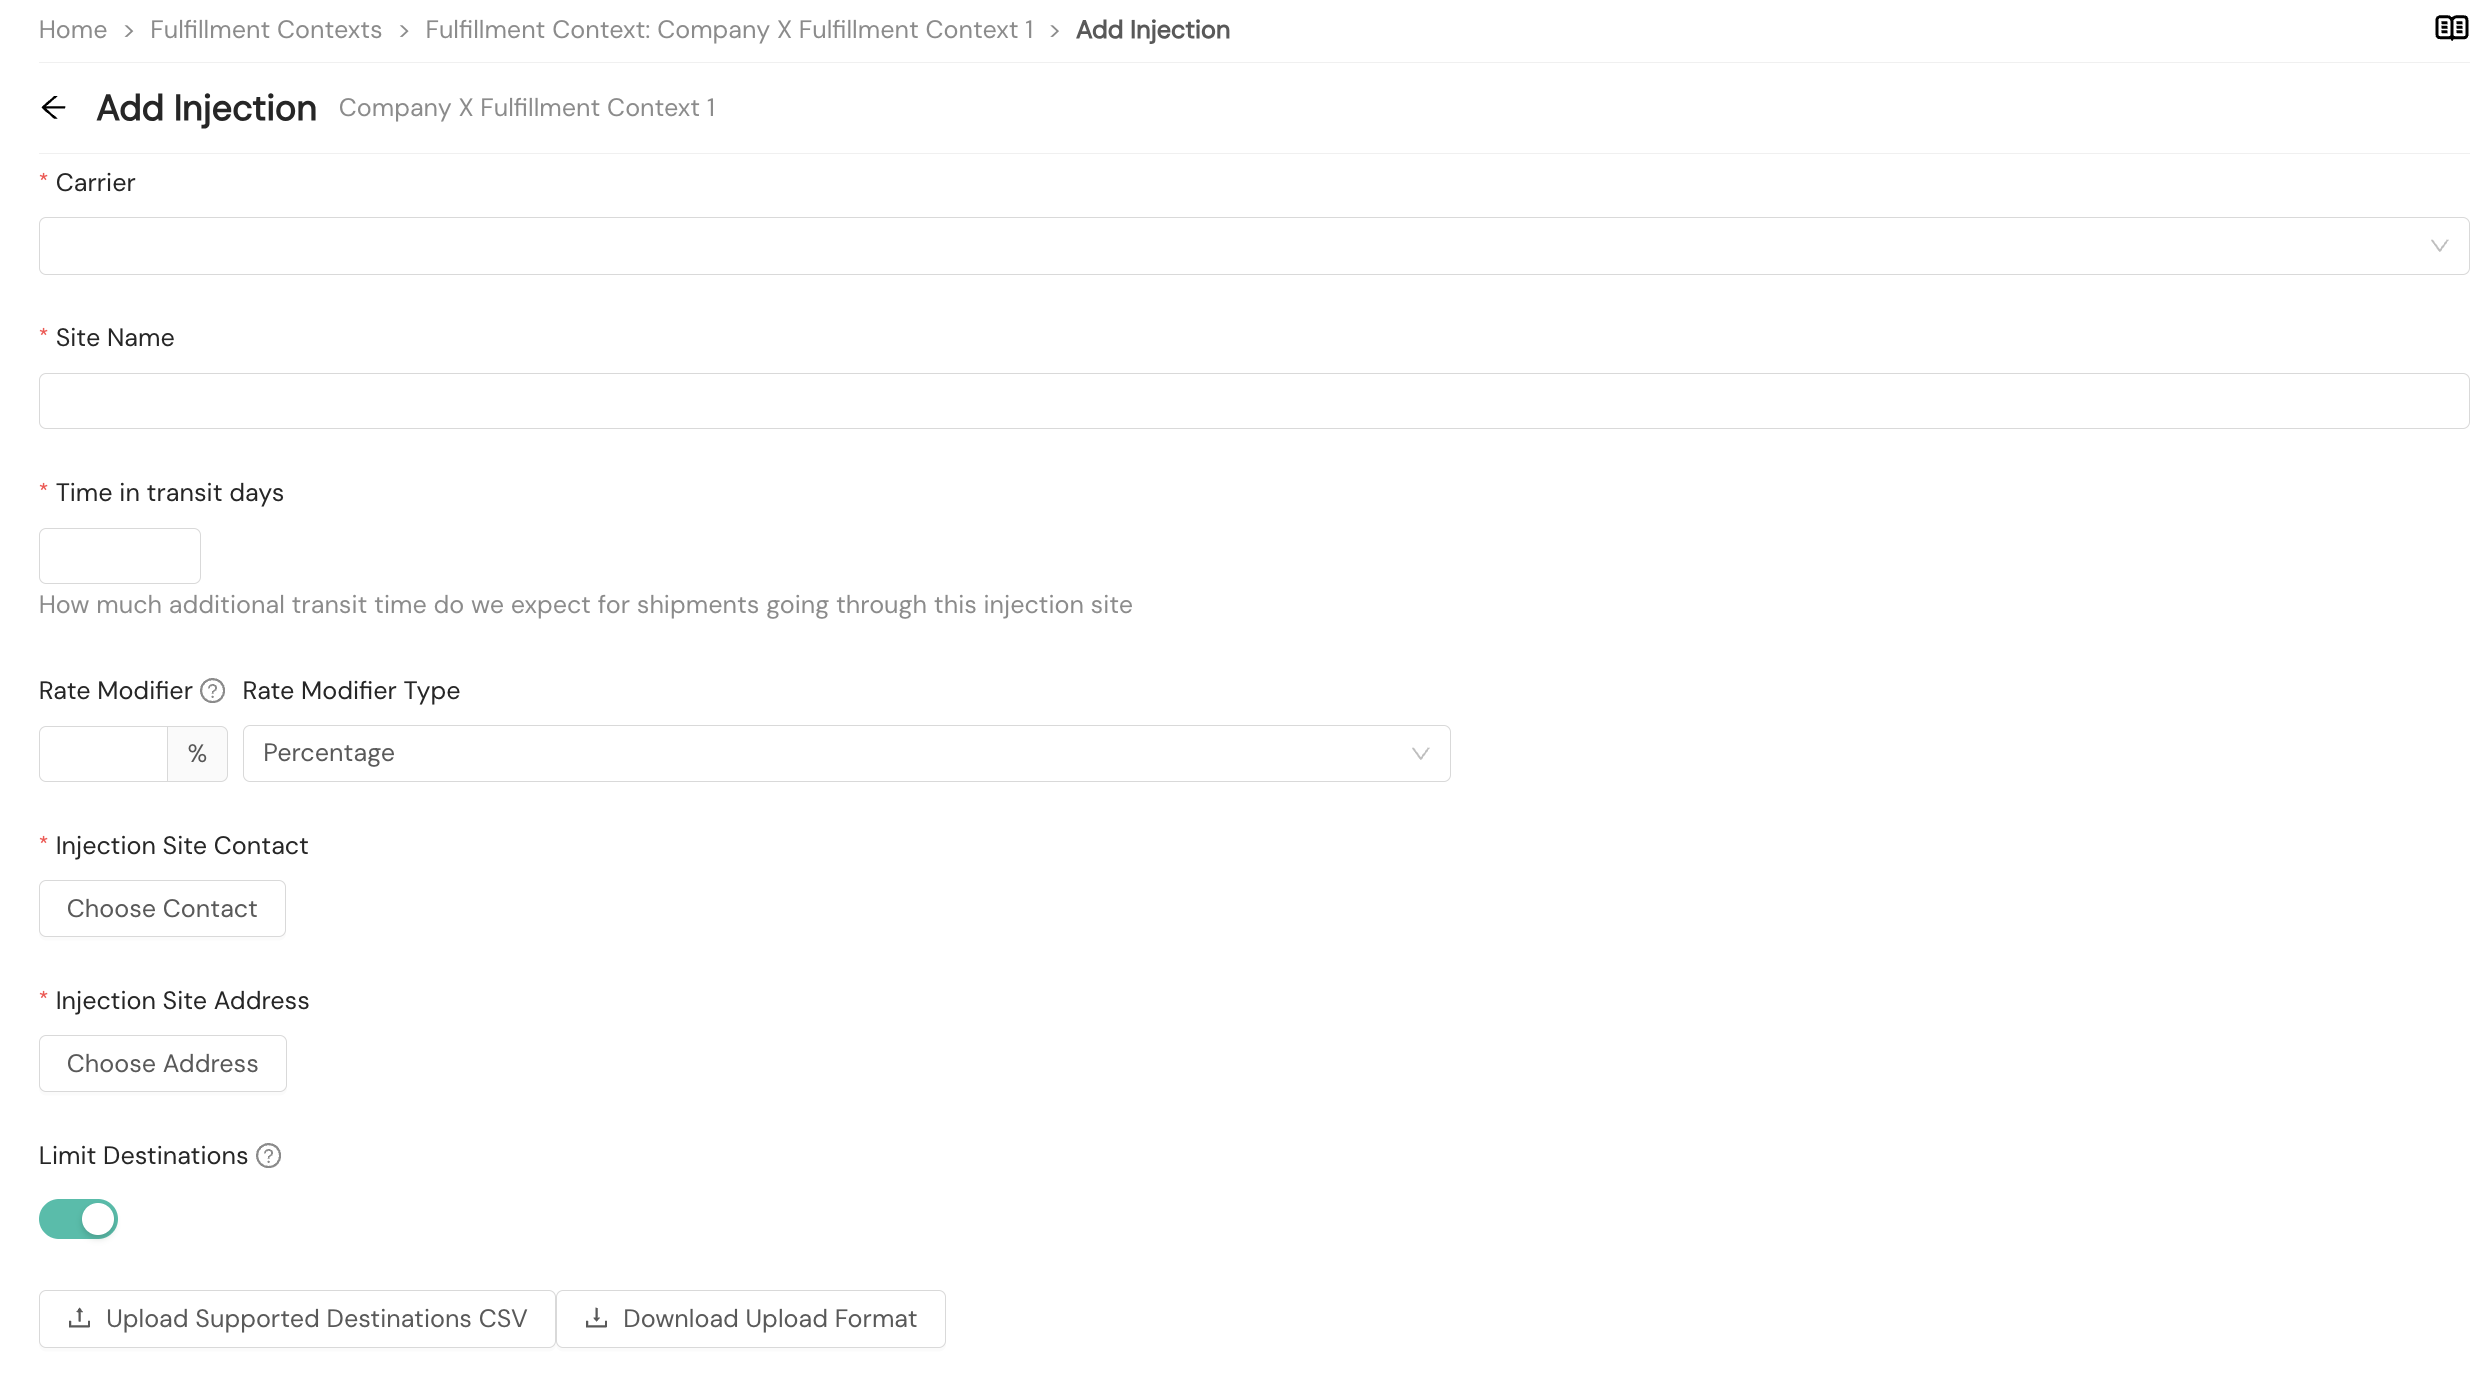
- Carrier. Required. You'll select the desired carrier for the injection site from a dropdown menu.
- Site Name. Required. A human-readable name your organization will use to refer to the injection site
- Time in Transit Days. Required. The additional transit time in number of days that your organization expects for shipments going through the injection site
- Rate Modifier. Optional. This is the numerical value of a rate modifier your organization might use for this injection site. It is expressed as either a percentage or a fixed rate.
- Rate Modifier Type. Optional. You’ll select from a dropdown menu of two choices: Percentage or Fixed.
- Injection Site Contact. Required. Once you select the Choose Contact button, you’ll have a choice to select an existing contact or create a new one.
- Injection Site Address. Required. Once you select the Choose Address button, you’ll have a choice to select an existing address or create a new one.
- Limit Destinations. Optional. If toggled on, you’ll be prompted to provide postal codes for destination addresses to which this injection site ships. You’ll download a CSV file for uploading the applicable postal codes.
Carrier contract required for injection siteEven if you have carrier contracts configured for a fulfillment context, you must add a carrier contract for each injection site.
Add a carrier contract to an injection site
To be used, an injection site must have at least one carrier contract associated with it. Once the injection site is created, you must add a carrier contract. This process is the same as setting up a carrier contract for a fulfillment context.

You can create a new contract or select an existing one.
To create a carrier contract, you'll provide details to be associated with it, as shown in the following screenshot and detailed below.
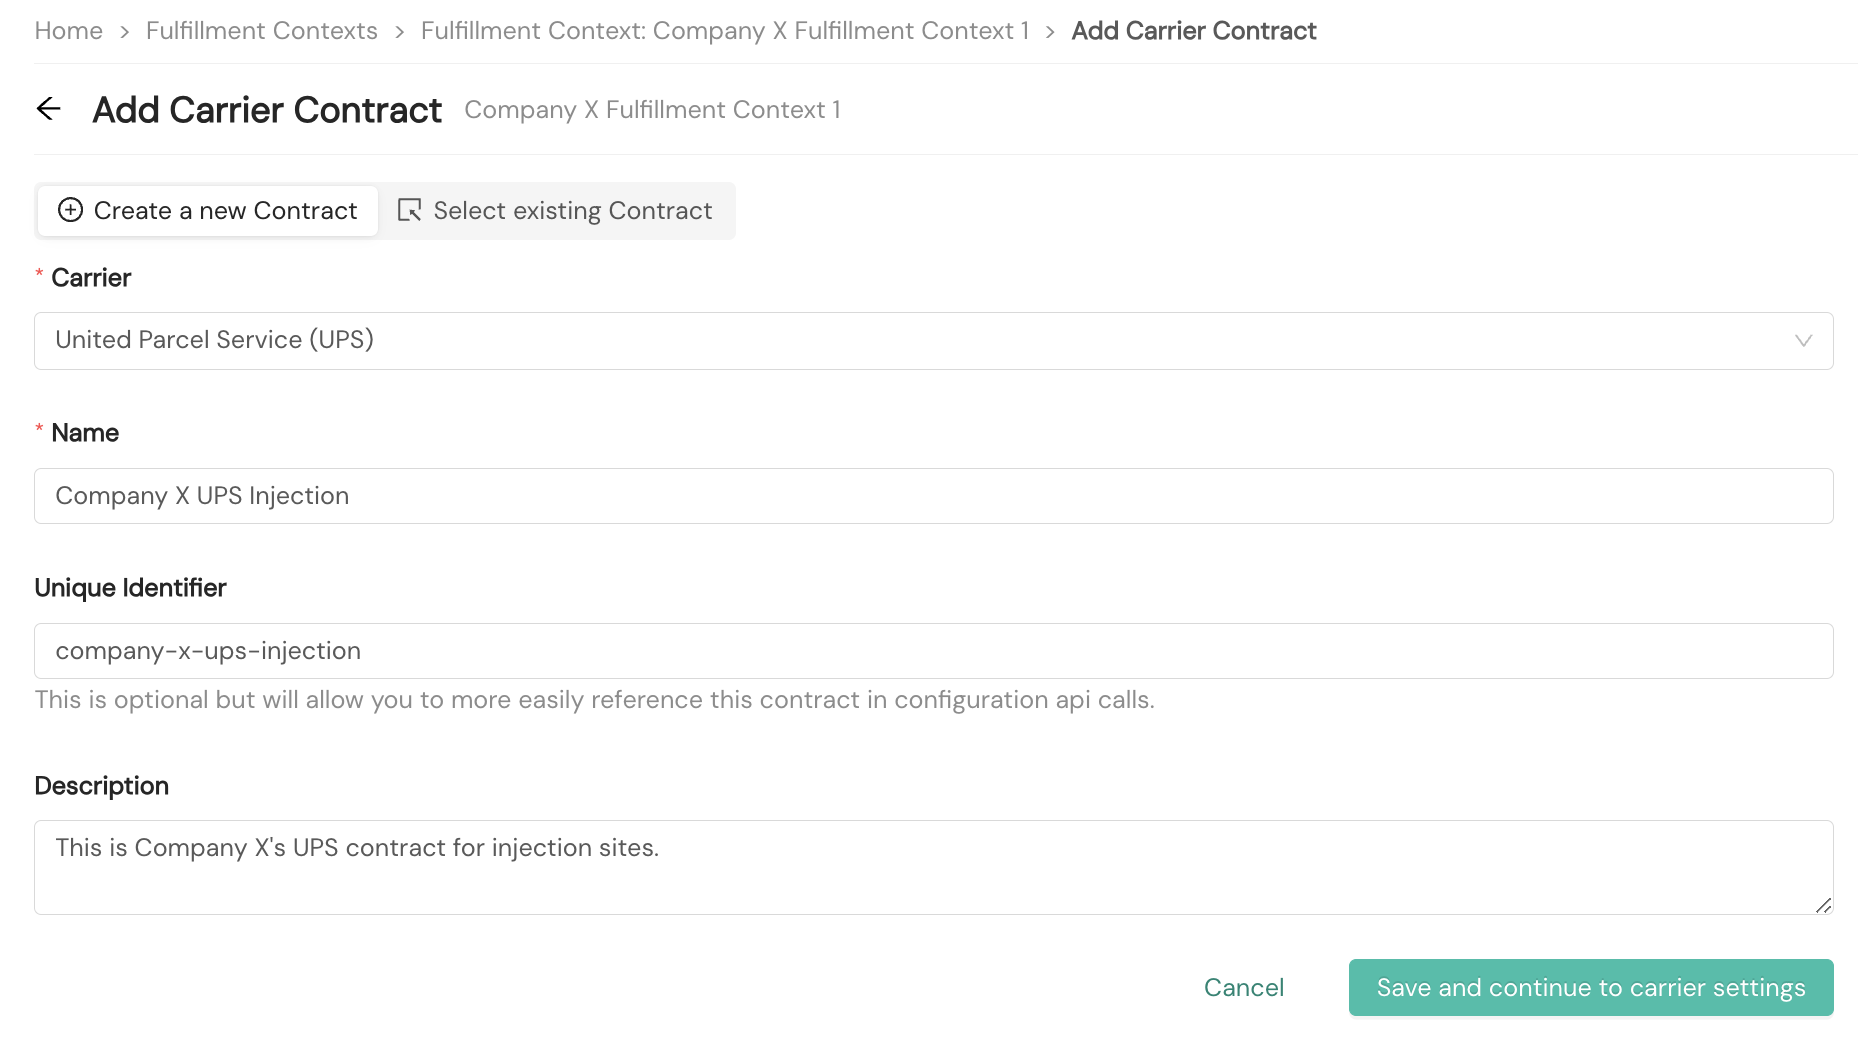
- Carrier. Required. You'll select the desired carrier from a dropdown menu.
- Name. Required. A human-readable name your organization will use to refer to the contract
- Unique Identifier. Optional. An optional field that can help you more easily reference the fulfillment context in calls to Shipium's APIs; this unique ID is case sensitive.
- Description. Optional. An optional description to help you organize your organization's carrier contracts
Next, you'll need to establish carrier settings.
Add carrier settings to an injection site
Once you configure a carrier contract for the injection site, you'll set up the carrier settings. You can select existing carrier settings or create new ones.
To create a new Carrier Settings configuration, you'll provide details to be associated with it, as shown in the following screenshot and detailed below.
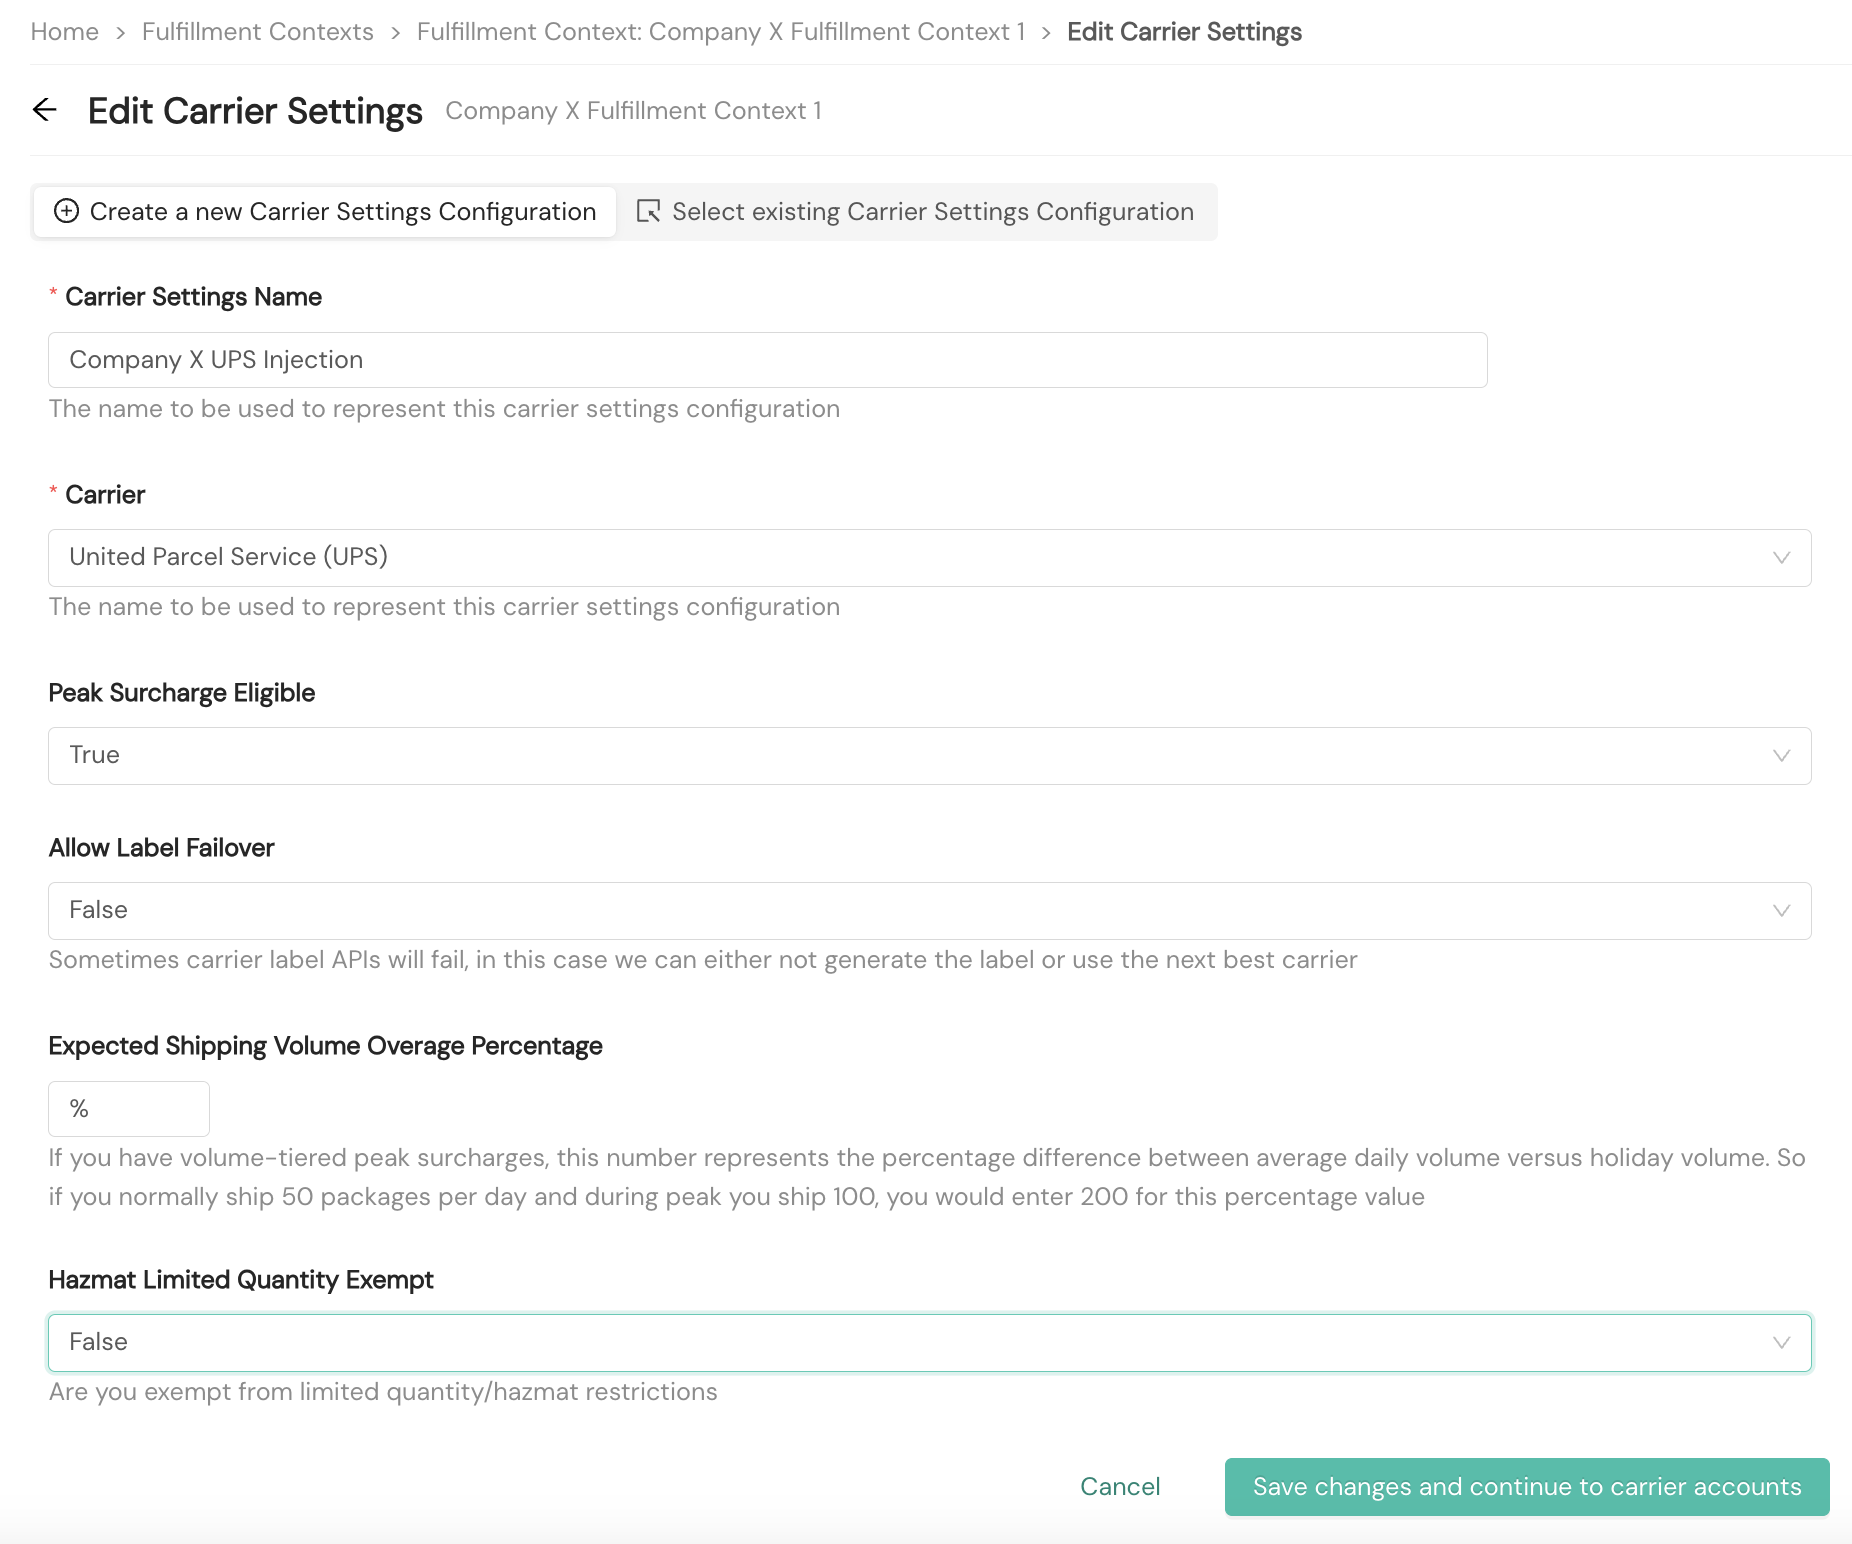
- Carrier Settings Name. Required. A human-readable name your organization will use to refer to the carrier settings configuration
- Carrier. Required. You'll select the desired carrier from a list of available carriers in a dropdown menu.
- Peak Surcharge Eligible. Required. You'll select a value of either True or False from a dropdown menu, depending on the eligibility of the carrier settings configuration for peak surcharges.
- Allow Label Failover. Required. You’ll select True to allow failover or False to not allow failover from the dropdown menu. In the case of a carrier label API failure, Shipium can either not generate the label or use the next best carrier. This means that if the carrier was selected and can't be reached, the next-best carrier and ship method will be used. You can find more information about failover in the Carrier Failover document.
- Expected Shipping Volume Overage Percentage. Optional. If your organization has volume-tiered peak surcharges, this number represents the percentage difference between average daily volume versus holiday volume. For example, if you normally ship 50 packages per day and during peak you ship 100, you would enter 200 for this percentage value. A value under 100 indicates that you have less volume during peak.
- Hazmat Limited Quantity Exempt. Required. You'll select a value of either True or False from a dropdown menu, depending on the hazmat limited quantity exemption eligibility of the carrier settings configuration.
Next, you'll need to establish a carrier account.
Add a carrier account to an injection site
Once you configure a carrier contract and carrier settings for the injection site, you'll set up the carrier account. You can select an existing carrier account or create a new one.
To create a new Carrier Account, you'll provide details to be associated with it, as shown in the following screenshot and detailed below. The information requested for a carrier account is dependent upon the carrier. For this example, United Parcel Service (UPS) appears as the carrier. Fields beyond the Cost Center field for other carriers differ. Your Implementation team member is available to assist you in completing any of this information.
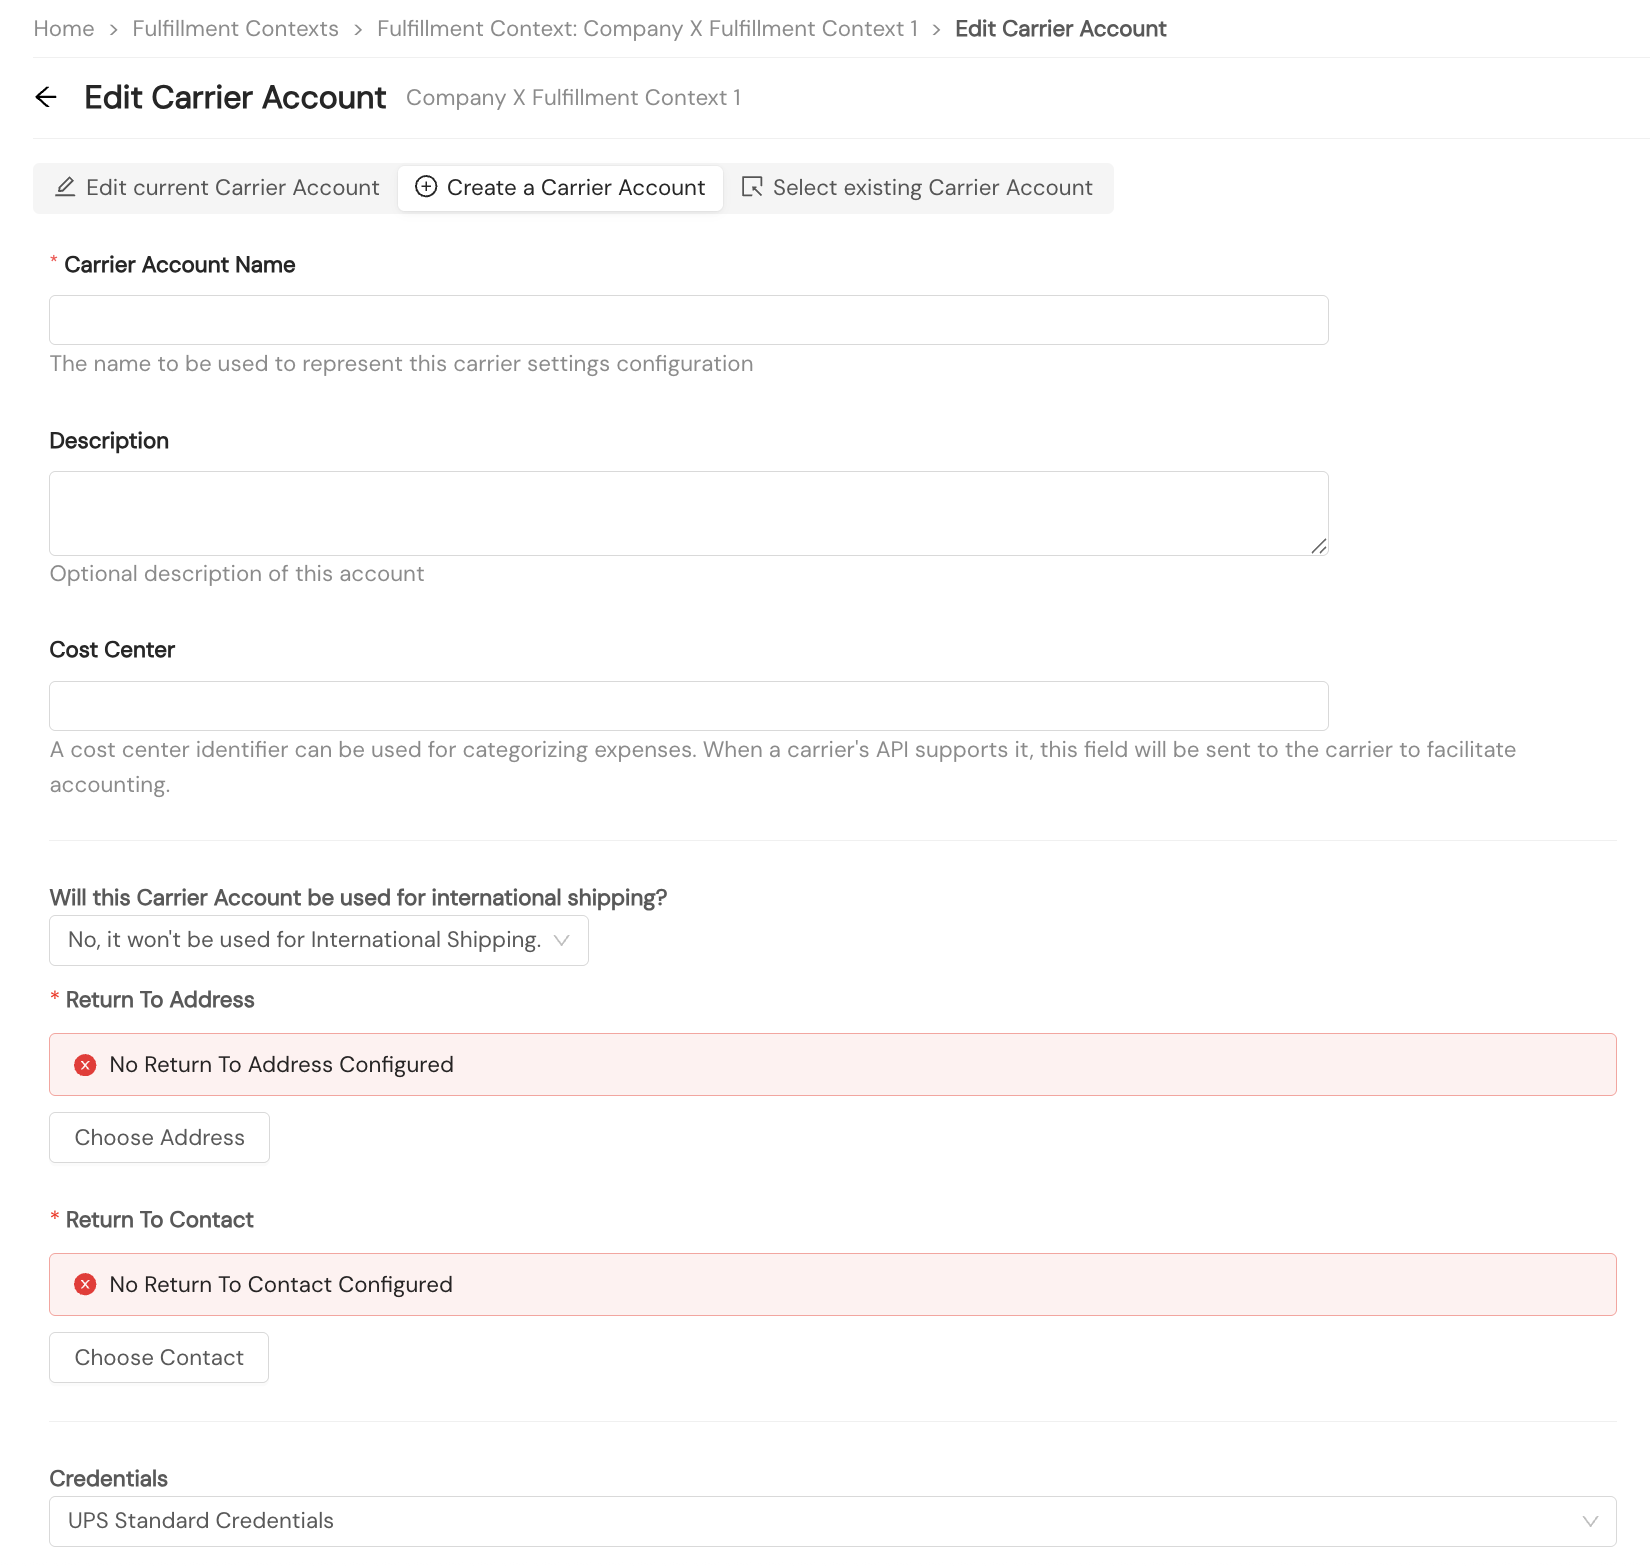
- Carrier Account Name. Required. A human-readable name your organization will use to refer to the carrier account
- Description. Optional. An optional description your organization can use to help you organize your carrier accounts
- Cost Center. Optional. A cost center identifier can be used for categorizing expenses. When a carrier's API supports it, this field will be sent to the carrier to facilitate accounting.
- International Shipping. Optional. If you're using the carrier account for international shipping, you''ll select Yes from the dropdown menu.
- Return To Address. Optional. A return to address is the address where a package will be returned, if it is undeliverable for any reason. This overrides any other return address that might be configured at a higher level, such as on the carrier account or at the origin. You can select an existing return address or create a new one.
- Return To Contact. Optional. A return to contact is the person within your organization who serves as the point of contact regarding shipment returns. This overrides any other return contact that might be configured at a higher level, such as on the carrier account or at the origin. You can select an existing return contact or create a new one.
- Credentials. Required. You'll select the desired carrier credentials from the list of available carrier credentials in a dropdown menu.
Next, you'll need to establish carrier rates.
Add carrier rates to an injection site
You can establish rates and surcharges your organization has for the carrier contract for an injection site in the fulfillment context. The interface allows you to export a rate and surcharges table to complete and upload into the Shipium Console for the selected carrier service method. However, you must have your carrier account configured before you're allowed to enter carrier rates.
You can select an existing carrier rate configuration or create a new one.
To create a new carrier rate, you'll provide details to be associated with it, as shown in the following screenshot and detailed below. You must have a rate configured for each of the applicable service methods for your carrier account that will be used for this injection site. The only case in which you would not be required to provide specific carrier rates is if you designate a carrier rate as uncosted, meaning that Shipium will not attempt to cost the method during Carrier Selection.
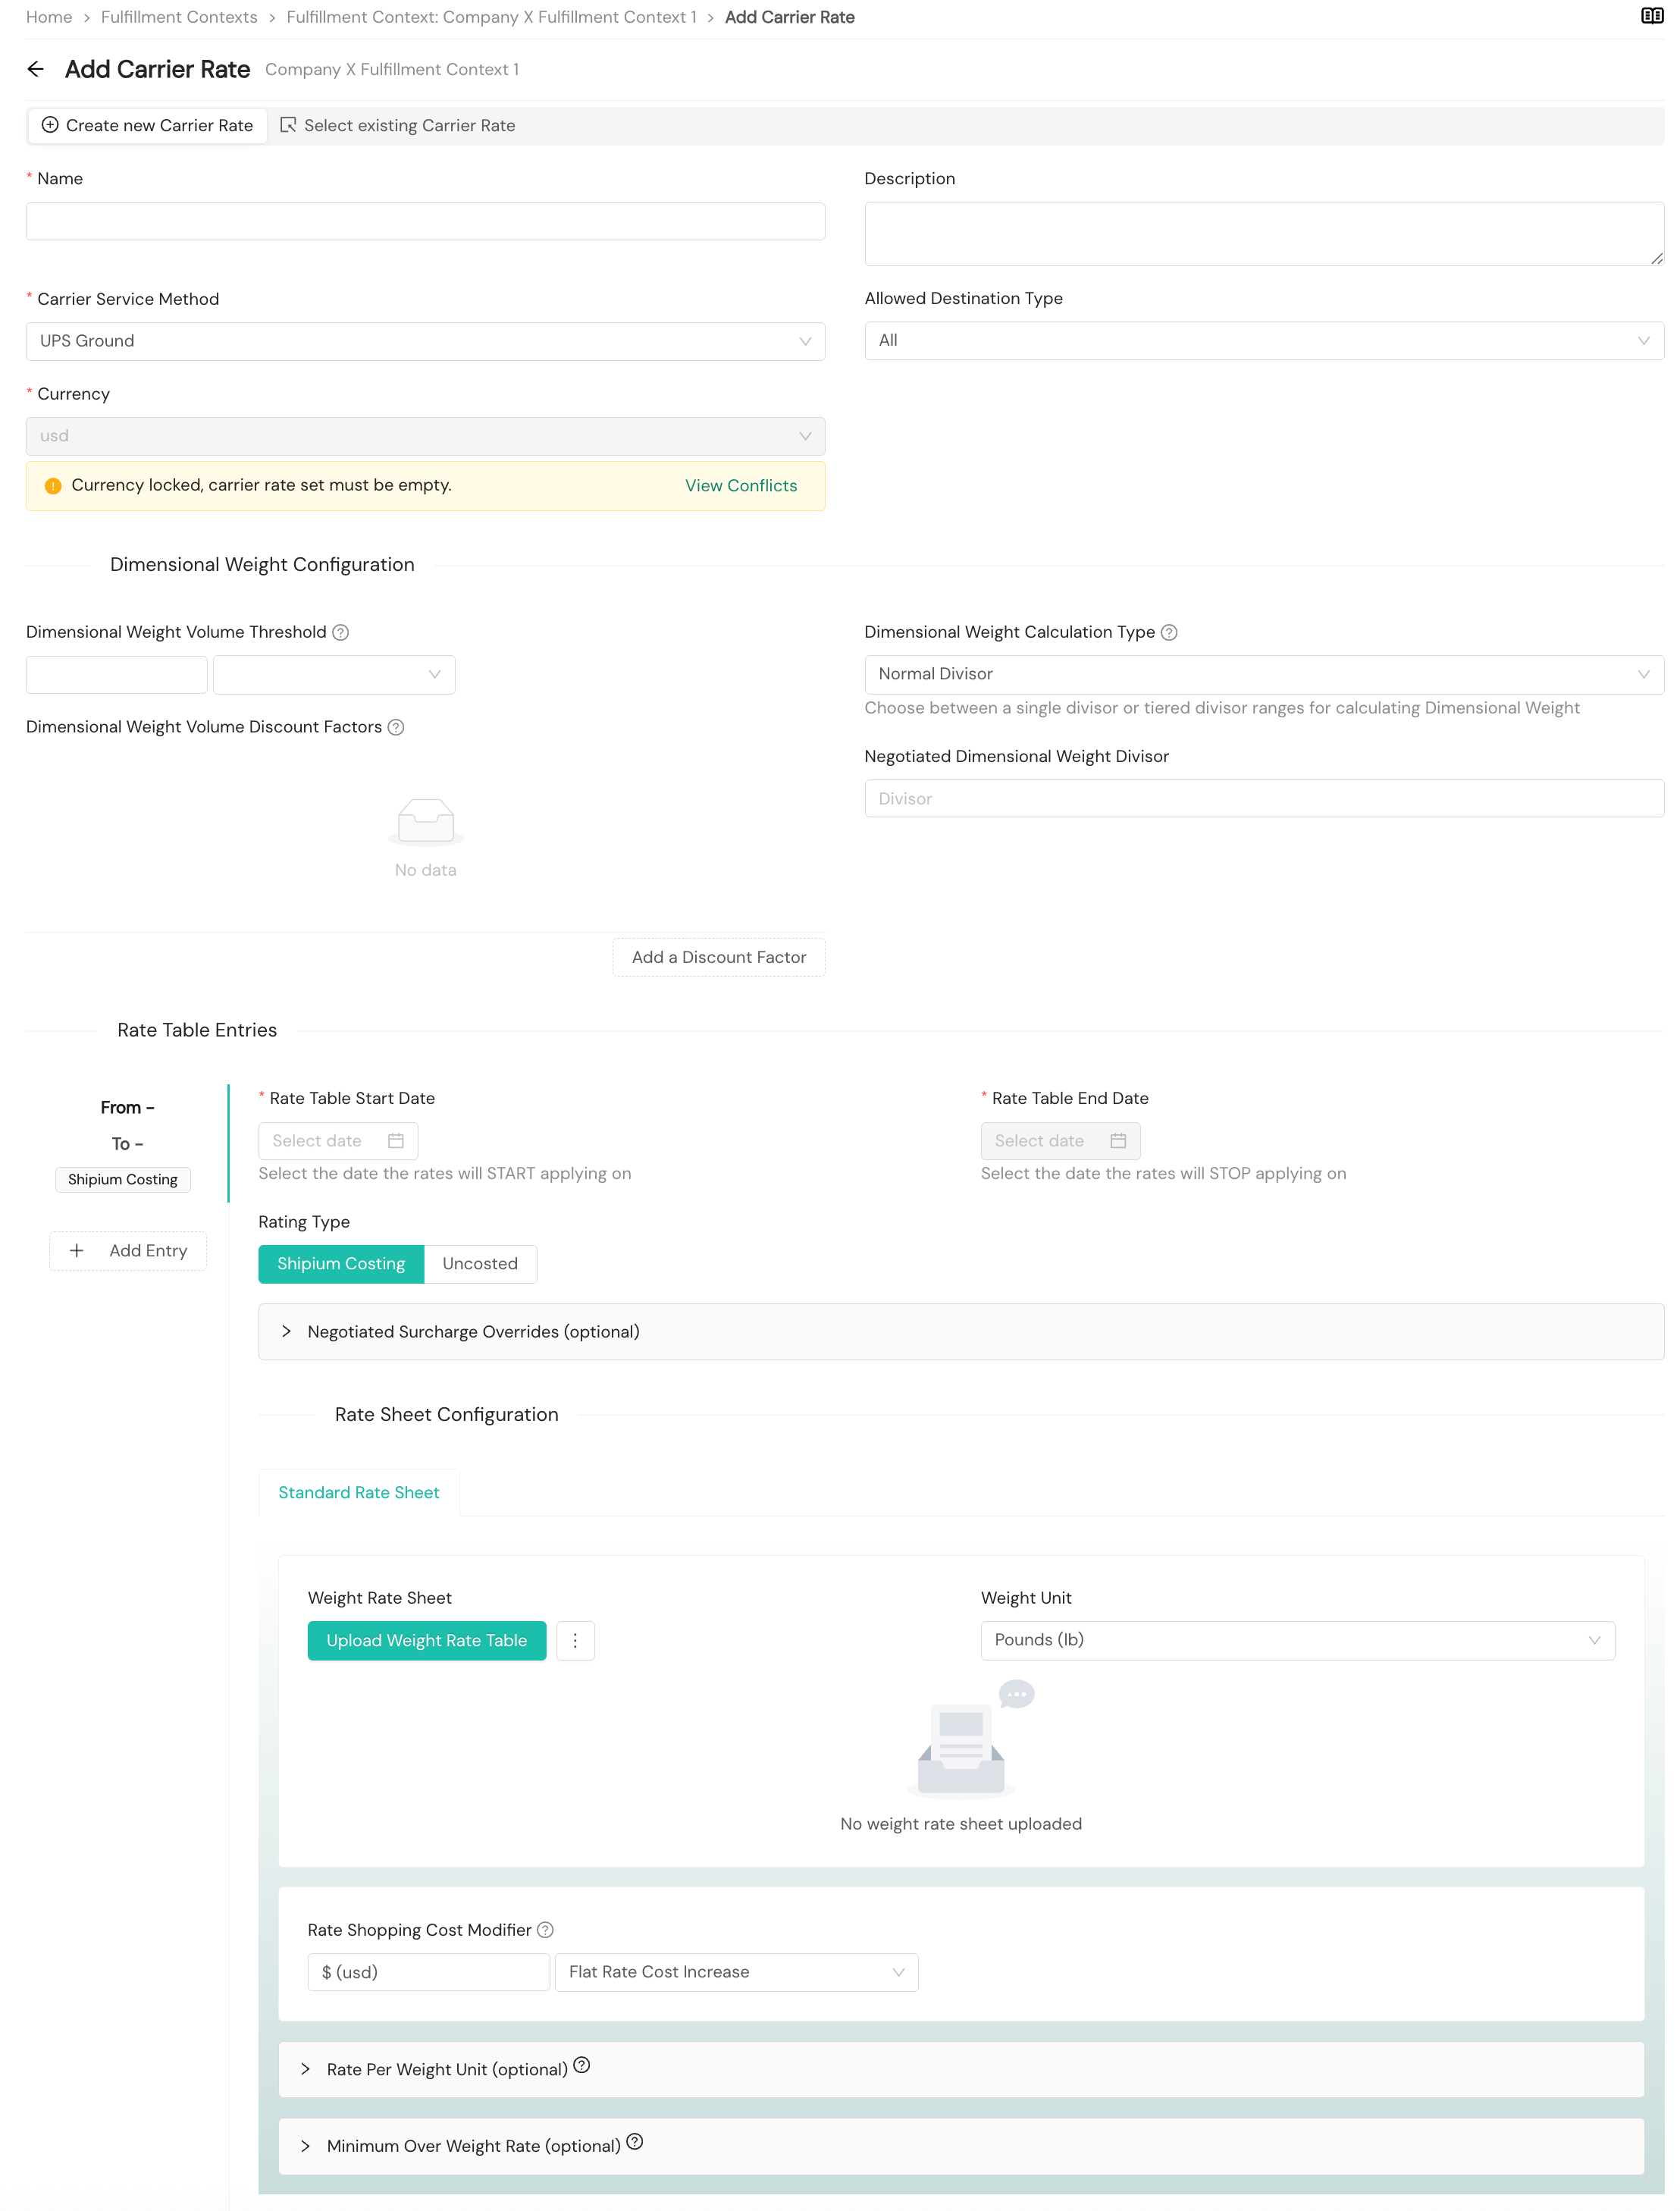
Details
- Name. Required. A human-readable name your organization will use to refer to the carrier rate
- Description. Optional. An optional description your organization can use to help you organize your carrier rates
- Carrier Service Method. Required. You'll select the desired service method for the applicable carrier from a dropdown menu. You must establish a rate for each carrier service method for your context.
- Allowed Destination Type. Required. You'll select All, Commercial, or Residential as the type of destination address allowed from a dropdown menu.
- Currency. Required. You'll select your desired currency from the dropdown menu. Currency cannot be changed when multiple carrier rates are in a contract.
Dimensional weight configuration
Dimensional weight configuration scenarios are included at the end of this section.
-
Dimensional Weight Volume Threshold. Optional. You may have a custom dimensional weight volume threshold for the applicable carrier service method. This value represents the minimum volume required for any package for any dimensional weight divisor to be applied, whether it's a single or tiered divisor. If you provide this value, any packages with a volume below this threshold will not have a dimensional weight divisor applied. If you do not provide a value for this field, dimensional weight will always be calculated, regardless of package volume. You'll also need to select the appropriate volume unit for the dimensional weight volume from a dropdown menu (feet, meters, inches, centimeters). You most likely will select inches or centimeters.
-
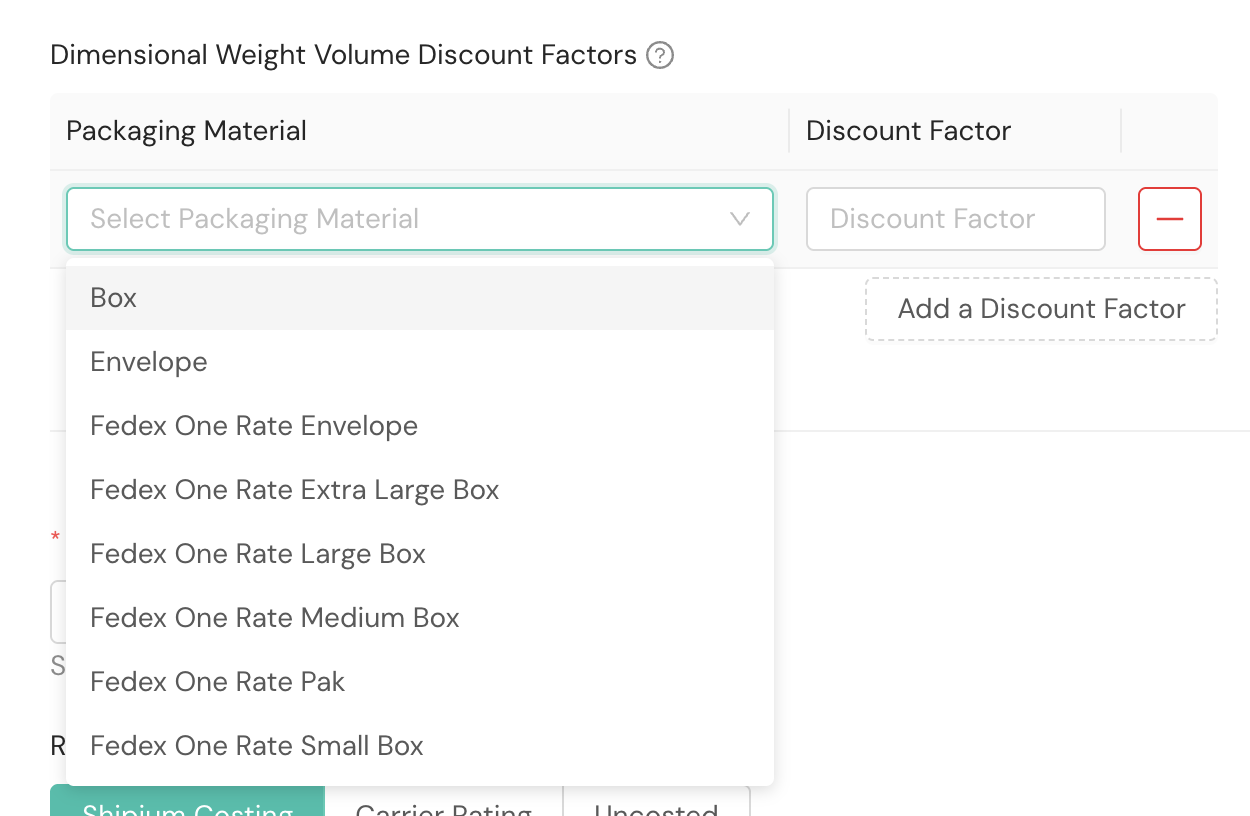
Dimensional Weight Volume Discount Factors. Optional. You can add volume discount factors according to packaging material, to be applied against the package volume before the dimensional weight is applied. The discount factor value must be a decimal number less than 1. This optional discount factor must be pre-negotiated with UPSMI or USPS.
-
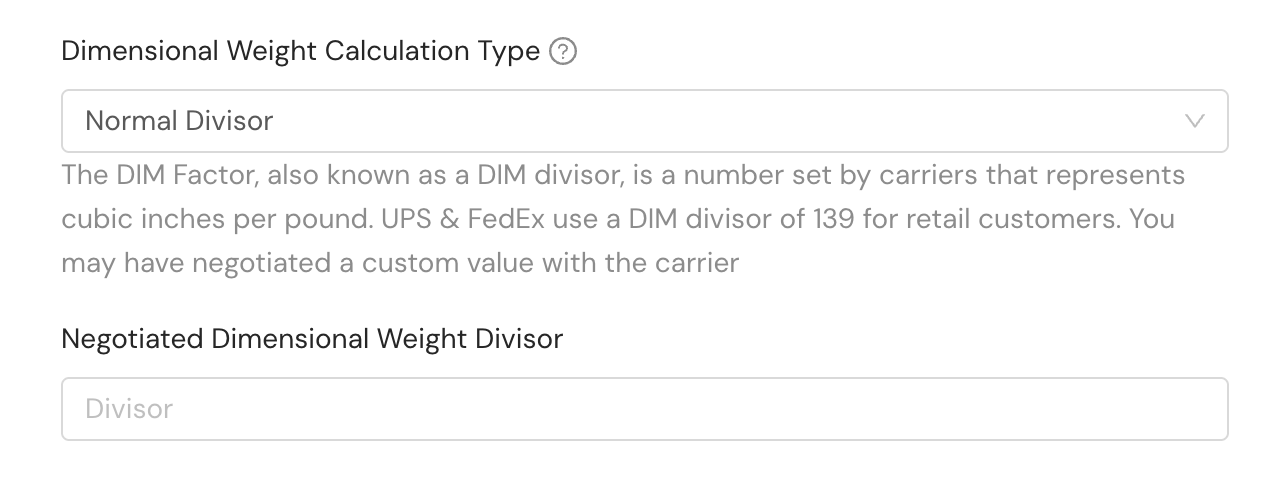
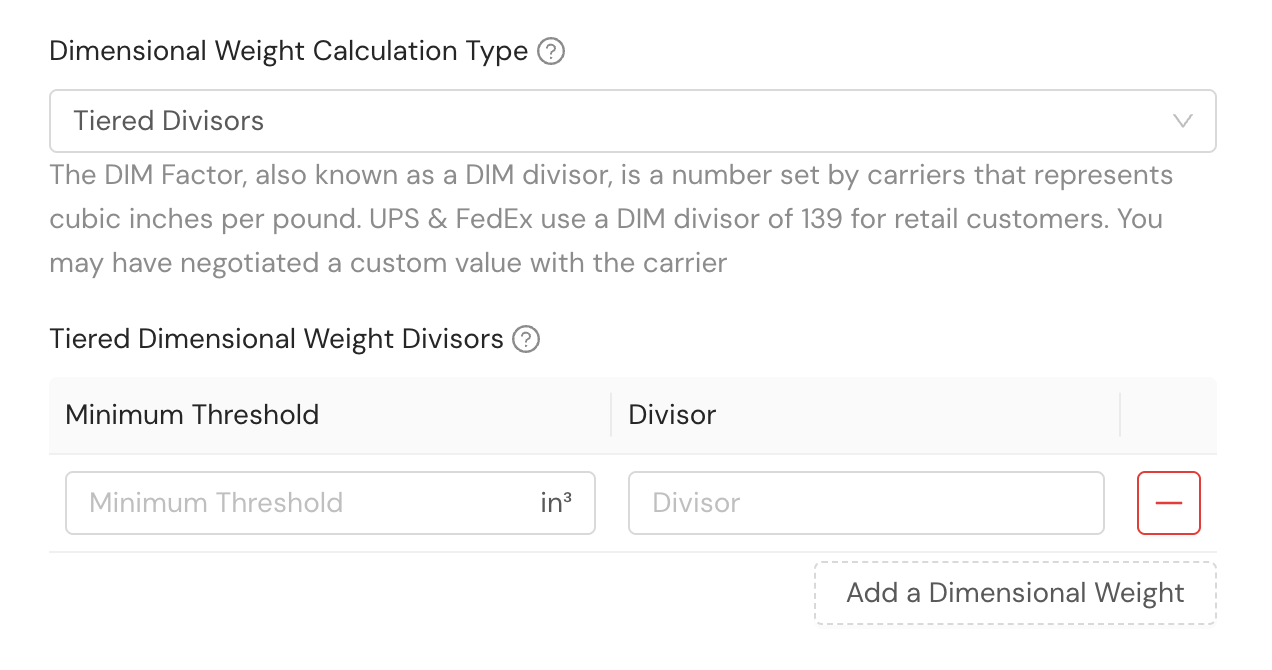
Dimensional Weight Calculation Type. Optional, but required if configuring a dimensional weight volume threshold. You can choose between normal (single) and tiered divisors for calculating the dimensional weight.
-
Normal (single). For this calculation type, you'll provide a single value for the negotiated dimensional weight divisor that is applied once the dimensional weight volume threshold is met. Any packages with a volume above your defined dimensional weight volume threshold will have the negotiated dimensional weight divisor applied to their calculation. If you did not specify a dimensional weight volume threshold, this divisor will be applied to all packages.
-
Tiered. For this calculation type, you can define multiple thresholds for which specific dimensional weight divisors apply. Any packages with a volume above one defined threshold but not above the next (if more than one is defined) will have that dimensional weight divisor applied. The system selects the dimensional weight divisor with the largest threshold that the package exceeds without going over. Each threshold value must be an integer.
-
-
Negotiated Dimensional Weight Divisor. Optional, for normal dimensional weight calculation type only. You may have a negotiated dimensional weight divisor for the applicable carrier service method. This value is a number set by the carrier that represents cubic inches per pound.
-
Tiered Dimensional Weight Divisors. Optional. You can add multiple ranges for which a divisor should apply.
Rate table entries
Once you have rate table entries configured, you'll see a listing of them in the lefthand column in the Rate Table Entries section.
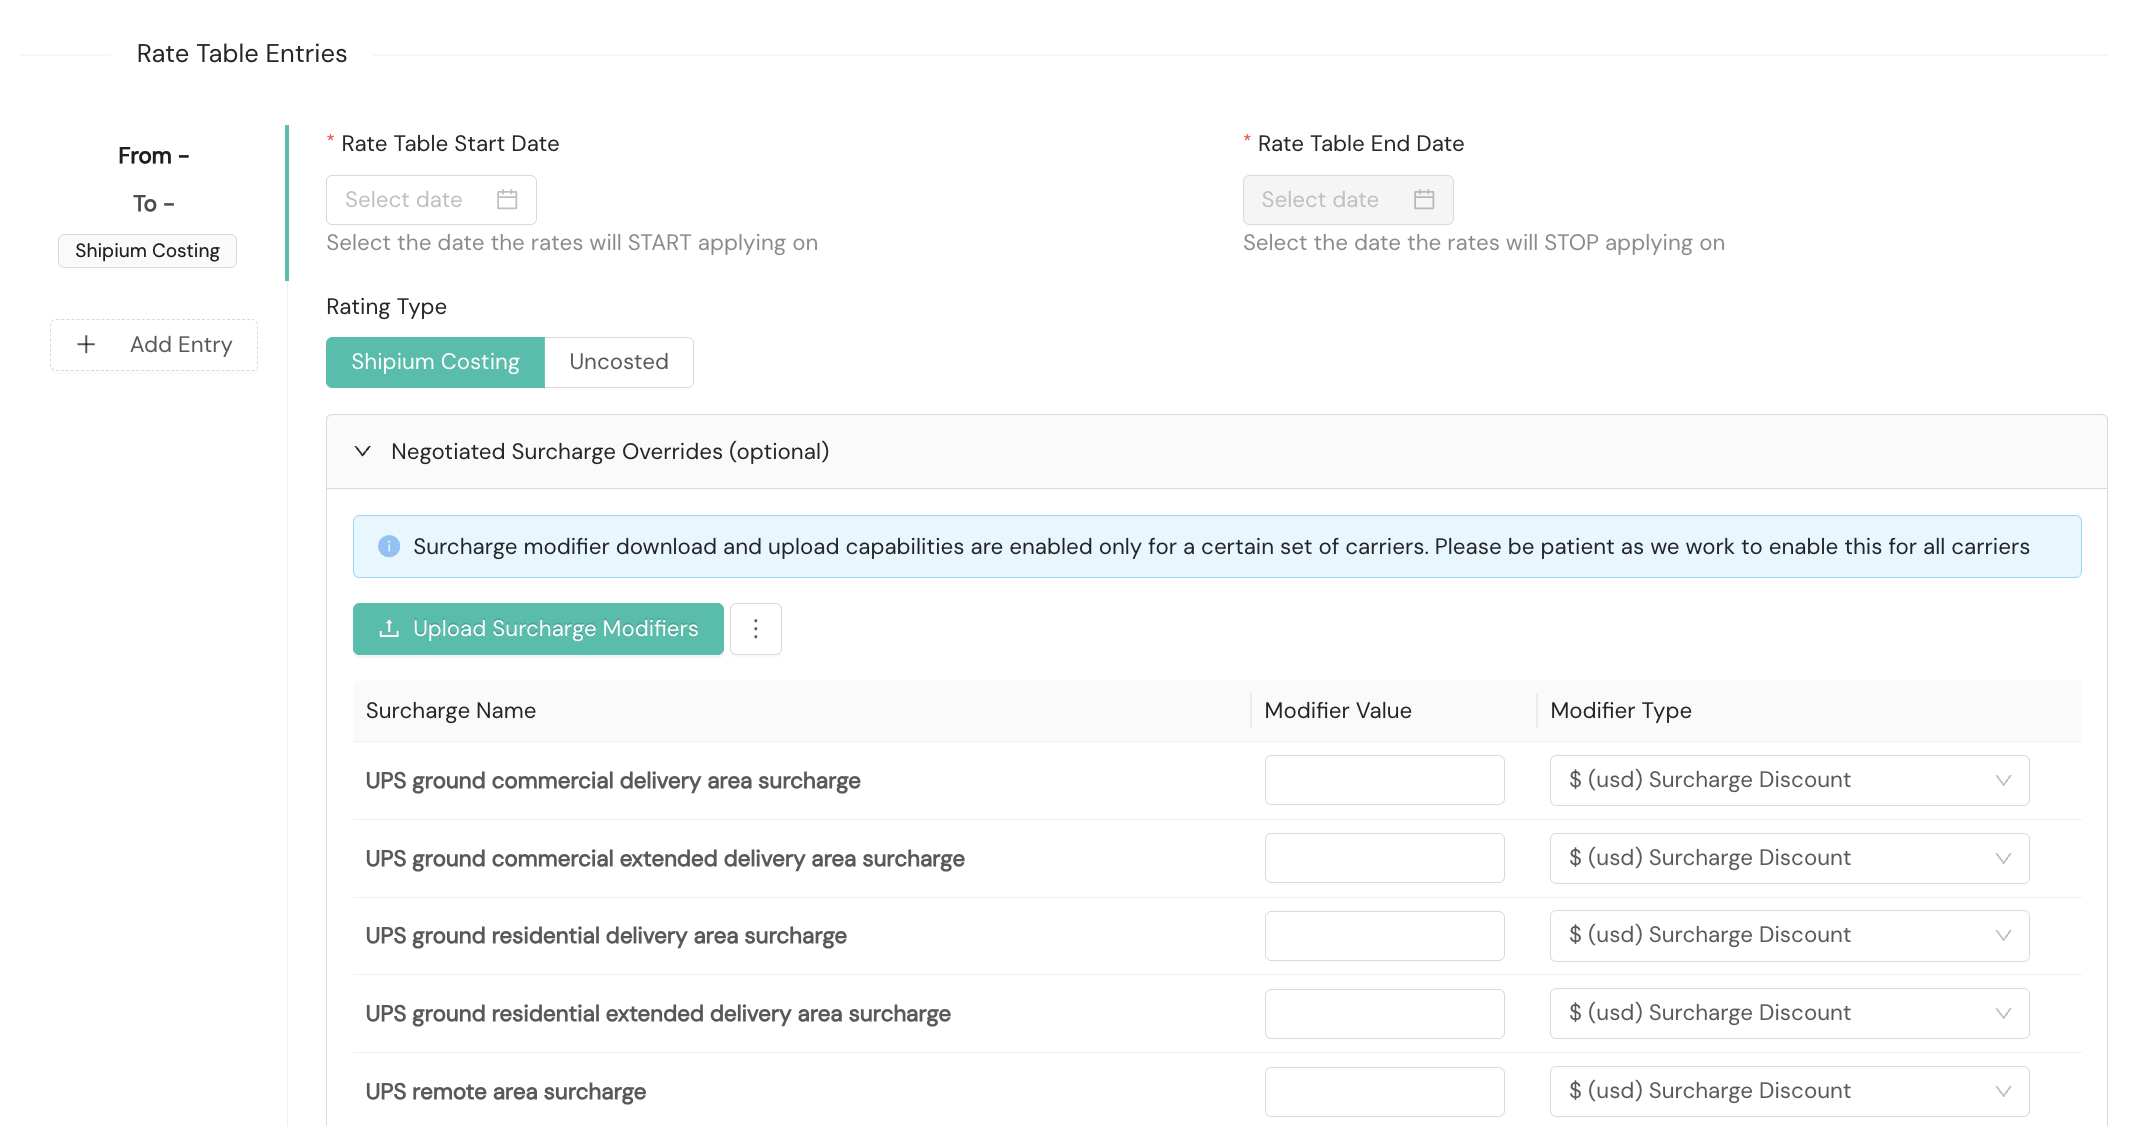
- Rate Table Start Date. Required. You'll select the date on which you wish the carrier rate to start applying.
- Rate Table End Date. Required. You'll select the date on which you wish the carrier rate to stop applying.
- Rating Type. Choices for the type of rating are determined by the carrier service method you selected in the previous step. Options include:
- Shipium Costing. Estimates are based on Shipium’s costing engine, using the rate cards and surcharges you configure.
- Carrier Rating. Shipium provides an estimate directly from the carrier. You do not need to configure rate cards or surcharges but do need to supply a carrier schedule. For LTL shipments, you must select this rating type.
- Uncosted. Shipium will not attempt to cost the method and will only select it during Carrier Selection if no costed methods are available. You do not need to configure rate cards or surcharges but do need to supply a carrier schedule.
- Negotiated Surcharge Overrides. Optional. When creating a rate, you may also elect to enter any surcharge overrides your organization has negotiated with the carrier applicable to the service method for which you're creating the rate. Surcharges vary by carrier. You can refer to Peak and Other Carrier Surcharges for more information on carrier surcharges. For each surcharge override you wish to configure, you'll provide the modifier value and its type. There are three main types of surcharge discounts that can be configured for carrier rates:
- % Surcharge Discount. This applies a percentage-based discount to a surcharge. For example, if a surcharge is $10 and you configure a 20% surcharge discount, the final surcharge amount will be $8.
- $ Surcharge Discount. This applies a fixed currency amount discount to a surcharge. For example, if a surcharge is $10 and you configure a $2 USD surcharge discount, the final surcharge amount will be $8. The currency for this discount is determined by the currency configured for the fulfillment context.
- Fixed % Surcharge Discount. This sets the surcharge to a fixed percentage of its original amount. This is different from the % Surcharge Discount because it's a discount to a specific percentage, not by a specific percentage. For example, if a surcharge is $10 and you configure a fixed % surcharge discount of 30%, the final surcharge amount will be $3.
There are two types of replacement surcharge modifiers: - Fixed % Surcharge. This modifier replaces the original surcharge with a new value calculated as a percentage of the total shipping cost. For example, if the total shipping cost is $50 and you configure a Fixed 5% Surcharge, the new surcharge will be $2.50, regardless of the original surcharge amount.
- Fixed $ Surcharge. This modifier replaces the original surcharge with a fixed currency amount. For instance, if the original surcharge is $10, and you configure a Fixed $5 Surcharge, the new surcharge will be $5. The currency of this fixed amount is determined by the currency configured for the fulfillment context.
In essence, these "replacement" modifiers ignore the original surcharge value and substitute it with a new value, either a percentage of the total shipping cost or a fixed amount.
Rate sheet configuration
Three types of rate sheets can be configured. Standard rate sheets may be uploaded for any supported carrier. Remote rate sheets may be added for specific service methods, including USPS Ground Advantage, USPS Priority Mail, and other USPS service methods via USPS (not via third-party USPS software partners). Multiparcel rate sheets may be added for carrier Nationex.
In addition, cubic rate cards may be uploaded for carriers shipping with USPS for part of the delivery transport, including DHL, eHub, OSM, UPSMI, and USPS directly or via EasyPost, Endicia, or Pitney Bowes.
Cubic vs. weight based rating API response differencesWhen cubic rating is used, the API response will contain a
billableCubicVolumeobject instead ofbillableWeight. When a shipment is rated by volume (i.e., cubic rating), thebillableWeightfield in thecarrierSelectionandcarrierLabelobjects will be null. When a shipment is rated by weight (i.e., billable weight), thebillableCubicVolumefield in the response will be null.
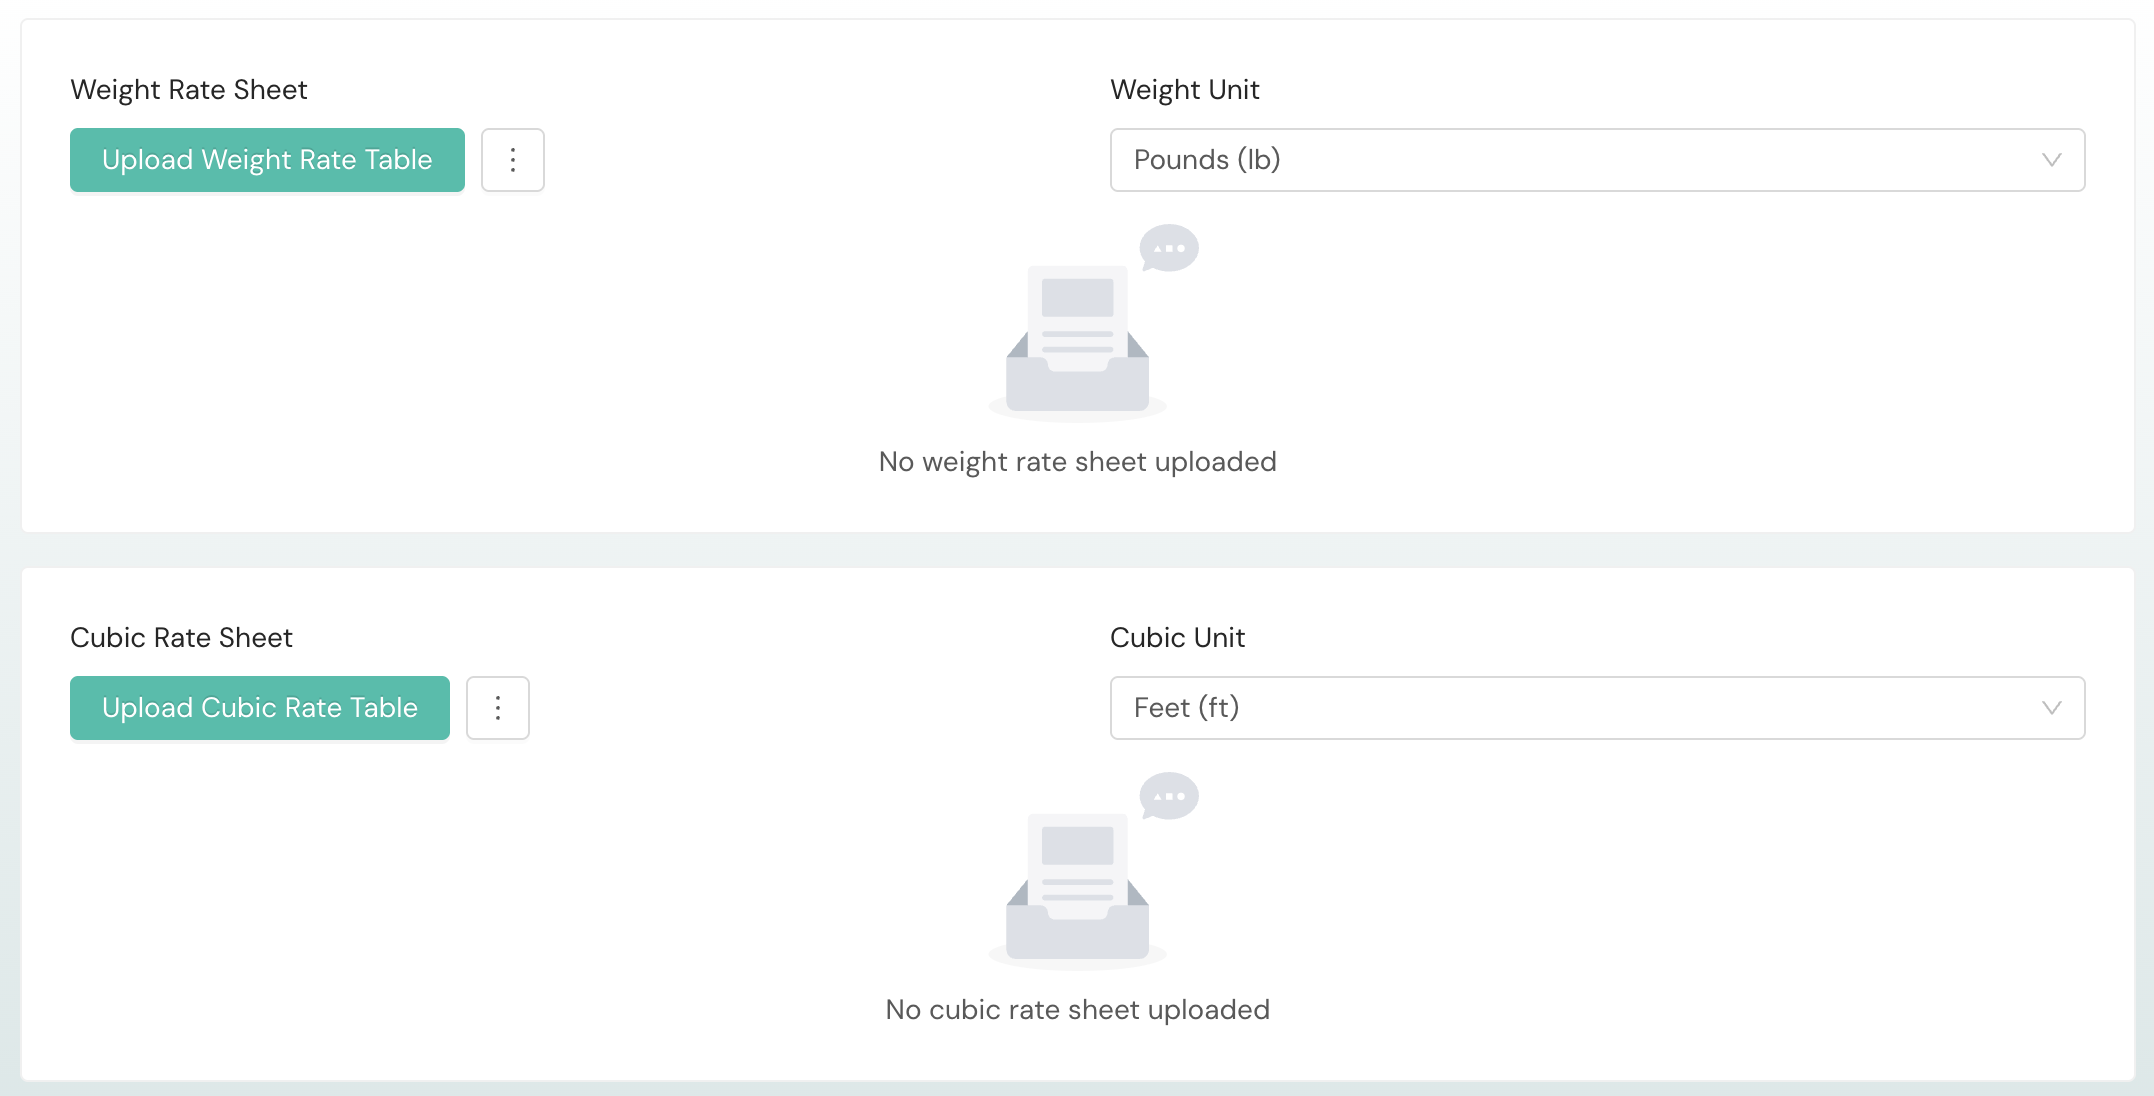
If you have both a weight and a cubic rate sheet, you'll see them both in this section of rate configuration. To have the option to upload rate cards, you will need to select Shipium Costing as your rating type during the Rate Table Entries step.
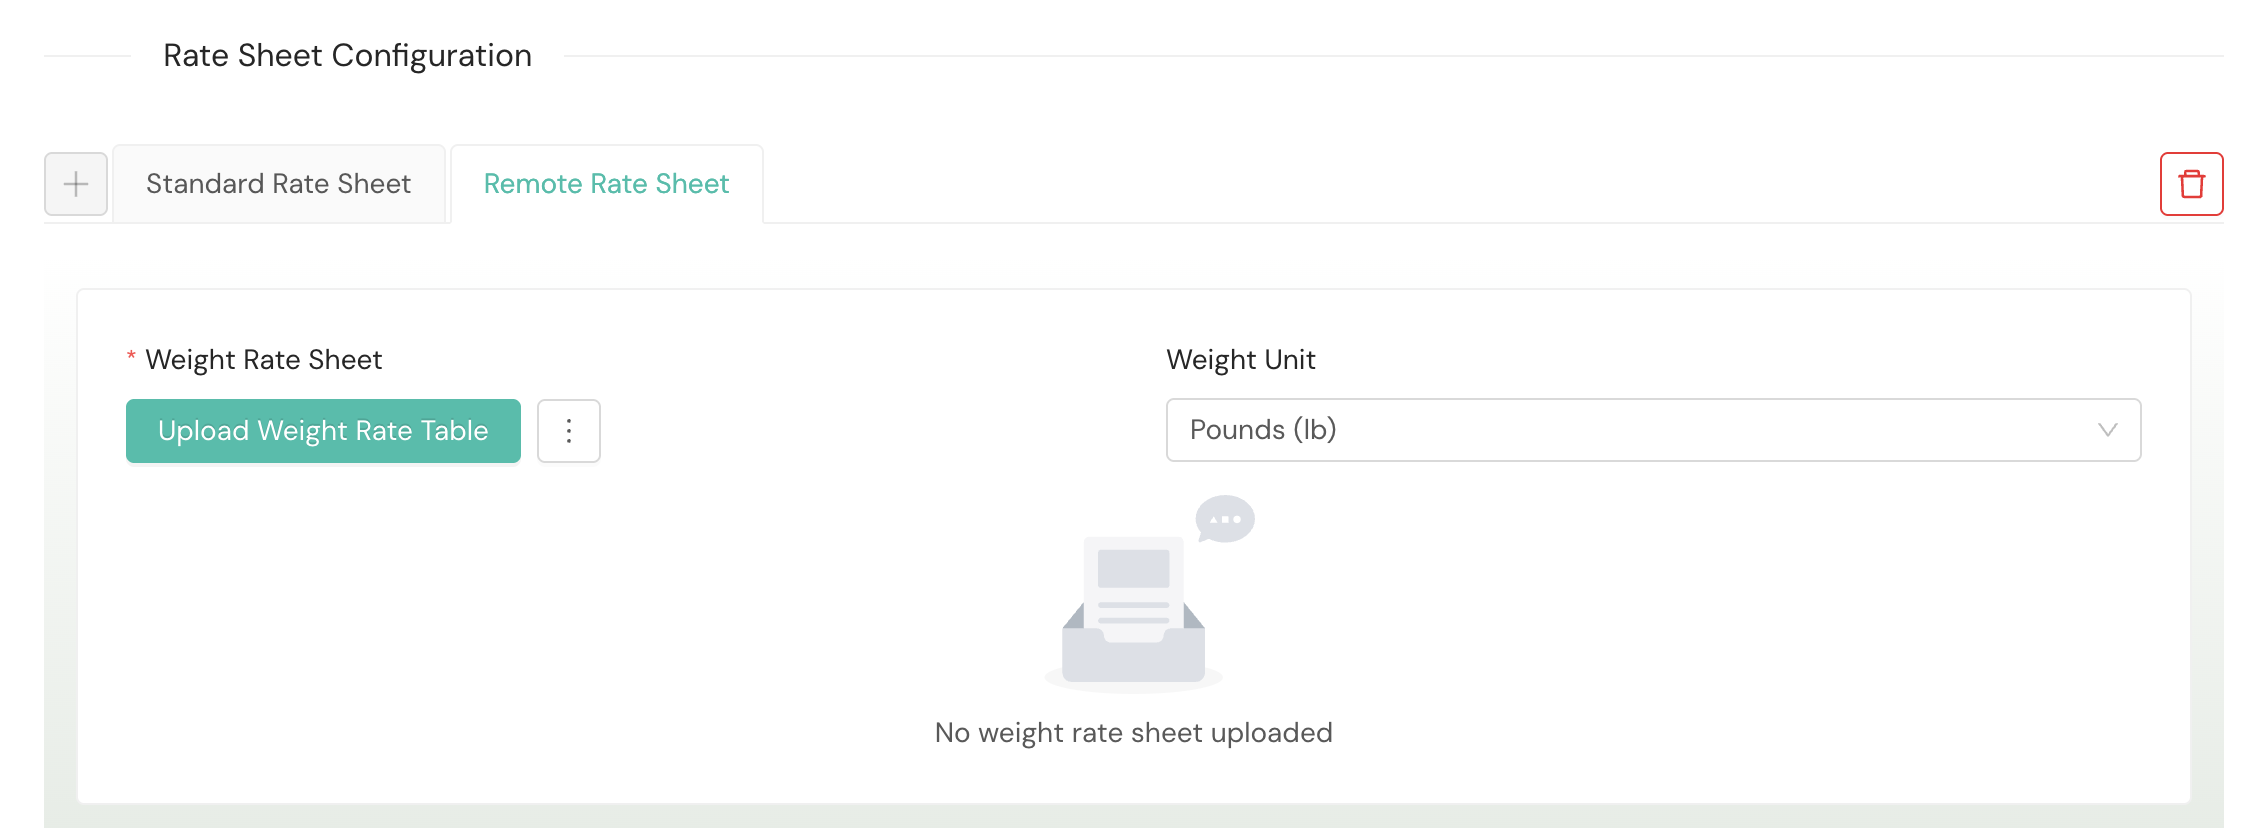
Standard rate sheet
The standard rate sheet is the default option, unless you've selected a USPS service method that qualifies for remote rates. The optional remote rate is described below. For a standard rate sheet, you'll upload the applicable rate sheet, whether a weight rate table or a cubic rate table.
-
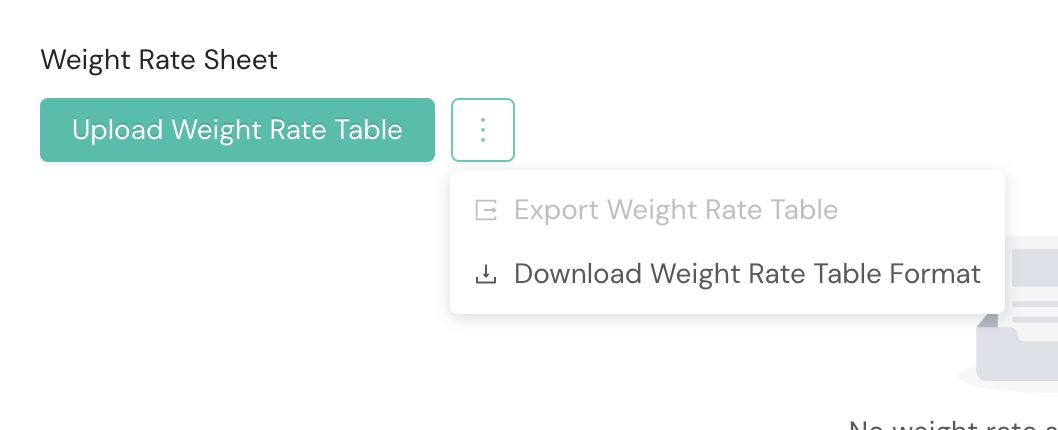
Weight Rate Sheet. Optional. You may download a CSV file to complete with the carrier service method rates and upload the CSV file back to the console.
-
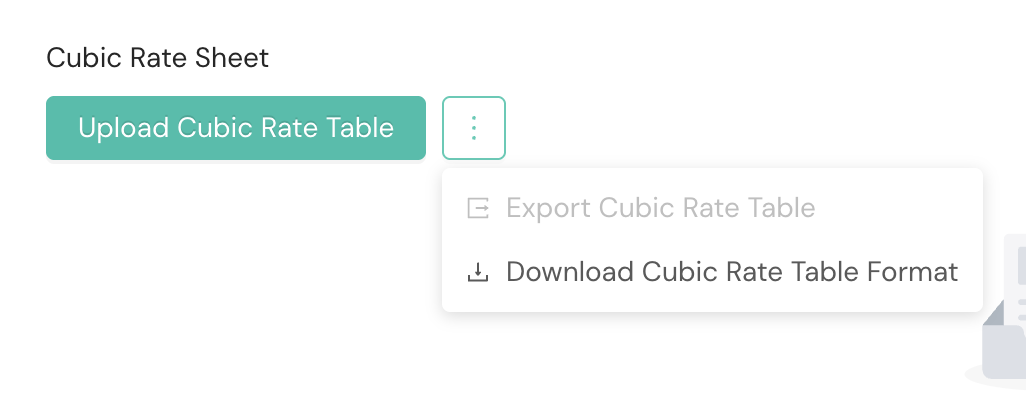
Cubic Rate Sheet. Optional. You also can download a CSV file to complete with the carrier service method rates to upload for your cubic rates. For packages under the max cubic price tiers of 1.00 cubic foot, a weight-based and cubic rate card may both be applied when rate shopping. When both are applicable, Shipium will calculate both estimated label costs for the package and return the lowest cost rate match between the two.
-
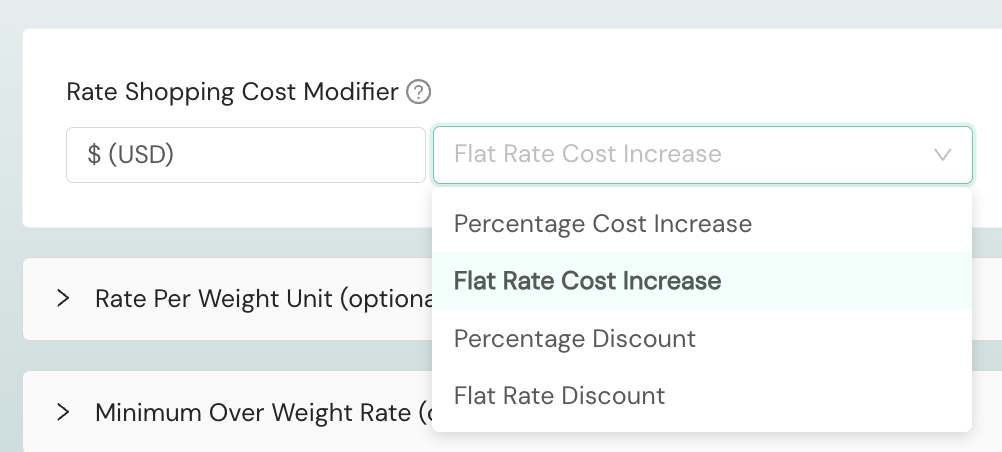
Rate Shopping Cost Modifier. Optional. You may have a cost modifier for this carrier rate. When specified, Shipium will add the amount to the rate calculated for the carrier service method during rate shopping. This value can be a flat rate cost increase or flat rate discount expressed in dollars, or it can be a percentage cost increase or percentage discount expressed as a percentage.
Remote rate sheet
For certain USPS service methods, you can add a remote rate sheet. You'll select the + button to the left of the Standard Rate Sheet tab. The additional tab will not be visible if remote rates do not apply to your selected service method.
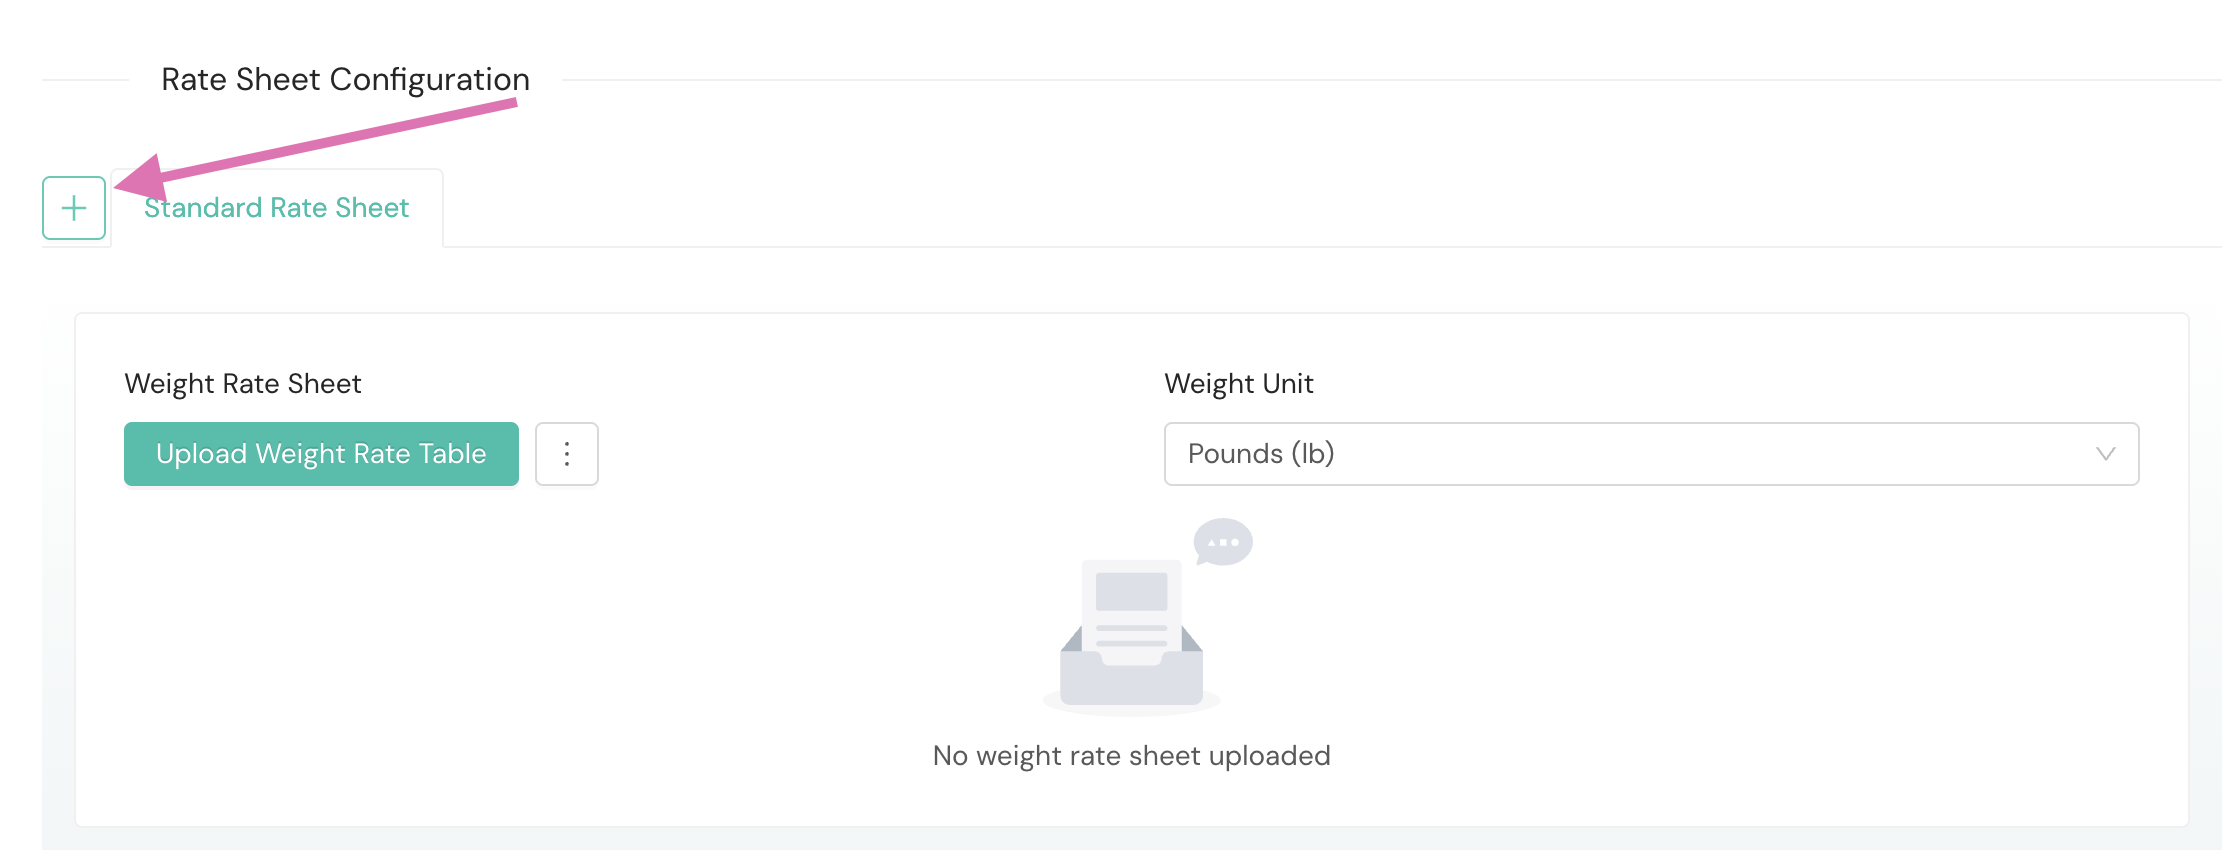
The Remote Rate Sheet tab will appear for your configuration once you select the + button.
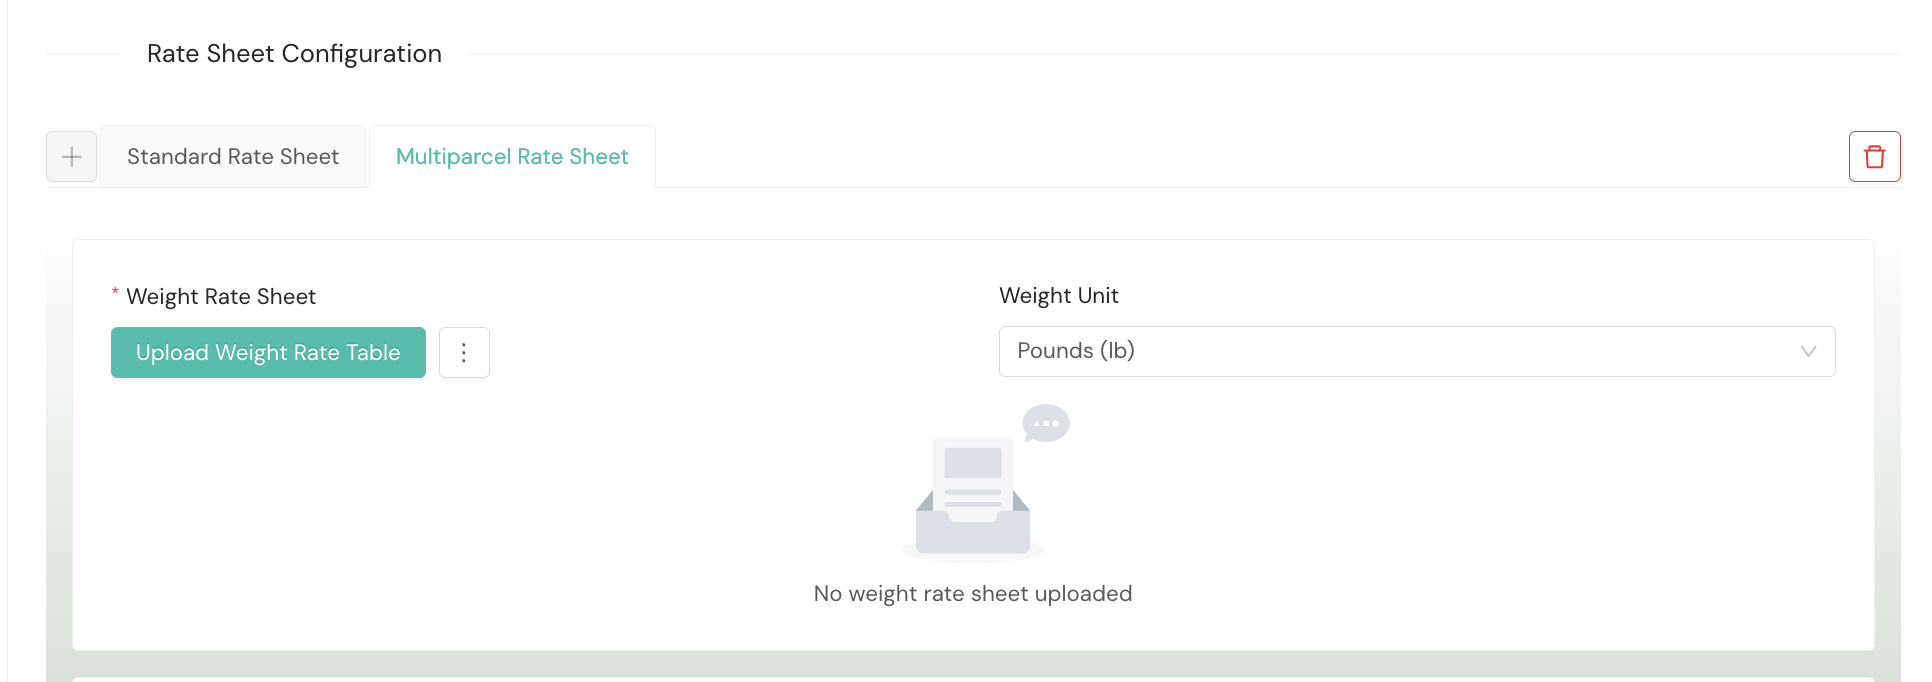
Multiparcel rate sheet
Nationex uses a dual rate sheet system to rate multiparcel shipments. If you're using this carrier, you'll need to upload a multiparcel rate sheet in addition to the standard rate sheet. The first package in the shipment will be rated according to the standard rate sheet, and all subsequent packages in the shipment will be rated using the multiparcel rate sheet.
You'll select the + button to the left of the Standard Rate Sheet tab.
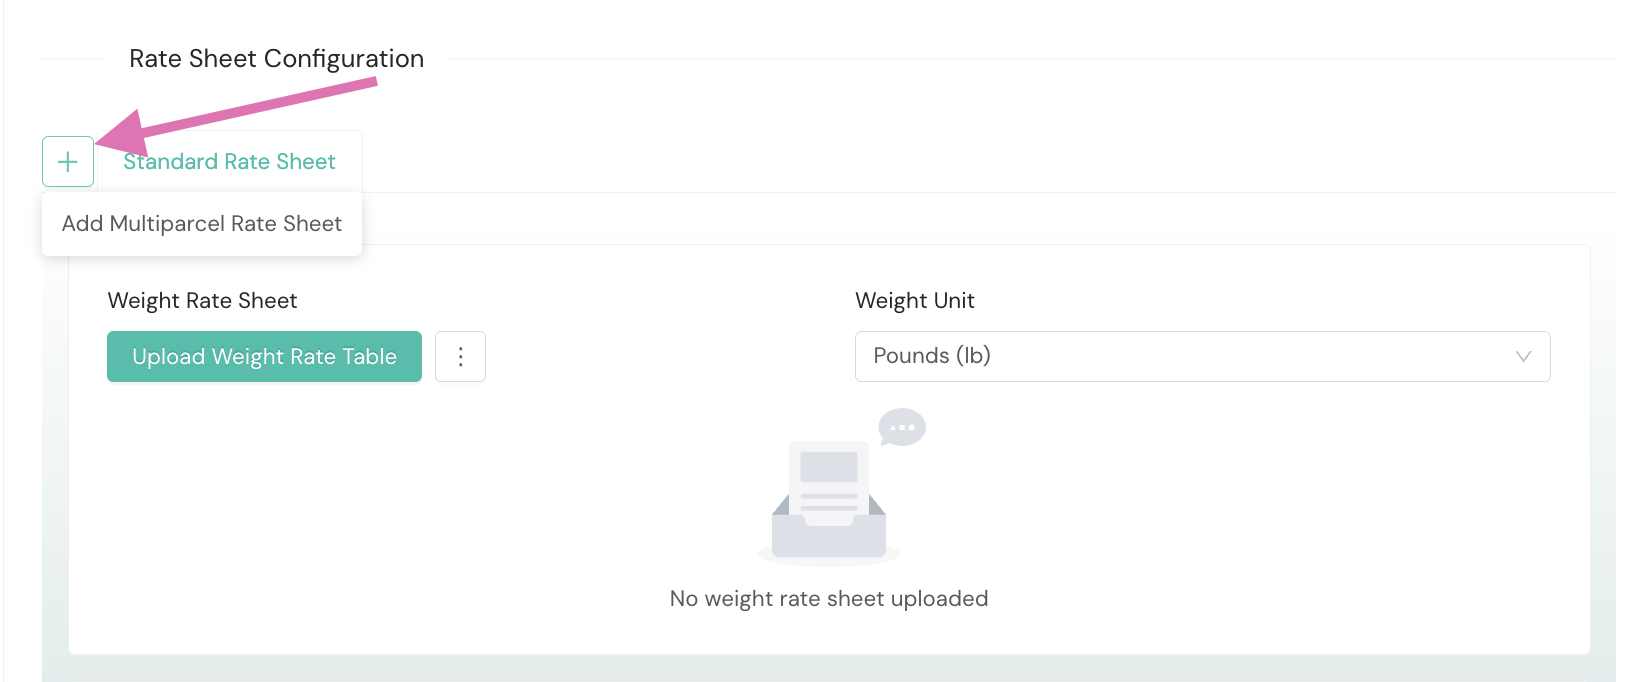
The Multiparcel Rate Sheet tab will appear for your configuration once you select the + button.
Other optional rate sheet configurations
The carrier service method for which you're creating a rate may have shipment weight and size thresholds. You can configure a Rate Per Weight Unit by delivery zone for packages that exceed the weight threshold for the rate table to enable rate shopping for the shipment. Similarly, you can enter Minimum Over Weight Rate by zone for packages that exceed the size threshold to ensure the shipment will be rate shopped. If you have both Rate Per Weight Unit and Oversize Rates configured for a carrier service method, the oversize rate takes priority.

- Rate Per Weight Unit. Optional. These values should be provided instead of normal rates when a package exceeds all weights in the rate table. This value will be multiplied by the weight unit to calculate the rate. A package that exceeds the weight threshold for this rate table will not be rate shopped unless rate per weight unit is configured.
- Minimum Over Weight Rate. Optional. These values should be provided instead of normal rates when a package exceeds all weights in the rate table. The minimum over weight rate value is the minimum rate for packages exceeding the maximum weight in the rate table.
Add carrier schedules to an injection site
Once you've established an injection site, you can add carrier schedules to it via the Origins tab within Fulfillment Contexts.
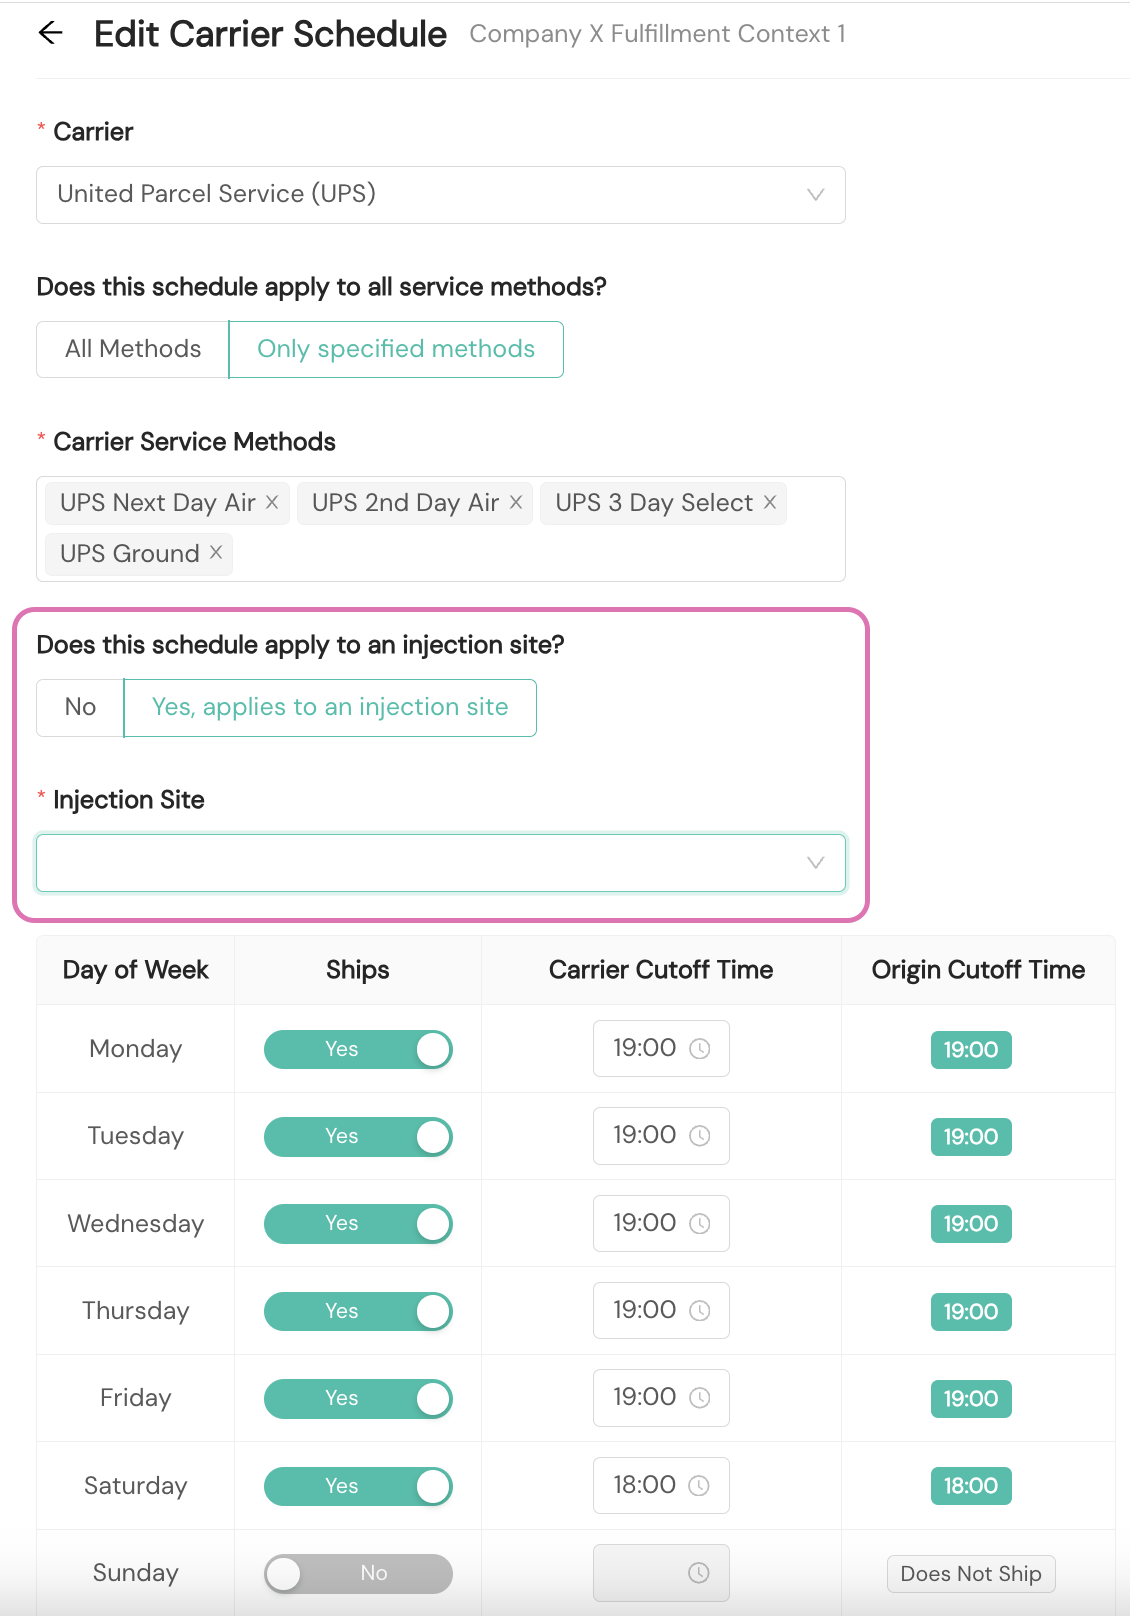
In the Origins tab, you'll find Carrier Schedules, where you can edit an existing carrier schedule to apply to your selected injection site or you can add a new carrier schedule.

Whether you edit a schedule or add a new one, you'll see an option to apply the schedule to an injection site. If you select "Yes, applies to an injection site," you'll choose the applicable injection site from a dropdown menu that appears and establish the days of the week and cutoff times for the schedule.
Manifest shipments from an injection site
Once you've configured an injection site and created shipments routed through it, you can manifest those shipments to provide carrier confirmation of package retrieval from the injection site location.
How manifesting works for injection sites
Shipments routed through an injection site are stored with the injection site's postal code. When you create a manifest — either through a scheduled manifest or manually — the Shipium platform identifies these shipments based on the injection site location and includes them in the manifest report.
You can manifest injection site shipments through:
- Scheduled manifesting. Navigate to the Injection Sites tab on the Schedule Manifest page to configure a manifest schedule for your injection site. Shipments will be automatically manifested at the scheduled times.
- Manual manifesting. Navigate to the Manual Manifest page and use the Injection Site dropdown to filter to your injection site location, then select the Action button to create an on-demand manifest.
For detailed instructions on setting up and managing manifests, see Manifest Shipments.
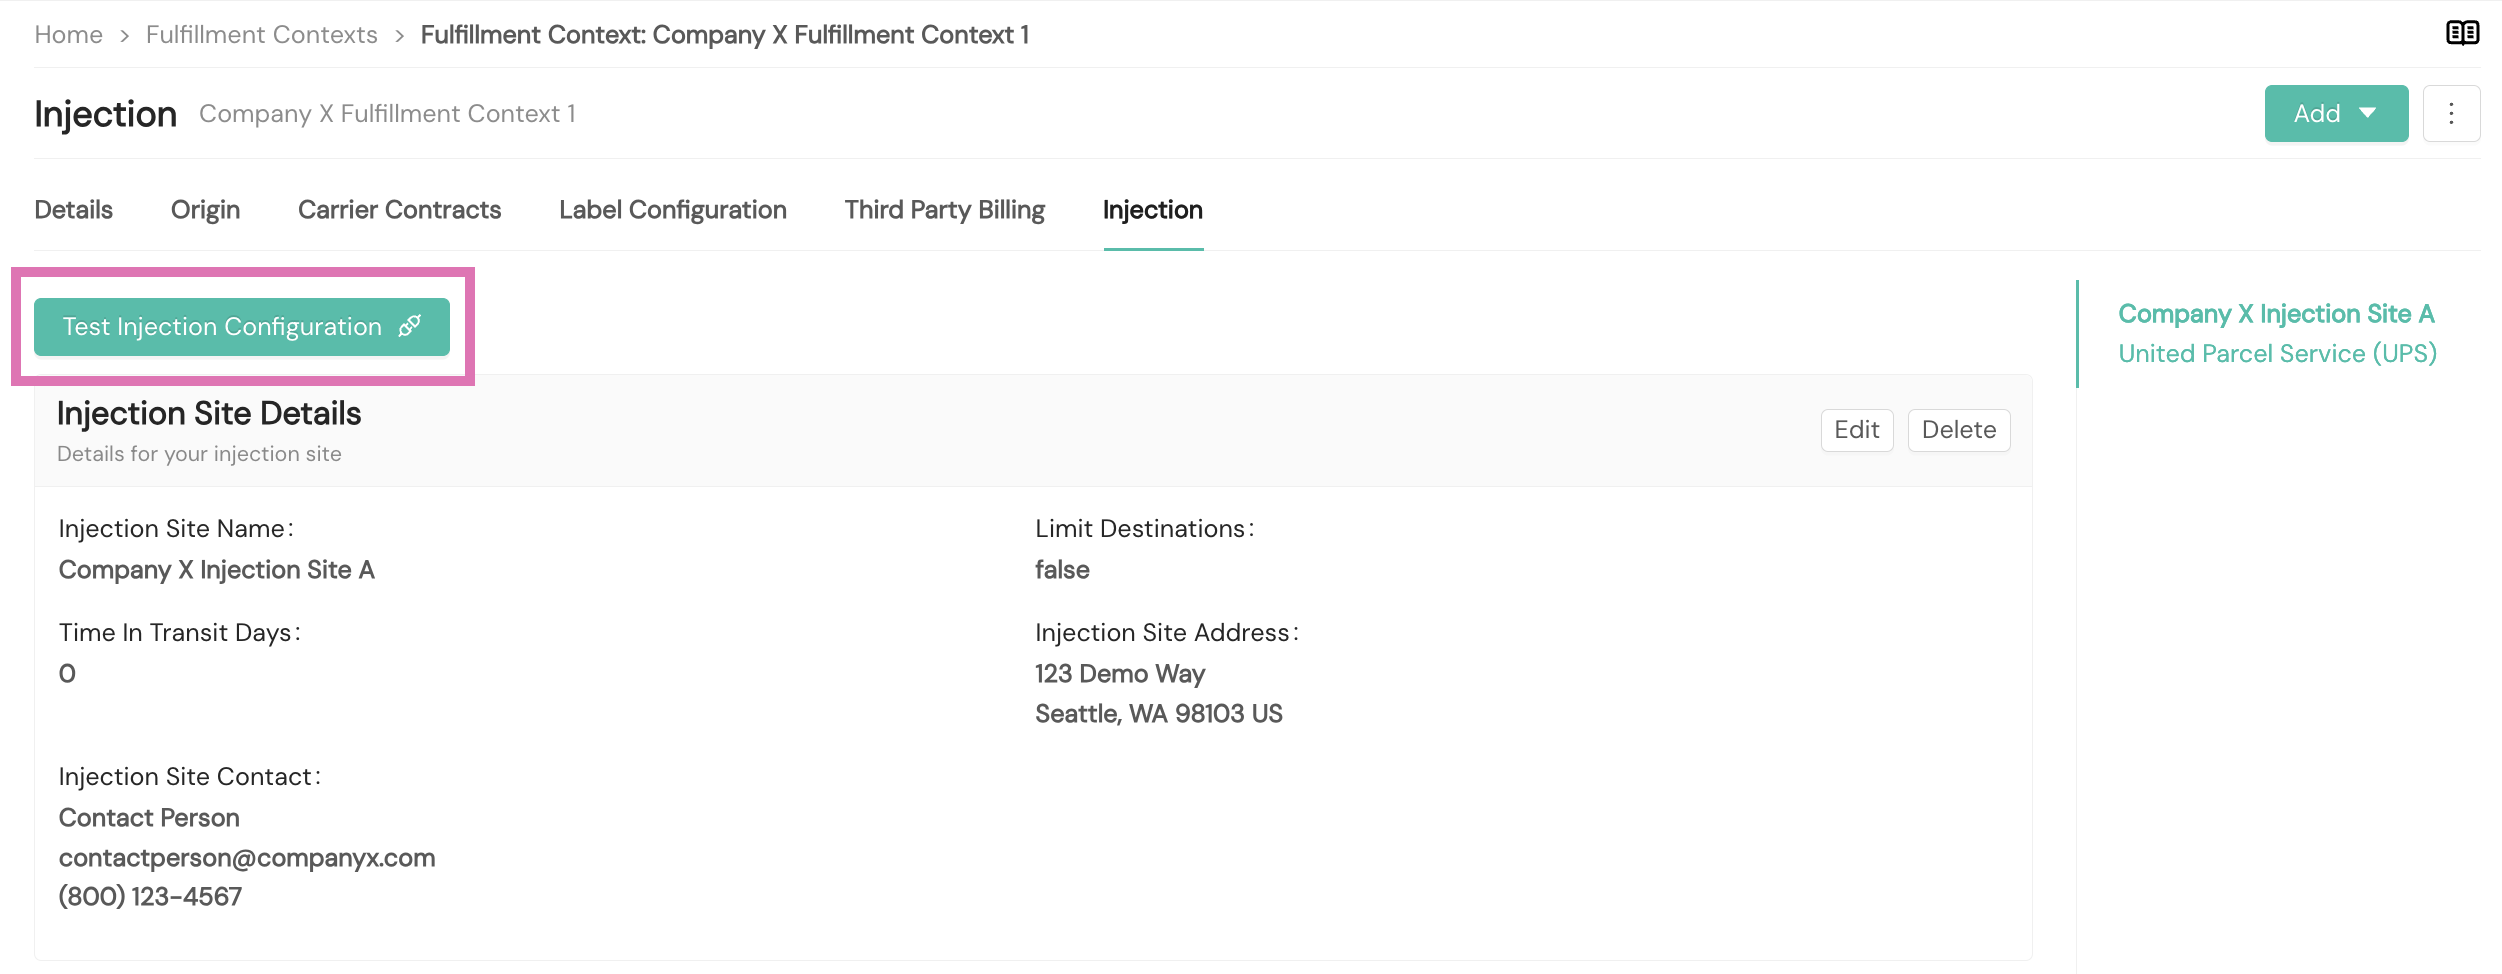
Test contract configuration
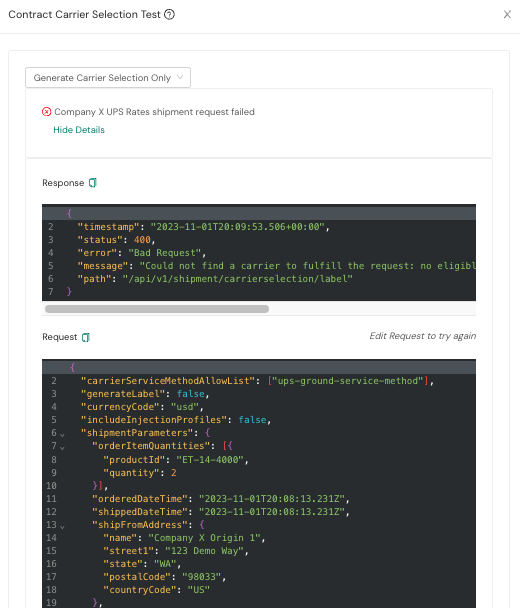
Once you've configured an injection site's carrier contract, you can test the configuration using the Test Injection Configuration button on the homepage for the Injection tab. The testing tool generates a generic Carrier Selection or Label Service request per the configured service method. If you have a more specific use case to test, you should use the Rate Calculation Test Tool.
The test will return the API call request body and JavaScript Object Notation (JSON) response. You may edit the request body to retest the contract configuration.
Add label augmentations to an injection site
Any desired label augmentations for the injection site must be added separately, even if the augmentations are already included in the fulfillment context.
Label augmentations must be configuredOnly the augmentations saved specifically for the injection site will be applied to the site. Label augmentations for the fulfillment context will not apply to injection labels.
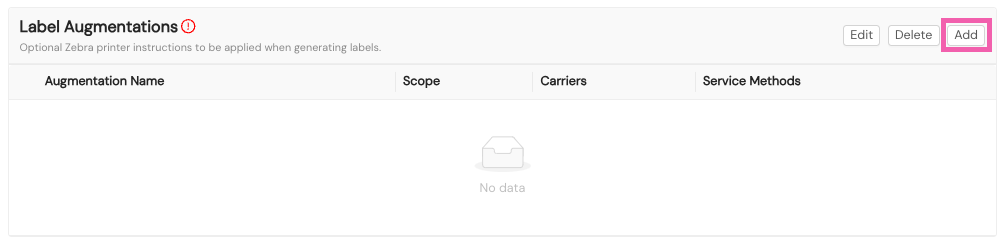
You can add label augmentations by selecting the Add button within the Label Augmentations section of the Injection tab. Label augmentations refer to any special printer instructions to be applied when generating a label.
You can create a new label augmentation or select an existing one. The label augmentation applies special Zebra Programming Language (ZPL) printer instructions when generating a label.
To create a label augmentation, you'll provide details to be associated with it, as shown in the following screenshot and detailed below. The label print preview at the right of the screen is based on the ZPL code entered.

- Augmentation Scope. Required. You'll designate the augmentation's scope in this step, whether applicable to all carriers and service methods within your fulfillment network, to only selected carriers, or to only selected service methods.
- Label Augmentation Name. Required. A human-readable name your organization will use to refer to the label augmentation
- Injection Position. Required. You'll select either Top or Bottom, depending on the desired position for the label printing.
- Shipment Tag to Match. Optional. If you have a shipment tag that you wish to link the label augmentation to, you'll provide it here (e.g., ORDER-ID).
- ZPL. Required. The Zebra Programming Language code is required for a label augmentation. You'll see a print preview to the right of the screen.
Another way of making a label augmentation is via API call including a customLabelEntries array. You can find out how in Label Customization.
Maintain and make changes to an injection site
You can access the fulfillment context's injection site via the Injection tab within the fulfillment context. Each section includes an Edit button that enables editing of the context component.
Definitions
The following table includes terms and descriptions associated with injection shipping within the Shipium platform.
| Term | Description |
|---|---|
| Destination address | The destination address on the shipping label |
| Fulfillment center (FC) address | The address of the warehouse or origin |
| Injection address | The address used as the origin for rate shopping; this address can be required by the carrier, with no Shipium purpose. |
| Injection site | The physical address of the carrier sort center where partner packages will be injected to |
| Rating address | The address used for rate shopping; this address may be the same as the injection address or origin address. |
| Return-to address | The address to which packages are returned |
| Shipper address | The partner’s address or the origin address on the shipping label |
Resources
Your Shipium team member is available to help along the way. However, you might find these resources helpful: