
Origins
Set up and maintain your fulfillment network origins.
About origins
An origin represents the originating physical location to be used when creating a shipment. Most commonly, this is likely a fulfillment center, warehouse, or other dedicated location where packages are prepared and shipped. It can also be any location from which you may be pursuing fulfillment operations of some kind, including dropship locations or stores.
Shipium uses this configuration entry to determine which postal code and timezone to use when performing estimated delivery date and cost modeling calculations. You must have an origin configured to have a valid fulfillment context, and each origin requires a schedule to be considered a valid origin. Each fulfillment context will have only one origin, but origins can be shared by multiple fulfillment contexts.
An origin is requiredA valid fulfillment context requires an origin to be associated with it. For an origin to be valid, it must have a schedule configured. Your organization won't be able to use the fulfillment context until you link an origin to it.
Fulfillment contexts
In order to use Shipium’s APIs, your organization needs to establish your fulfillment network configurations within the Shipium platform. We refer to these configurations as Fulfillment Contexts. A fulfillment context allows you to configure the characteristics for your network origins, carrier contracts, label augmentations, third party billing, injection shipping, and tenants, in addition to other feature settings. To use a fulfillment context, you must establish an origin for it.
Configure origins
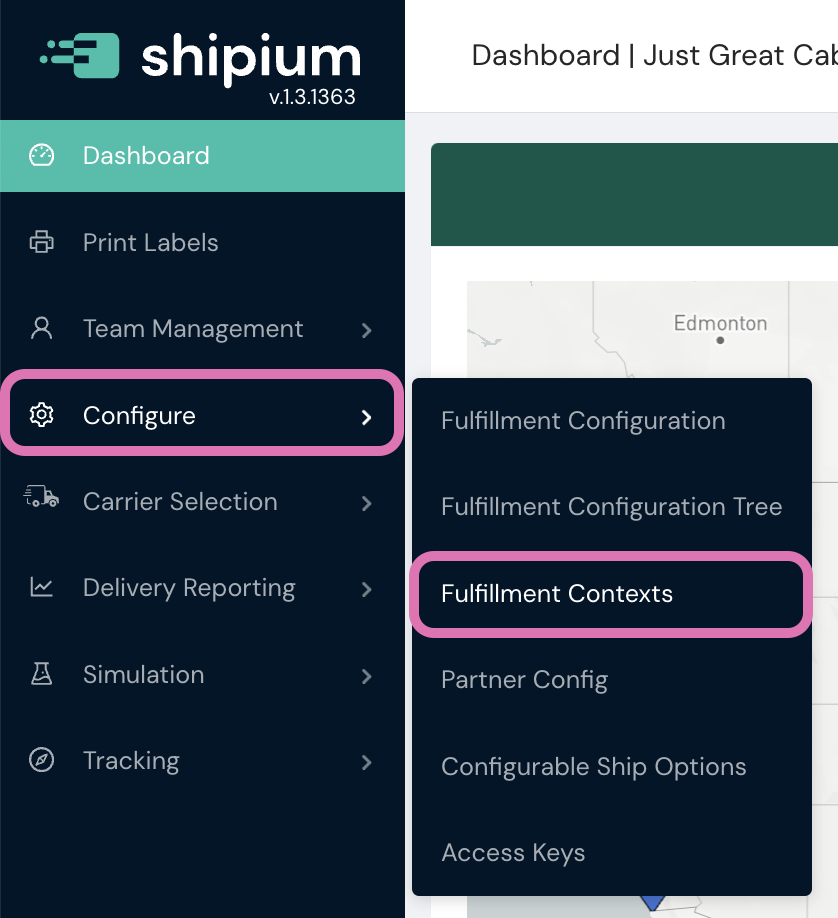
In order to configure origins, you'll need to access Fulfillment Contexts in the Configure section of the lefthand navigation menu within the Shipium Console. These instructions assume you've already established a fulfillment context in the Shipium platform. If you haven't yet set up a fulfillment context, you can find guidance for how to do so in the fulfillment contexts documentation.
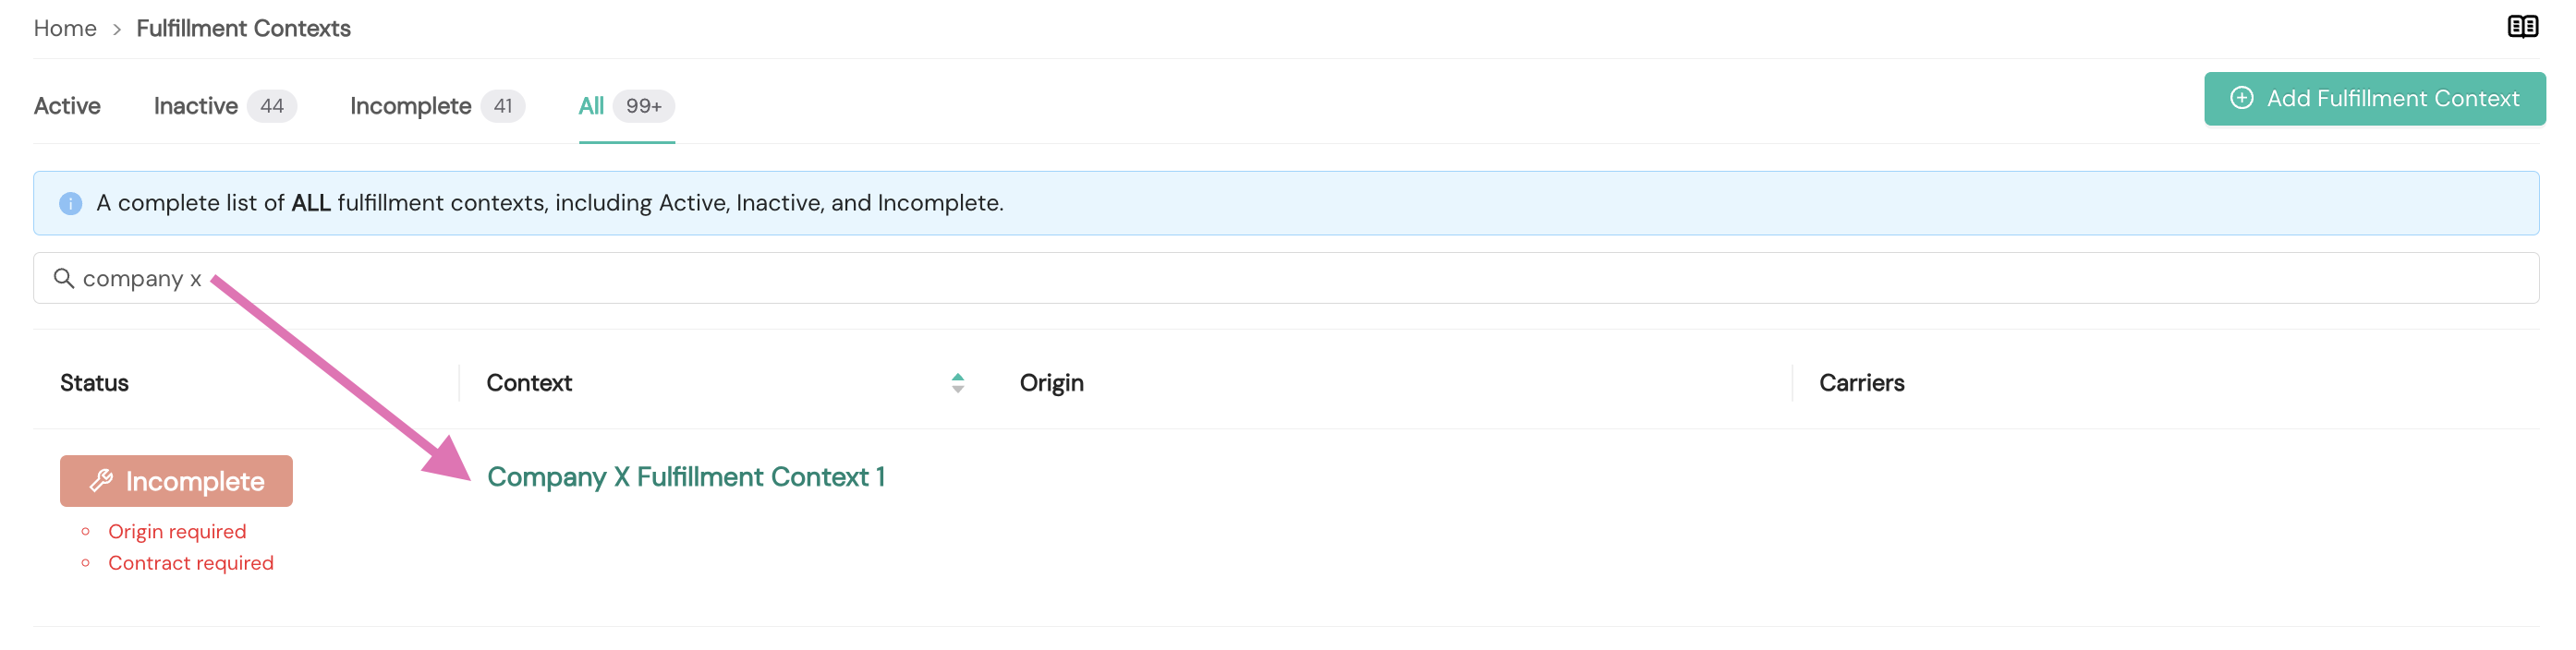
To locate the fulfillment context for which you wish to configure an origin, you can use the search bar at the top of the Fulfillment Contexts homepage or simply scroll through a list of the available contexts. Once you've located the desired context, you can access it by clicking on its name.
Within the Origin tab of the context, you can add a new origin by selecting the Add Origin button within the warning message that there is no origin associated with the fulfillment context or by selecting Add an Origin from the dropdown menu at the right of the screen.


You can create a new origin or select an existing one.
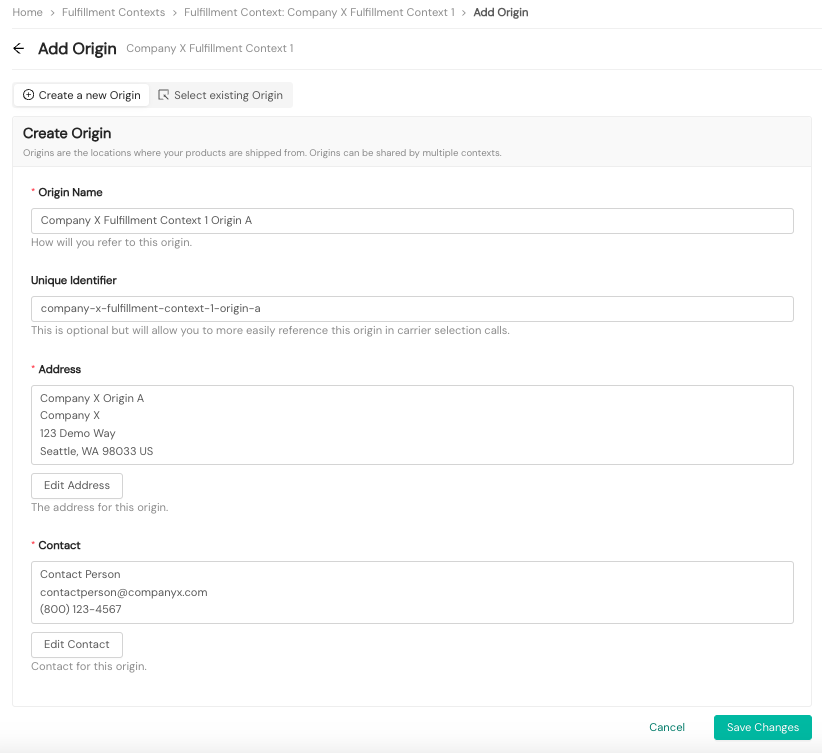
To create an origin, you'll provide details to be associated with it, as shown in the following screenshot and detailed in the sections that follow.
Origin details
For Origin Details, you'll provide an Origin Name, optional Unique Identifier, Address, and Contact information. The Origin Name should be one that your organization can use to differentiate among your different network origins. The Address is the physical location of the origin, and the Contact details provide contact information for the origin should a carrier need to contact someone from your organization at the origin. This information will be used when you make a call request to Shipium's APIs. To override the address values with updated origin address data included in your API call, you'll add an optional boolean flag to your request payload in either shipmentParameters or multiParcelShipmentParameters. The Carrier and Method Selection & Shipment Label API and Multi-Parcel Shipments documents provide additional details about the useShipFromAddressInRequest field. (Note: If shipping with carrier LaserShip, use caution with this flag as the carrier's strict address matching could result in an error.)
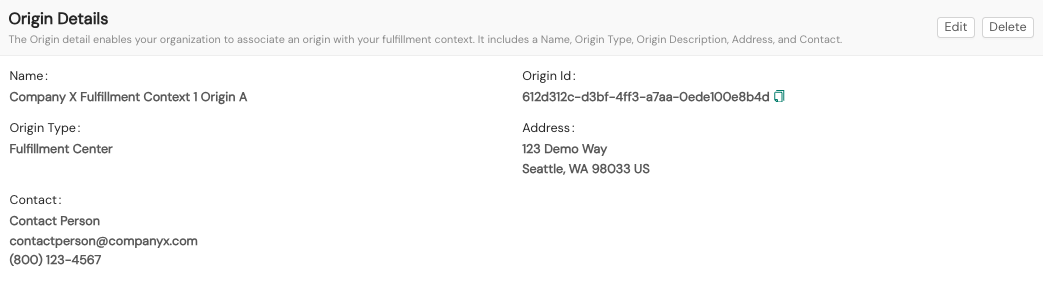
The Unique Identifier is an optional field that can help you more easily reference the fulfillment context in calls to Shipium's APIs. This unique ID is case sensitive. You can use your own unique identifier value or the Shipium-generated value (the Origin ID in the following screenshot) for your origin upon its creation when calling Shipium's APIs; you can include either of these values as the origin ID within shipment parameters (or multi-parcel shipment parameters for multi-parcel shipments).
Origin schedule
To begin using a fulfillment context, you must have an Origin associated with it. For an origin to be valid, it must have a schedule configured.

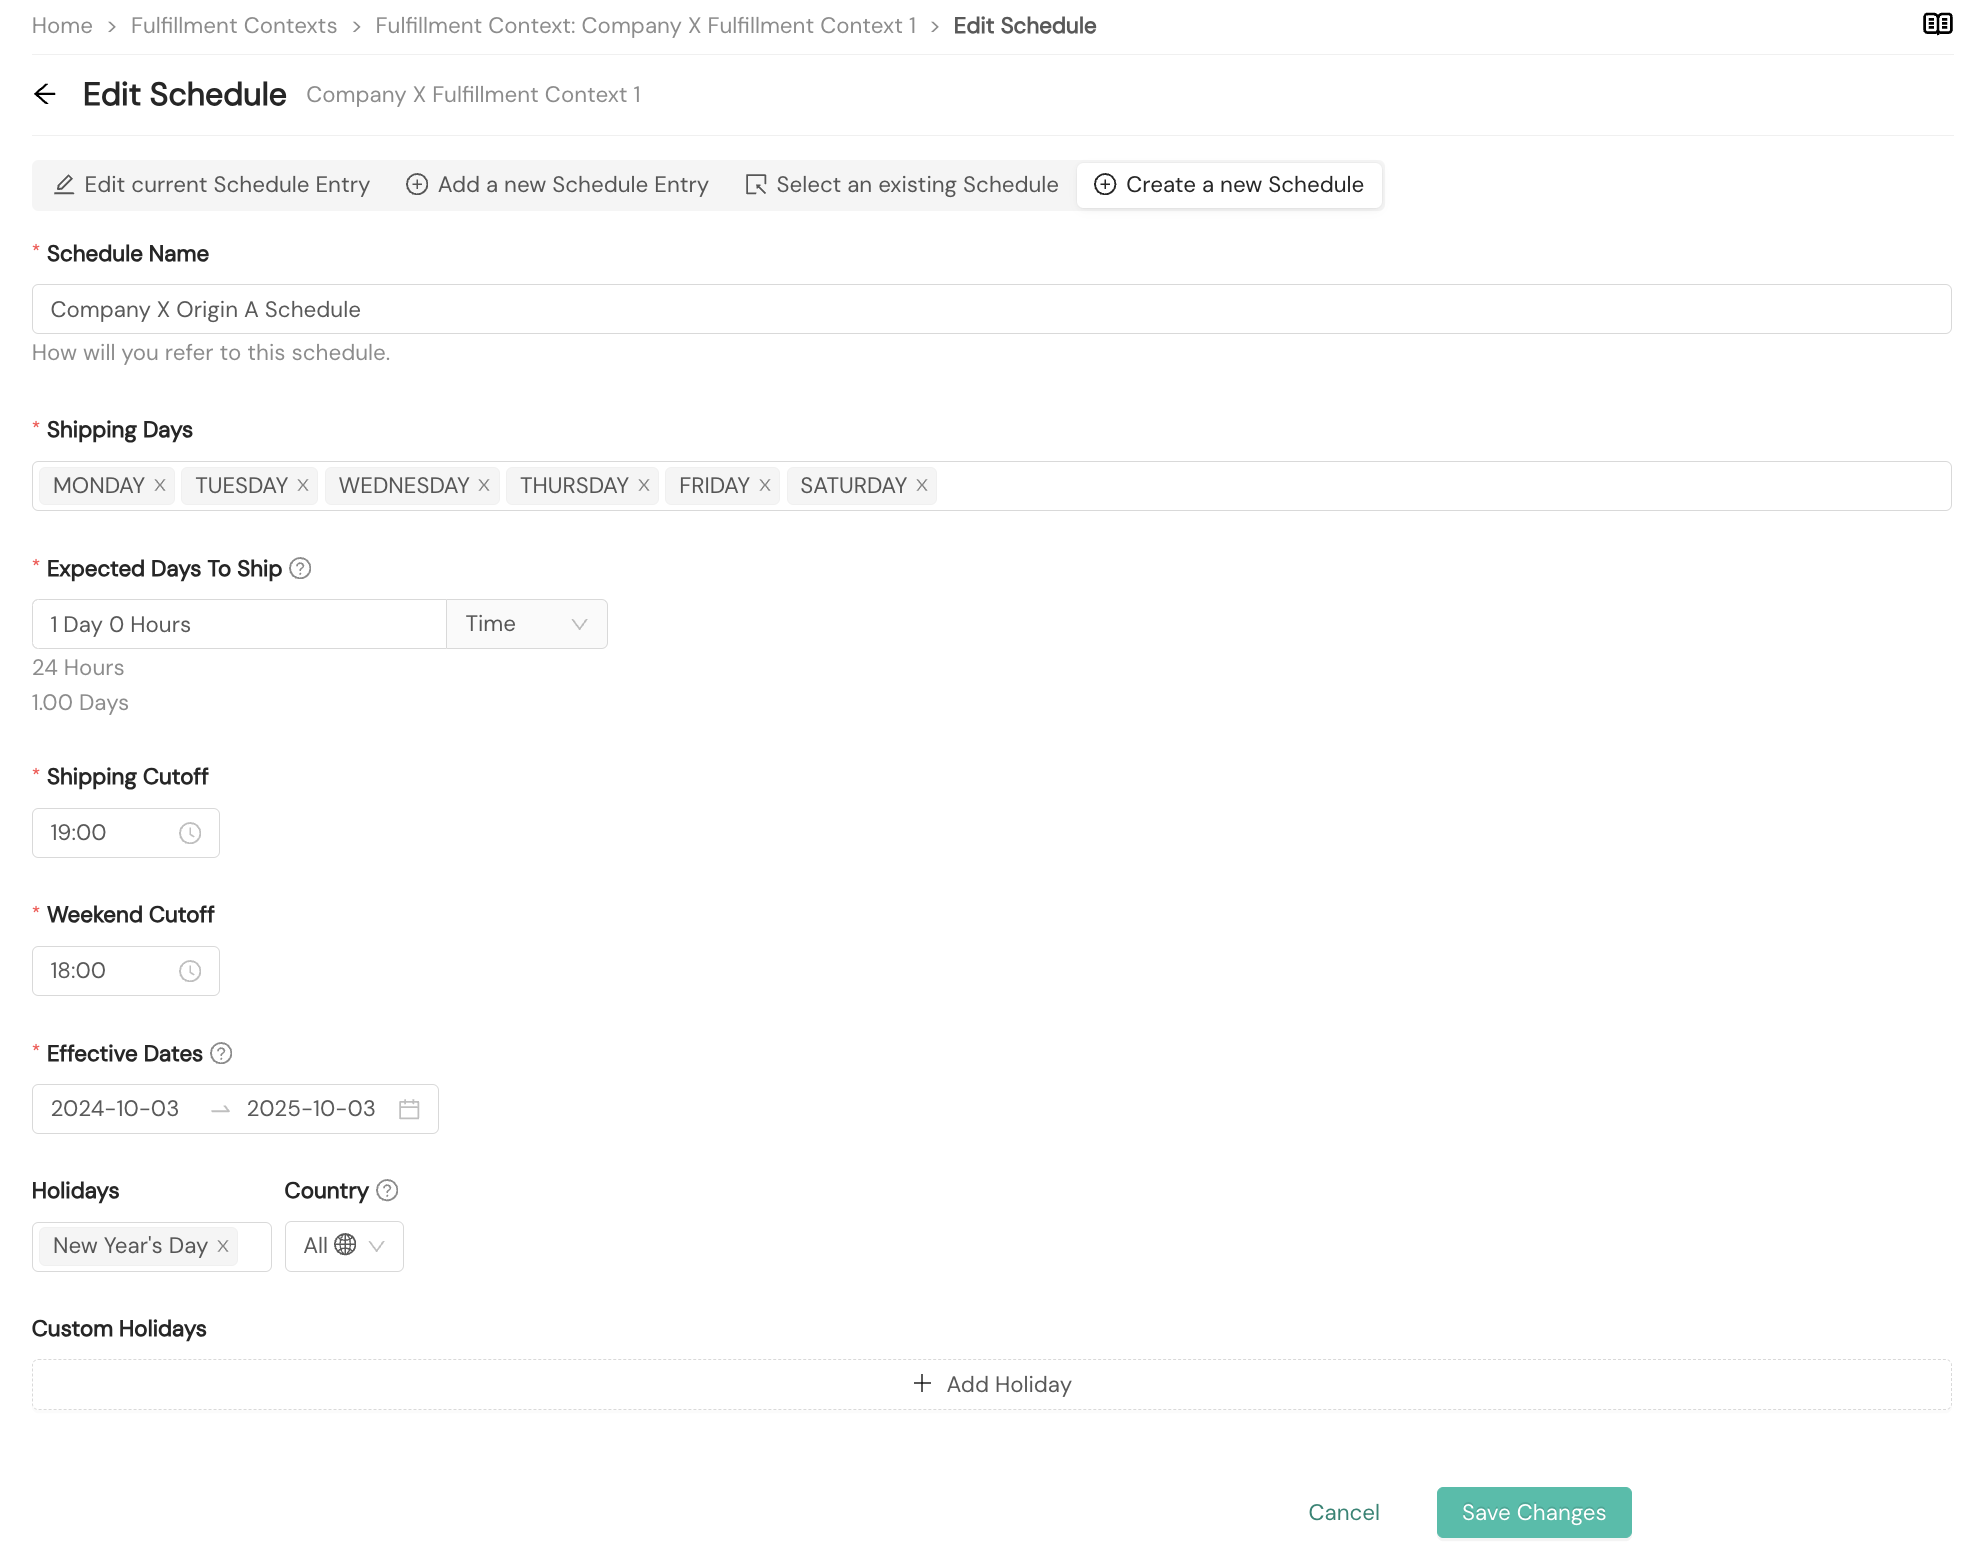
For Origin Schedule, you'll set up the shipment schedule for a particular origin. Each origin has one schedule associated with it.
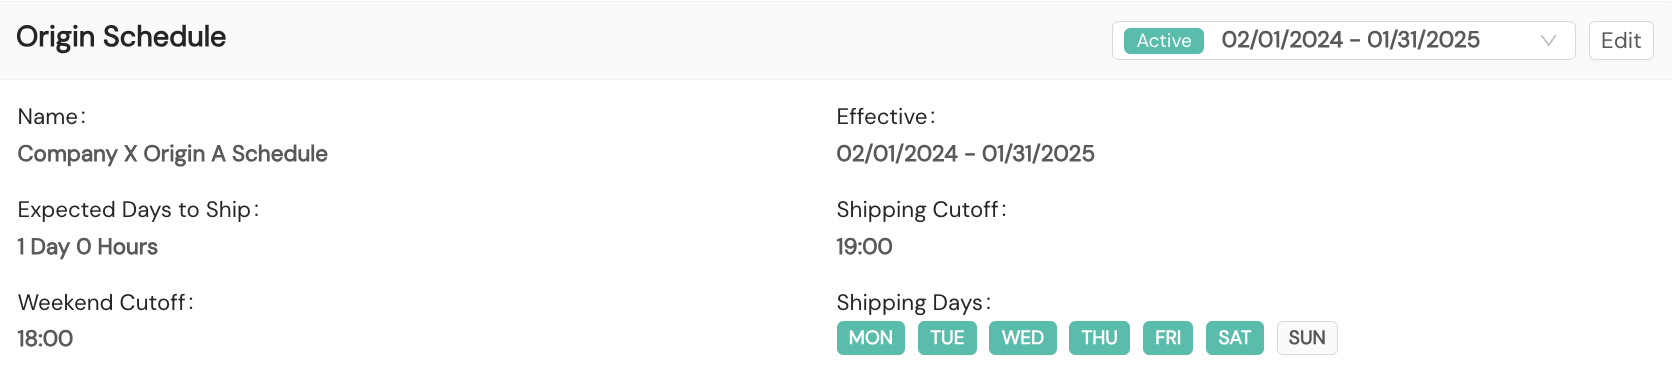
The schedule will include an effective start and ending date as well as the shipping days of the week, the shipping cutoff time for weekdays, and the weekend shipping cutoff time. You'll also configure your organization's expected number of days to ship once an order has been received at your origin. For example, if shipments typically leave your origin on the same day that the order was received, you'll select 0 for the expected days to ship. This value can be set at the hour increment. In addition, you can configure holidays that will be observed at the fulfillment center associated with the fulfillment context, selecting from a list of holidays and/or adding your own custom holidays. Holidays may be configured by country location. Setting up holidays for your origin does not establish carrier-specific holidays during which certain carriers do not provide pickup services. Carrier holidays are defined by individual carriers and configured internally by the Shipium team.
Carrier schedules
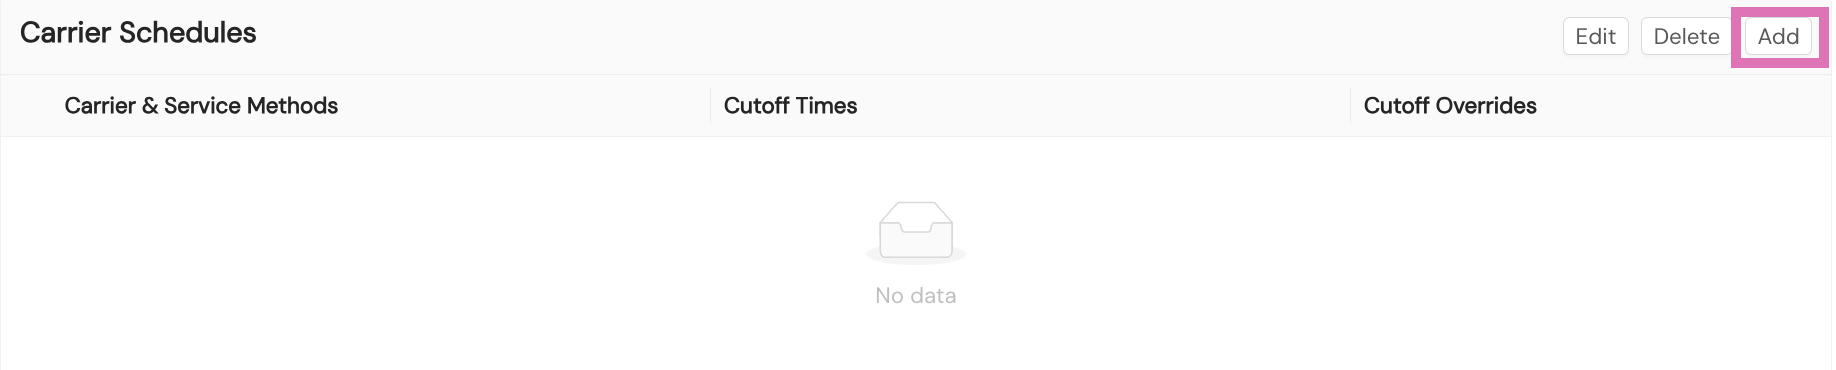
You can set up multiple Carrier Schedules for each origin, which directly link to the origin schedule. Within the Shipium platform, a carrier schedule serves to override an origin schedule, based on carrier pickup times (days of the week, multiple cut-off times per day, holidays, etc.). To add a new carrier schedule, you'll select the Add button within the Carrier Schedules section of the Origin tab.
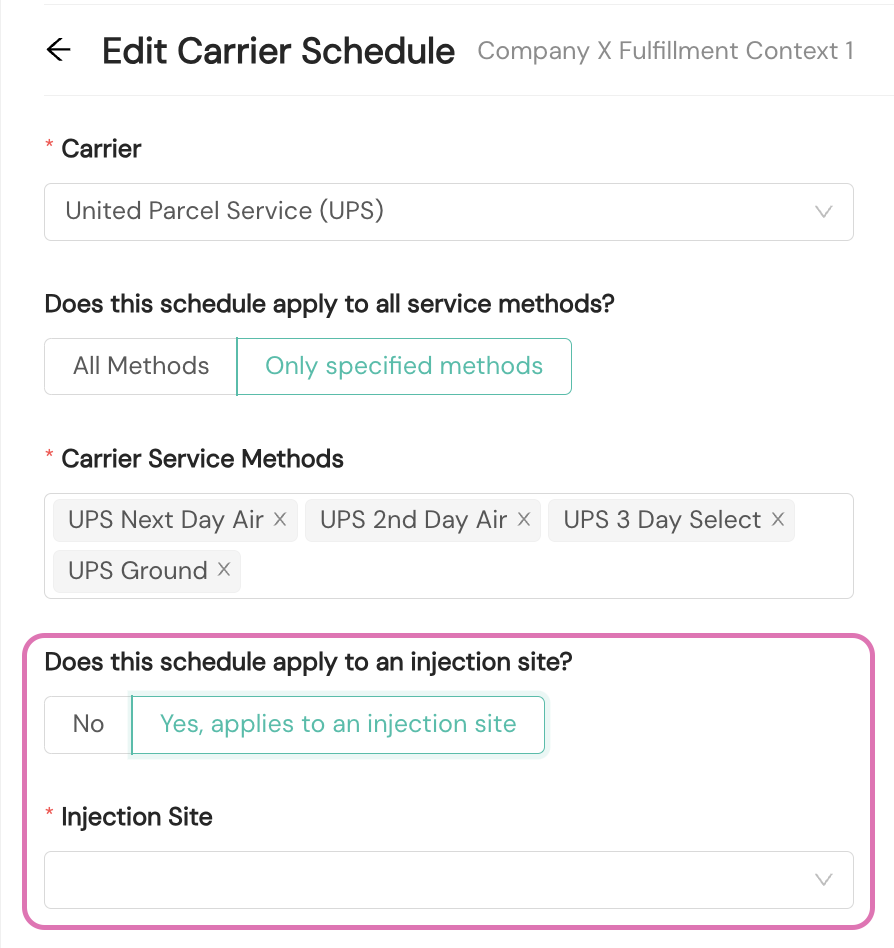
You'll select the desired carrier from a dropdown menu. You'll also determine if the carrier schedule applies to all service methods for the selected carrier or to only specified methods, which you'll then choose from a dropdown menu.
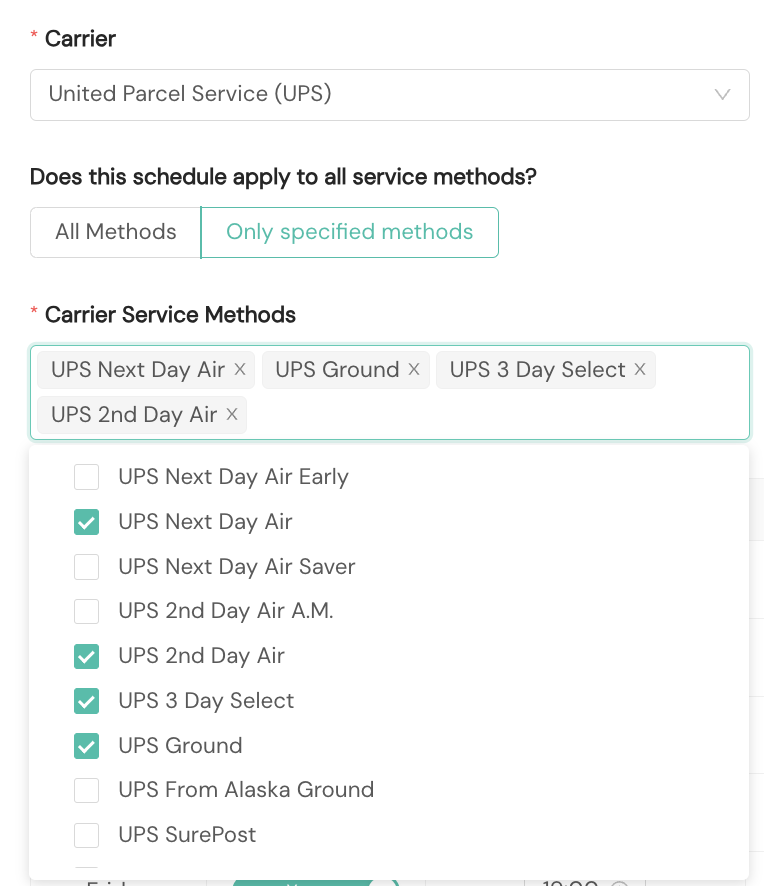
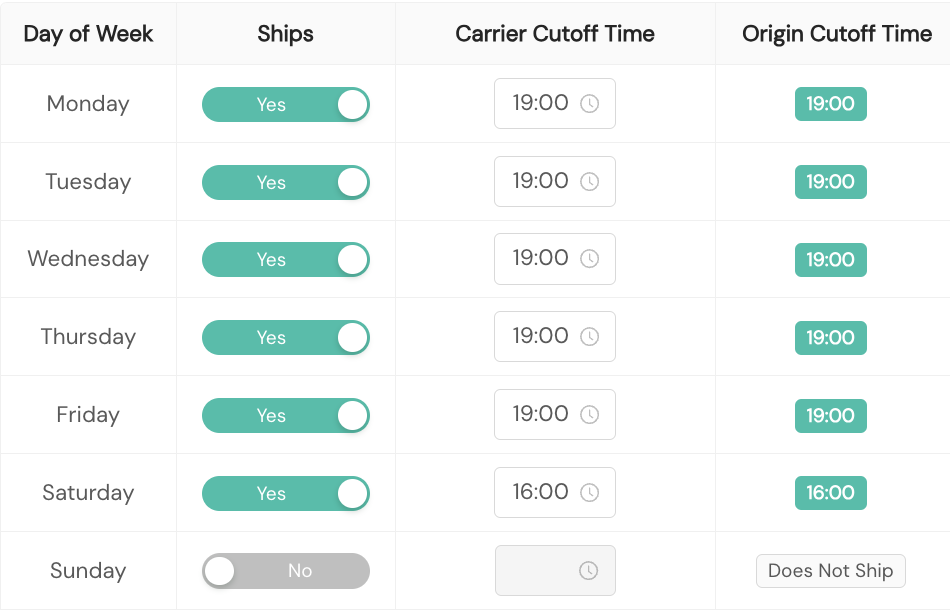
Finally, you'll confirm the days of the week and cutoff times for pickup.
You can set up carrier schedules at any time, either before or after you configure carrier contracts. However, for a carrier schedule to be valid, it must correlate to a contract for the same carrier within your fulfillment context.
If you have injection sites in your network, you can set up carrier schedules for them also. However, you must configure the injection site prior to setting any carrier schedules. Once you have an injection site, you can apply a carrier schedule to it by selecting "Yes, applies to an injection site" within Carrier Schedules.
Maintain and make changes to an origin, origin schedule, or carrier schedule
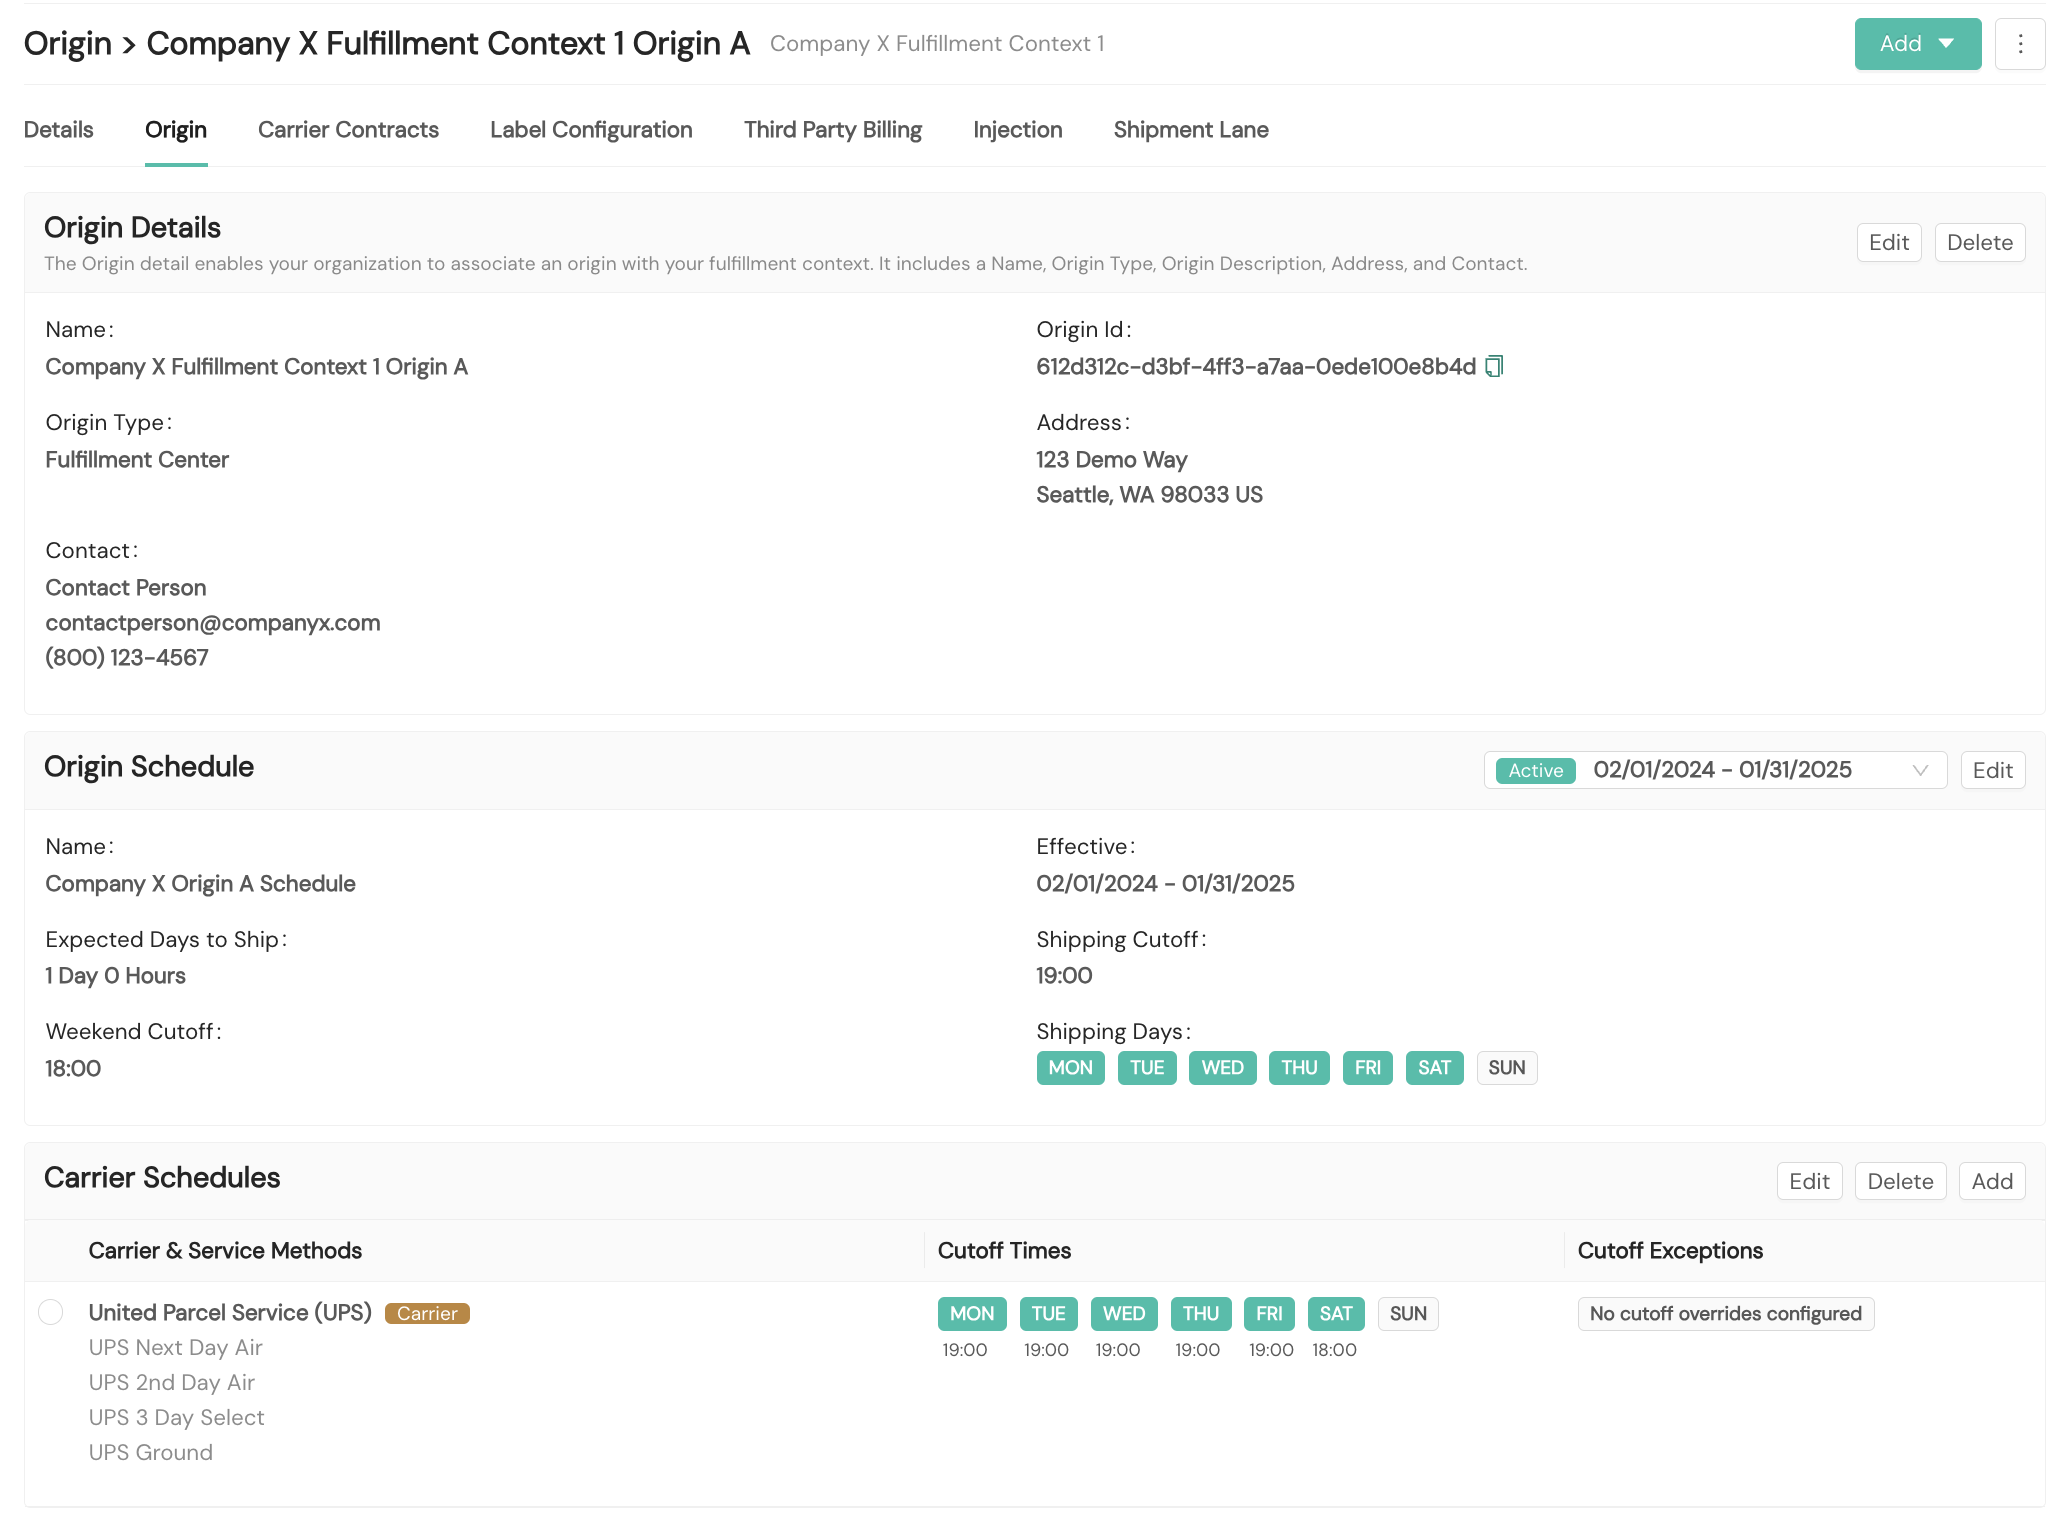
You can access the fulfillment context's origin details and schedule along with the associated carrier schedules via the Origin tab within the fulfillment context. Each section includes an Edit button that enables editing of the context component.
Resources
Your Shipium team member is available to help along the way. However, you might find these resources helpful:
Updated 9 months ago