Rate Tables
Add a rate table to your carrier account in the Shipium Console.
About rate tables
Rate tables are a way for your organization to configure carrier service rates within the Shipium Console. For each carrier service method that you add, you will also need to update your rate table and any surcharge modifiers associated with your account. These should have been made available to you either as part of signing up for an account with a carrier or as part of your negotiations for rates.
In general, you'll need to update your carrier rates when you first set up your Shipium account and each time you negotiate rates for a new time period. Having accurate rates is part of what enables Shipium's services to make the right decisions for your shipping use cases.
If for some reason you are having trouble identifying or finding your rate tables, please contact your Shipium team member to help you get the right information.
Alternative workflow instructions for configuring rate tablesYou can find instructions for adding or updating rate tables within the suggested fulfillment contexts workflow in the Carrier Rates section of the Carrier Contracts document. You also may follow the guidance in this document to add or update rate tables within the fulfillment configuration workflow.
Create new rate tables
Once you've added a new carrier service method, you'll need to create a rate table for that service method. You can do so by going to the service method in question either automatically when you add the new service method or by following the instructions for getting to a service method in Update Rate Tables below.
Each rate table is associated with a specific time period for which the rates in question apply. You can think of a rate table as a set of costs associated with a given carrier and service method that apply for a certain period of time (generally 1 - 3 years).
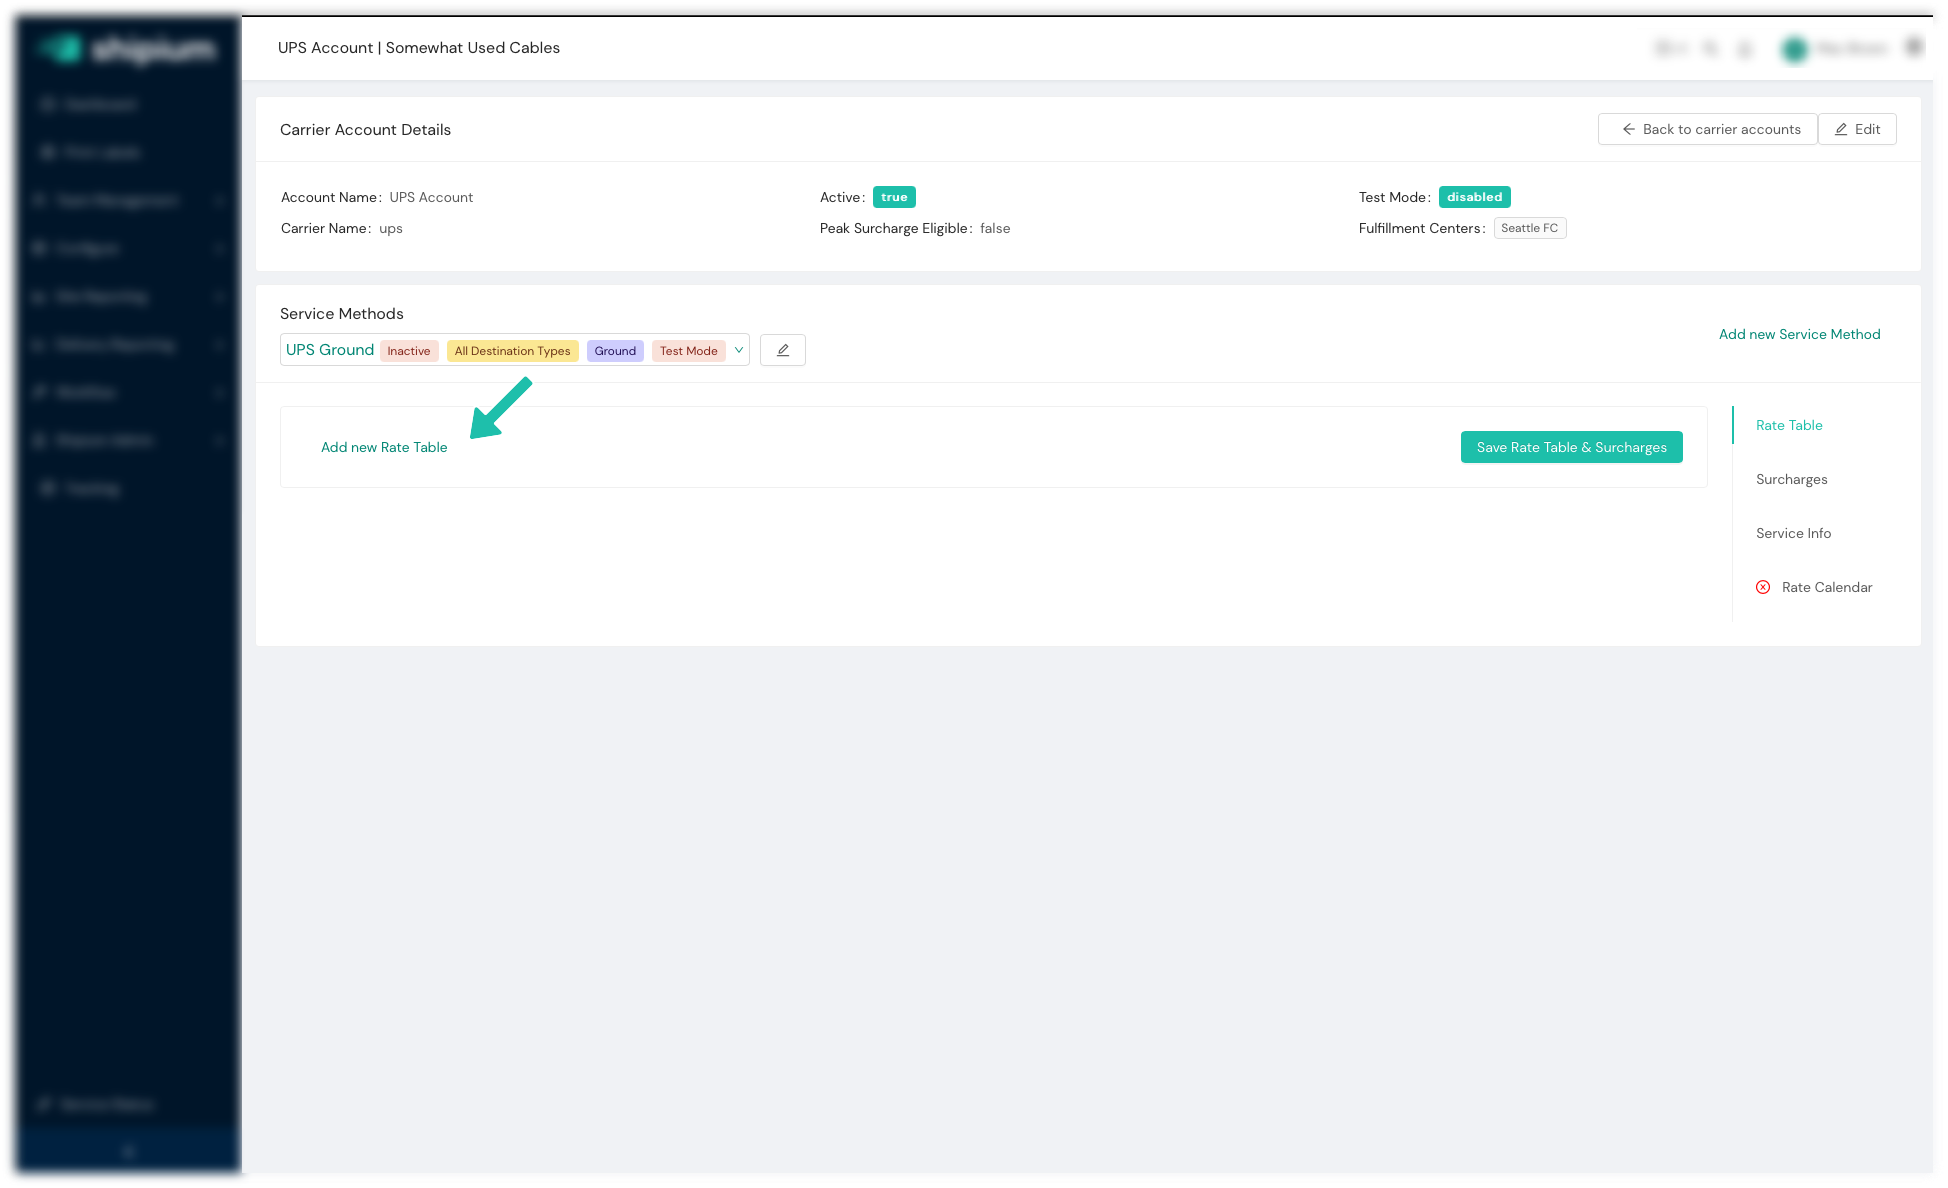
In order to add a new rate table, you will click on the Add New Rate Table link highlighted by the arrow in the above image. For subsequent rate tables that you add, click the Add New Rate Table link next to the list of existing rate tables.
Basic rate table data
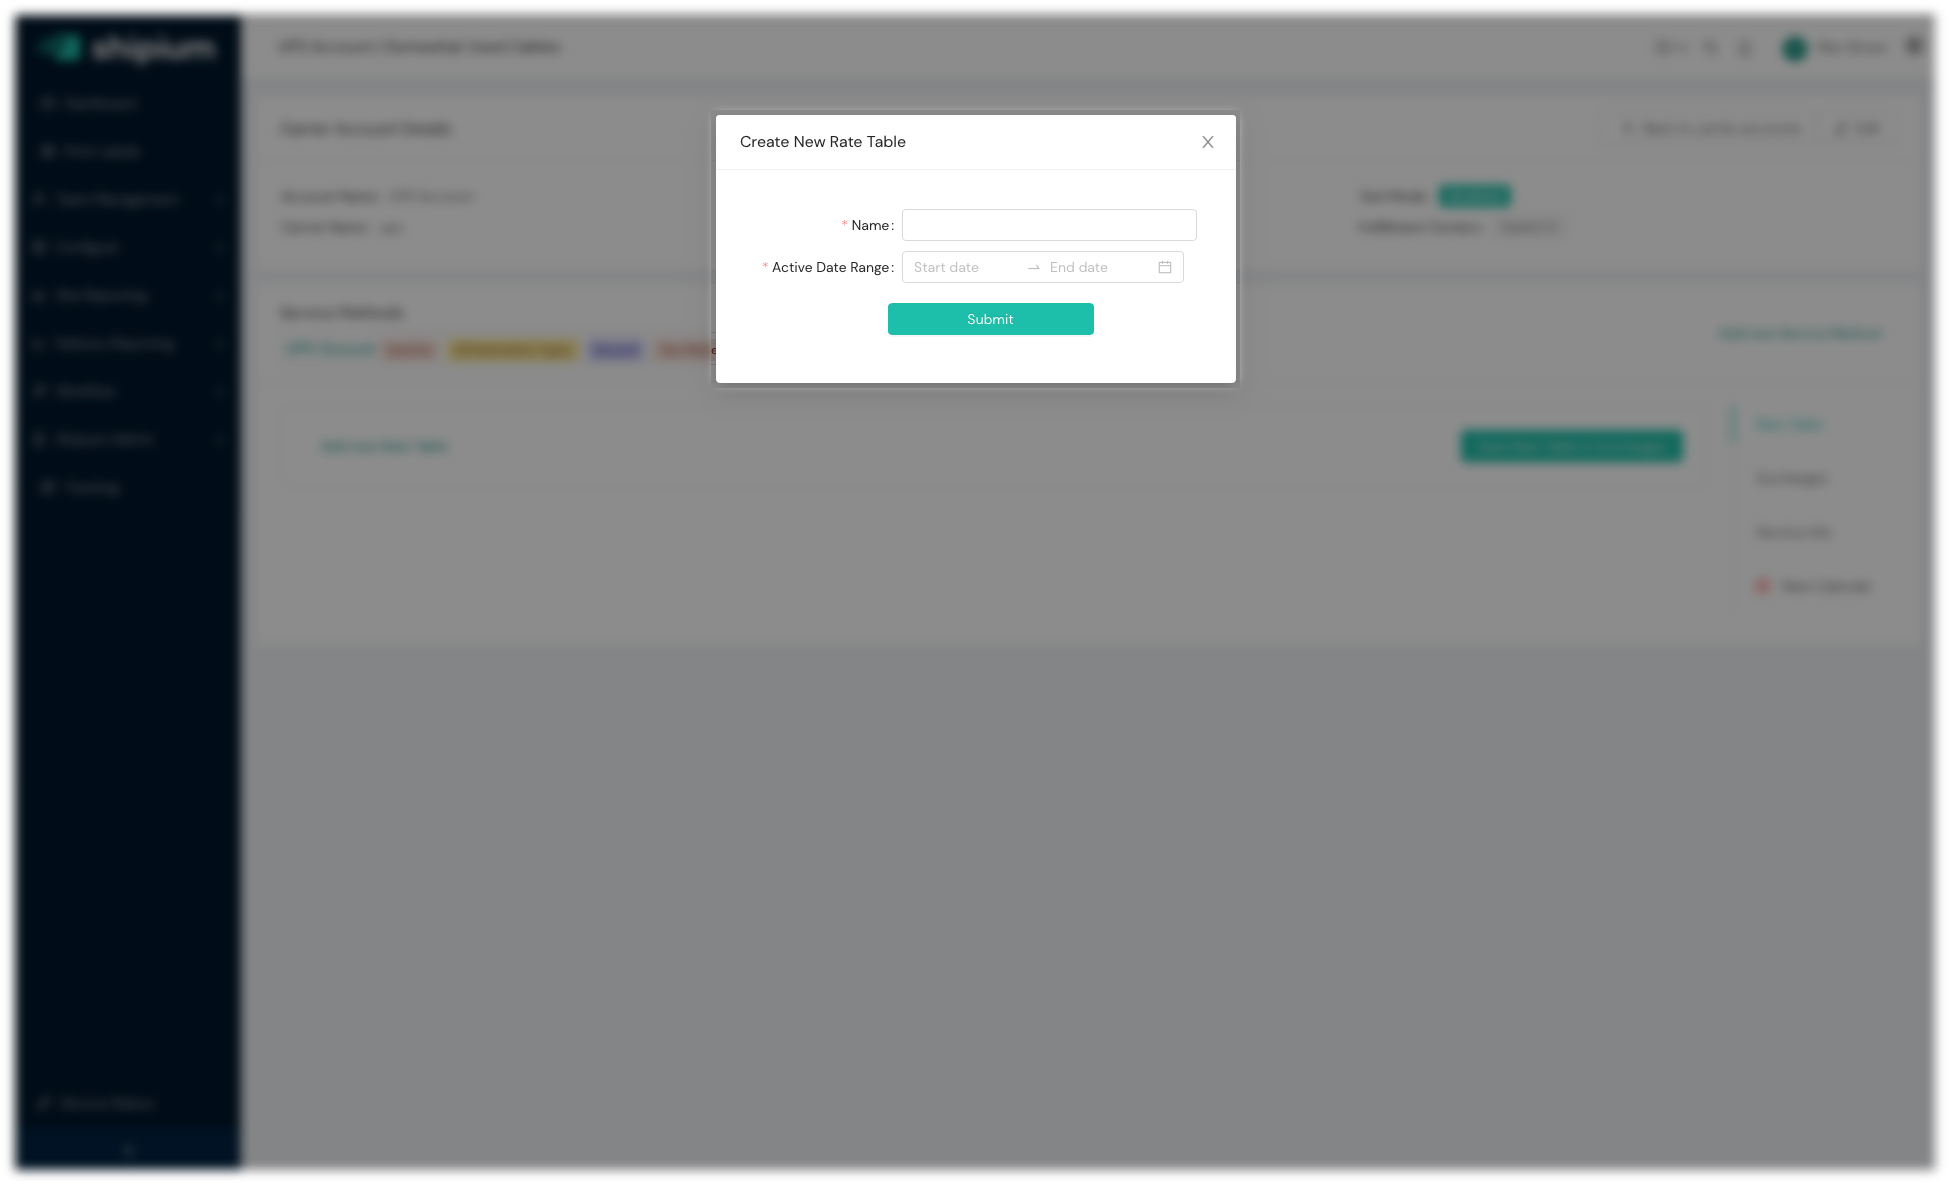
In either case, the next thing you will see is the Create New Rate Table dialog above. There are two pieces of information to populate:
- Name. We suggest something like "UPS Ground 2020-2021 Rates" or something similar that will make it clear to the next person what these rates are and what their source is.
- Active Date Range. The timeframe during which these rates apply; click on Start date to set the first date on which this rate applies and then on End date to set the last date on which the rate applies.
When you have populated the information, click the Submit button and you'll create your new rate table and be taken to a page to update the rates for the rate table you just created.
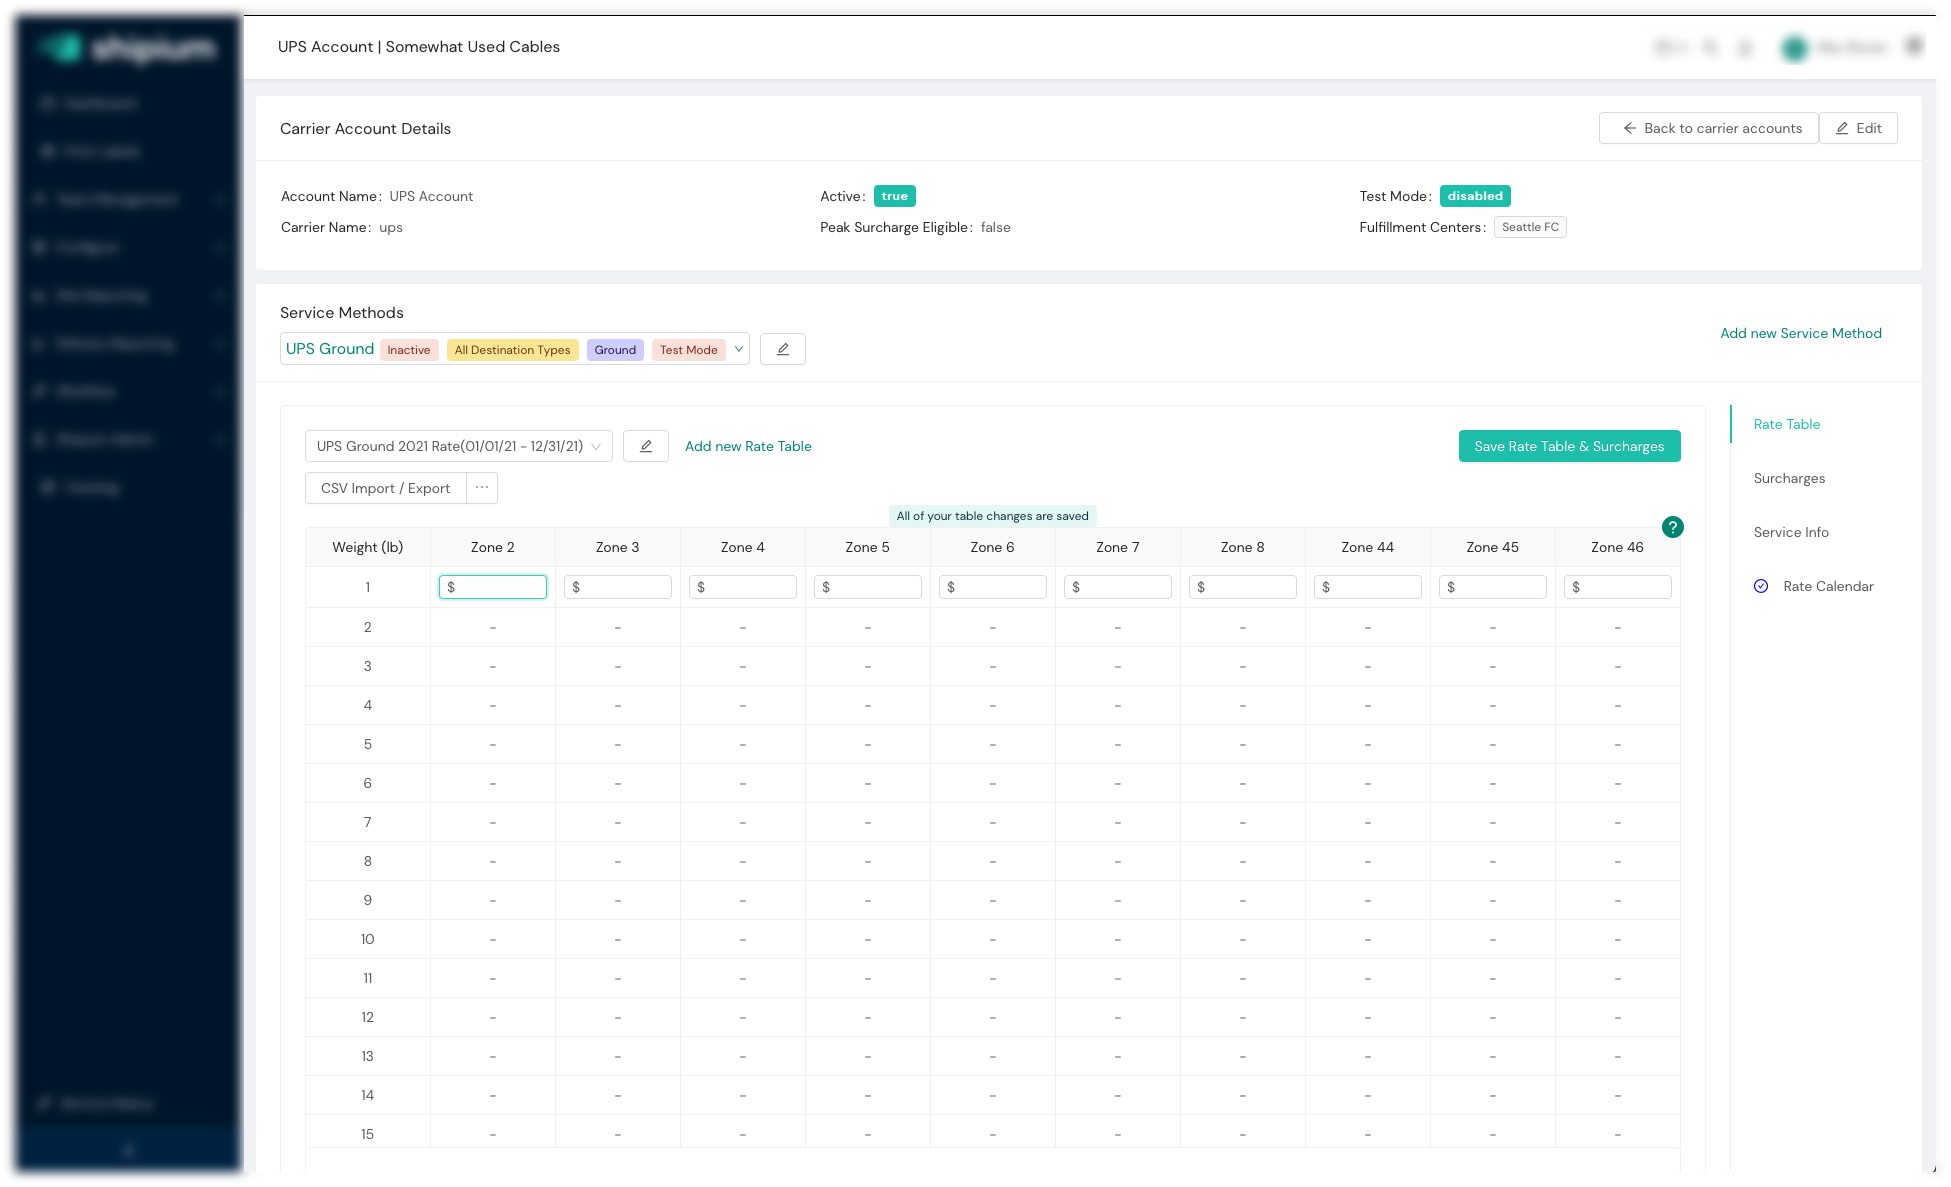
The below instructions for updating rate tables apply to new or existing rate tables.
Update rate tables
- Go to Configure > Carrier Accounts in the Shipium Console.
- Click on the Edit button for the carrier whose new service method you are updating.
- Under Service Methods, select the service method whose rates you will be updating.
If you are updating an existing rate table you will see something like the following (or an empty rate table for newly added service methods, as above).
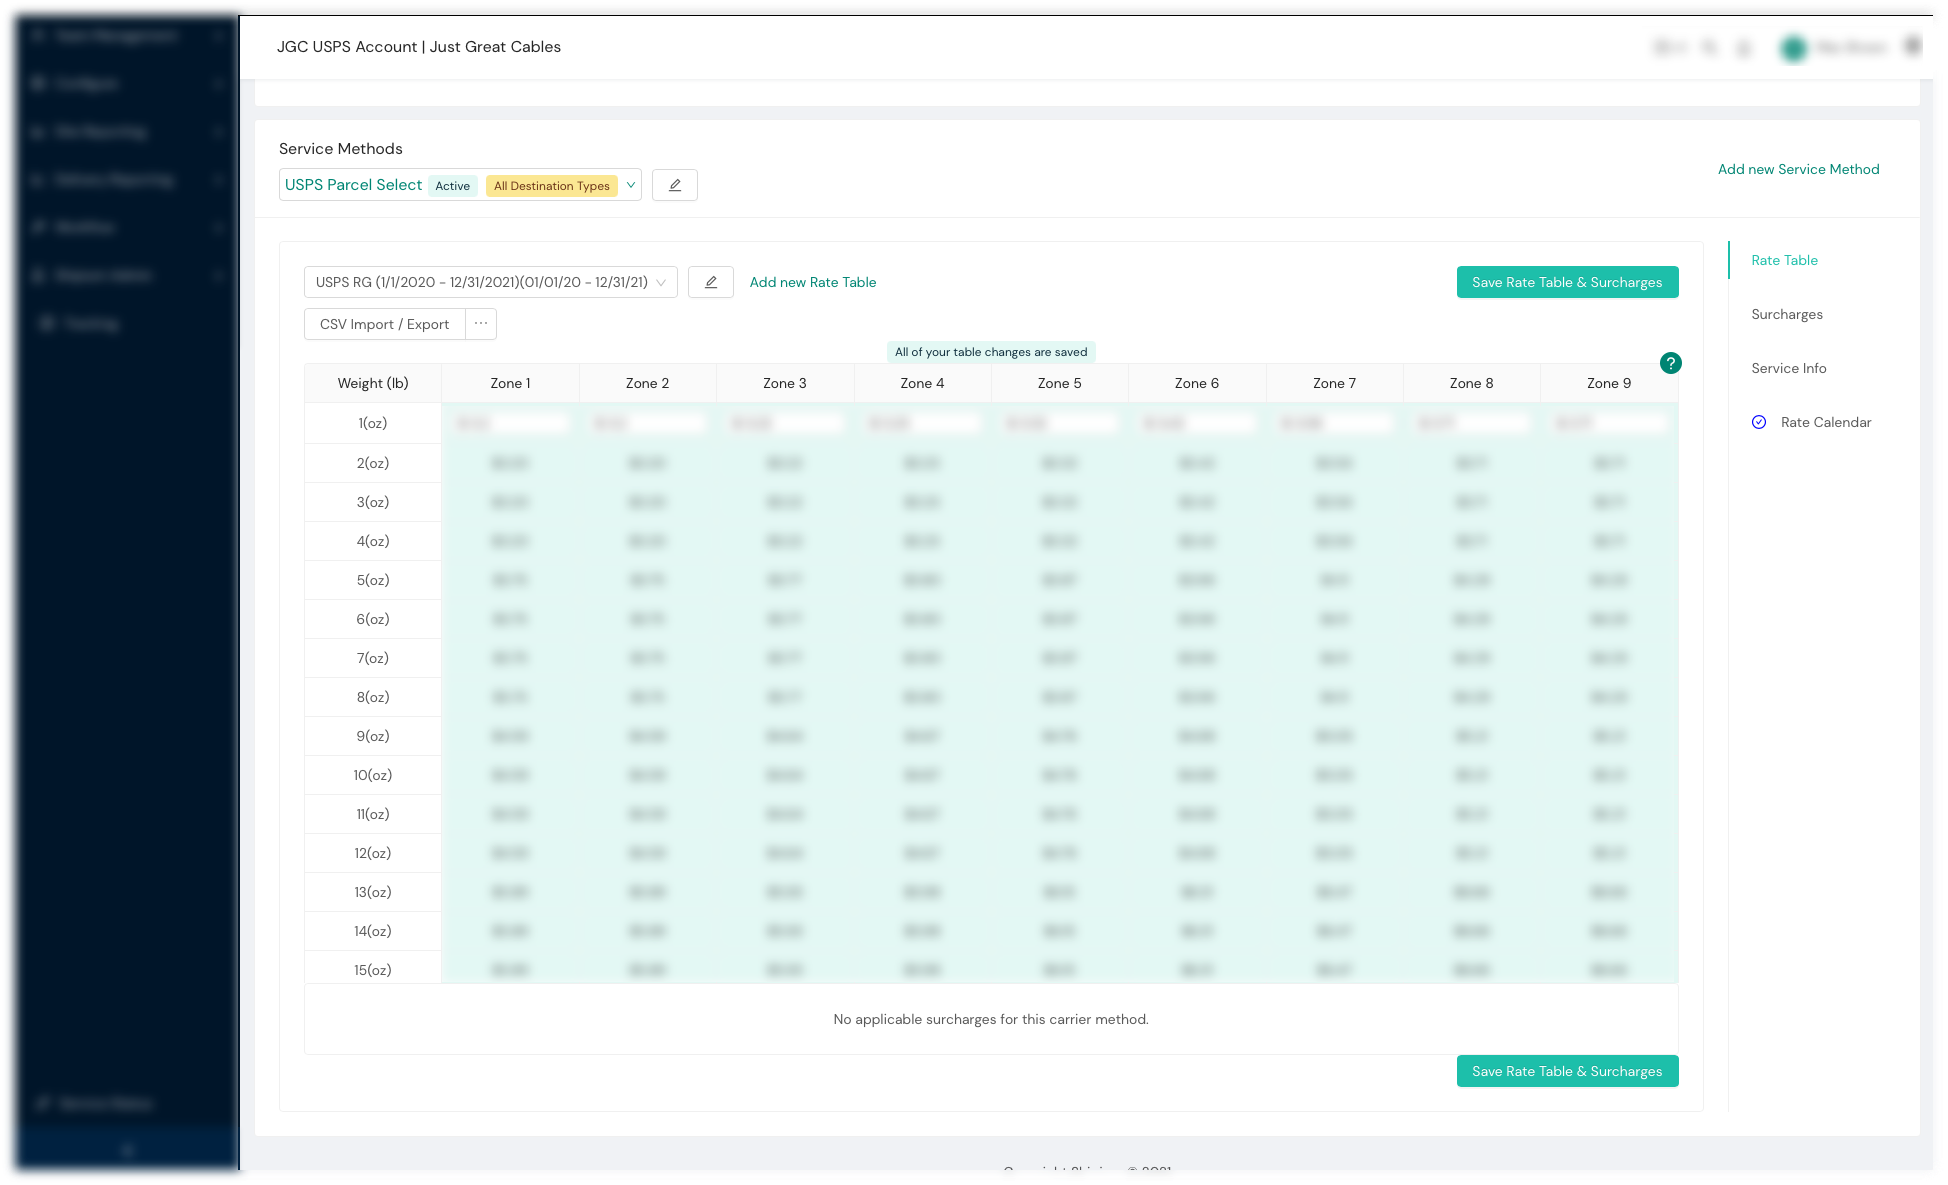
There are two ways to update a rate table:
- Update each zone/weight value by hand using the onscreen table controls.
- Download a template, populate it with your rates, and upload the new rates.
Update zone/weight values by hand
In this case, you can go directly to the table that you see above, click into one of the cells (such as 1 lb, zone 1) and then type in the rate that you have been provided by your carrier. Pressing the TAB key will then take you to the next entry to be populated. Continue until you have filled out the whole table.
The main use case for doing this is if you have been provided your rate table in a form that is not easily converted into an Excel / CSV file or if for some reason you just need to update one or two fields due to a minor rate change or a previous mistake.
Click Save Rate Table & Surcharges and your changes are in the system.
Upload a populated rate table template
Uploading a populated rate table template is by far the easiest choice. It is most likely that your carrier, rate partner, or 3PL will provide you rates in Excel. Translating those rates into our format will be an easy process by following these steps.
Download rate template
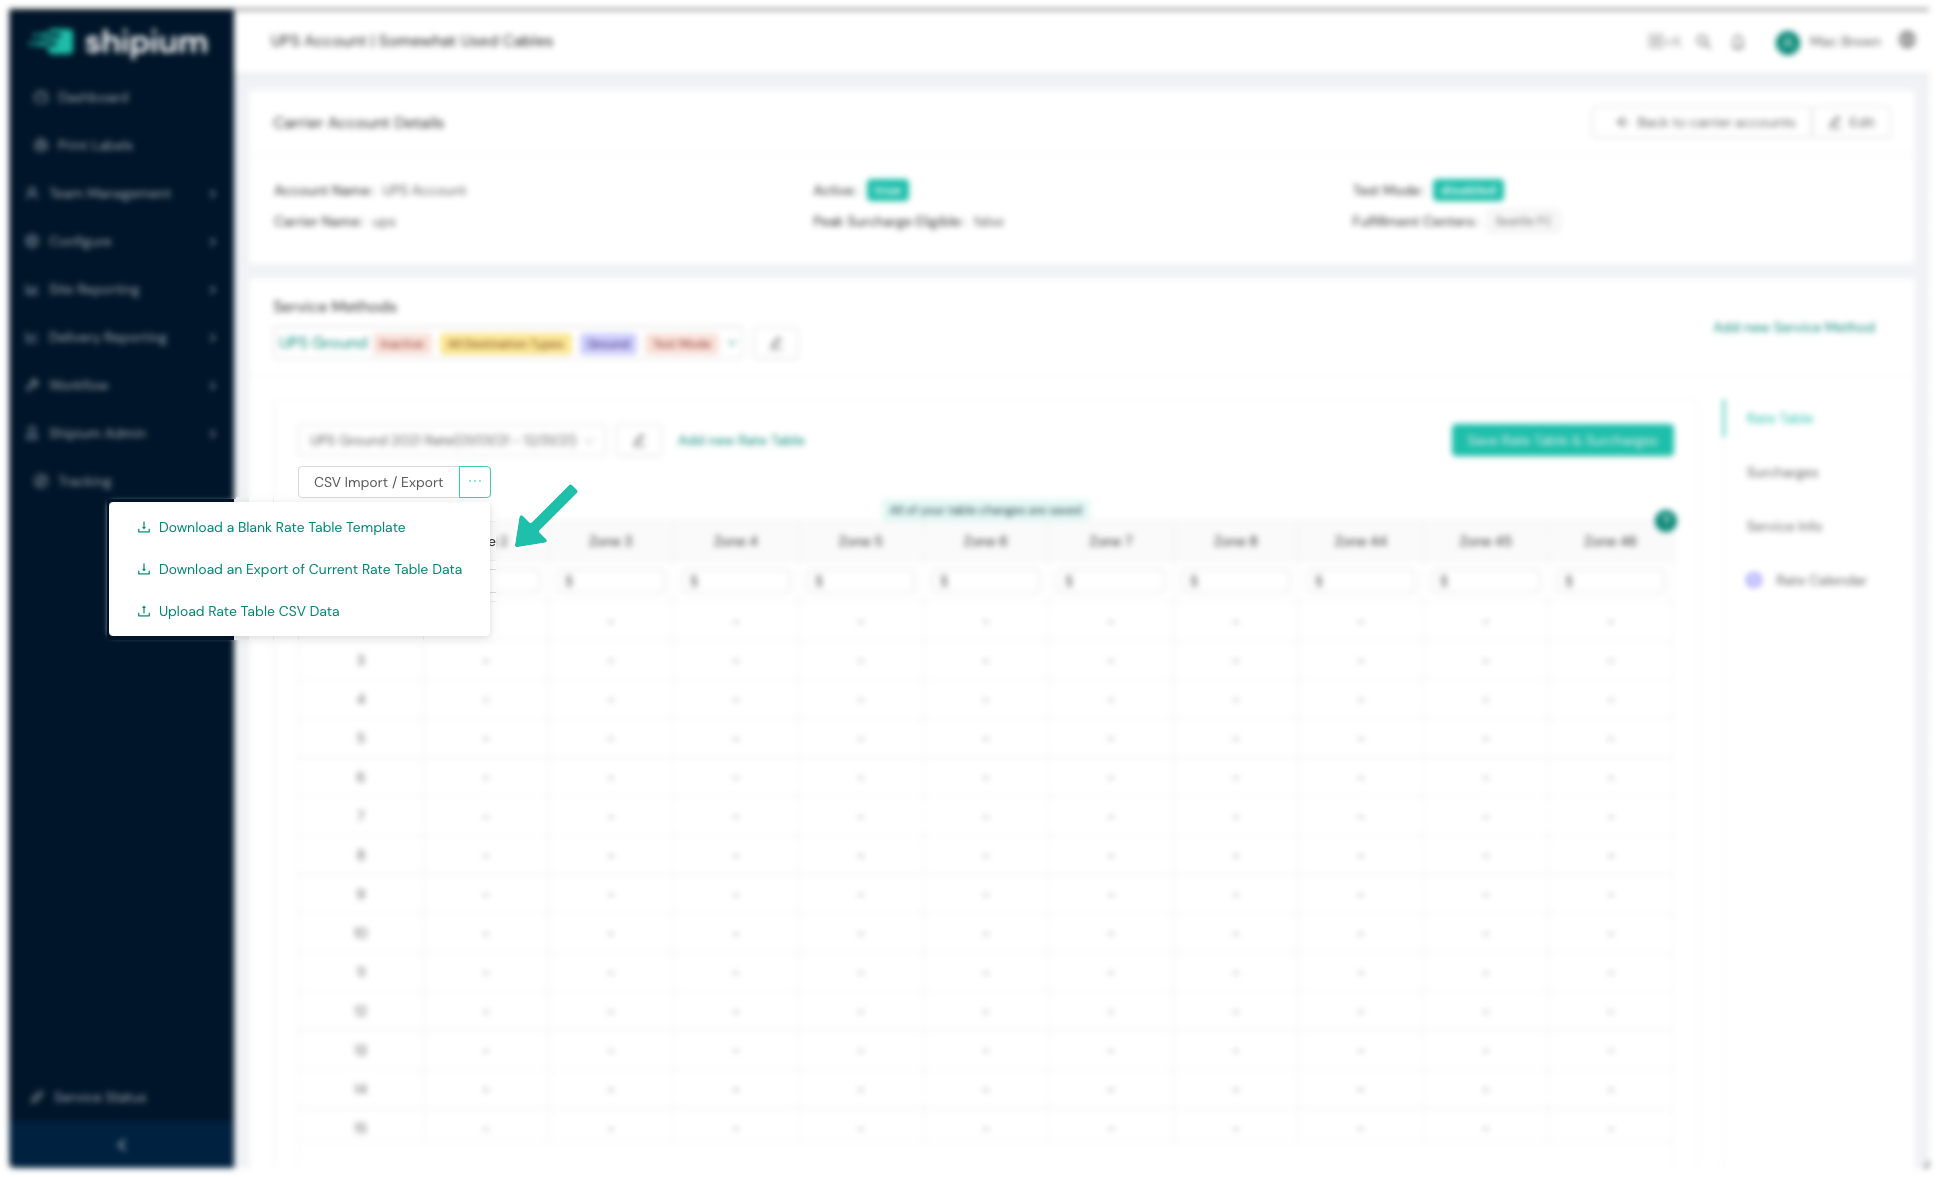
Just below the list of rate tables is a control labeled CSV Import / Export. Hovering on the ellipses will bring up a menu with three options. Select Download a Blank Rate Table Template, and a download file dialog will start in your browser. Save this template file with the name of the rate table you want to update.
You can then open this file in Excel or your spreadsheet application of choice (e.g., Google Sheets), copy your rate table into it (this example has ounce-weight and pound-weight values), and save it.
Make sure you save it or download it as a CSV – not as an Excel file.
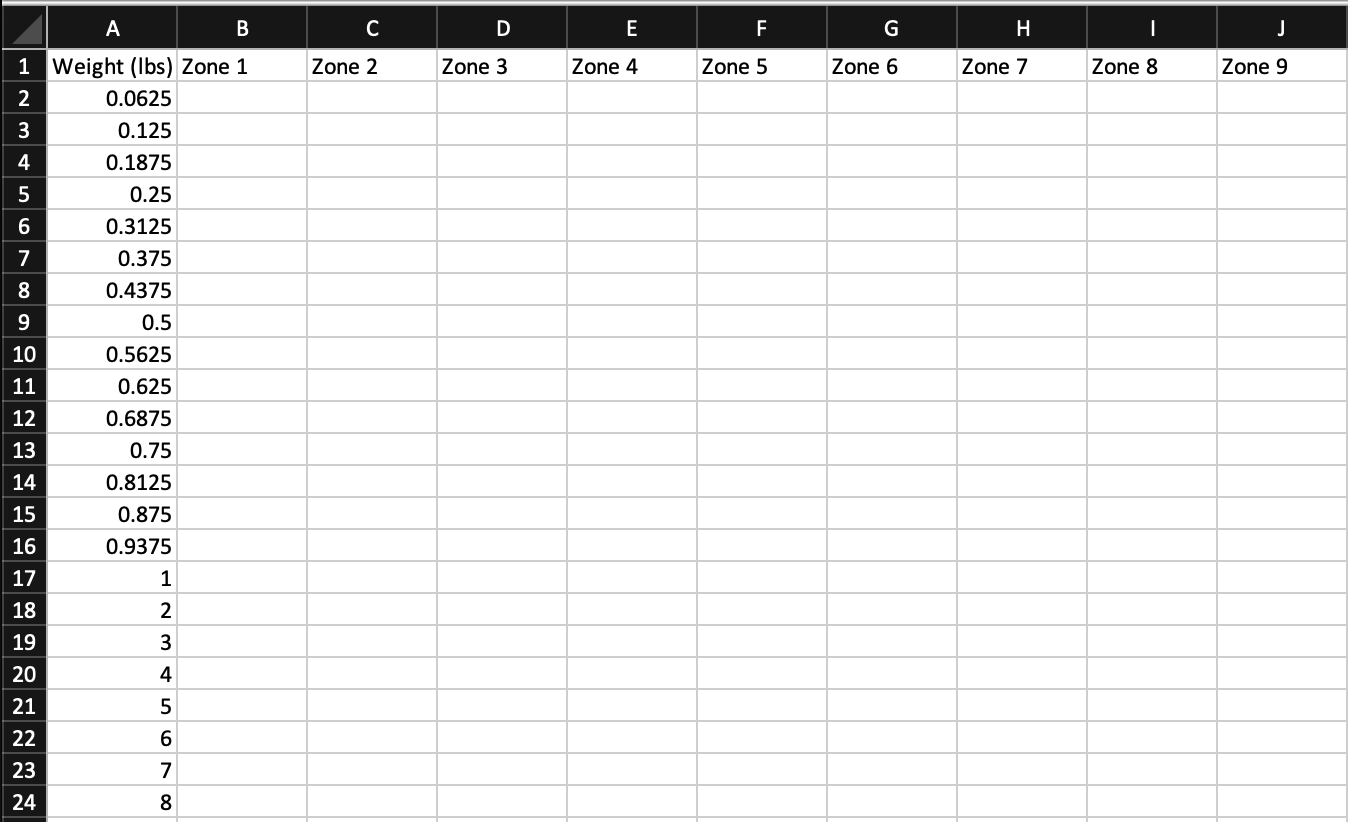
You can then click on the Upload Rate Table CSV Data entry in the CSV Import / Export control to upload your new rate table. It will populate the table in the UI, but make sure you click Save Rate Table & Surcharges after you populate the table to save the new rate table values.
Make sure to saveDon't forget to click on Save Rate Table & Surcharges after updating or else your changes won't be reflected in the system.
Resources
Your Shipium team member is available to help along the way. However, you might find these resources helpful:
Updated 3 months ago
