
Carrier Accounts
Add a carrier account to your carrier network in the Shipium Console.
About carrier accounts
Each time you want to use a new carrier account, you'll add that account to Shipium so that it's accessible. You'll set up information about the carrier such as account number and other organization-specific billing information as well as some details about which fulfillment centers will utilize the carrier account.
Once an account has been configured, you can then add service methods to it (e.g., ground, next-day air) and set configuration values associated with the service method.
Alternative workflow instructions for adding a carrier accountYou can find instructions for setting up a new carrier account within the suggested fulfillment contexts workflow in the Carrier Account section of the Carrier Contracts document. You also may follow the guidance in this document to set up a new carrier account within the fulfillment configuration workflow.
Set up and use carrier accounts
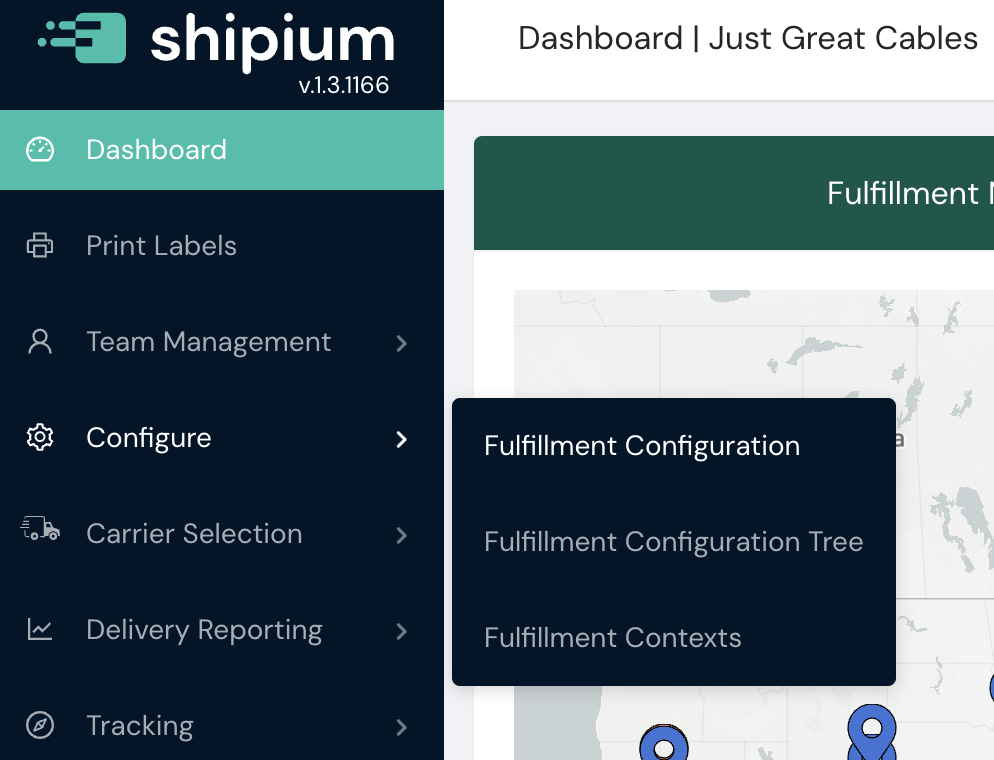
To add new or modify existing carrier accounts, you'll first need to access the Shipium Console. You'll select first Configure and then Fulfillment Configuration from the left navigation menu.
Within Fulfillment Configuration you'll scroll down to Carrier Configuration, which includes Carrier Accounts.

Add a new carrier account
Carrier account information neededTo set up a carrier account, you'll need information about that account, such as your FedEx Account Number or UPS Account Number.
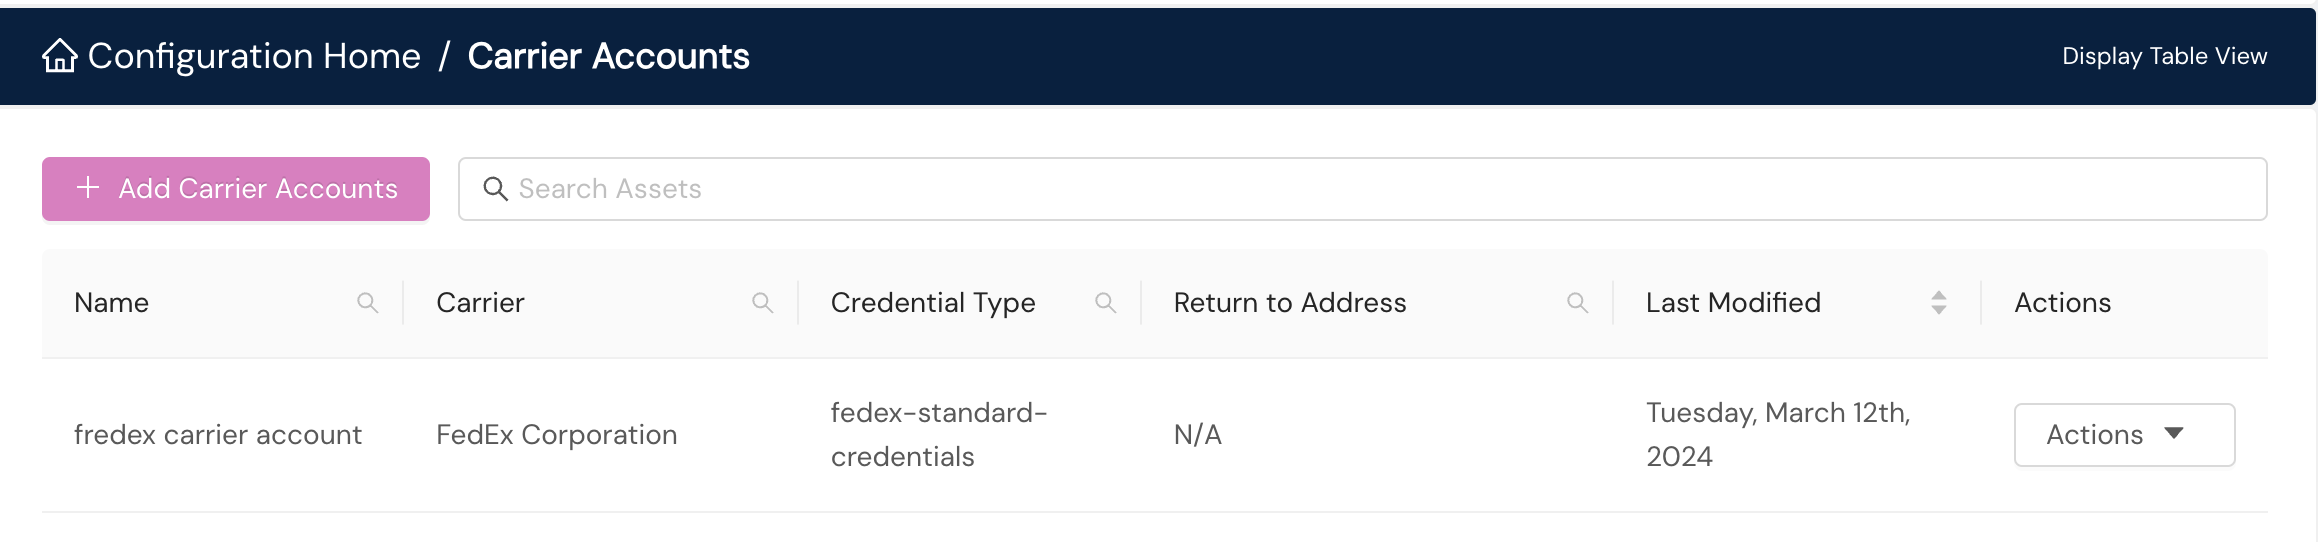
To add a new carrier account, you'll select the Add Carrier Accounts button, as shown in the following screenshot. If you already have carrier accounts associated with your account, you'll see them listed in your Carrier Accounts home screen. If it's your first time, you'll see an empty list. In either case, the process of adding a new carrier account is largely the same.
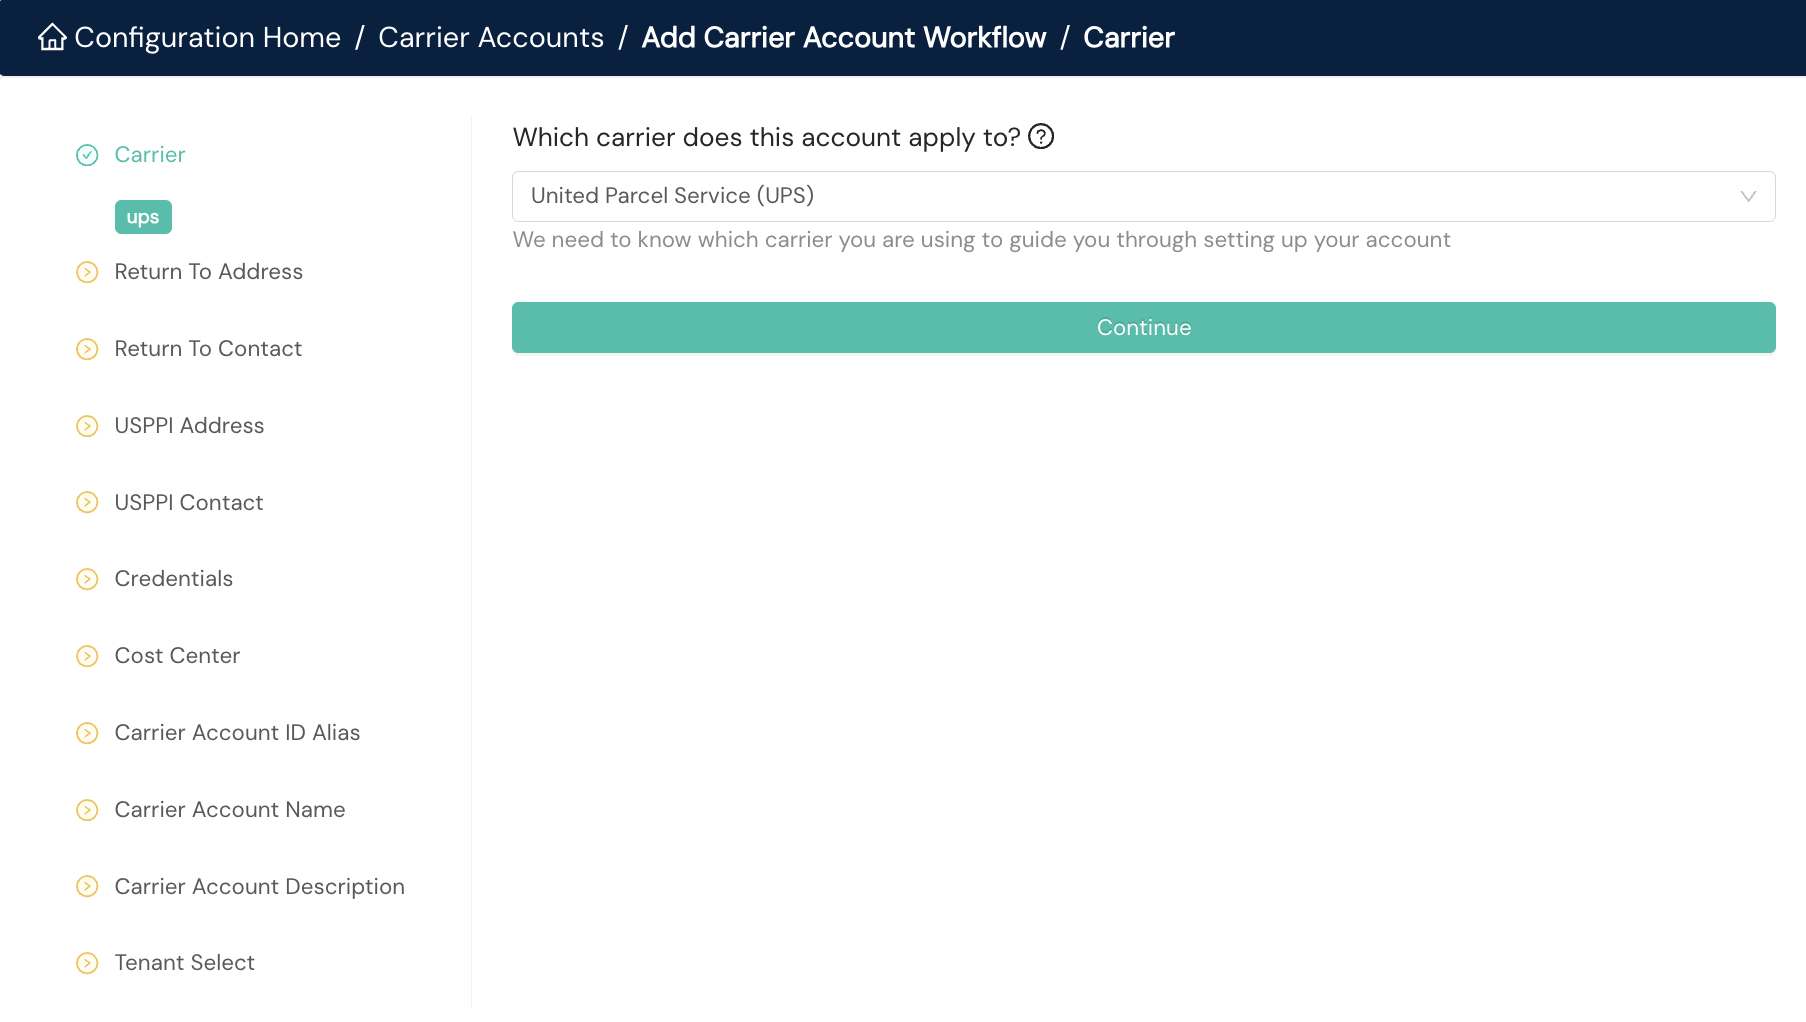
To create a new carrier account, you'll need to select the Carrier from a dropdown menu. The Carrier field will populate with your selection from the dropdown menu. Once you've chosen the carrier, additional fields will appear: Return To Address, Return To Contact, USPPI Address, USPPI Contact, and Credentials. Some carriers require the Return To Address and Contact information, and U.S. Principal Party in Interest (USPPI) information most often is required for international shipments. Credentials are needed to configure your account to use the carrier's service methods.
For Cost Center, you can provide an optional Cost Center Identifier (ID) to use for categorizing expenses. If your selected carrier supports the Cost Center ID field via its API, the Cost Center ID field will be sent to the carrier. This unique ID is case sensitive.
If your organization wishes to supply your own identifier for this carrier account to reference in API calls, you can provide it for Carrier Account ID Alias. The ID you pass in your API calls must match this ID exactly; ID values in the Shipium platform are case sensitive.
For Carrier Account Name, Shipium recommends choosing something that involves the carrier name. For the optional Carrier Account Description, Shipium recommends something that uses the carrier name along with additional description to help you differentiate the carrier account from another. Finally, for Tenant Select, you'll want to choose any tenants from the dropdown menu for which the carrier account will apply. If your organization's network doesn't use tenants, you can disregard this last field.
Pro tip for navigating the Shipium ConsoleSome fields within the Shipium Console will be marked with a question mark in a circle and contain hints about what kind of information is needed if you hover on them.
Once you have completed all of these fields, you can click the Submit button at the bottom of the screen and you will be returned to the Carrier Accounts screen where you will see your new carrier account.
Manage your carrier accounts
To access your carrier accounts, you'll need to select Configure and then Fulfillment Configuration from the main lefthand navigation menu. Then you'll scroll down to the Carrier Configuration category where you'll select Carrier Accounts.
Within Carrier Accounts, you can update or delete your organization's carrier accounts.
To modify or delete an existing carrier account, you'll need to select either Edit Carrier Account or Delete from the Actions dropdown menu, as shown in the following sample screenshot.
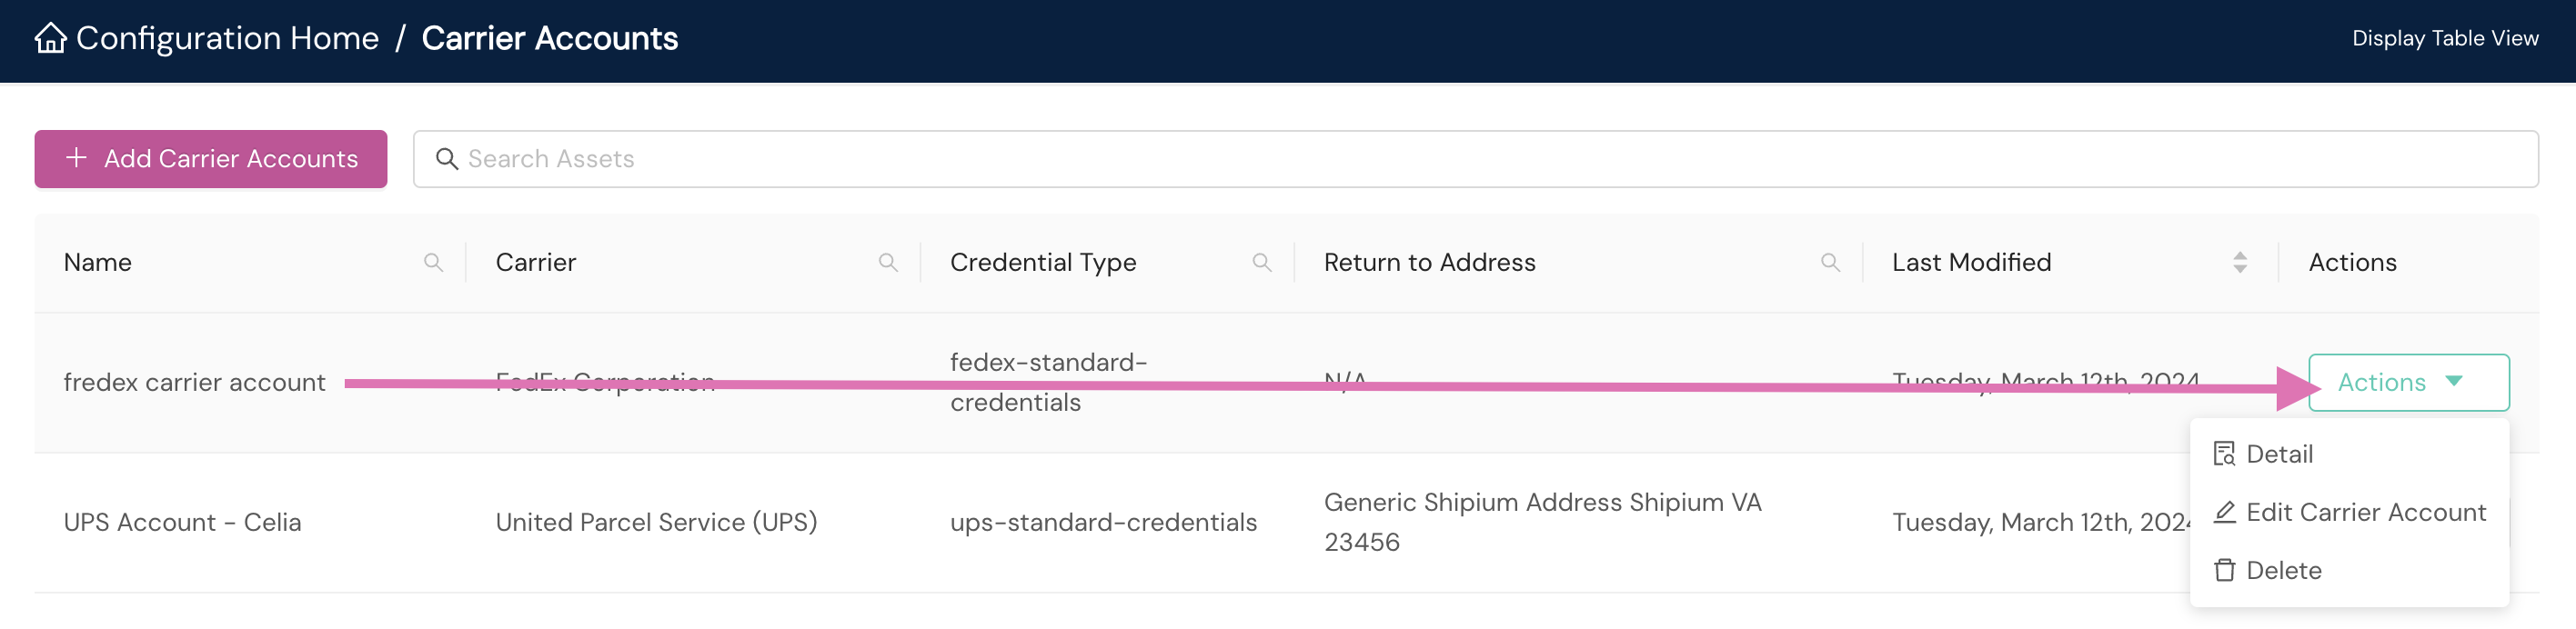
You can also select Detail from the dropdown Actions menu for additional details for any carrier account.
Add a new service method
See Carrier Service Methods for how to add service methods to your new carrier account.
Resources
Your Shipium team member is available to help along the way. However, you might find these resources helpful: