
Manifest Shipments
Manifest shipments via an automated or manual manifesting process.
About shipment manifesting
Shipment manifests are reports that provide confirmation of package retrieval from a fulfillment center, or origin. Some carriers require a manifest report for shipments. The Shipium platform supports manifesting for carriers including Canada Post, DHL, FedEx, FleetOptics, Global-e, Gori, Nationex, Pitney Bowes, Point2Point, Purolator E-Ship, SpeedX, and UPS.
Manifesting is available for both origin locations and injection sites. If your organization uses injection shipping — where shipments are transported from a fulfillment center to an alternative injection point for carrier delivery — you can manage manifesting for those shipments through the same workflows described below. To manifest for injection sites, you must have injection sites configured within your fulfillment context. See Injection for setup instructions.
The manifest report typically includes a single barcode with all details of the shipping packages retrieved so that your organization can invoice shipments and verify:
- the total number of packages by carrier;
- the number of items;
- package type; and
- recipient and sender details.
Within the Shipium system, you can set up automated manifesting or manifest manually on demand:
- Schedule Manifest. Manage the manifest process via a carrier schedule, with established days of the week and times for carrier pickup at your origin or injection site; or create custom manifest dates and times, with single or multiple pickups per day.
- Manual Manifest. Create a manifest on demand for a carrier account at an origin or injection site, or override an existing manifest schedule.
- Manifest Summary Report. Input a date range and receive an on-demand report of shipments that were created during that time.
Fulfillment center needed for scheduled manifestingYou must have a fulfillment center (origin or injection site) configured within the Shipium platform to create a manifesting schedule. You can find information in Origins and Injection.
Manual manifesting with carriers
Manual manifesting is the process by which your organization can create a manifest for a carrier on demand. This process is required if additional shipments are created at your fulfillment center after the scheduled manifesting has occurred but before the delivery driver arrives for package retrieval.
For example, your organization's automatically scheduled driver pickup occurs at your fulfillment center at 5 pm, resulting in a driver's manifest shipment summary for the scheduled driver pickup printing at 5 pm, but you need to create additional shipments after the manifest has been created and before the delivery pickup has occurred. You'll need to manually create a manifest in the Shipium Console to ensure all packages are manifested as required by the carrier.
Create or update a manifest schedule
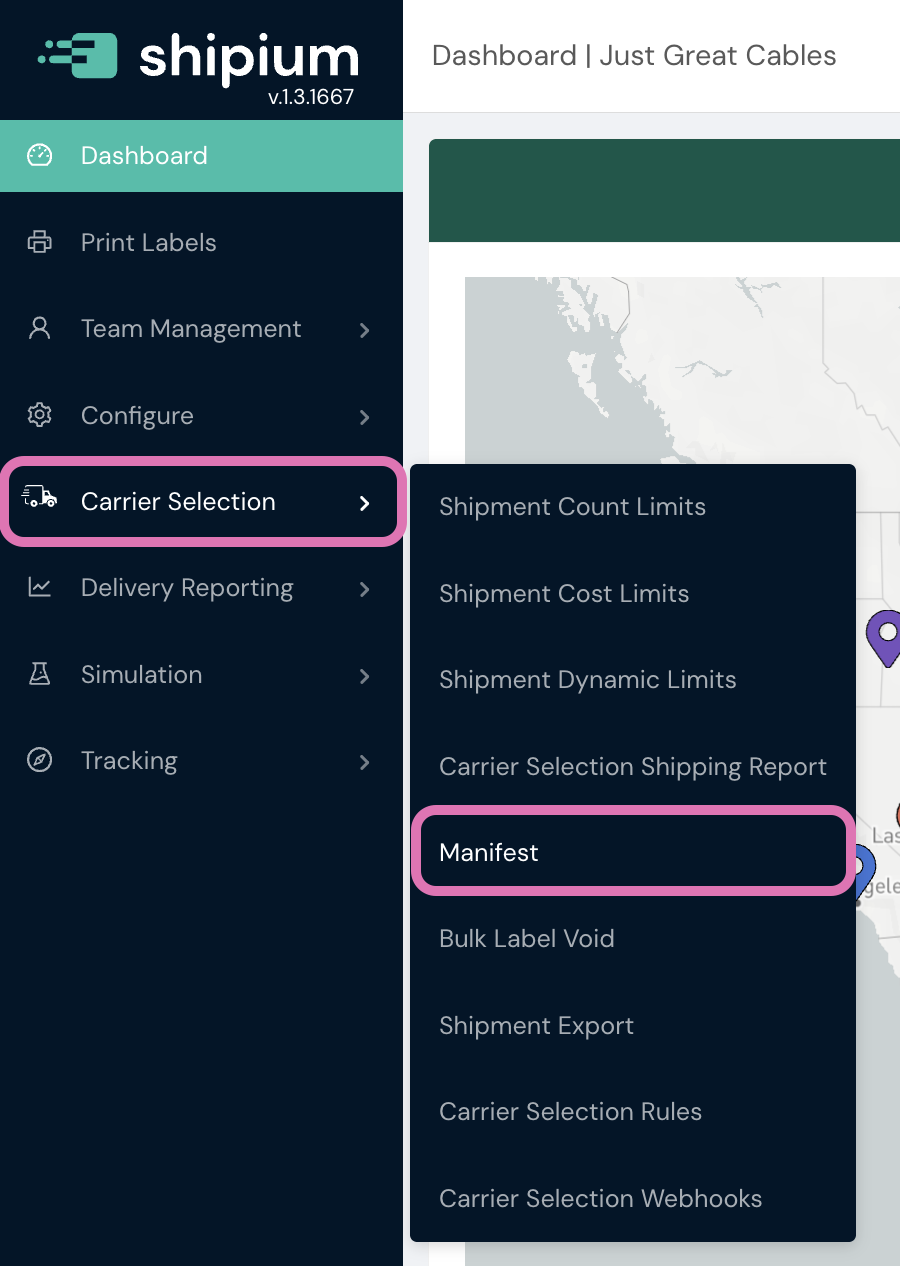
To create a new or edit an existing manifest schedule, you'll first need to log in to the Shipium Console. Once logged in to your account, in the lefthand navigation menu, you'll select Carrier Selection and then Manifest.

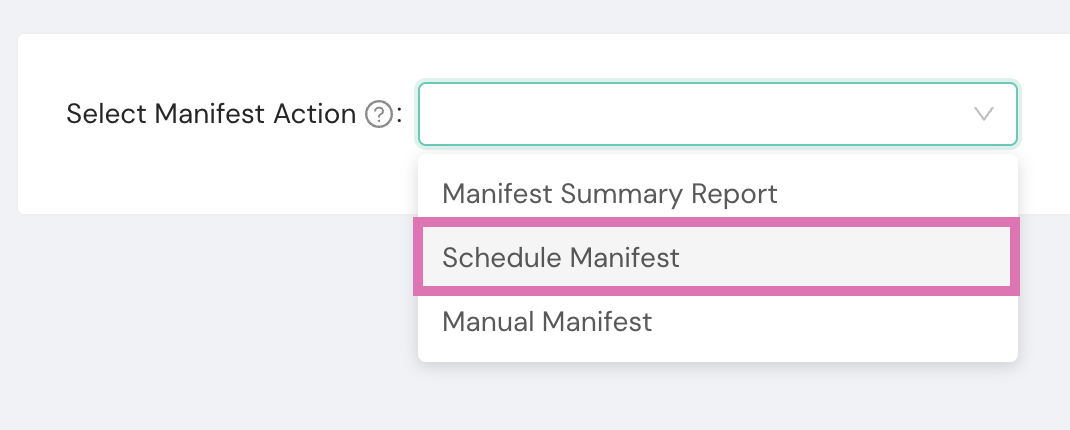
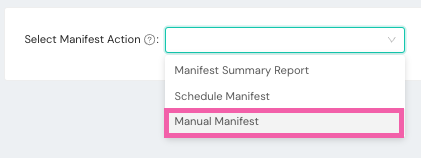
Next, you'll select Schedule Manifest from the dropdown menu.
After choosing Schedule Manifest, the page displays two tabs: Origin and Injection Site. Select the appropriate tab based on the location type for which you want to manage manifest schedules.
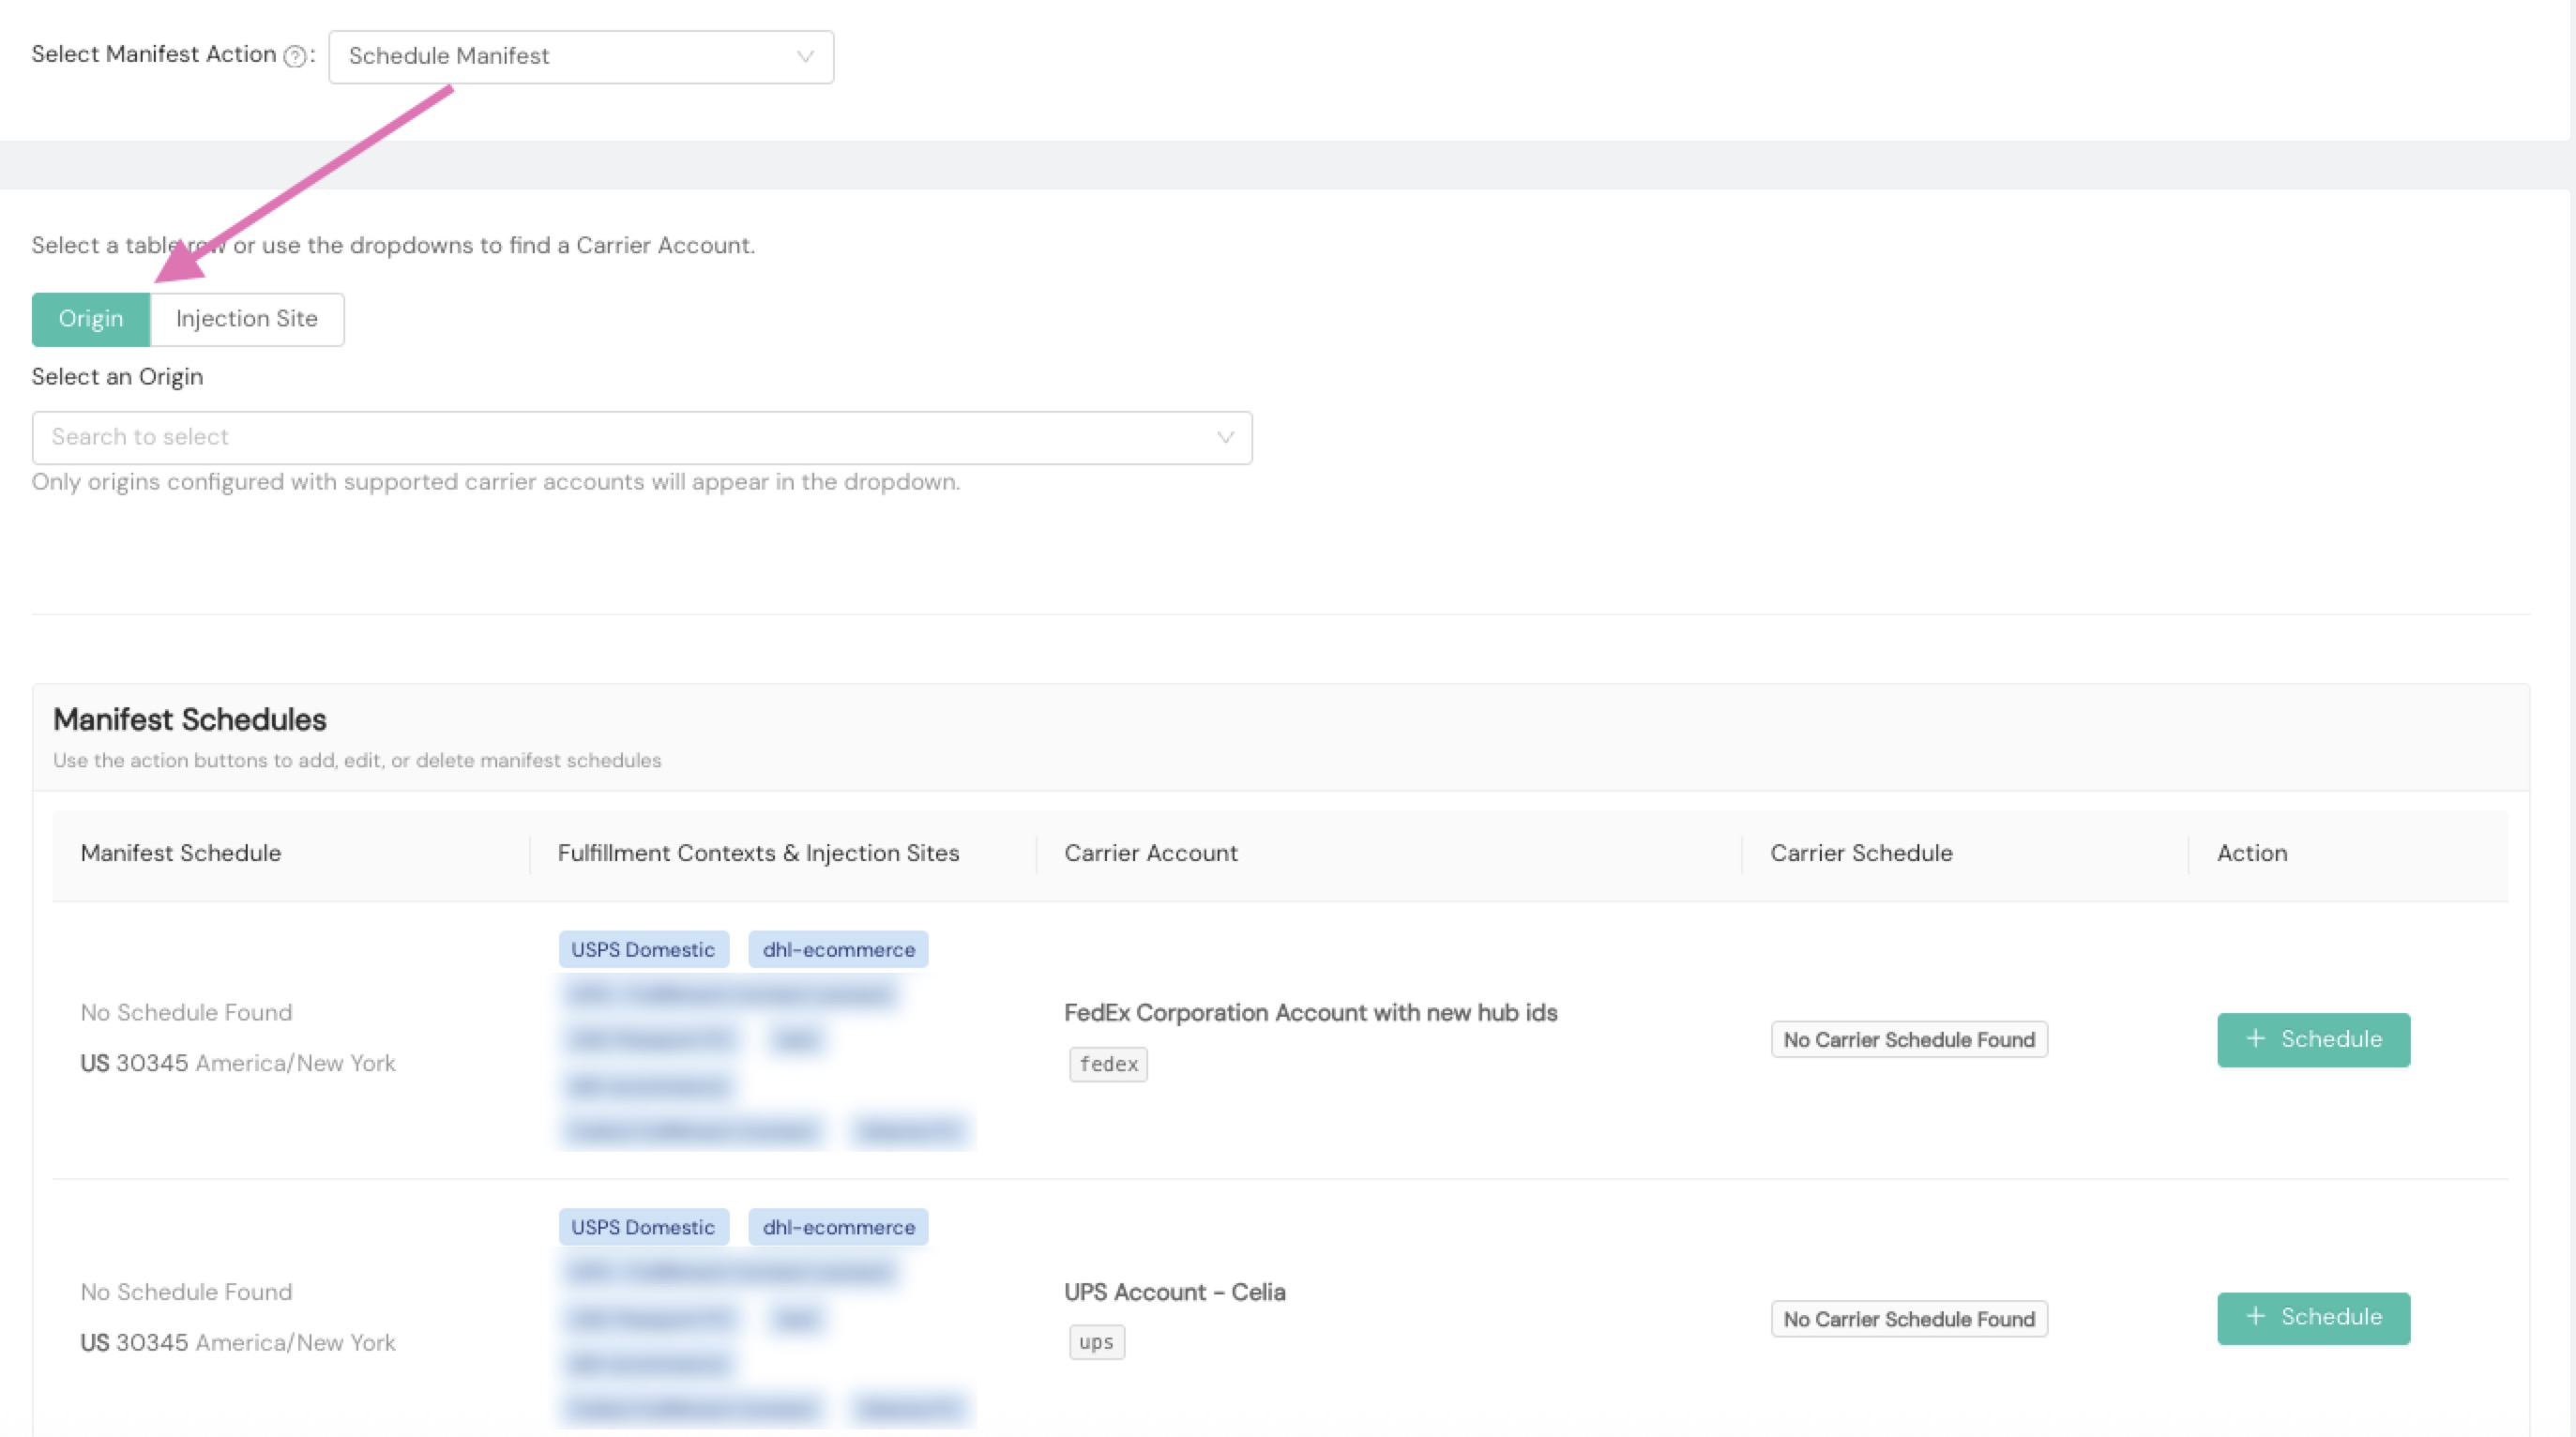
On the Origin or Injection Site tab, depending on which you selected, your organization's list of fulfillment centers (also referred to as fulfillment contexts) and injection sites will appear, providing the opportunity to add a new schedule for any of the configured locations by selecting the + Schedule button for the desired fulfillment context or injection site.
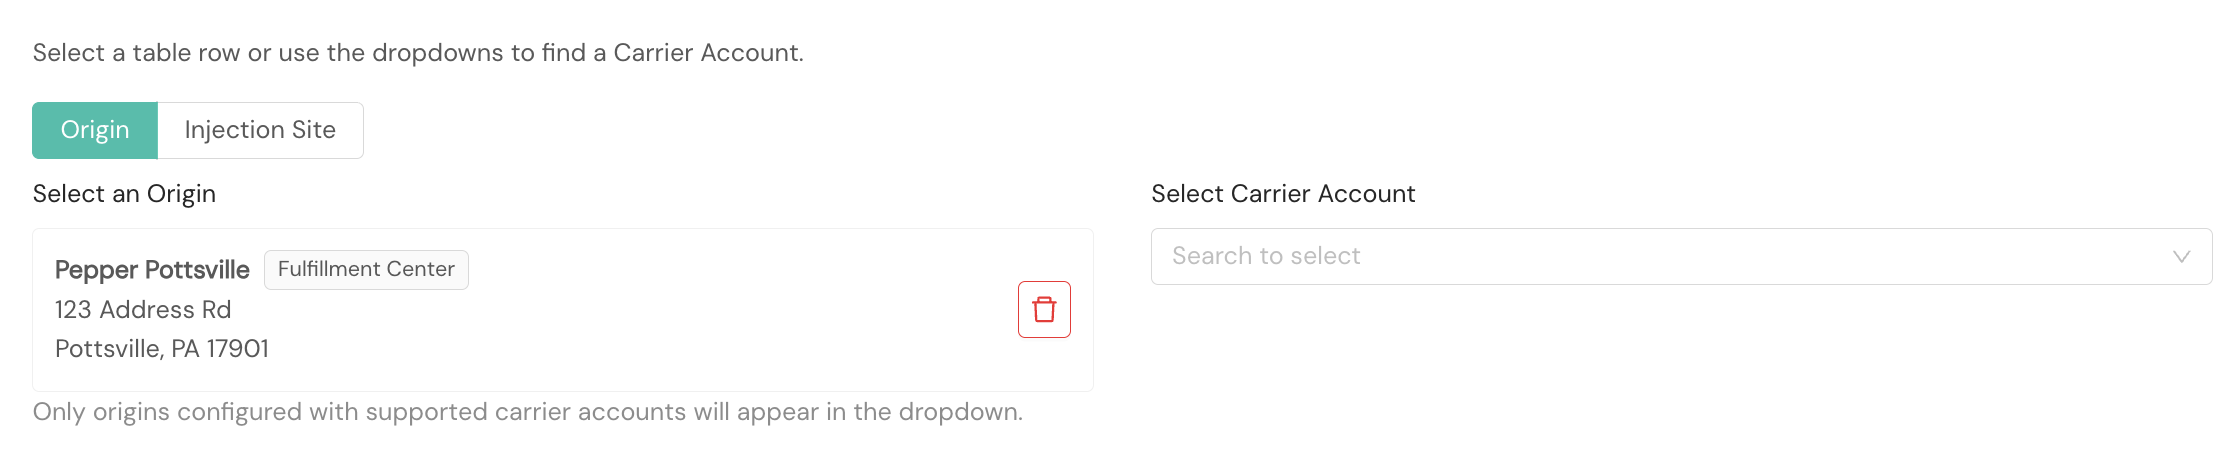
You also can use the dropdown menu below the two tab choices to select a particular origin or injection site. Once you select the location, you'll choose the desired carrier account from a dropdown menu that appears.
Injection site prerequisitesTo create a manifest schedule for an injection site, you must have a fulfillment context with at least one injection site configured, and a carrier contract associated with the injection site.
If a fulfillment context or injection site already has a manifesting schedule set up, the Edit and Delete buttons on the right side of that location's row in the Manifest Schedules list will enable you to edit or delete the manifest schedule associated with it (whether origin or injection site).

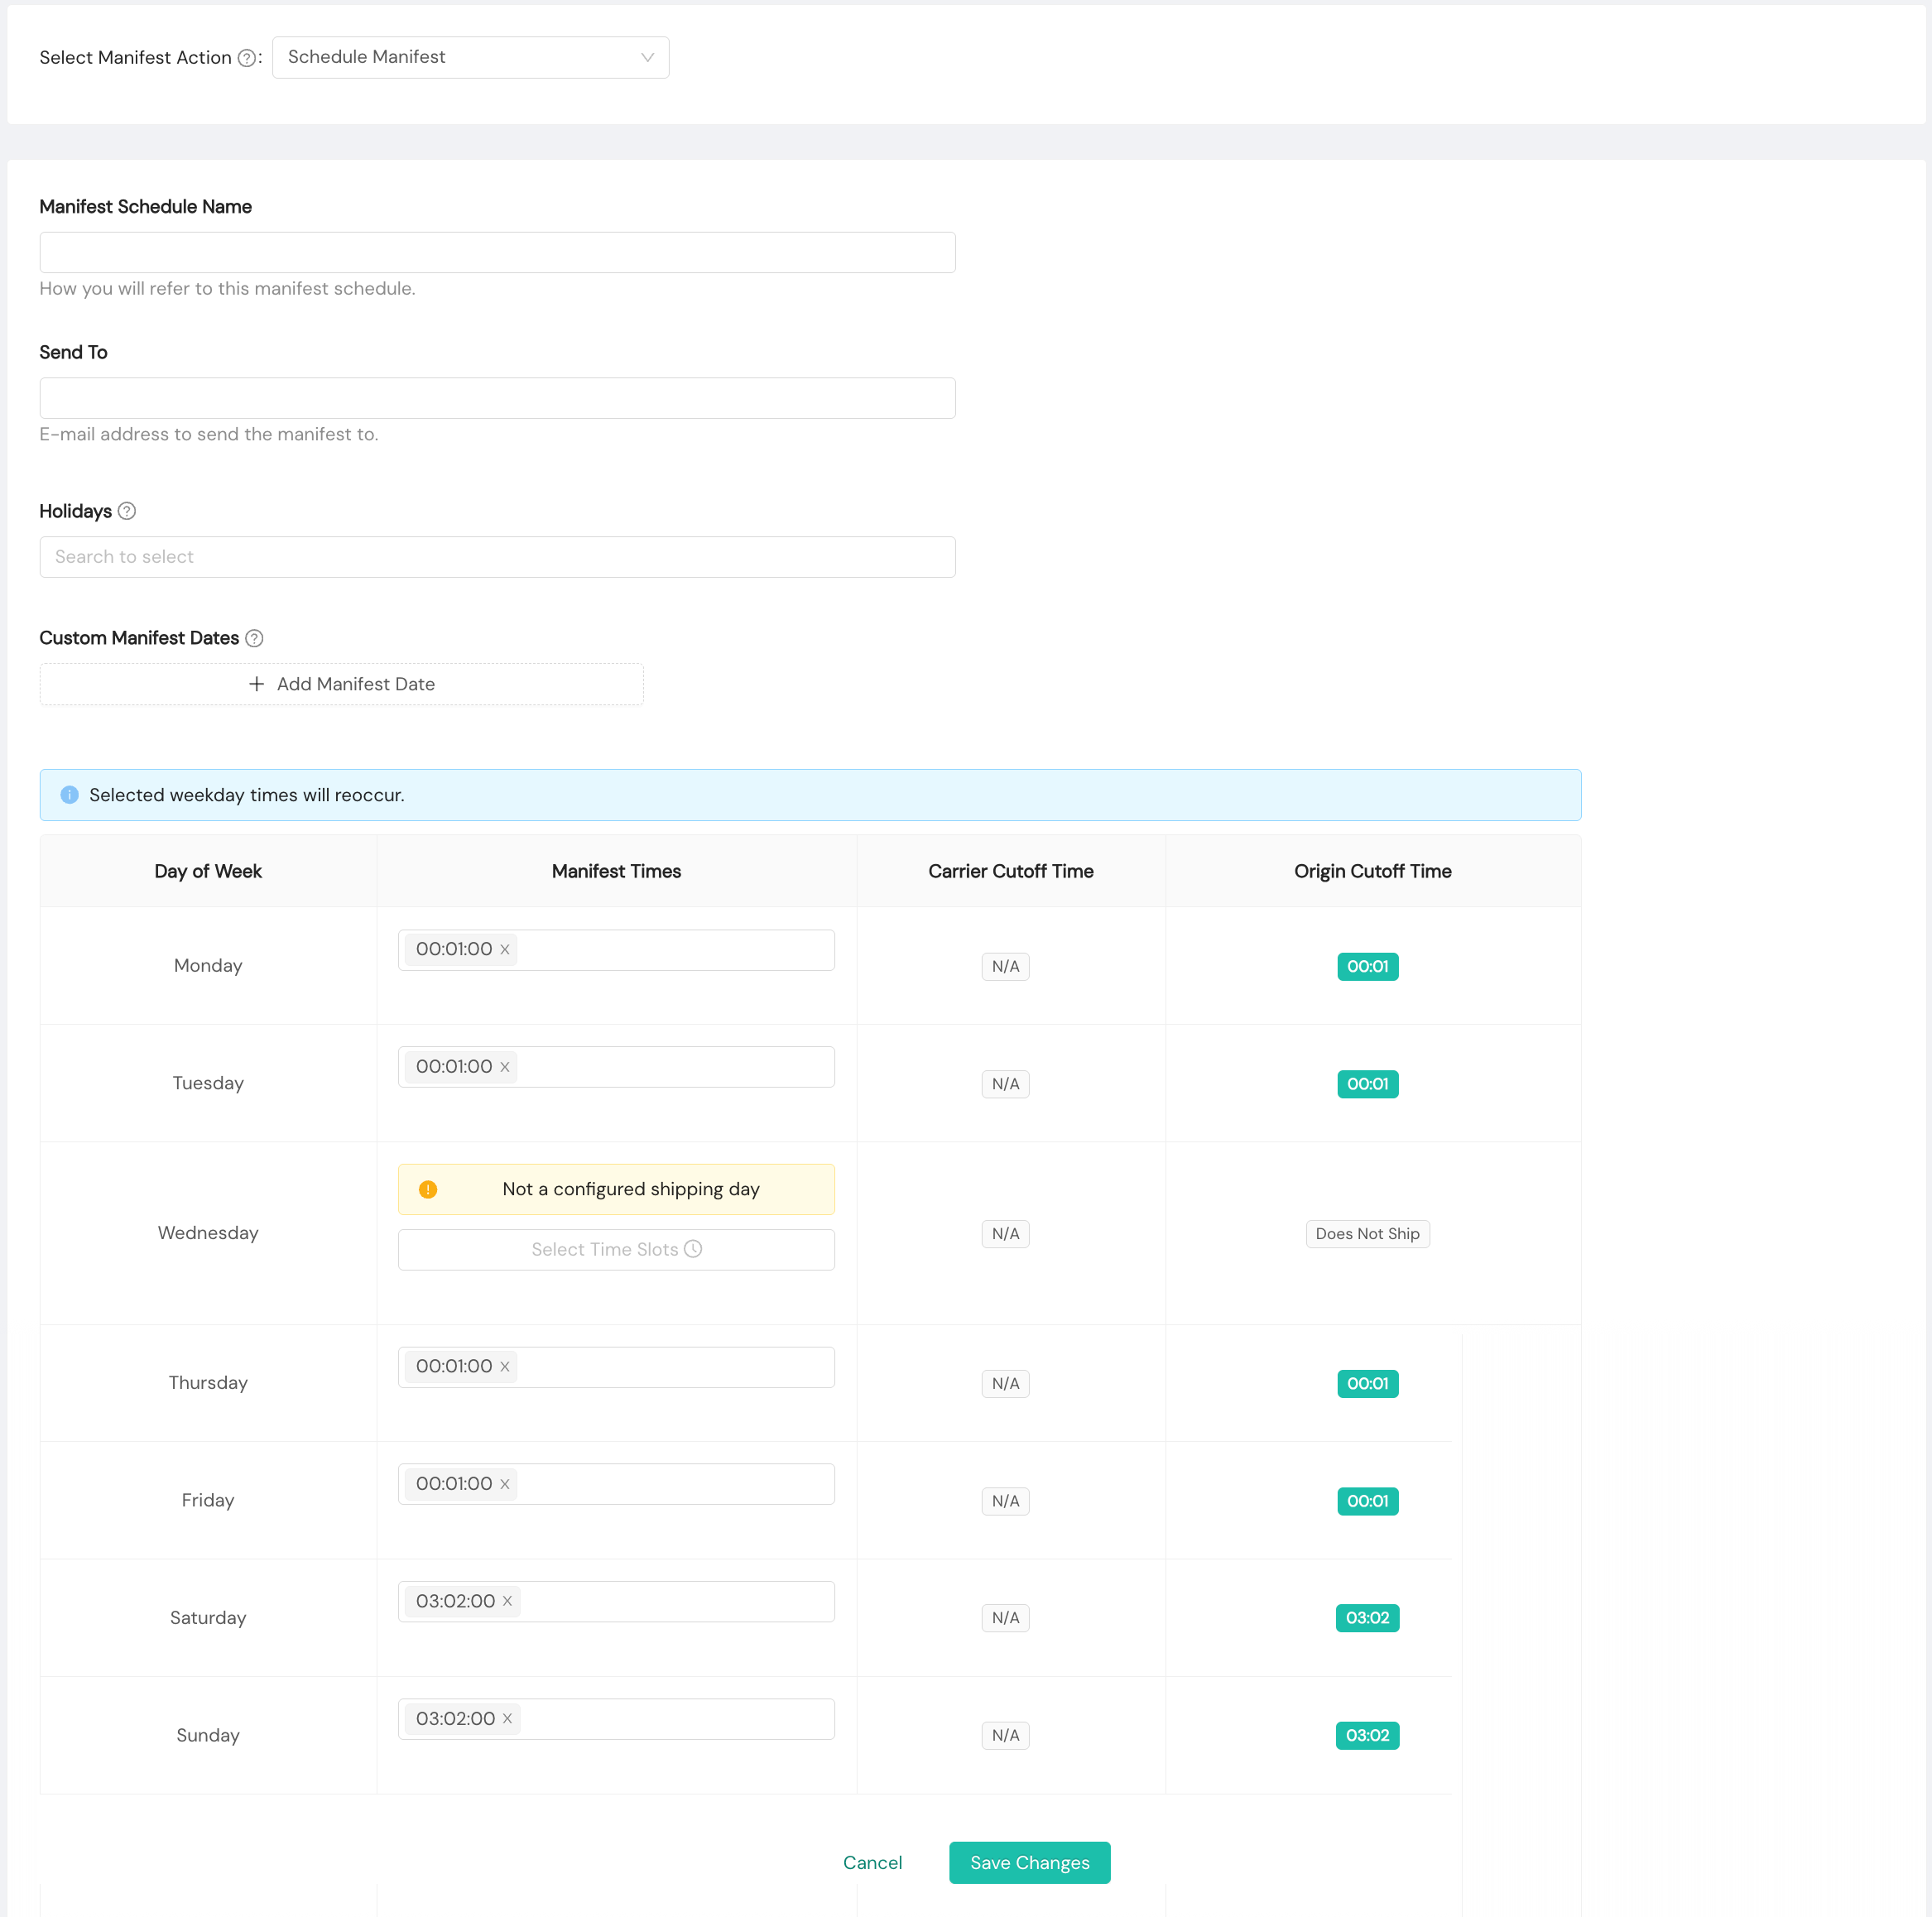
To add a manifest schedule, you'll need to provide the following information:
- Manifest Schedule Name. This is the human-readable name that your organization will use to refer to the schedule.
- Send To. You can optionally add an email address as a recipient of an email including the manifest report (available for carriers that support this option).
- Holidays. You can select multiple values from a dropdown list of holidays.
- Custom Manifest Dates. You can add multiple custom manifest dates and times, allowing for multiple pickups in one day.
- Manifest Times. You can add multiple times for a scheduled manifest for each day of the week applicable to the selected fulfillment center.
Manually manifest a carrier account on demand
To manually manifest for a carrier account, you'll first need to log in to the Shipium Console. Once logged in to your account, in the lefthand navigation menu, you'll select Carrier Selection and then Manifest.

Next, you'll select Manual Manifest from the dropdown menu.
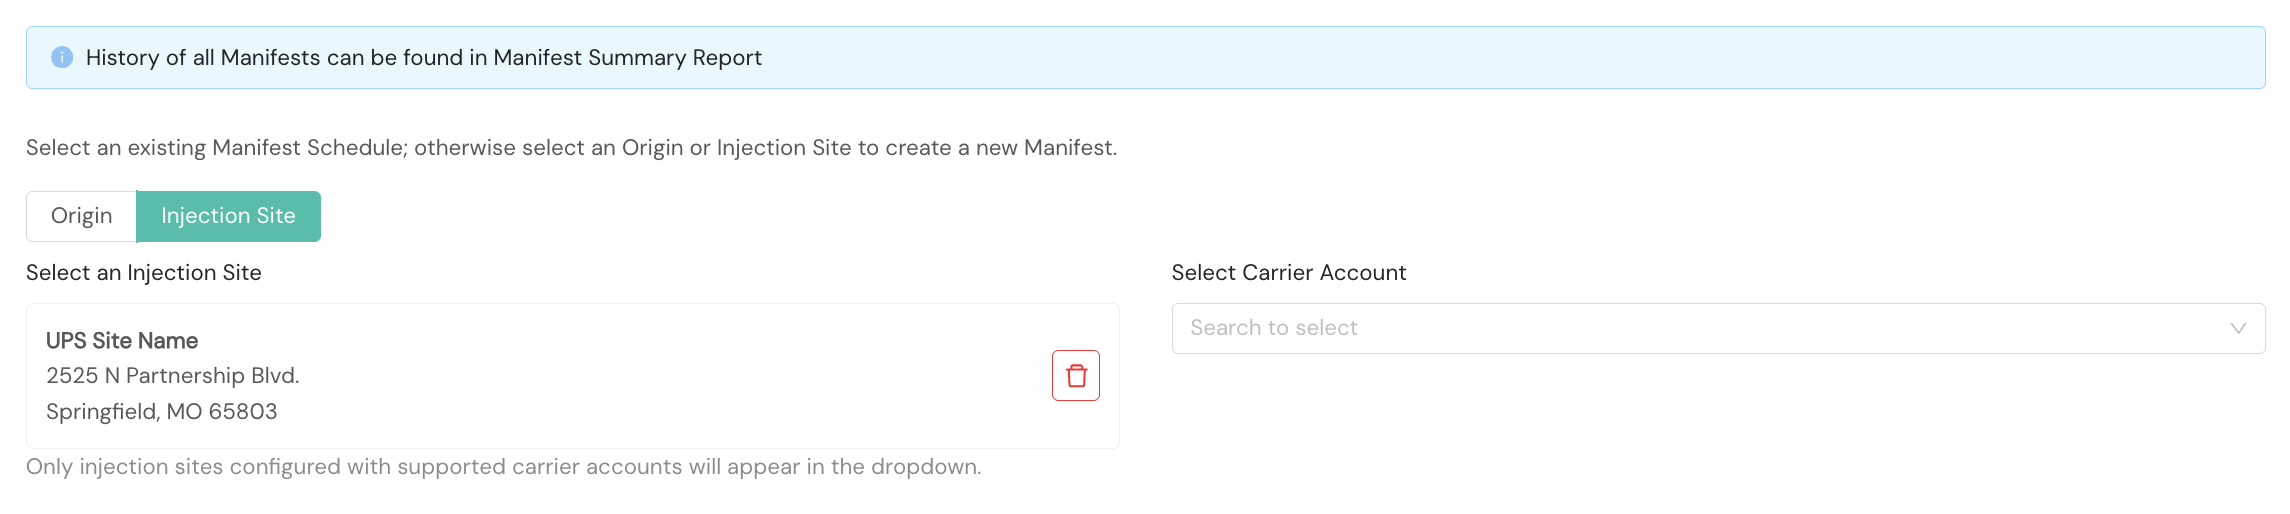
After choosing Manual Manifest, the page displays two tabs: Origin and Injection Site. Select the appropriate tab based on the location type for which you want to manually manifest.
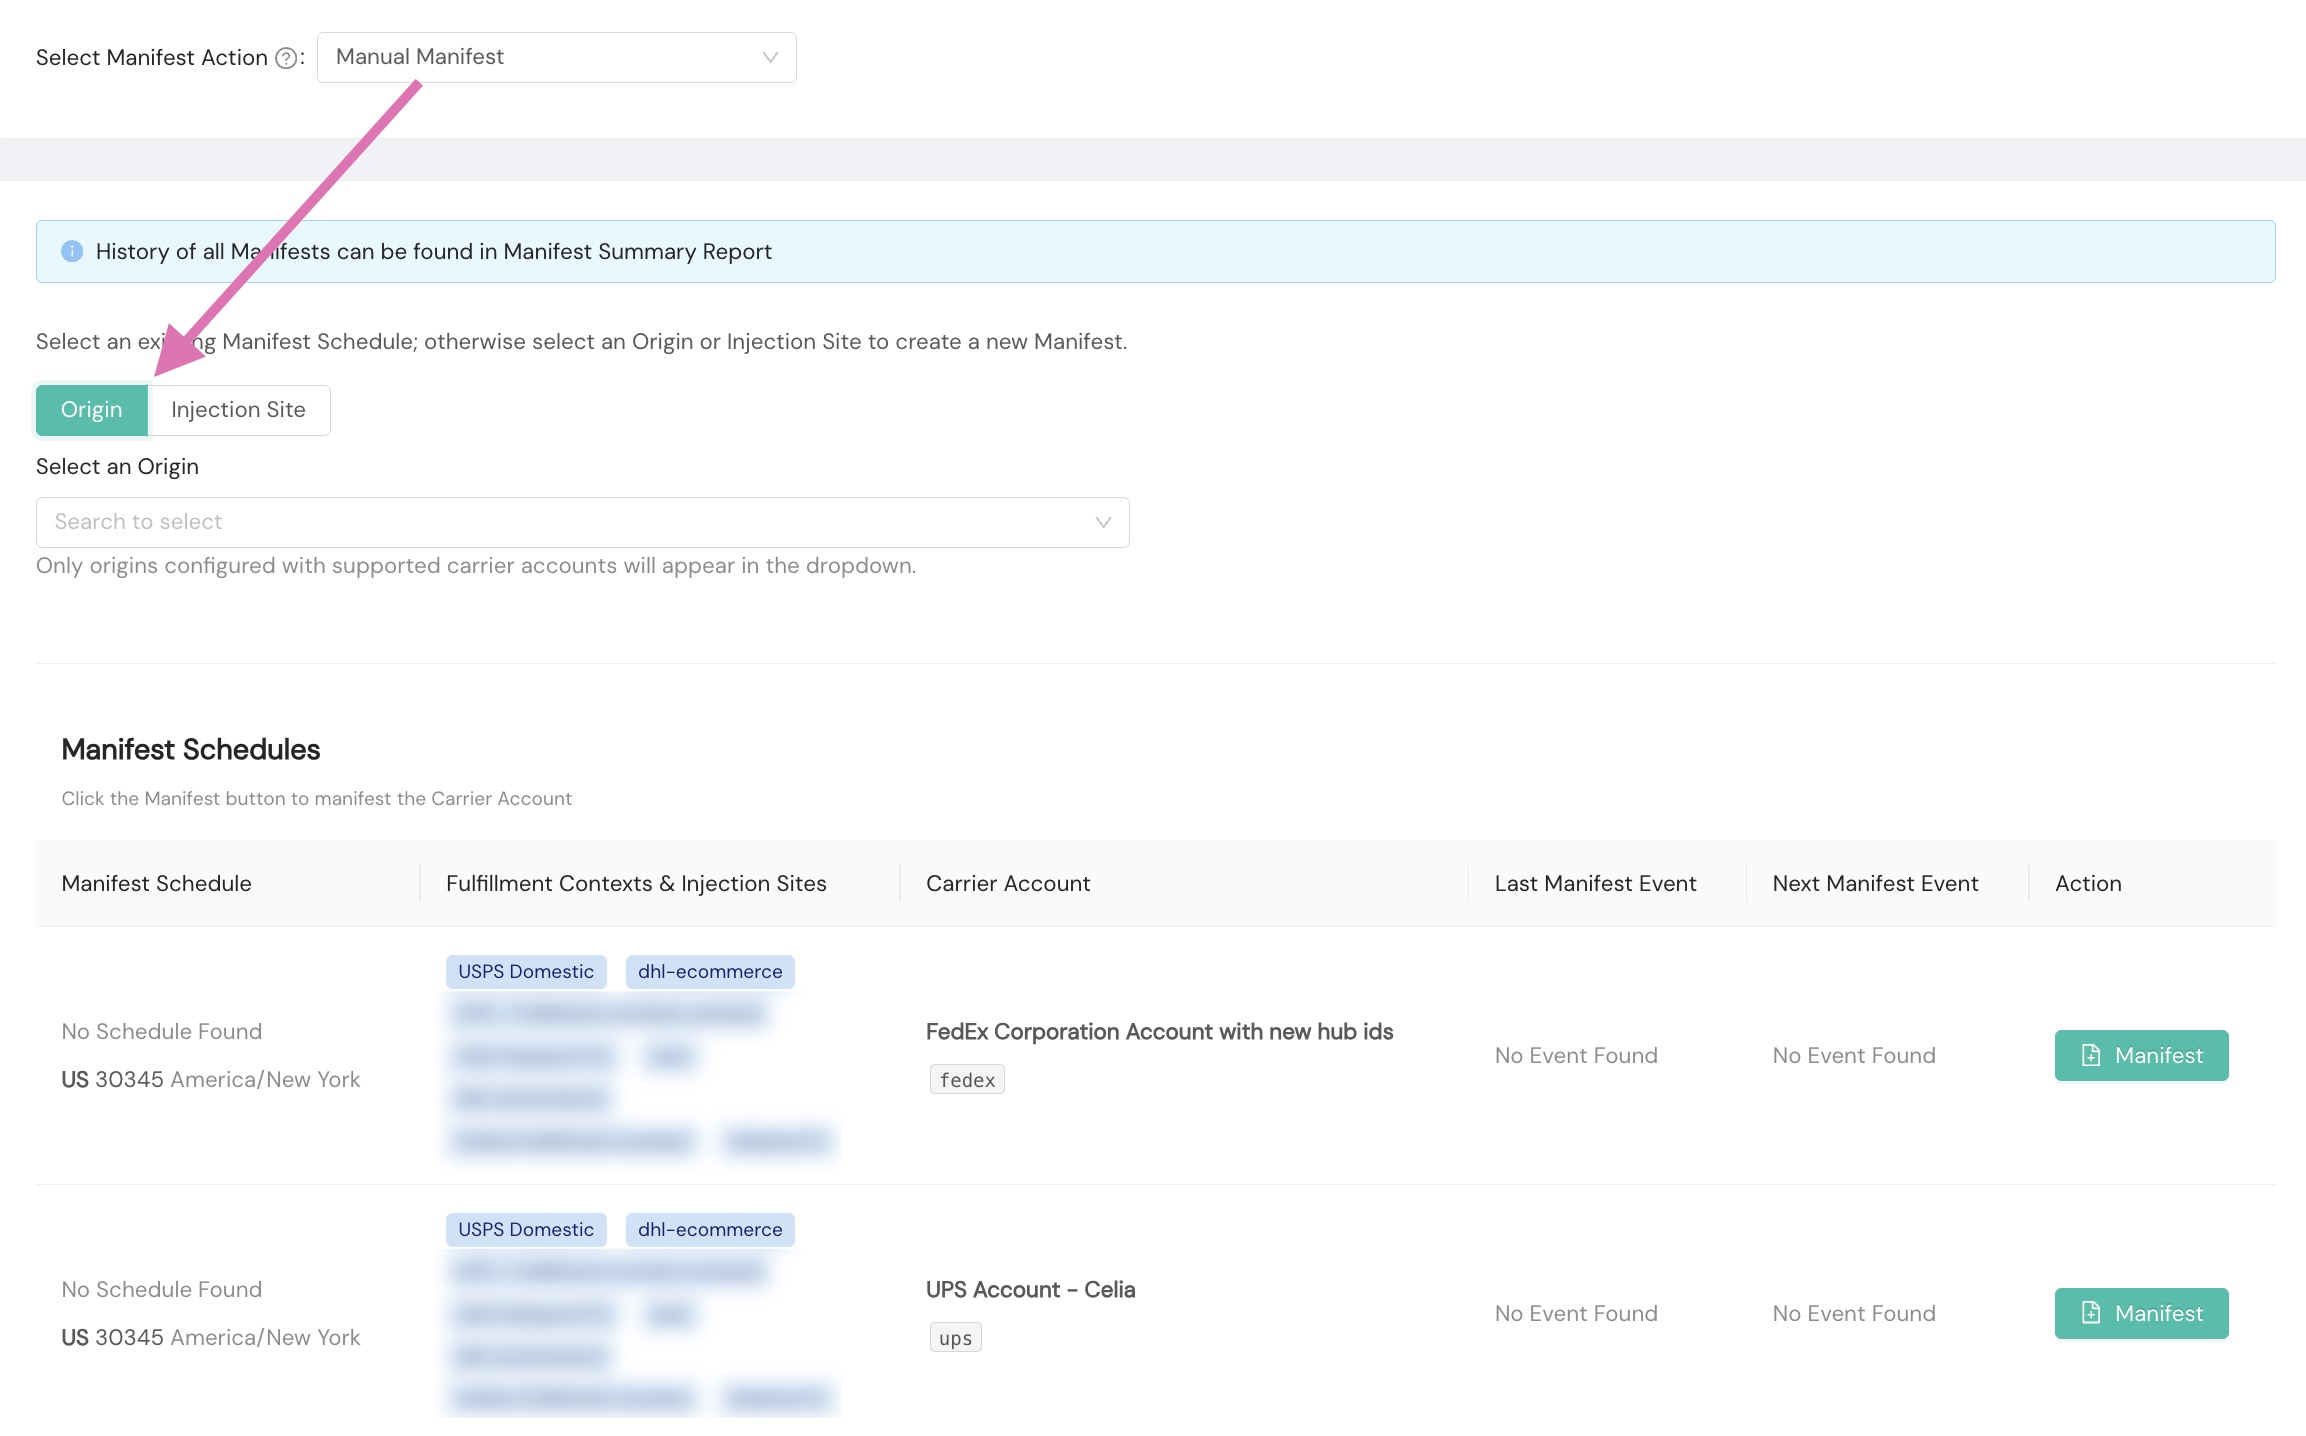
Depending on which tab you selected, you can use the Select an Origin or Select an Injection Site dropdown menu at the top of the page to filter the list to a specific location and then the Select Carrier Account dropdown.
If your fulfillment center (also referred to as a fulfillment context) or injection site already has a manifest schedule, you'll see it in the Manifest Schedules list and you can click the Manifest button to manually manifest for that location. Options associated with manually manifesting are explained below.

Generate a manifest report on demand
Historical manifestsIf you're looking for previous manifests, you can find your organization's manifesting history by using the primary Select Manifest Action menu to select Manifest Summary Report, where you'll find a history of all manifests.
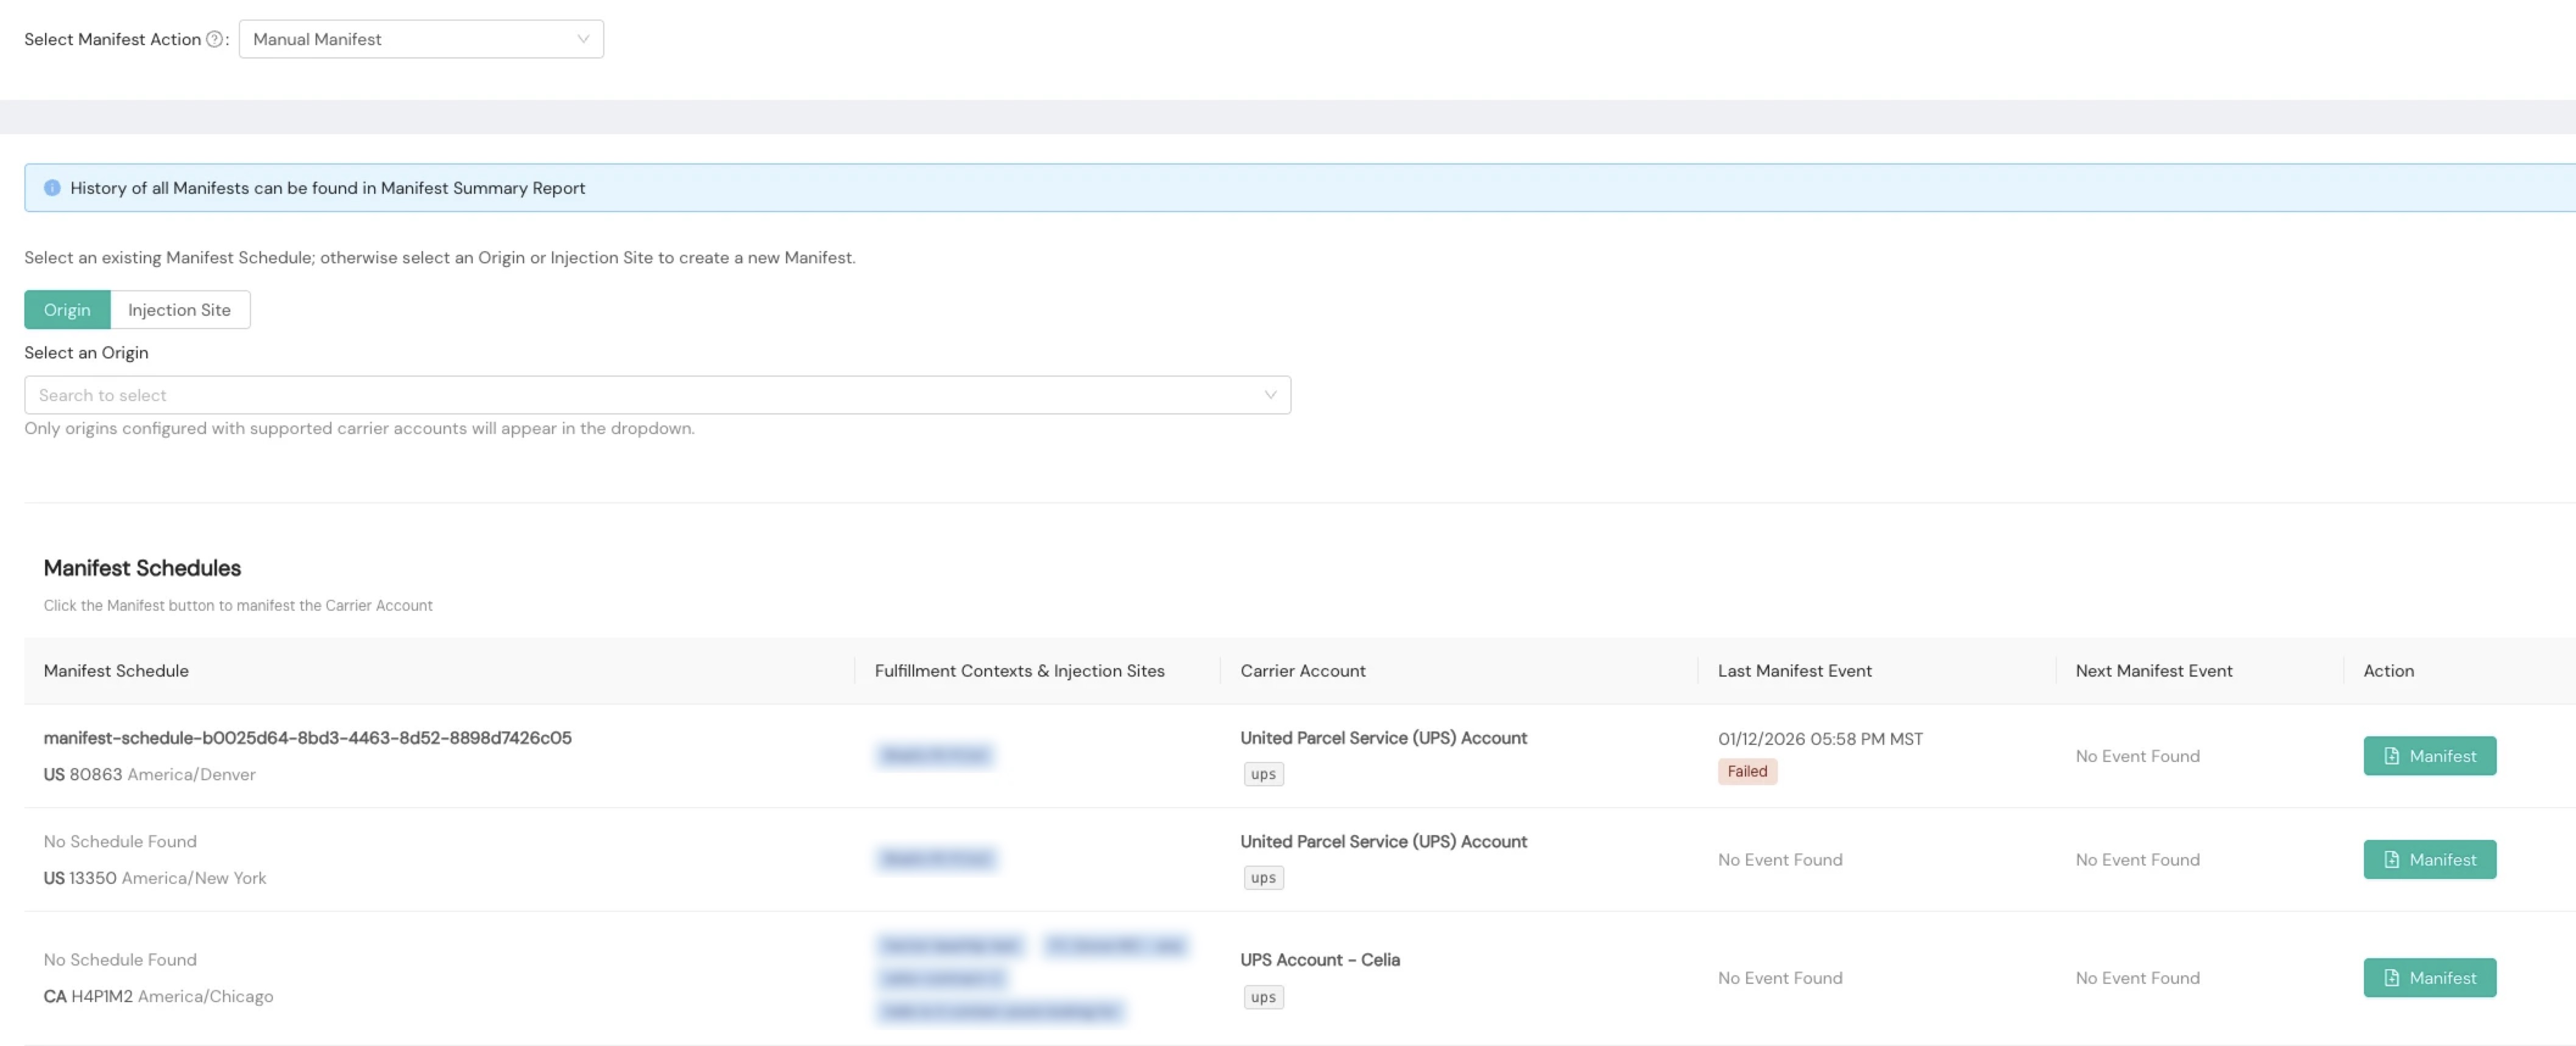
Your organization's list of existing manifest schedules for configured origins, also referred to as fulfillment contexts, and injection sites will appear. You can manually manifest any of them by clicking the Manifest button for the applicable row.
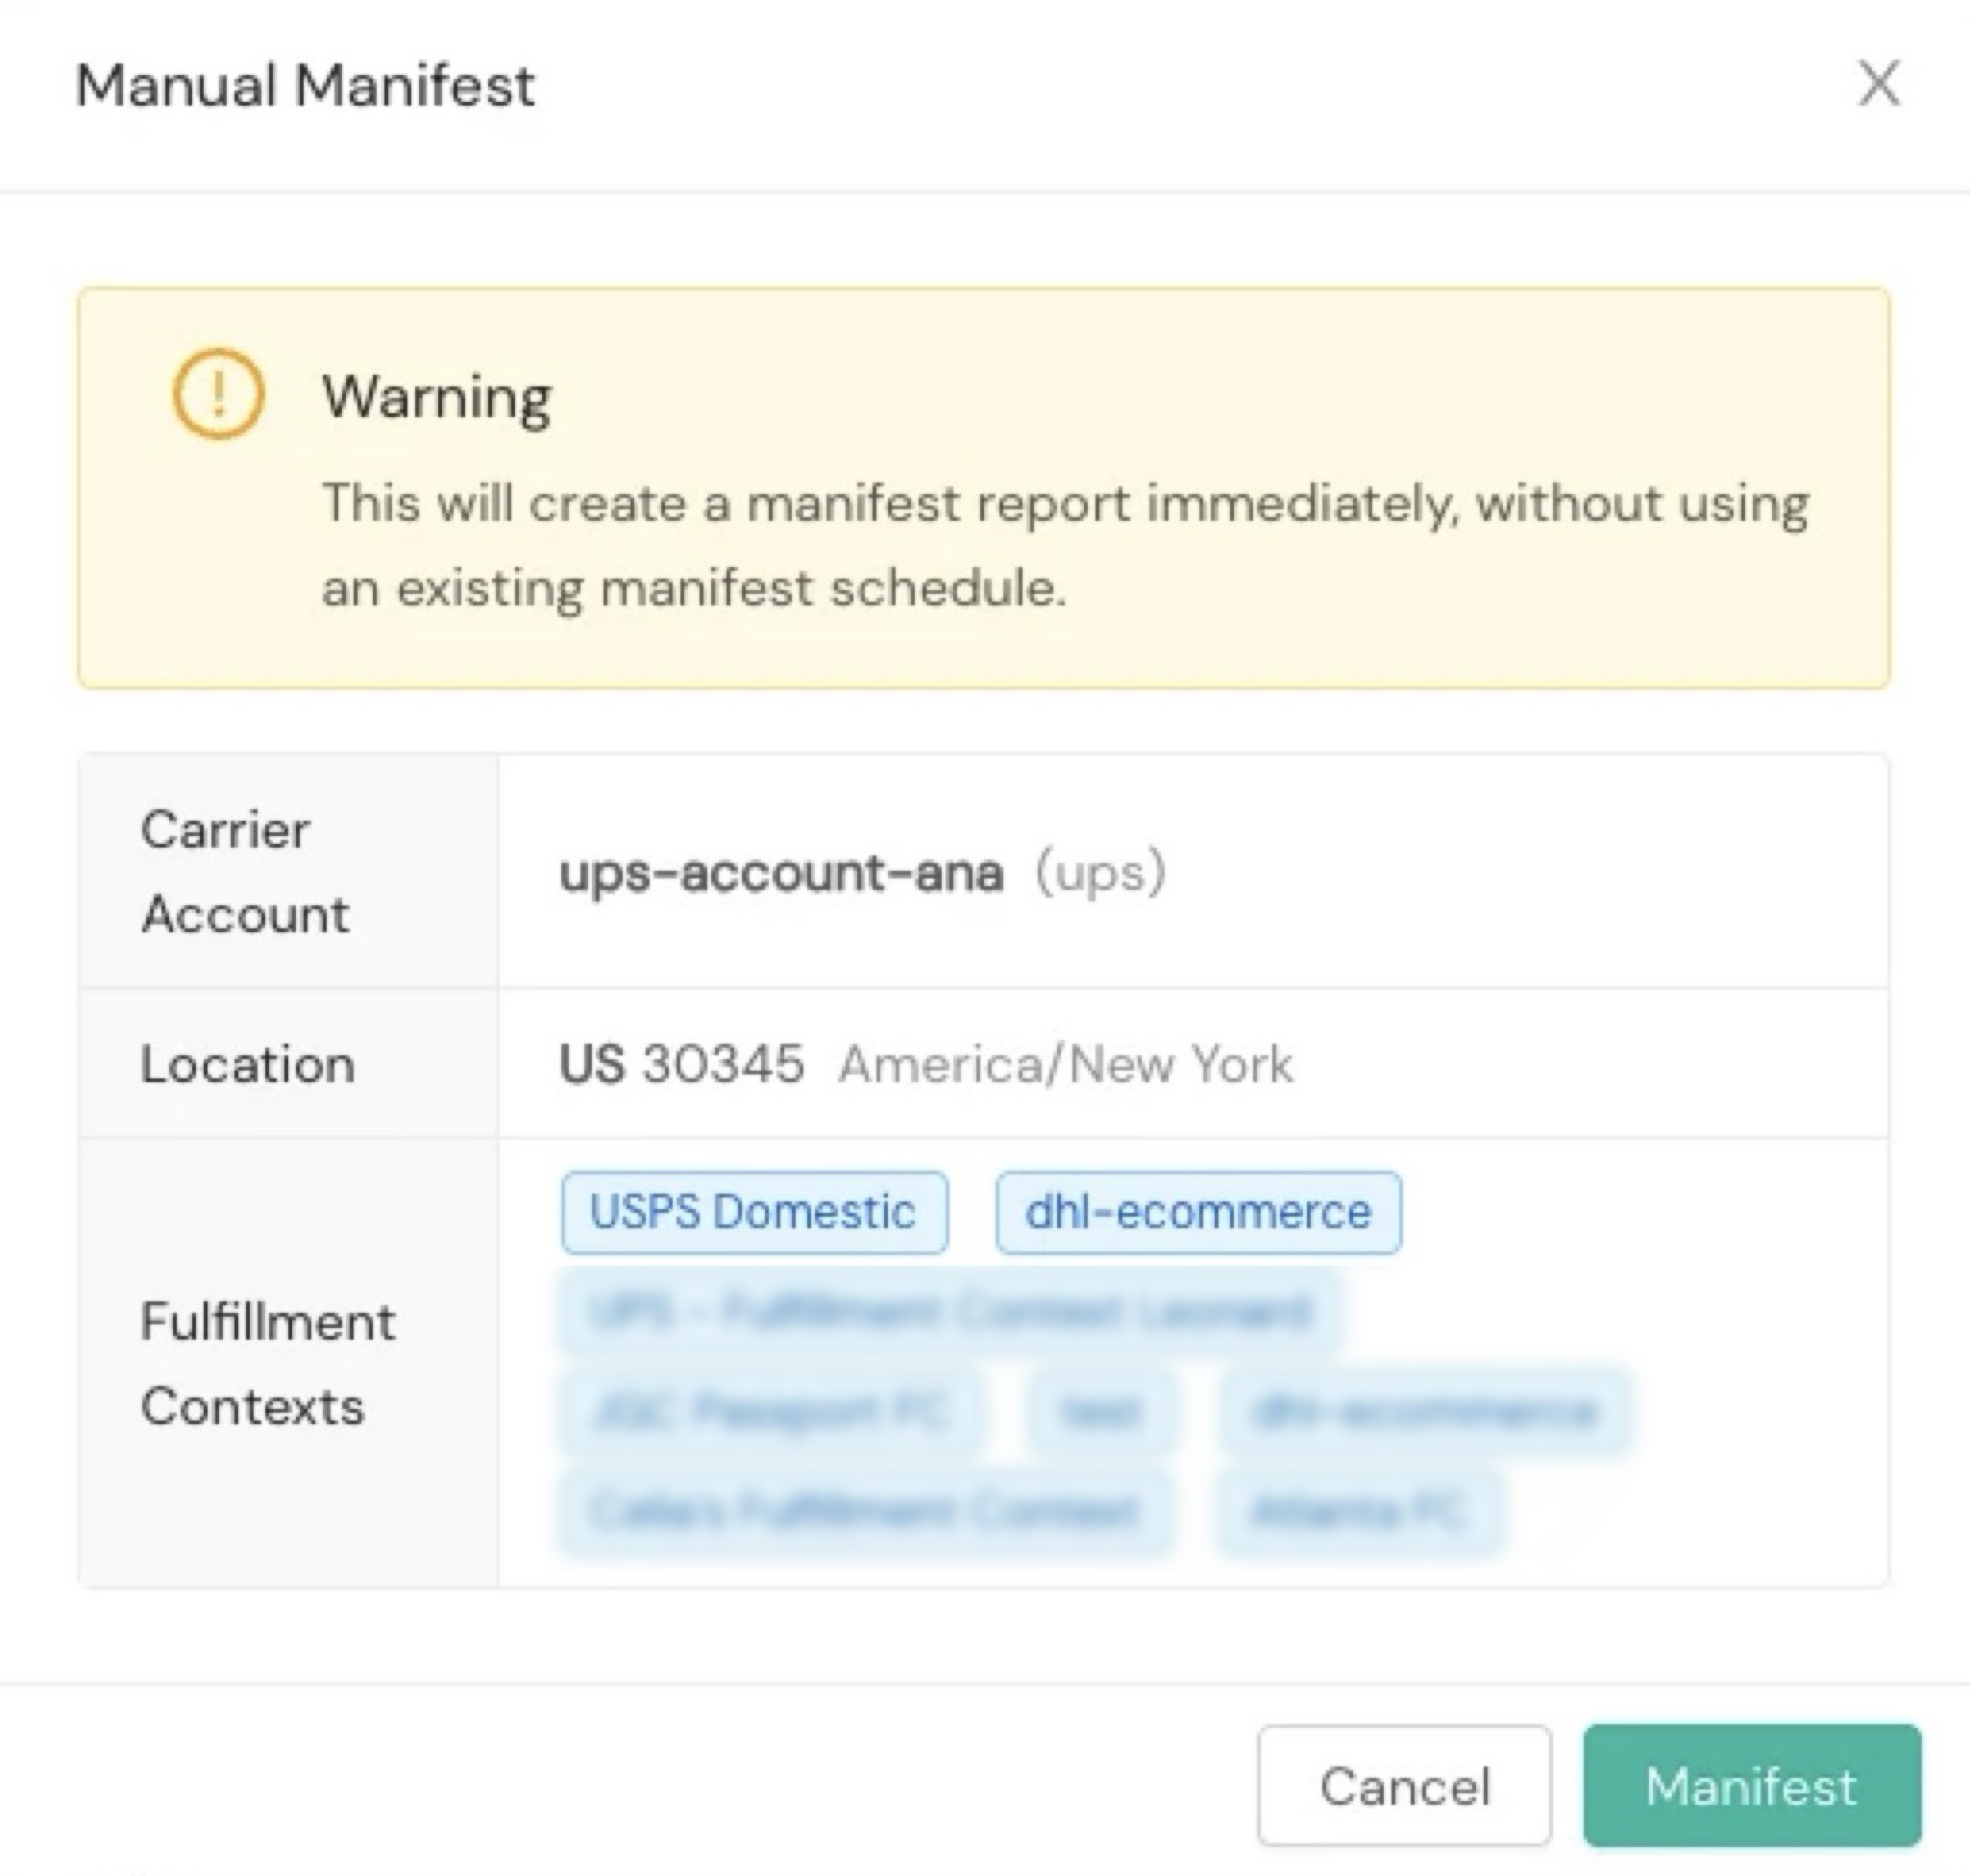
After clicking Manifest, you'll see a confirmation window for the manual manifest request.

Manually manifest a report without impacting upcoming scheduled manifesting
If the carrier account has an existing manifest schedule, selecting the Manifest button will enable you to create a manifest for the selected schedule without affecting future scheduled manifests, unless there is a manifest scheduled within the next hour. If there is an upcoming manifest within the hour, you'll need to override it to proceed.
A message alerting you that you're creating a manifest for the selected schedule will appear.
After you select the Manifest button, you'll be taken to the Manifest Summary Report homepage view of all your organization's manifest reports. The newest one you generated will appear at the top of the list.
Override a scheduled manifest
When you select the Manifest button for a carrier account with an existing manifest schedule, you can view the manifest schedule name and the next manifest event for the carrier account to ensure you're overriding the correct schedule.
If there is a manifest scheduled within one hour, a message will appear providing the option to Override or Manifest without Override.
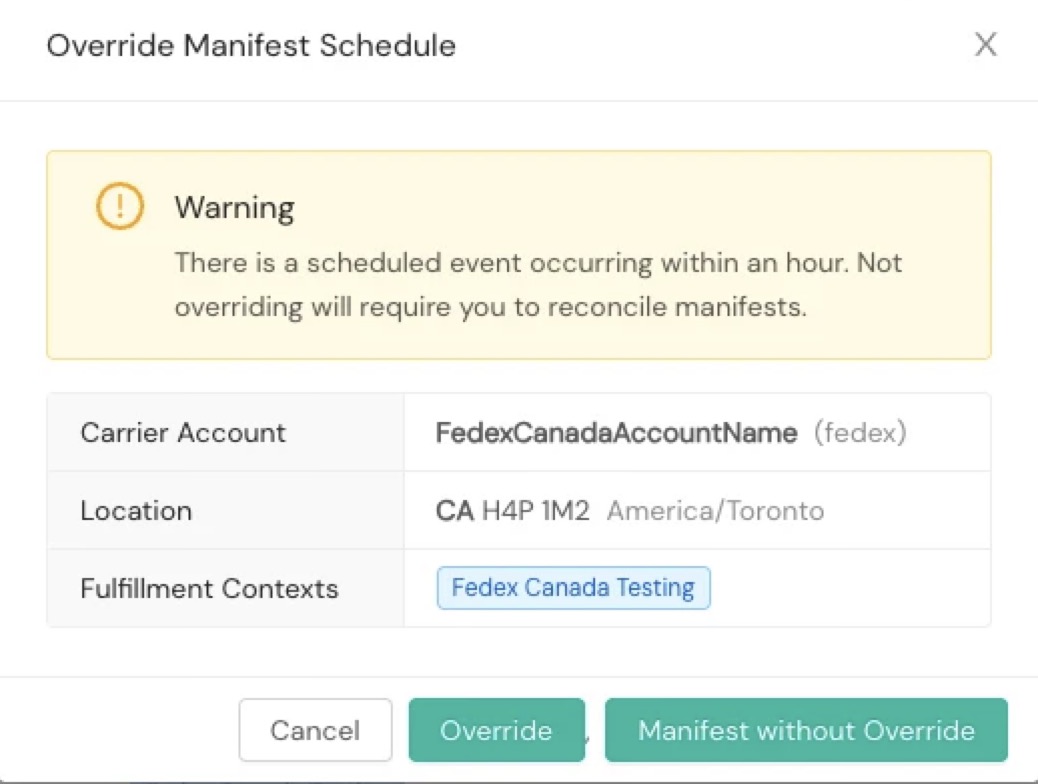
If you choose to Override the upcoming scheduled manifest, Shipium will add the override to the manifest schedule and start the manual manifesting process. The regular scheduled manifest will be disregarded for that one time.
If you elect to Manifest without Override, a manifest will be created for the carrier account immediately and the regular upcoming manifest will occur as scheduled.
Generate general manifest summary reports
To generate a general manifest report, you'll first log in to the Shipium Console and access Carrier Selection and then Manifest.

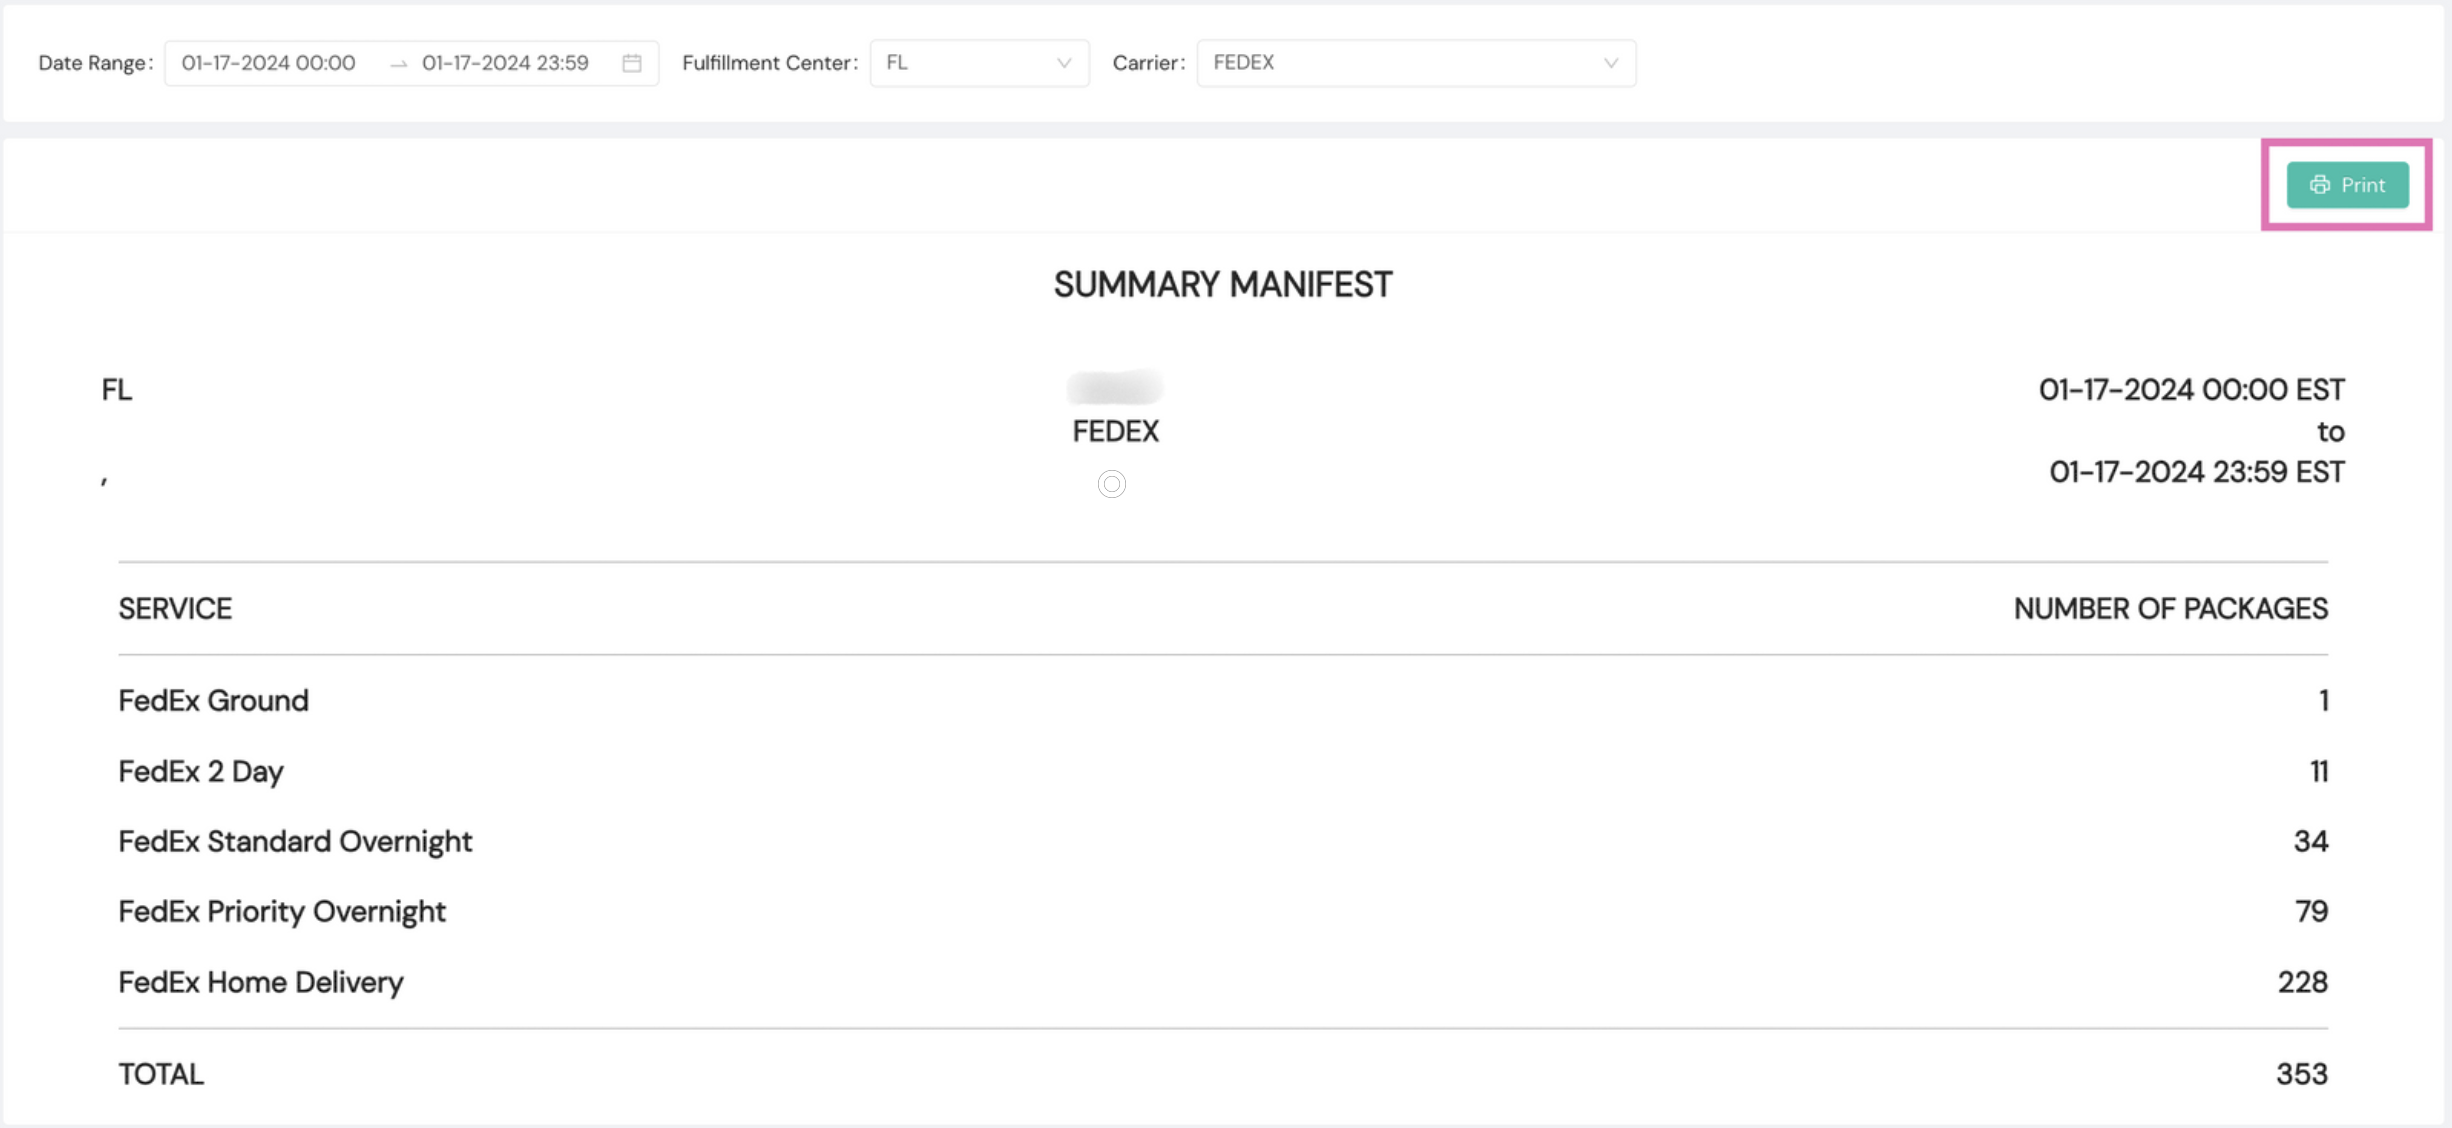
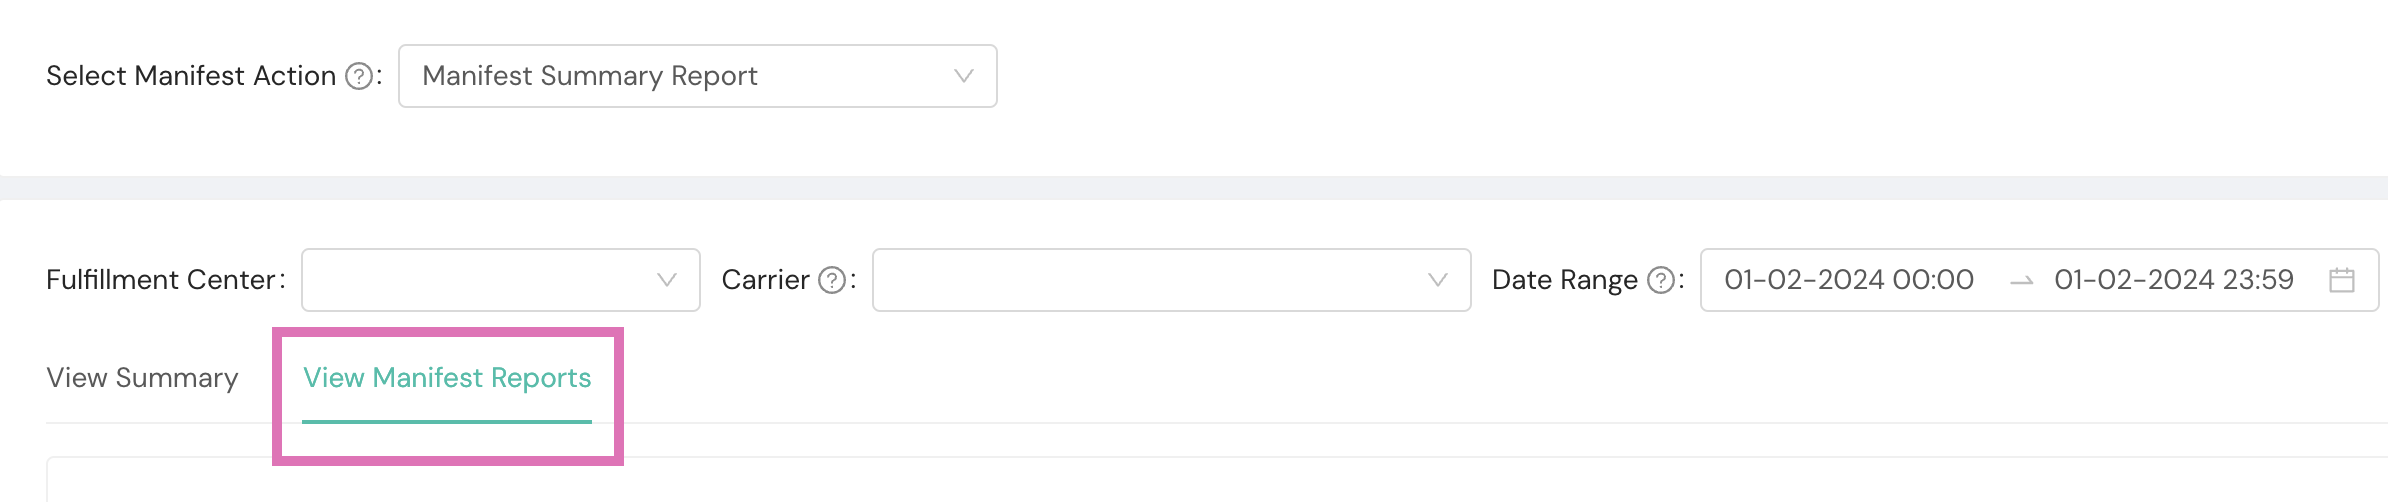
You'll see three data fields on the page: Fulfillment Center, Carrier, and Date Range.
- Fulfillment Center. Select the fulfillment center, or origin, for which you are manifesting the shipment.
- Carrier. Select the desired carrier from the dropdown menu.
- Date Range. Use the dropdown calendar to select your applicable date ranges for the shipment you wish to manifest.

Once you've selected your date range and fulfillment center and chosen your carrier, a general Summary Manifest report preview will be generated. You can select Print to print the report.
View past carrier shipment summary manifest reports
You can access your organization's record of manual manifests via the Shipium Console.
- As with setting up your organization's manual manifesting, in the lefthand navigation menu, select Carrier Selection and then Manifest.
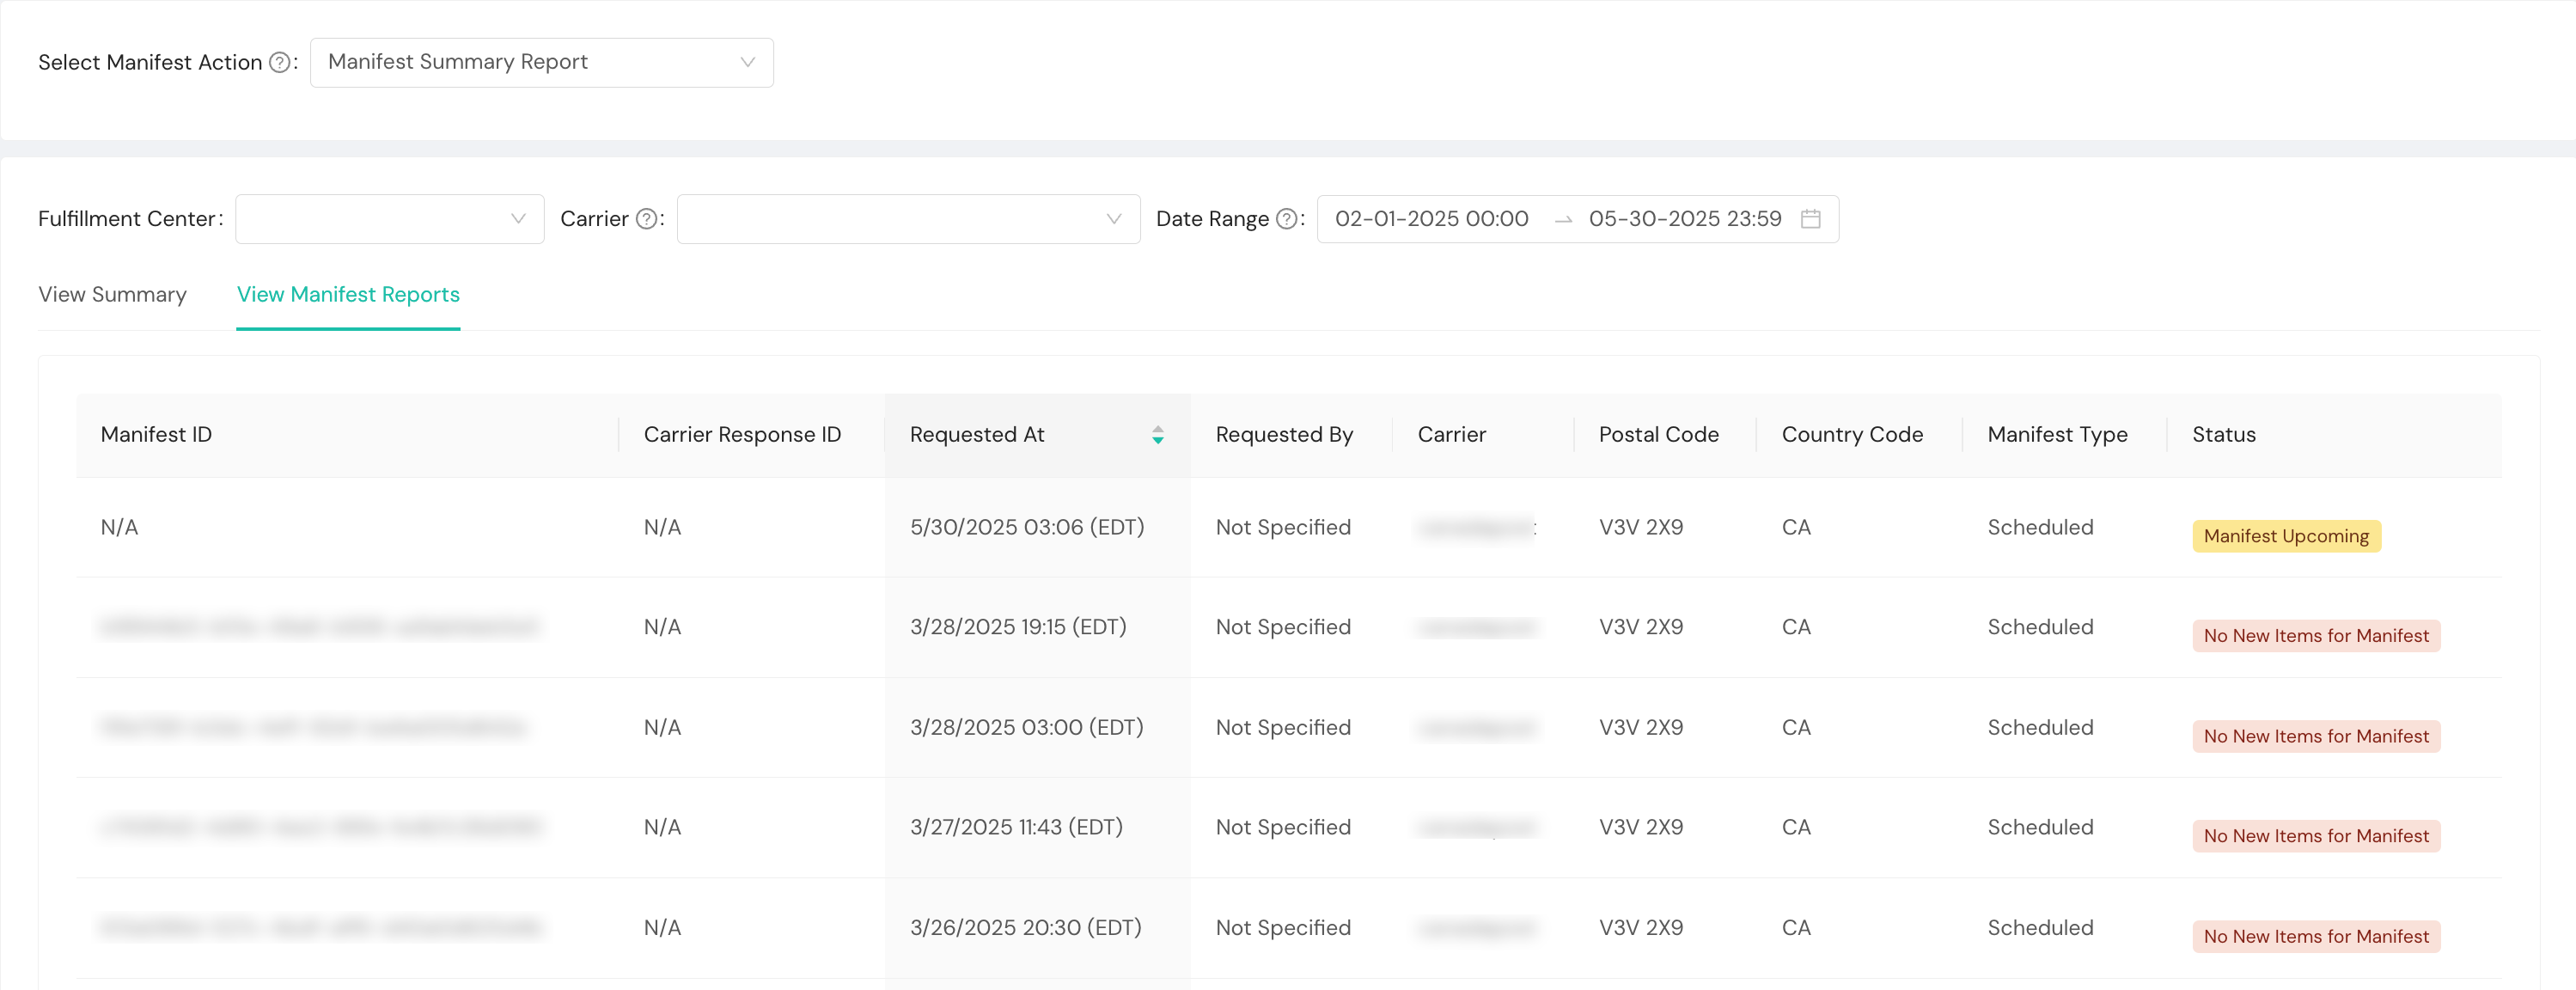
- You'll need to complete the three required fields: Fulfillment Center, Carrier, and Date Range. Then you will select the View Manifest Reports button.
- You should now see a list of your organization's past shipment summary manifest reports applicable to your selected date range and fulfillment center, any of which you can download as a PDF file by selecting the Download Report button next to the report. If the report is unable to be downloaded, the Download Report button will be replaced with a download status, such as "Manifest Upcoming".
FAQ
Q: How long can I access a manifest report in the Shipium Console?
A: You can retrieve previous manifesting reports for up to one calendar year in the console.
Q: Can I schedule multiple pickups in one day when using scheduled manifesting?
A: Yes, you can customize your scheduled manifesting to occur multiple times in a day for a fulfillment center.
Resources
Your Shipium team member is available to help along the way. However, you might find these resources helpful: