
Billing Management
Shipium's billing management platform provides a comprehensive process to handle outbound parcel customer invoicing and payment collection.
About Billing Management
Billing Management enables you to oversee aspects of customer invoicing and payment collection for goods or services provided via outbound parcel delivery. Shipium's billing management system ensures that billing is accurate and enables your organization to make cost-optimization decisions in your operations.
To efficiently handle and streamline financial transactions associated with billing, our platform adheres to the following key goals:
- Accuracy. Billing information is correct, including rates, quantities, and total amounts, to minimize errors and discrepancies.
- Efficiency. Automation and optimization of the billing process reduce manual effort, speed up invoicing, and enhance overall operational efficiency.
- Timeliness. Prompt generation and delivery of invoices helps to avoid delays in payment and improve cash flow.
- Reporting and analysis. Reports and billing data analysis provide insights into financial performance and trends.
Who uses Billing Management
Billing Management is available to organizations that need to manage carrier cost reconciliation and customer invoicing for outbound parcel shipments. This includes:
- 3PL organizations. Third-party logistics providers who manage shipping for multiple tenants (customers) and need to generate invoices, apply markup rates, and track margins across their customer base. 3PL users typically configure billing contracts at the partner level, then set up tenant contracts, sell rate sheets, and billing schedules to automate invoicing for each of their customers. 3PL organizations are typically configured with a tenant view.
- Enterprise organizations. Large shippers who want to reconcile carrier invoices against their shipment data, track shipping costs, and gain visibility into carrier billing accuracy. Enterprise users benefit from carrier transaction search, billing error identification, and cost reporting features. Enterprise organizations are typically configured with a partner view.
Your organization's use case determines which Billing Management features are most relevant. Contact your Shipium representative to discuss your requirements and ensure the platform is configured for your needs.
SSO configuration is the first stepPrior to your organization using billing management features in the Shipium Console, you'll need to complete single sign-on (SSO) configuration for your network and users. You can find guidance in the SSO for Your Shipium Account documentation.
Initial configurationBilling Management requires initial configuration by Shipium before your organization can begin using the platform. This includes carrier account mapping, billing preferences, and other foundational settings. Your Shipium representative will work with you to complete this setup during onboarding. Contact your Shipium representative if you have questions about your billing configuration.
Within Billing Management, your organization can:
- Create invoices and view invoice details
- Add tenants and view tenant contracts (primarily for 3PL organizations)
- Add and view billing schedules
- Add and view sell rate sheets (primarily for 3PL organizations)
- Add and view service level mappings
- Configure carrier zone mapping
- View and reconcile billing errors
This document provides guidance for using Billing Management in the console.
Set up your fulfillment contextYou will need to configure network settings via Shipium's fulfillment context workflow to use Billing Management. The Fulfillment Contexts documentation provides more information.
Carrier Selection customersThe Billing Management service is currently optimized for customers using Shipium's Carrier Selection service. If your organization does not use Carrier Selection, contact your Shipium representative to discuss Billing Management configuration options for your use case.
Partner and tenant views
What you see in Billing Management depends on how your organization is configured. Shipium configures your organization during onboarding based on your use case:
- Partner view is for organizations that manage their own shipping and billing without tenants. You'll see billing data and configuration options for your organization's shipping operations. This view is typical for enterprise shippers.
- Tenant view is for organizations (such as 3PLs) that manage billing across multiple tenants (customers). You'll see tenant-specific billing data and configuration options for managing individual customer relationships, including tenant contracts, sell rate sheets, and tenant attribution.
Your Shipium representative will confirm which view is configured for your organization. If you have questions about your configuration, contact your Shipium representative.
Partner view navigation
Organizations configured with a partner view have access to the following Billing Management features:
- Invoices. View and manage invoices for your organization.
- Carrier Transactions. Search and manage carrier transaction records.
- Billing Contracts. Configure carrier billing contracts for the partner, including currency and applicable date range.
- Billing Schedules. Set up automated invoice generation schedules.
- Billing Webhooks. Register webhooks to receive invoice event notifications.
- Service Level Mappings. Map carrier service levels to standardized categories.
- Zone Mapping. Configure billing zone mappings for rate calculations.
- Billing Errors. Review and resolve billing errors.
Tenant view navigation
Organizations configured with a tenant view have access to the following Billing Management features:
- Invoices. View and manage invoices at the partner level and for individual tenants.
- Carrier Transactions. Search and manage carrier transaction records, with the ability to filter by tenant.
- Tenant Contracts. Configure billing contracts specific to each tenant.
- Sell Ratesheets. Define the rates charged to each tenant for shipping services.
- Billing Schedules. Set up automated invoice generation schedules for your tenants.
- Billing Webhooks. Register webhooks to receive invoice event notifications.
- Service Level Mappings. Map carrier service levels to standardized categories.
- Zone Mapping. Configure billing zone mappings for rate calculations.
- Billing Errors. Review and resolve billing errors.
Feature availability by view
Most Billing Management features are available in both views, but some features are specific to how your organization is configured:
| Feature | Partner view | Tenant view |
|---|---|---|
| Billing Contracts | ✅ Available | — |
| Tenant Contracts | — | ✅ Available |
| Sell Rate Sheets | — | ✅ Available |
In addition to navigation differences, some pages display different filters and columns depending on your organization's view. For example, organizations with a tenant view see additional Tenant filters and columns on the Invoices and Carrier Transactions pages.
Getting started with Billing Management
When you first access Billing Management, a guided tour helps you understand the key features and recommended setup sequence.
Billing console overview
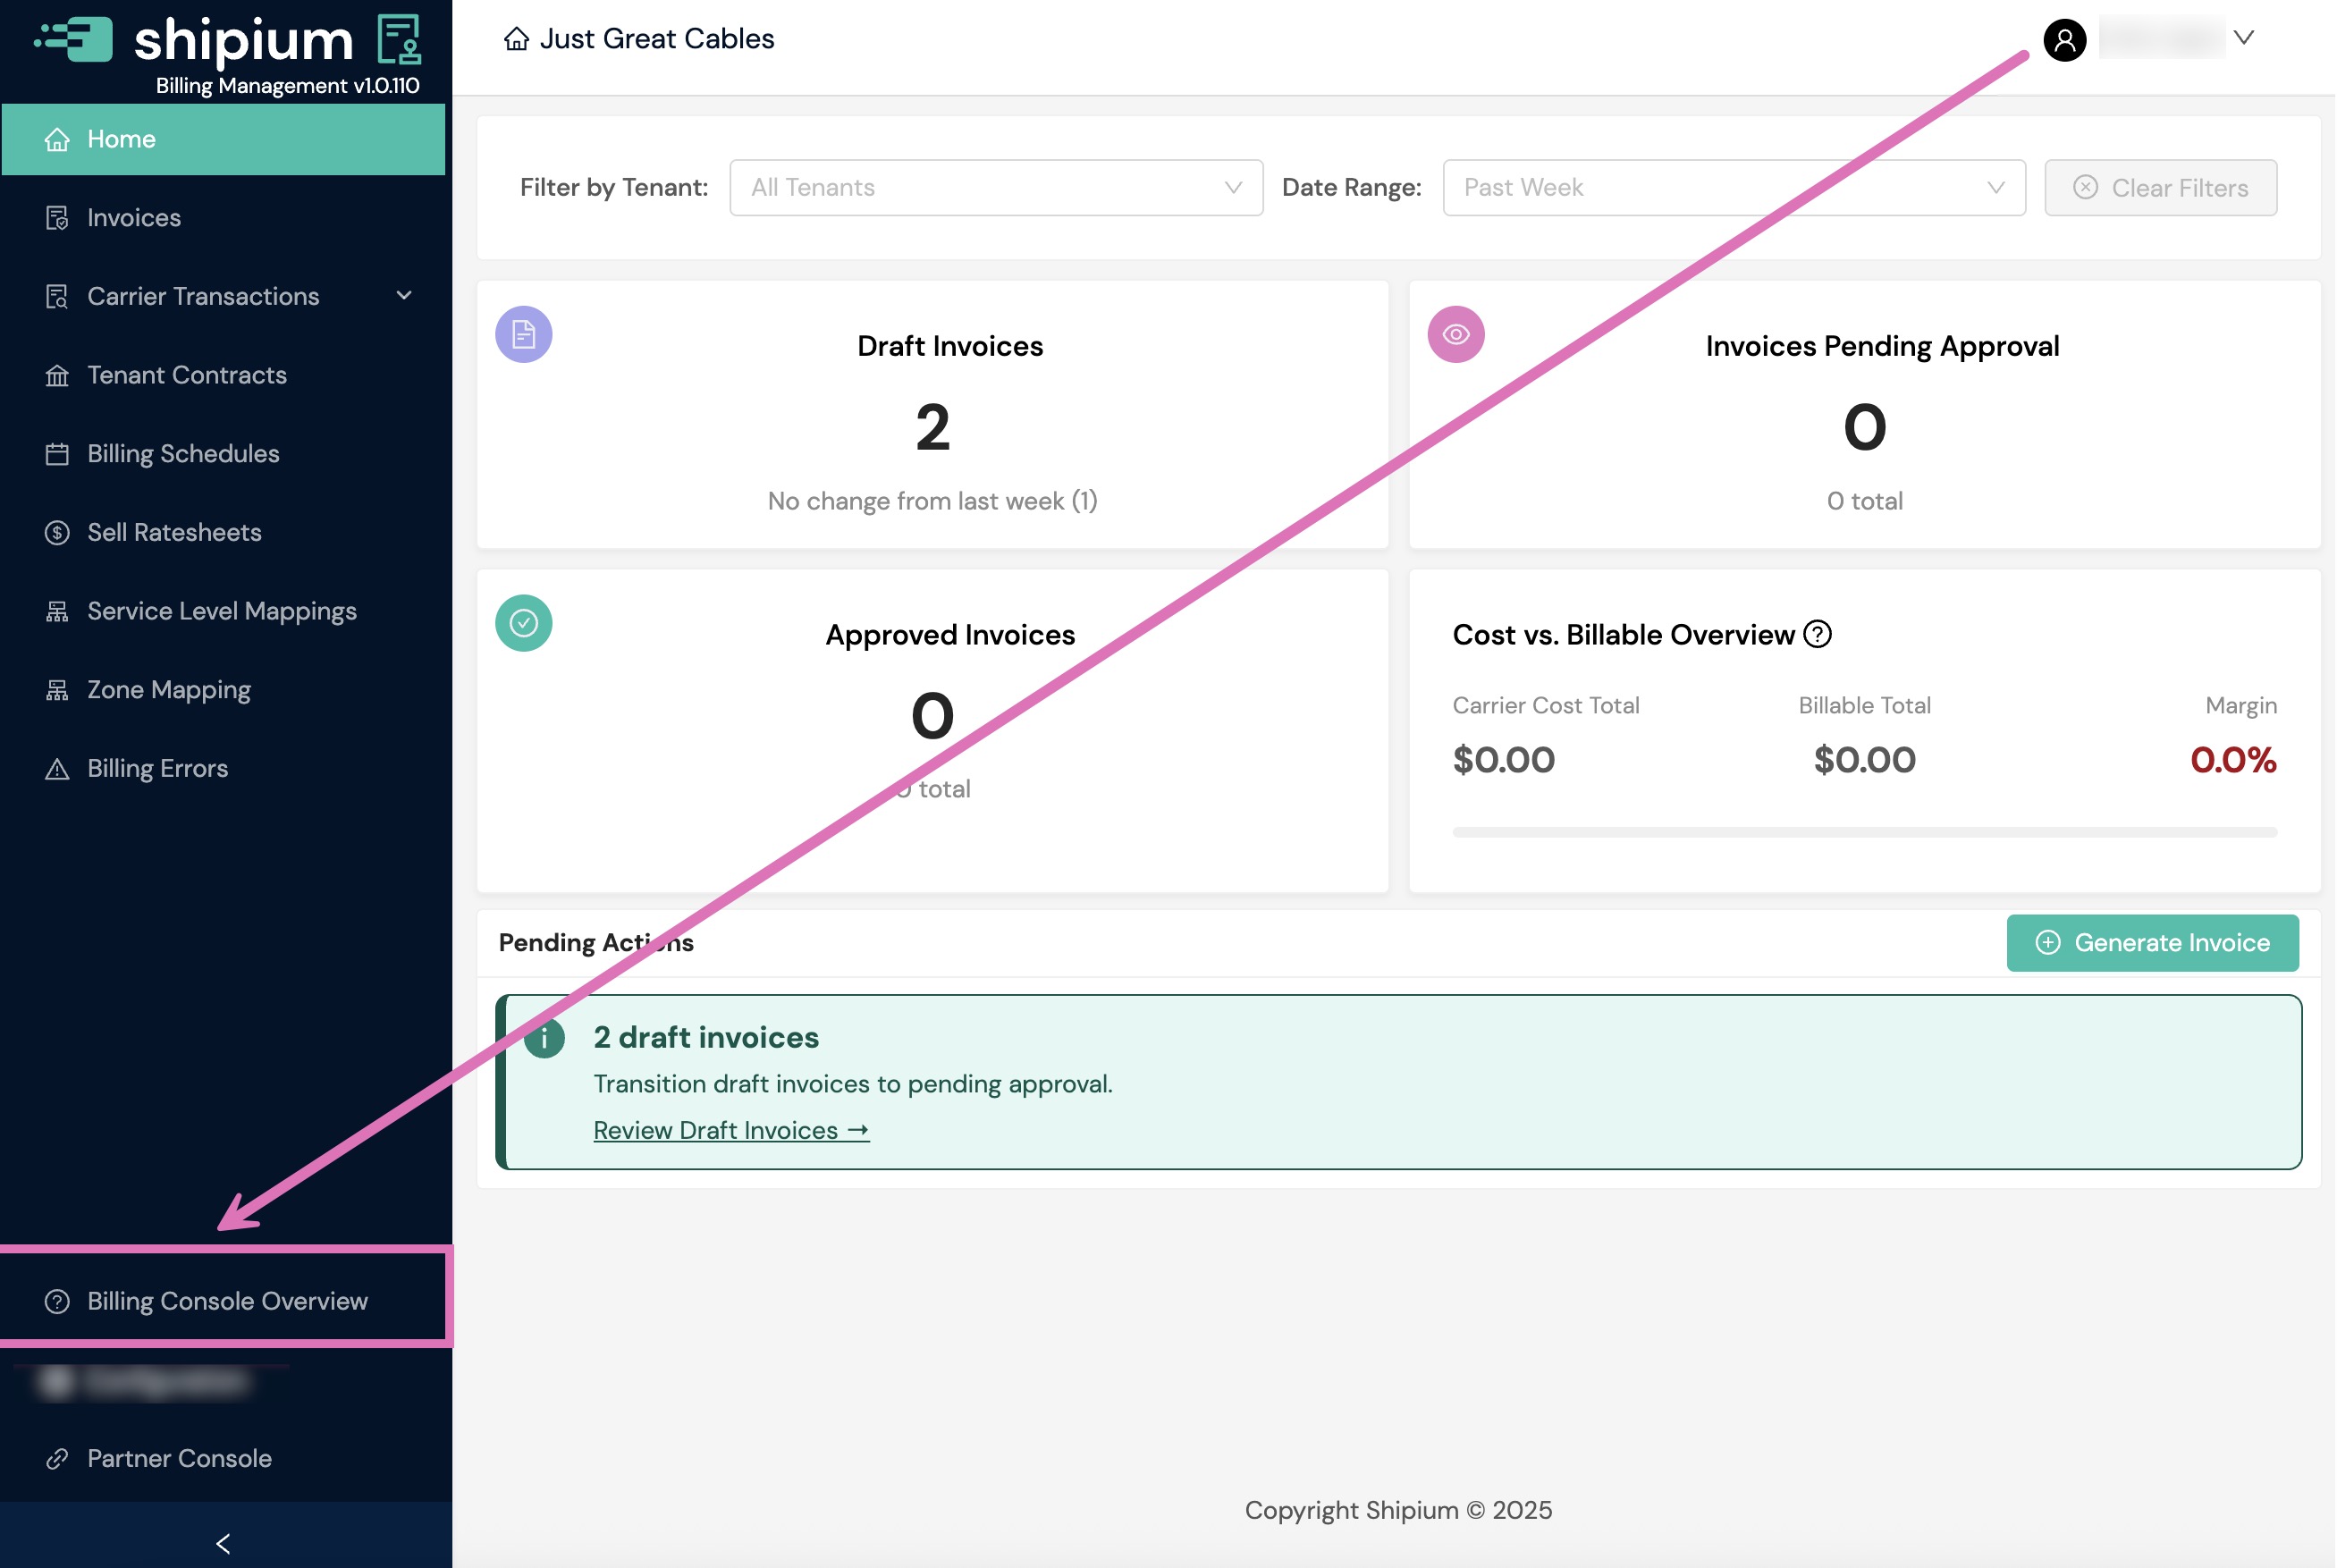
To access the guided tour at any time, select Billing Console Overview from the bottom of the lefthand navigation menu.
Select Start Tour to begin the guided walkthrough. The tour introduces six key components of the billing system in the recommended setup sequence: Sell Rate Sheets, Billing Zone Maps, Service Level Mappings, Schedules, Tenants, and Invoices. The tour is oriented toward tenant view features. If your organization is configured with a partner view, some tour steps (such as Sell Rate Sheets and Tenants) may reference features not available in your view. See Feature availability by view for details.
As you progress through the tour, you can select Get Started for any component to go directly to that section and begin configuration. You can return to the tour at any time, and completed steps are marked with a checkmark in the right-hand progress panel.
You can also access any component at any time from the lefthand navigation menu.
Recommended setup sequenceFor new Billing Management users, we recommend completing setup in the order presented in the tour: start with sell rate sheets and zone maps, then configure service level mappings and schedules, followed by tenant setup. Once configuration is complete, you can begin generating invoices.
Access Billing Management
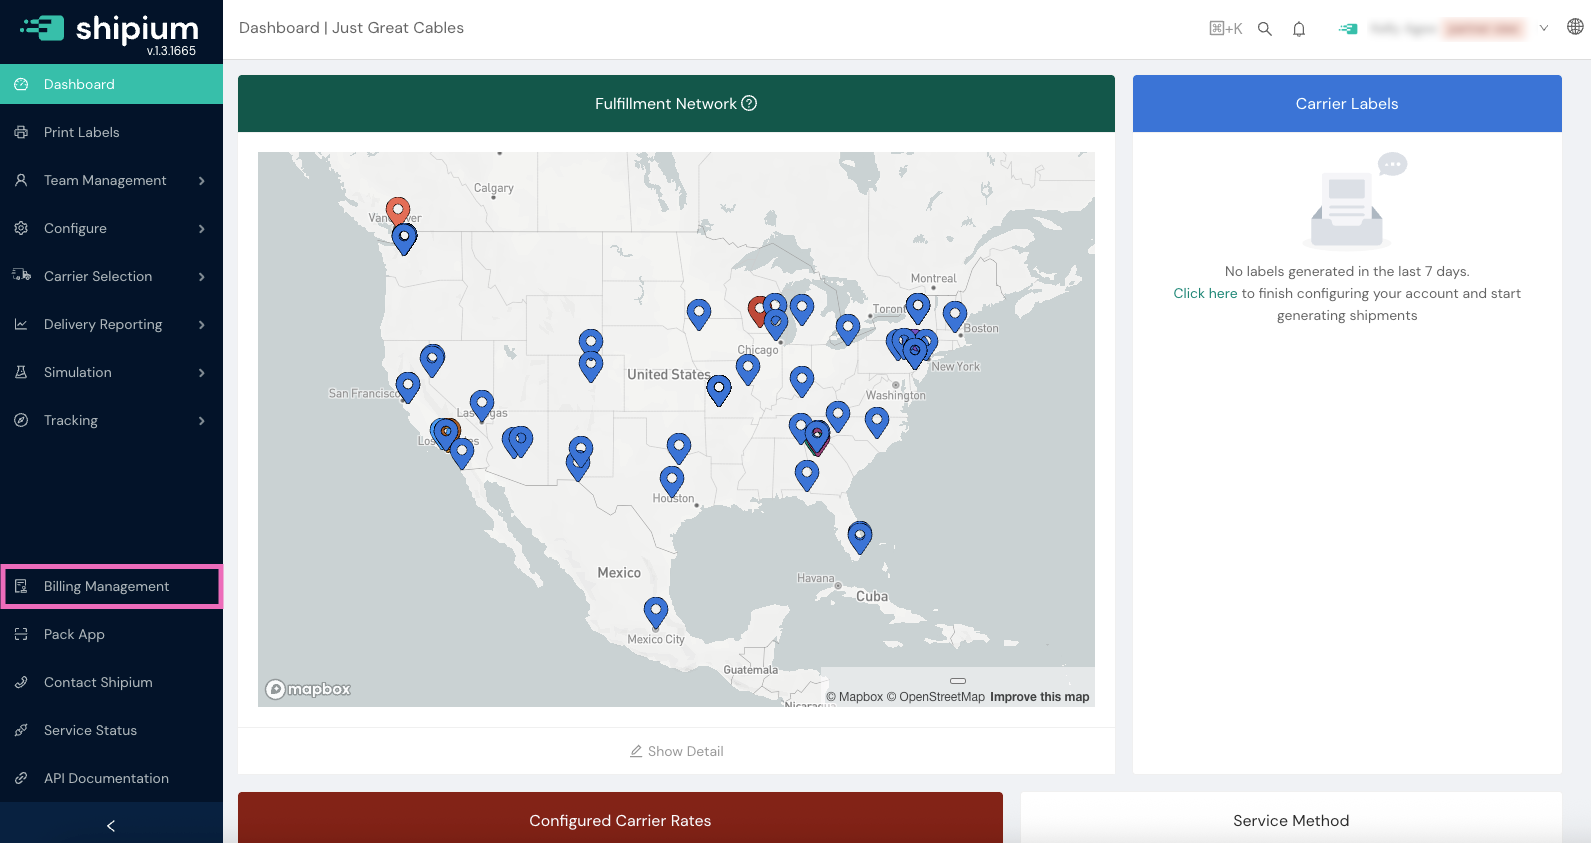
To begin, you'll log in to the Shipium Console and select Billing Management from the lefthand navigation menu.
On the Billing Management home screen, a summary of your invoices shows how many invoices you have in Draft, Pending Approval, or Approved status, along with your cost margin. You can filter invoice sets by tenant and date range. Each invoice status card displays whether the number of invoices has increased or decreased since the previous time period.
Pending Actions
The Pending Actions section at the bottom of the home screen highlights items that need your attention, with direct links to resolve them:
- Draft invoices. Invoices ready to transition to Pending Approval status. Select Review Draft Invoices to view and submit them.
- Billing errors. Transactions with configuration issues (such as missing sell rate sheets). Select the review link to identify and resolve the errors.
- Unattributed transactions. Carrier transactions that need tenant assignment. Select Review Unattributed Transactions to assign them to the appropriate tenant. This pending action is visible to organizations configured with a tenant view.
Each pending action displays a count and a brief description of what needs to be done.
In addition, you can create an invoice from this page by selecting the + Generate Invoice button.

The Cost vs. Billable Overview section provides key financial metrics at a glance:
- Carrier Cost Total. The total amount charged by carriers for all shipments within the selected time period.
- Billable Total. The total amount billed to your customers for all shipments within the selected time period.
- Margin. The percentage difference between your Billable Total and Carrier Cost Total, calculated as: (Billable Total - Carrier Cost Total) / Billable Total × 100.
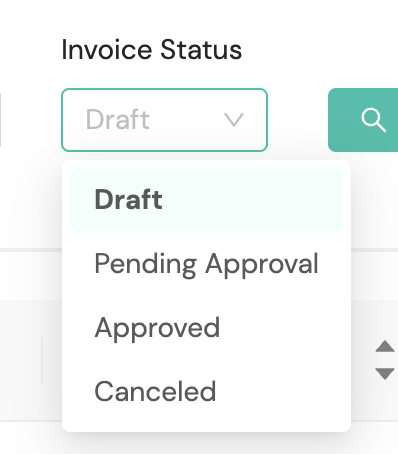
Clicking on any of the invoice status cards on the home page takes you to the home Invoices page with that particular type of invoice, whether Draft, Pending Approval, or Approved, selected from the Invoice Status dropdown.
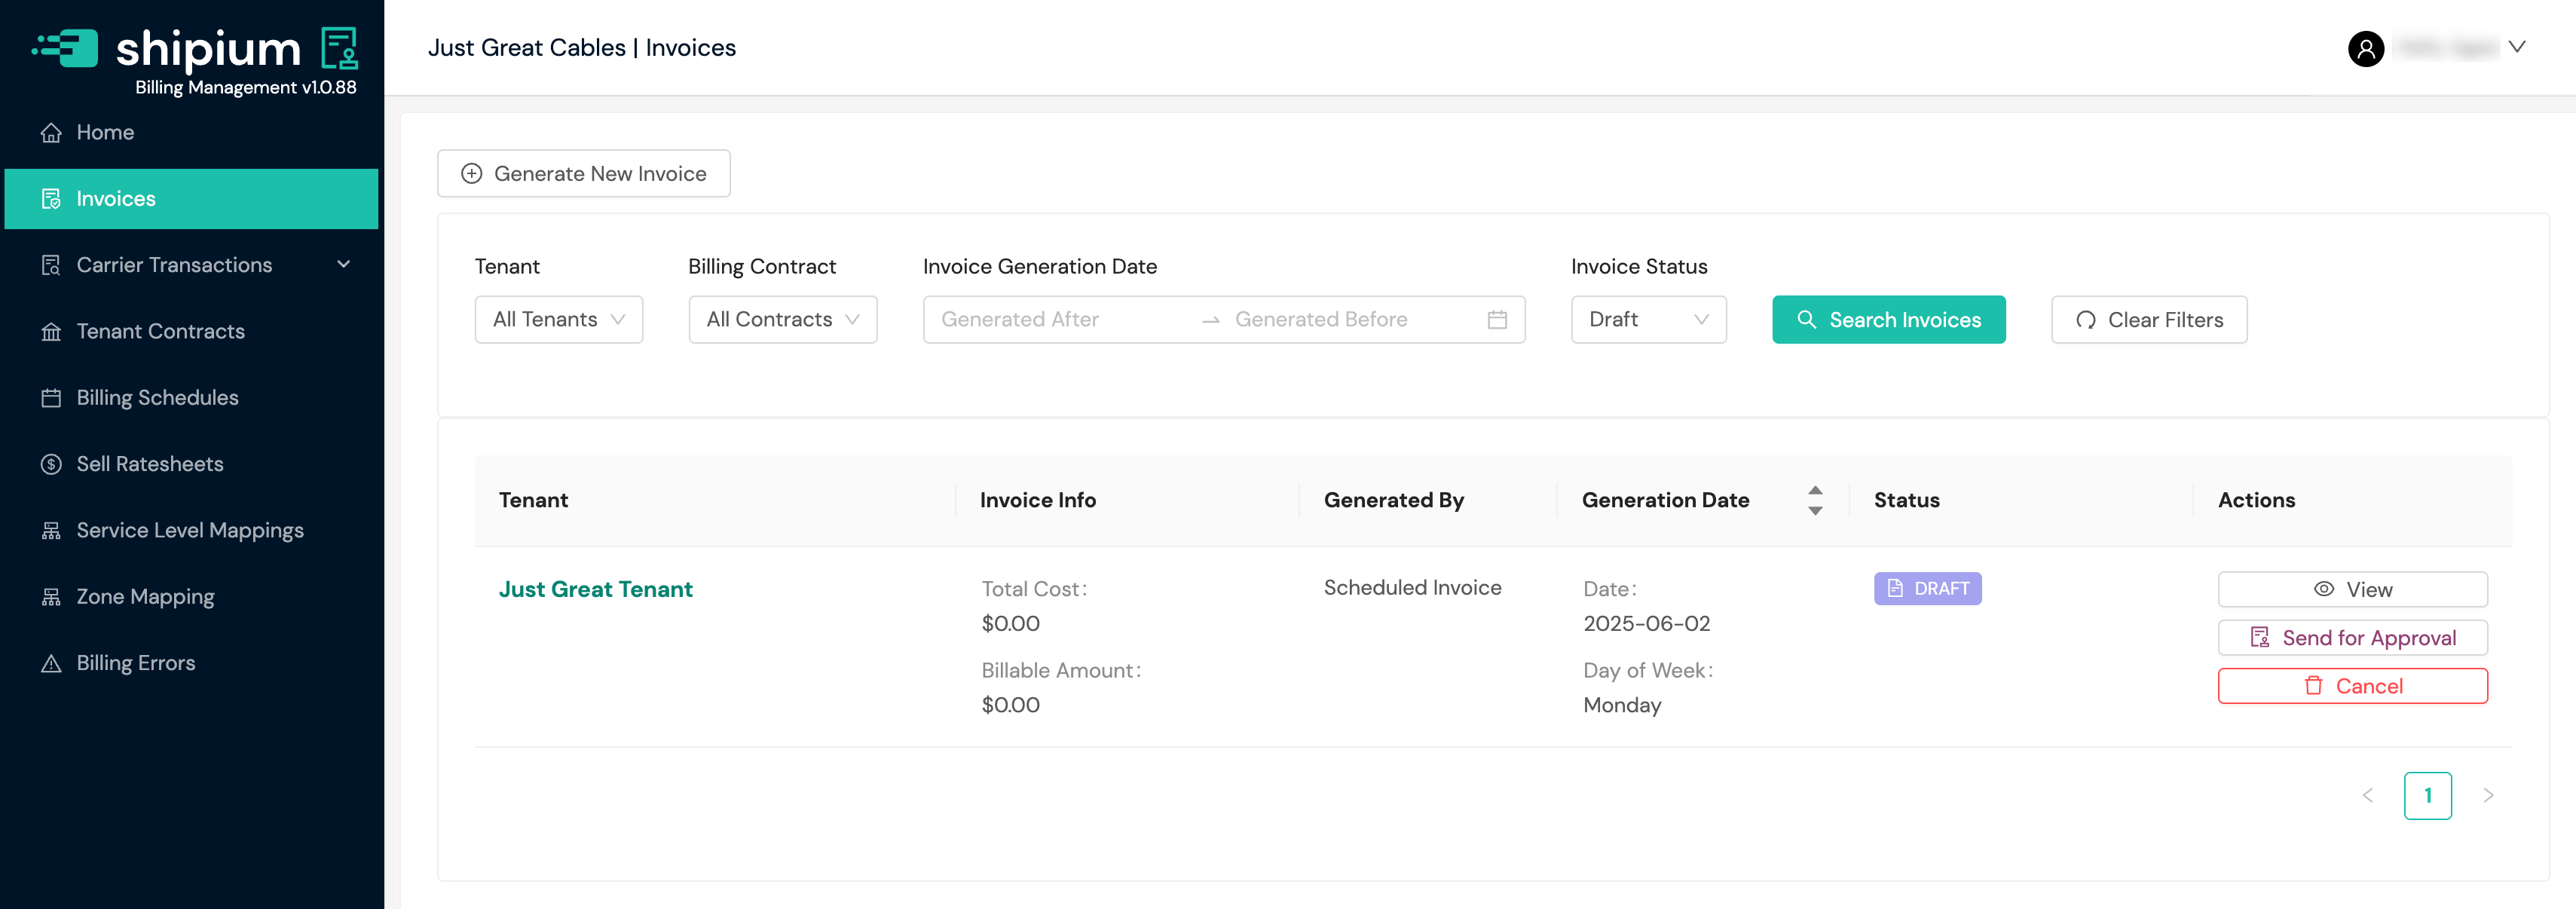
Invoices
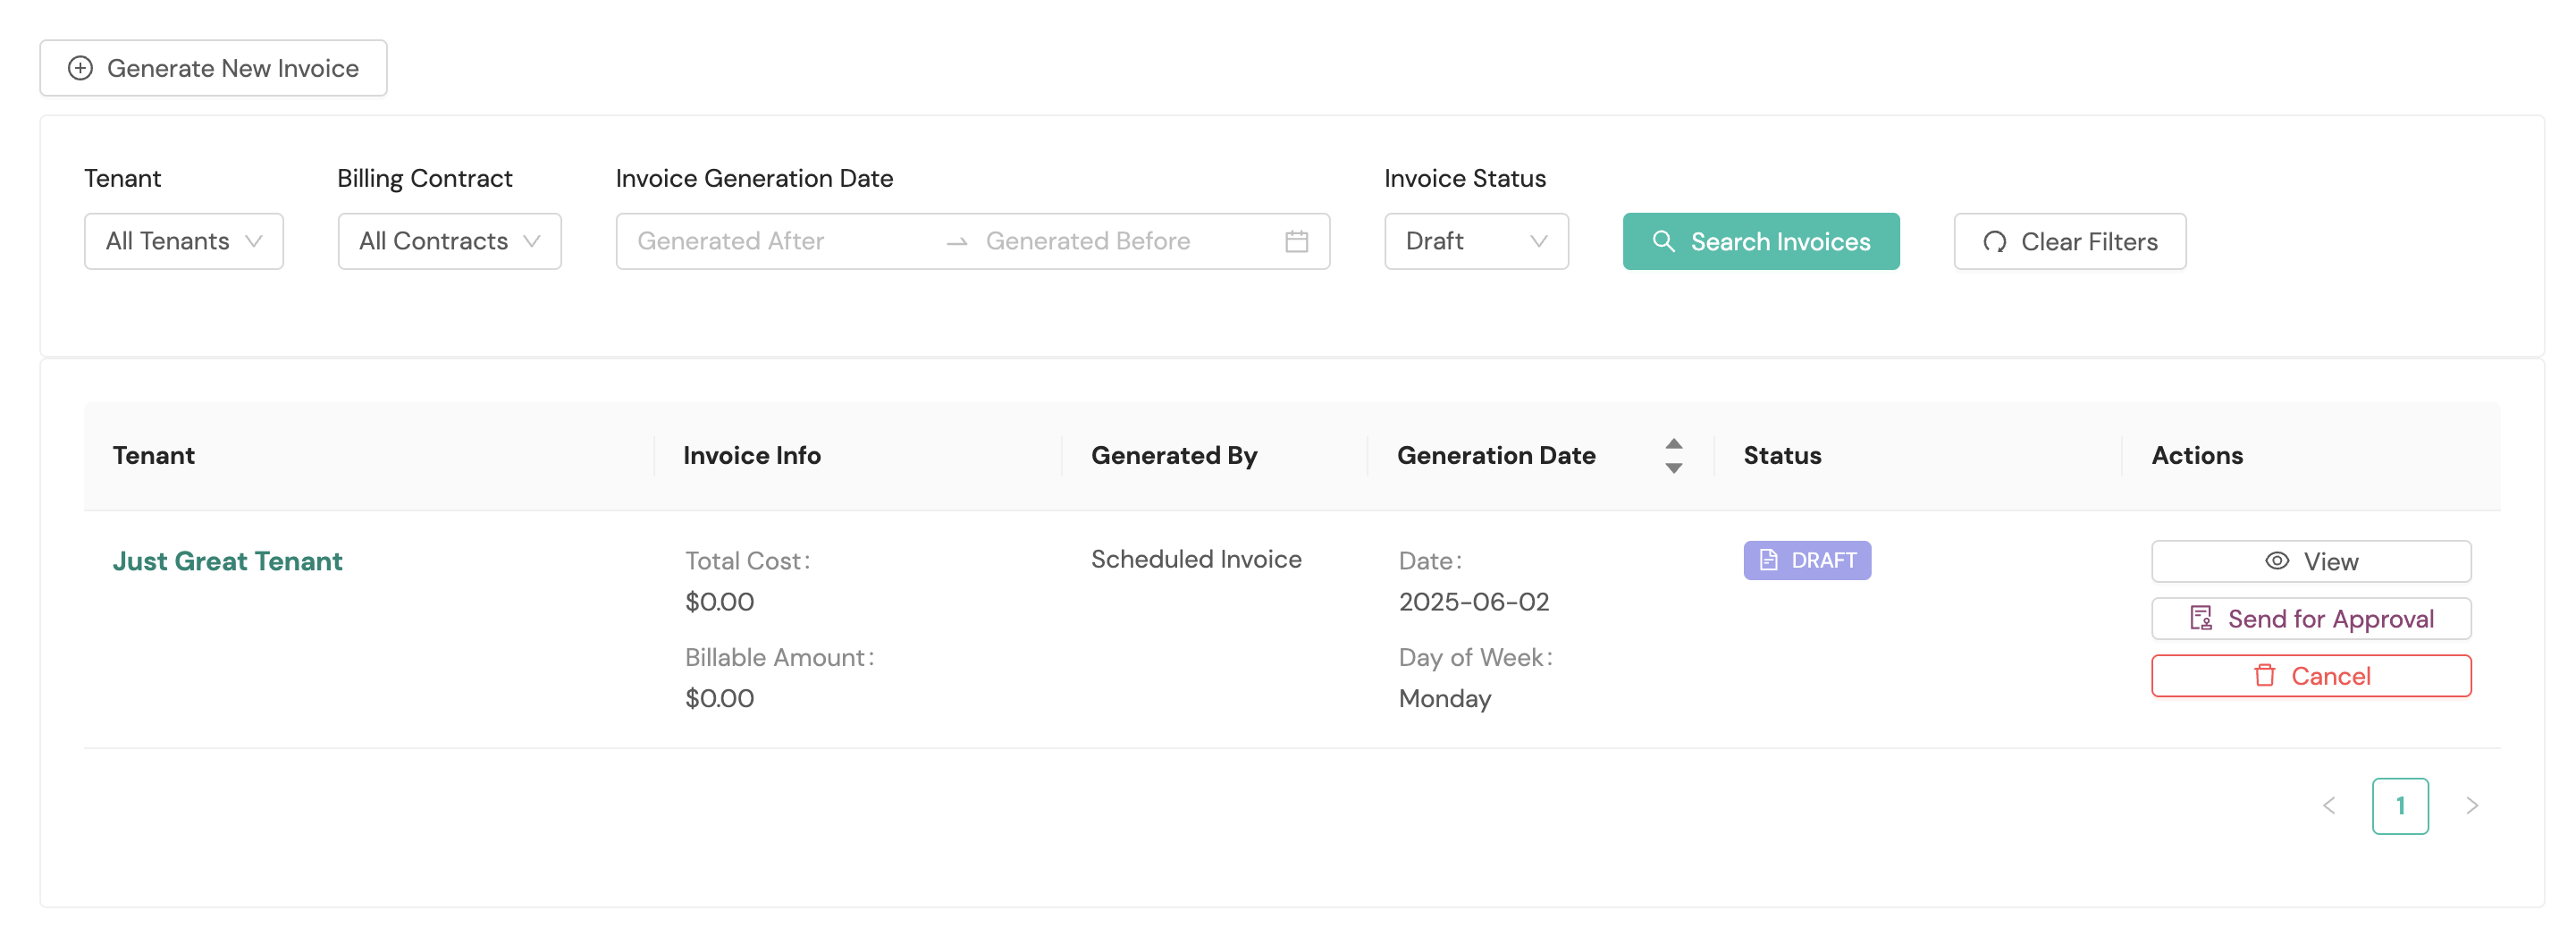
On the Invoices home screen, you can generate a new invoice, take action for listed invoices, and search for invoices using available filters. Invoice data is retained for 15 months in the Shipium platform.
Filters by view:
| Filter | Partner view | Tenant view |
|---|---|---|
| Tenant | — | ✅ Available |
| Billing Contract | — | ✅ Available |
| Invoice Generation Date | ✅ Available | ✅ Available |
| Invoice Status | ✅ Available | ✅ Available |
Organizations with a partner view see an Invoice column with invoice IDs on the invoice list. Organizations with a tenant view see a Tenant column showing which tenant each invoice belongs to.
With invoice management, you can:
- Generate and manage invoices for your organization and tenants (if applicable)
- Track billing amounts and payment status
- View complete invoice history and audit trails
- Download and export invoices in multiple formats
Invoice lifecycle
Invoices in the Billing Management service move through a defined lifecycle, with each status determining available actions.
Invoice statuses:
- Draft. The initial state of a new invoice. In this state, the invoice is mutable and can be modified.
- Send for Approval. Submits the invoice for review, changing the status to Pending Approval.
- Cancel. Cancels the draft invoice, changing the status to Canceled.
- Pending Approval. The invoice has been submitted for review and is awaiting approval.
- Approve. Approves the invoice, changing the status to Approved
- Cancel. Cancels the invoice, changing the status to Canceled
- Approved. The invoice has been approved and is considered final.
- Cancel. Cancels the approved invoice, changing the status to Canceled
- Canceled. The invoice has been canceled and is no longer active. This is a terminal state.
Automate invoice approval with webhooksFor organizations that want to automate invoice processing, Billing Management supports webhooks that notify your systems when invoices are created, finalized, or voided. Auto-cut functionality can automatically approve invoices on a schedule. Contact your Shipium representative to configure webhooks and auto-cut for your billing schedules. See Webhooks for Billing Management for more information.
Invoice runs
The Invoices page has two tabs: Invoices, which lists generated invoices, and Runs, which shows the history of scheduled invoice generation runs. Use the Runs tab to confirm whether a scheduled run took place and what it produced, including runs that generated no invoice because there was no billable activity in the period.
To find a run, filter by Tenant, Status, or Run Time (using the Run After and Run Before fields), then select Search Runs. Select Clear Filters to reset.
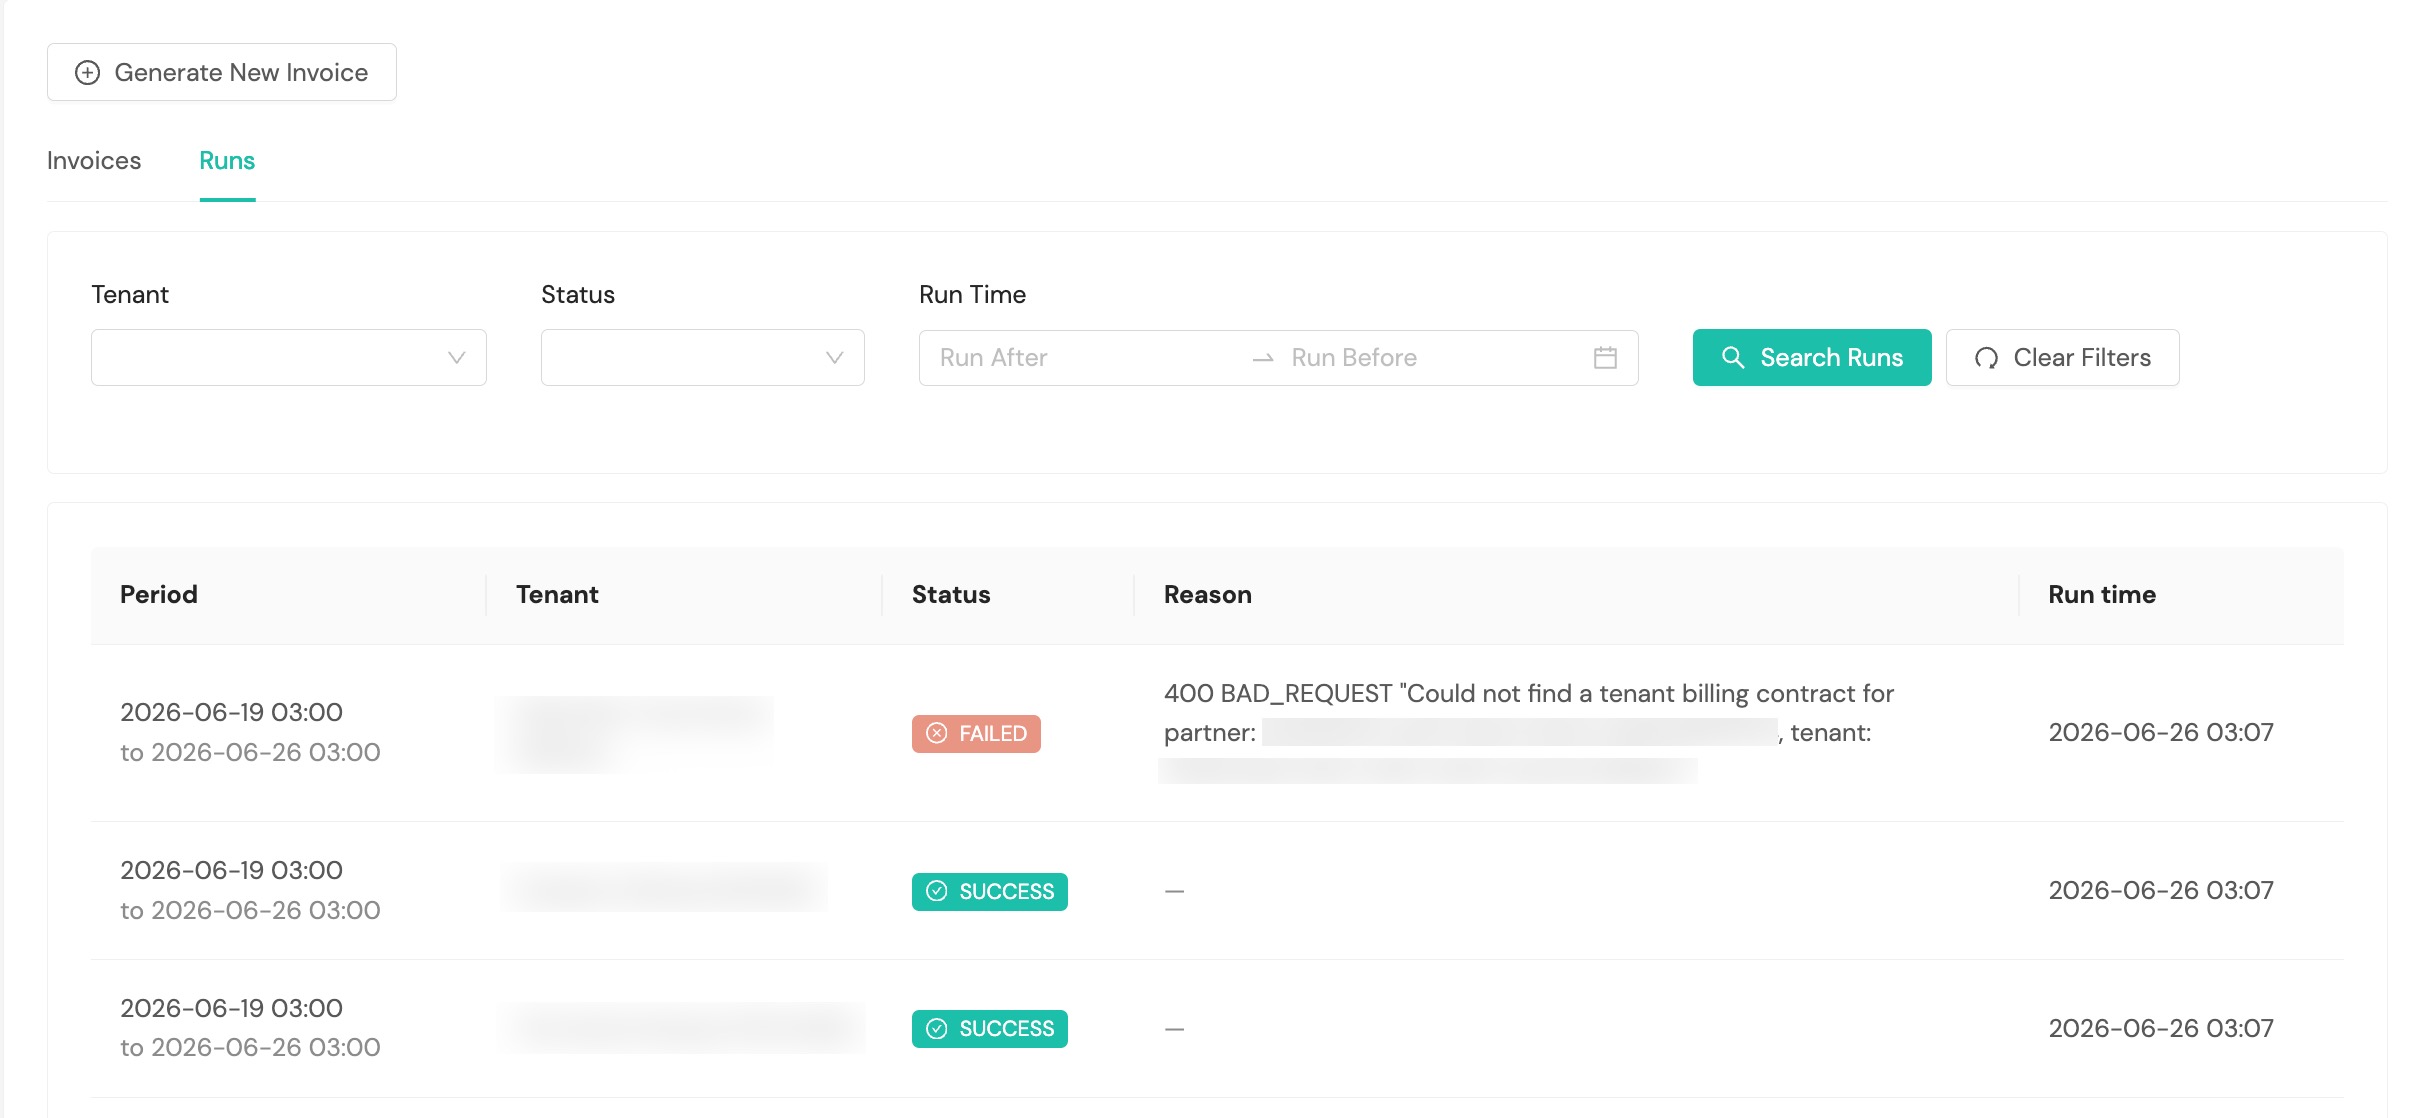
Each run shows:
- Period. The billing period the run covered
- Tenant. The tenant the run generated invoices for
- Status. The outcome of the run (see below)
- Reason. Additional detail about the outcome, such as why a run produced no invoice
- Run Time. When the run executed
A run has one of the following statuses:
- Queued. The run is scheduled and waiting to start.
- Processing. The run is in progress.
- Retry. The run failed and is scheduled to run again automatically.
- Success. The run completed and generated one or more invoices.
- Failed. The run did not complete, either because of an error or because its automatic retries were exhausted.
- No Data. The run completed but found no billable carrier transactions in the period, so no invoice was generated. The Reason explains this and suggests verifying that carrier invoice files for the window have been received by searching Carrier Transactions for the same range.
Create an invoice
If you selected Generate New Invoice on the Invoices home screen, you'll see a popup requesting information about the invoice, including the timezone where the invoice is being created and the dates of service. Organizations configured with a tenant view will also see a Tenant to invoice dropdown to select the tenant responsible for payment.
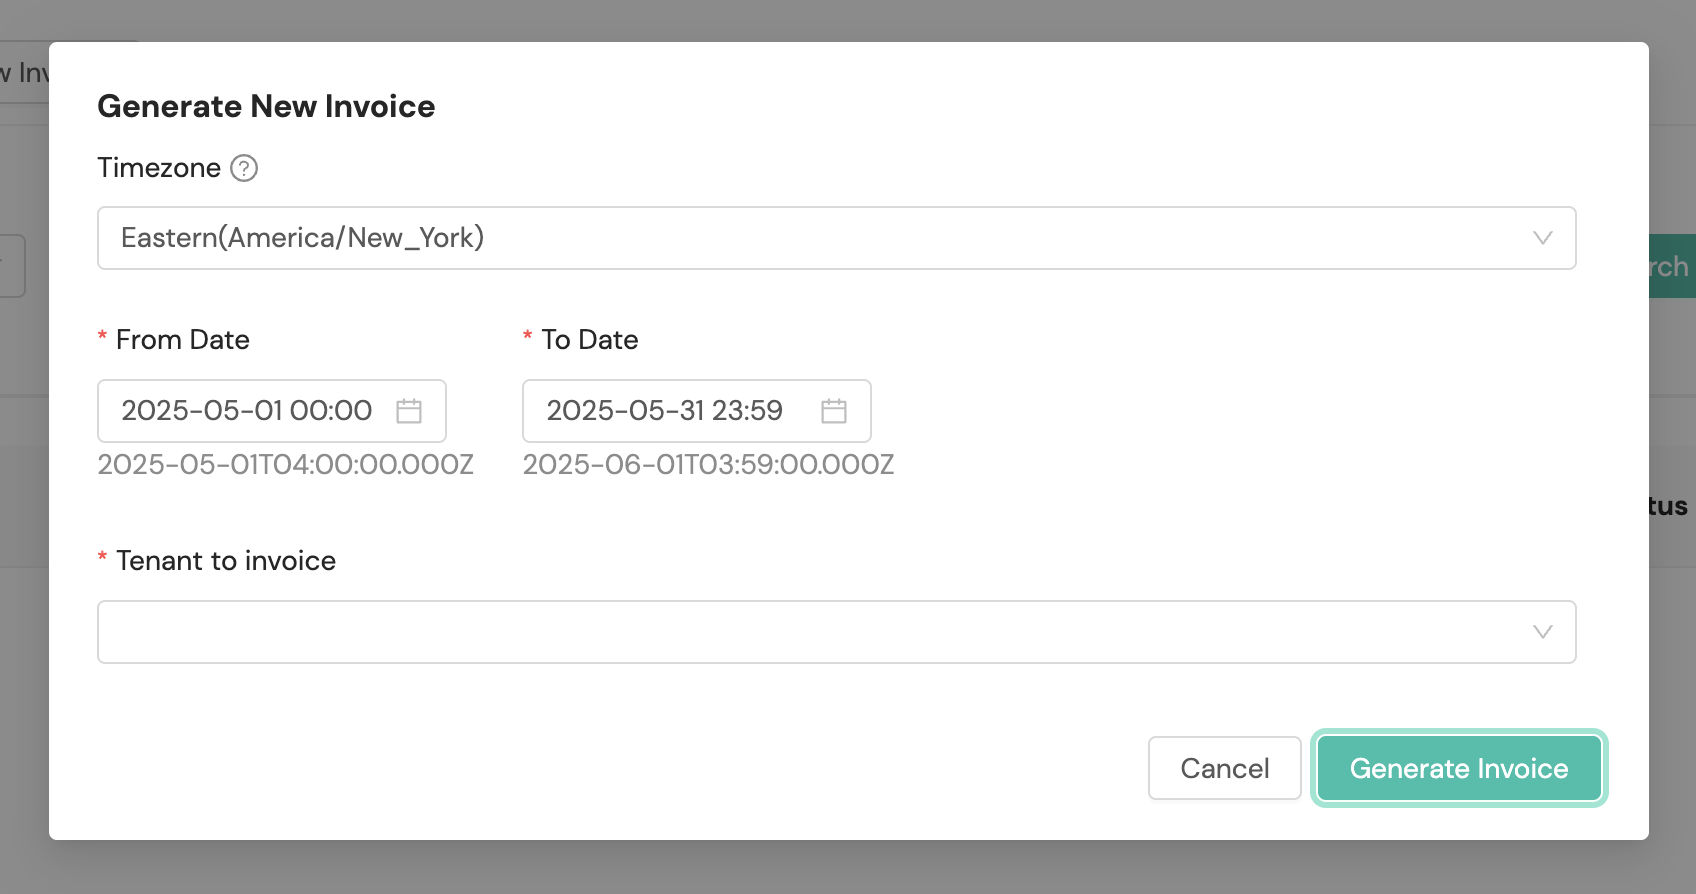
Invoice generation runs as a background job. You don't need to remain on the page while it processes. When the invoice has been generated successfully, a confirmation message will appear at the top of the screen.
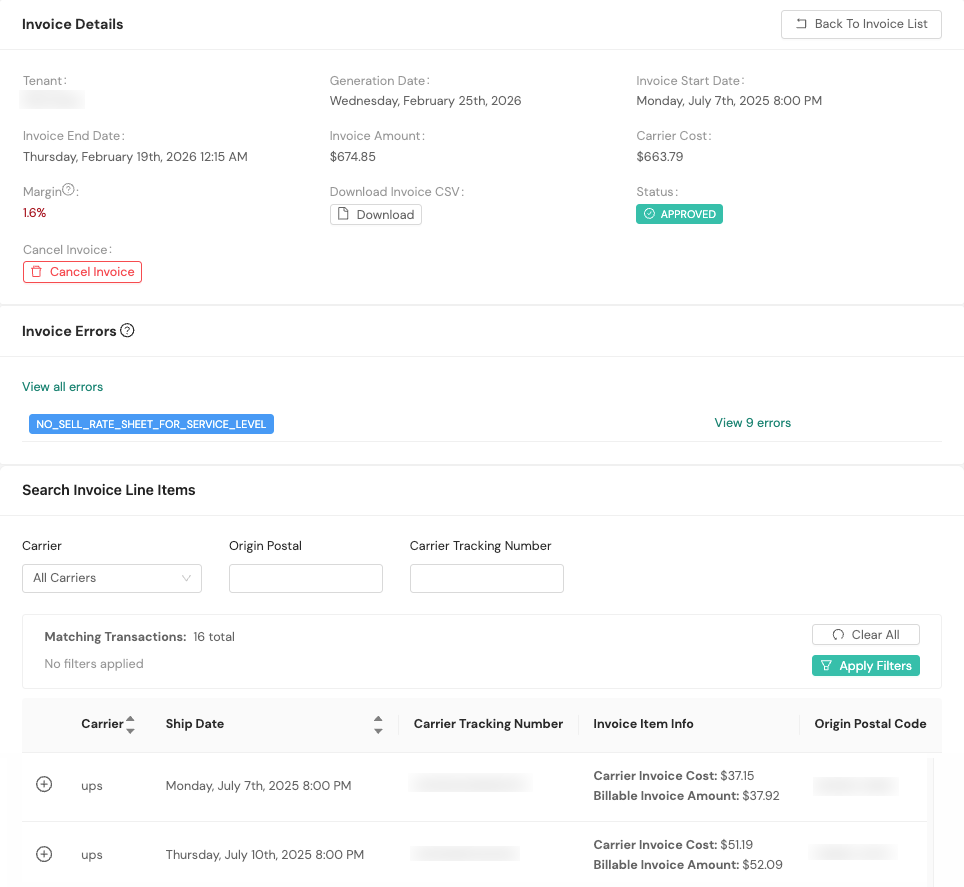
View an invoice
Select an invoice to open the Invoice Details screen. The header shows:
- Tenant. The tenant the invoice is for. This field appears for organizations configured with a tenant view.
- Generation Date. The date the invoice was generated.
- Invoice Start Date and Invoice End Date. The billing period the invoice covers.
- Invoice Amount. The total amount billed to the tenant for the billing period. This is the per-invoice equivalent of the Billable Total shown on the home screen in the Cost vs. Billable Overview section.
- Carrier Cost. The carrier's billed amount for the shipments on the invoice. Carrier Cost is for your organization's internal reference and is not included in the CSV export sent to tenants.
- Margin. The share of the Invoice Amount your organization retains after carrier cost, calculated as (Invoice Amount − Carrier Cost) ÷ Invoice Amount. Margin is color-coded: green at 10% or above, yellow from 5% up to 10%, and red below 5%.
- Status. The invoice's current lifecycle status: Draft, Pending Approval, Approved, or Canceled.
From this screen you can download a CSV of the invoice, search its line items by Carrier, Origin Postal, and Carrier Tracking Number, and cancel the invoice.
Send an invoice for approval
You have the option to send invoices in a draft status for approval. On the Invoices homepage, you can select the Send for Approval button for the desired invoice and you'll receive a message that the invoice was updated and saved successfully.
Approve an invoice
To approve an invoice, you'll select the Approve button for it within the Invoices primary page when the Status filter is set to Pending Approval. You'll receive a message that the invoice was approved successfully.

Cancel an invoice
You can cancel an invoice in Draft, Pending Approval, or Approved status by selecting the Cancel button for the desired invoice. When you select Cancel, a confirmation dialog will appear warning that the cancellation is not reversible and that associated line items will become available to attribute to a new invoice. To confirm, type the invoice identifier in the field provided and select Cancel Invoice.
Canceling transitions the invoice to Canceled status and triggers the invoice_voided webhook. The invoice remains in the system for audit purposes but is excluded from billing operations.
Remove invoices from the workflow
To remove an invoice from the billing workflow, select the Cancel button. Canceling transitions the invoice to Canceled status. The invoice remains in the system for audit purposes but is excluded from billing operations.
| Invoice status | Cancel available? | Webhook triggered? |
|---|---|---|
| Draft | ✅ Yes | Yes (invoice_voided) |
| Pending Approval | ✅ Yes | Yes (invoice_voided) |
| Approved | ✅ Yes | Yes (invoice_voided) |
| Canceled | ❌ No (already canceled) | — |
Use Cancel when:
- A draft invoice was created in error
- Errors are discovered after an invoice has been submitted for approval
- Customer disputes require voiding the invoice
- Business circumstances change (e.g., contract modifications)
- Regulatory or compliance issues arise
Note: Canceling an invoice at any status triggers the
invoice_voidedwebhook for downstream systems.
Invoice status and webhook reference
Use this reference to understand the relationship between invoice statuses and webhook events. For details on canceling invoices at each status, see Remove invoices from the workflow.
Webhook event details
Invoice Created. Triggered when a new invoice is generated in Draft status; use this event to receive notification that a new invoice is ready for review.
Invoice Finalized. Triggered when an invoice is approved; this event includes a presigned URL for downloading the complete invoice data as a CSV file.
Invoice Voided. Triggered when an invoice is canceled, regardless of its previous status.
For detailed webhook payload information and integration guidance, see Webhooks for Billing Management.
Carrier transactions
You can search carrier transactions, perform batch tenant functions, and import a carrier invoice within this section of the Billing Management platform.
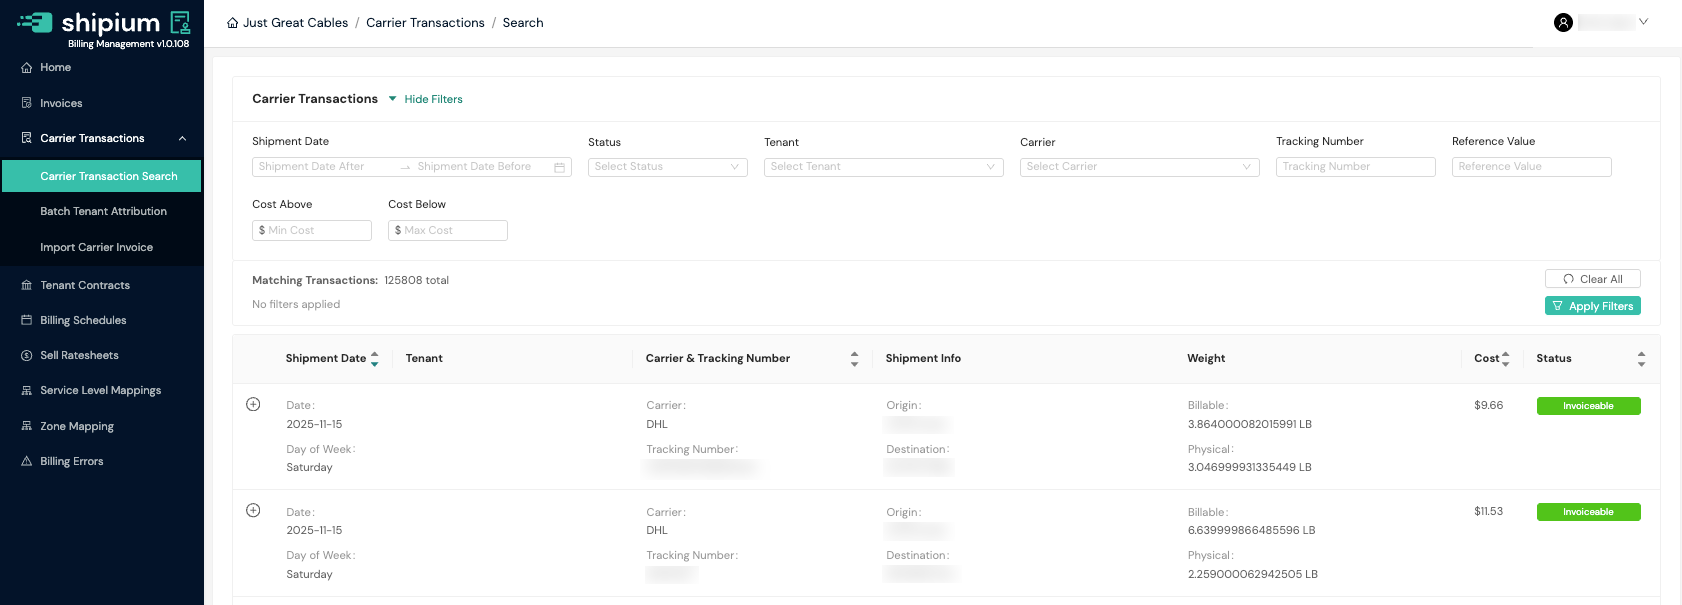
Carrier transaction search
The filters on the Carrier Transactions page allow you to search by shipment date, status (Pending Review, Invoiceable, and Excluded from Invoice), carrier, tracking number, reference value, cost above, and cost below. Recent carrier transactions will be listed on this page.
For organizations with a tenant view, an additional Tenant filter is available to narrow results to a specific tenant. The search results also include a Tenant column.
View carrier transaction details
When you expand a carrier transaction by selecting the + icon in the upper left corner of the transaction row, you can view detailed information about the shipment and associated costs.

Transaction statuses
Carrier transactions progress through several statuses during their lifecycle:
- Pending Review. Incomplete transactions that are missing required data (such as carrier zone or billable weight) and need manual review before they can be processed for invoicing.
- Invoiceable. The transaction has been matched to a tenant and is eligible to be included in an invoice.
- Invoiced. The transaction has been included in a finalized invoice.
- Partially Invoiced. Some line items in the transaction have been invoiced.
- Non-Invoiceable. The transaction is not eligible for invoicing, typically because it lacks line item details.
- Excluded from Invoice. The transaction has been manually excluded from invoicing.
Webhook notifications are triggered for invoice status changes, not carrier transaction status changes. See Webhooks for Billing Management for details.
The search filter displays three status options (Pending Review, Invoiceable, and Excluded from Invoice). The additional statuses (Invoiced, Partially Invoiced, and Non-Invoiceable) appear on transactions as they progress through the invoicing workflow.
Transaction information
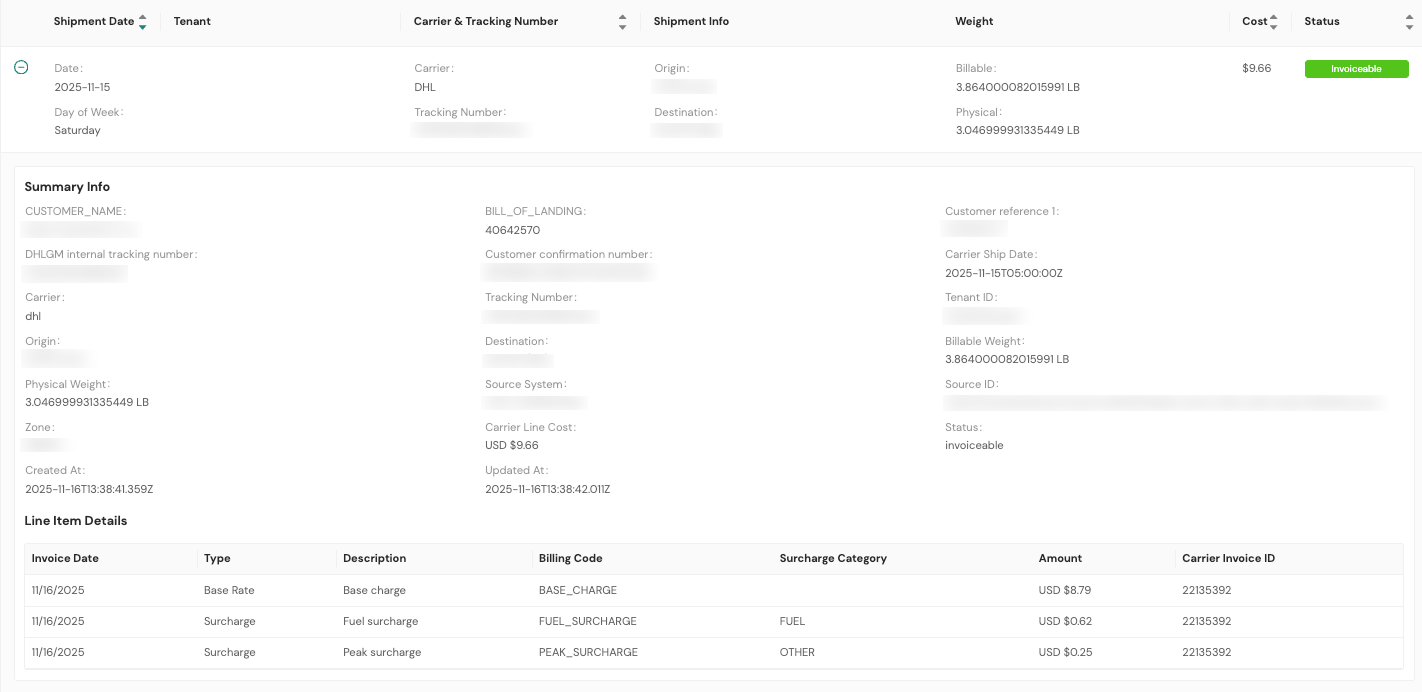
Each expanded transaction includes the following details:
- Summary Info. General transaction details including:
- Billable Weight. The weight used to calculate the shipping rate.
- Source System. The system from which the transaction data was imported.
- Reference Identifiers. Additional identifiers for the transaction, which may include fields such as Bill of Lading, carrier internal tracking numbers, and customer confirmation numbers depending on the carrier.
- Line Item Details. A breakdown of costs, including the base rate and any surcharges applied to the shipment.
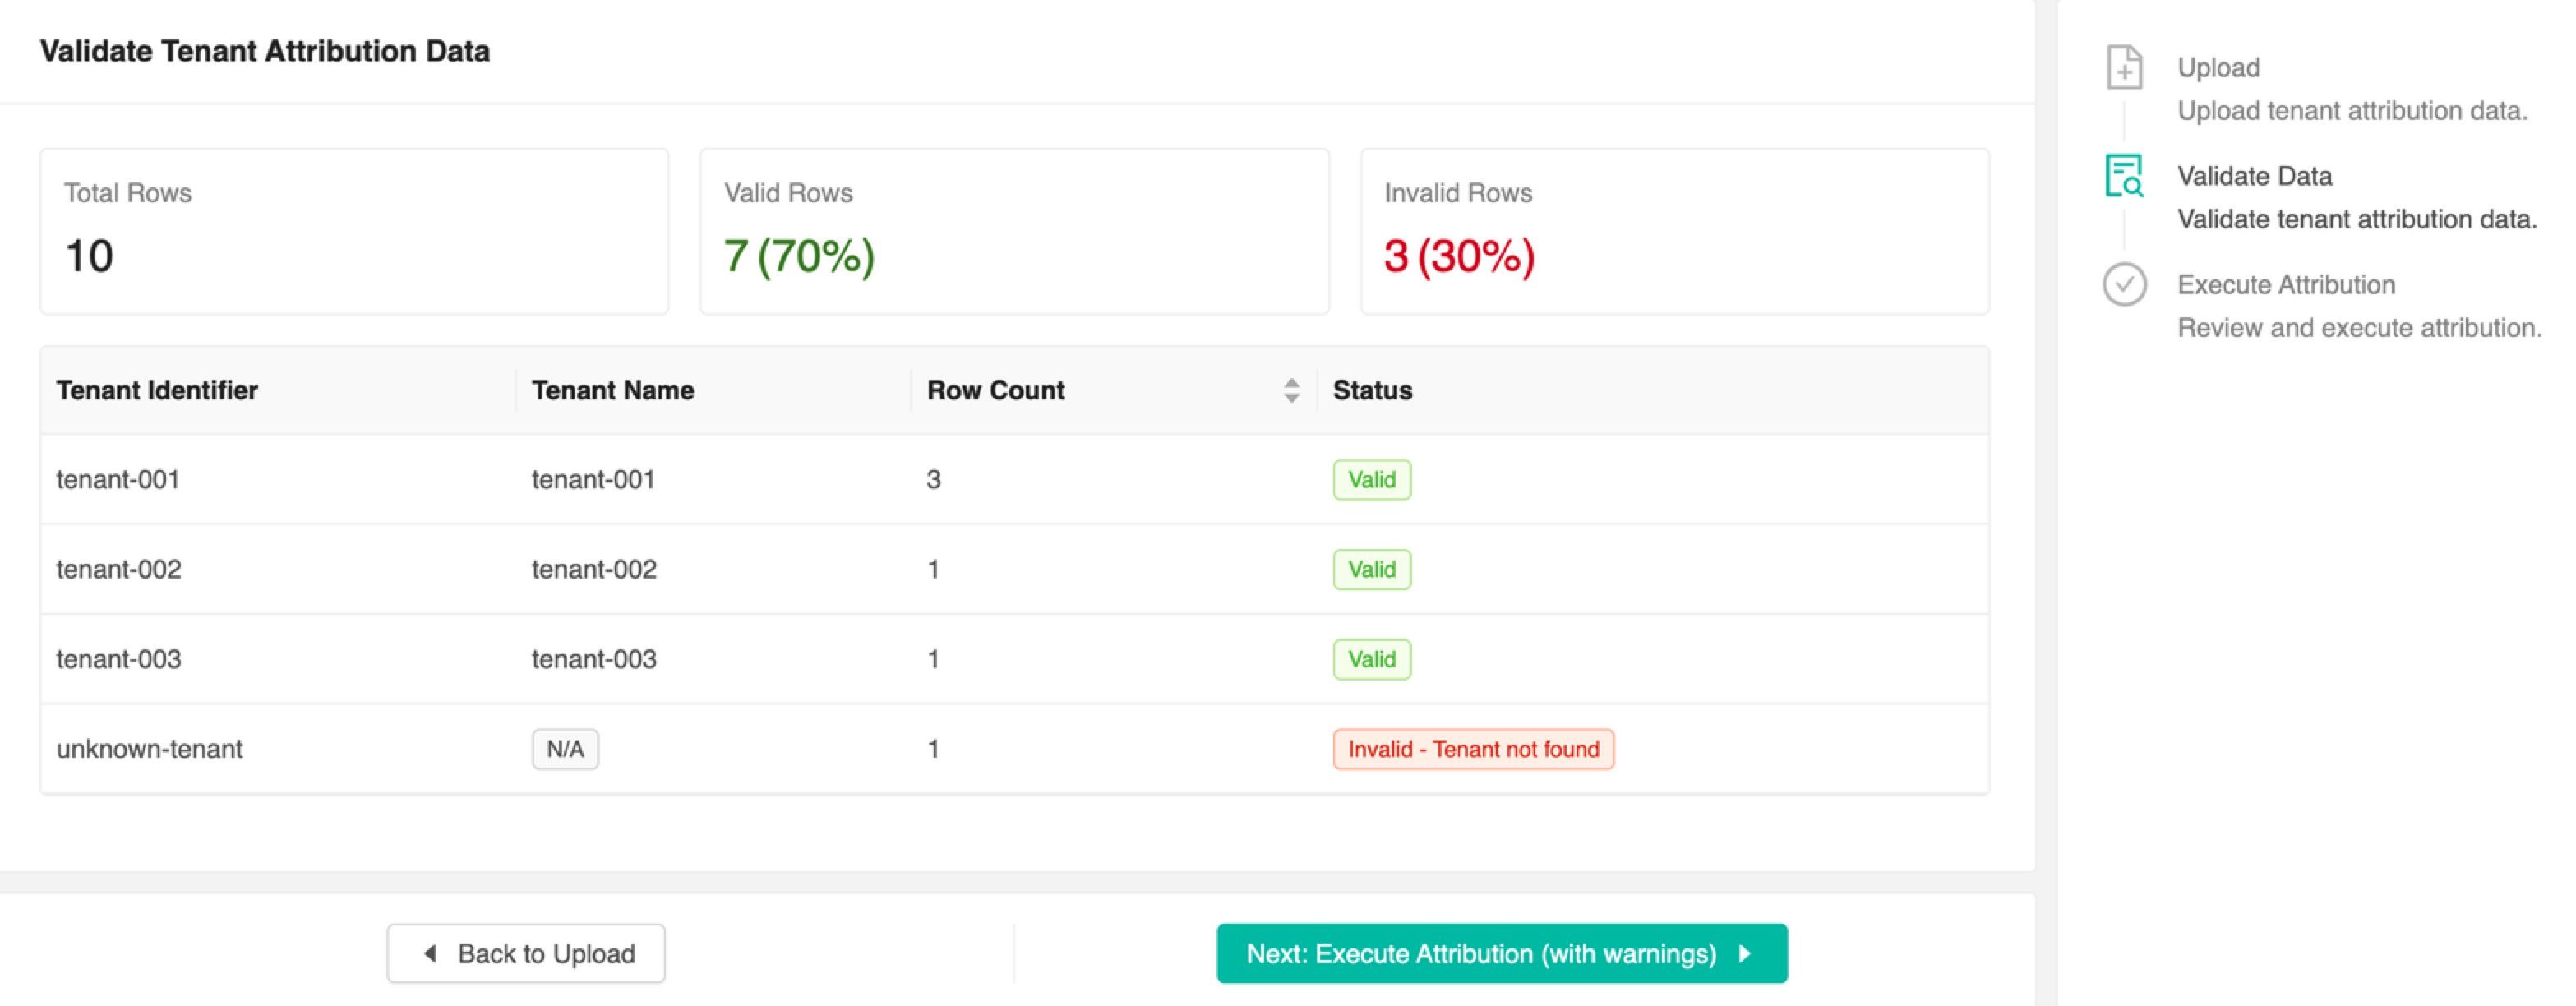
Batch tenant attribution
Using this feature, you can upload tenant information in bulk. This is particularly useful for 3PL organizations that need to assign carrier transactions to the appropriate tenant for invoicing. Batch tenant attribution is available to organizations configured with a tenant view.

You'll download a CSV template, populate it with the tenant identifier and tracking or reference identifier attributes, and upload it into the system.

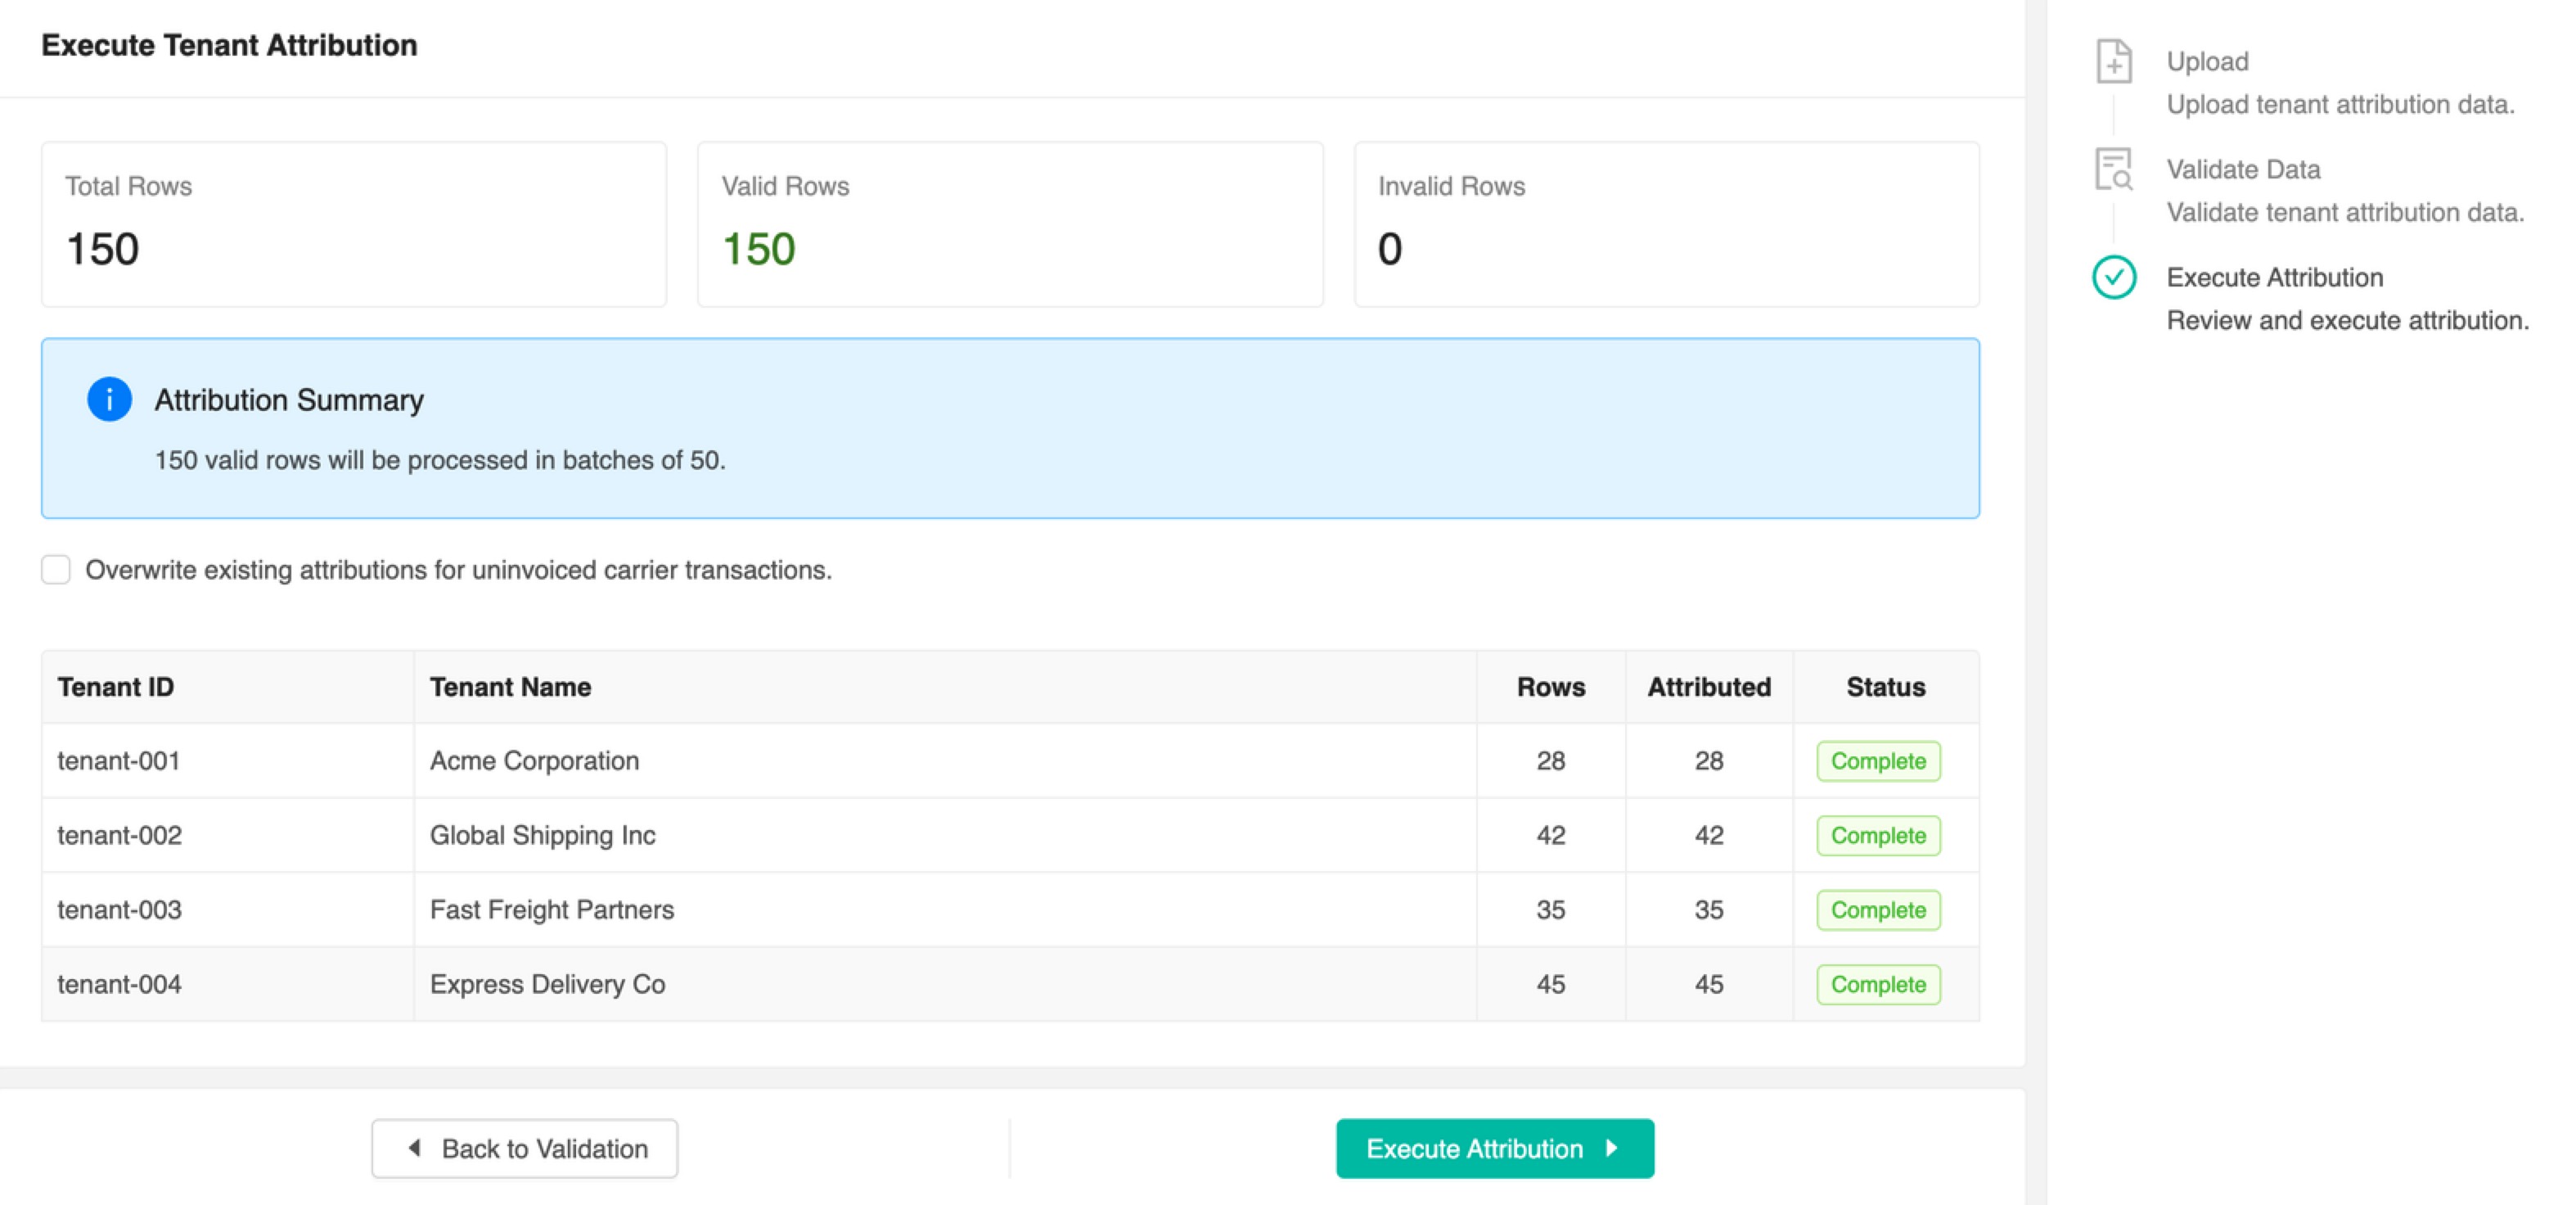
The next step is to validate the data you've provided.
Finally, you'll review the data and choose to incorporate it into your Billing Management profile.
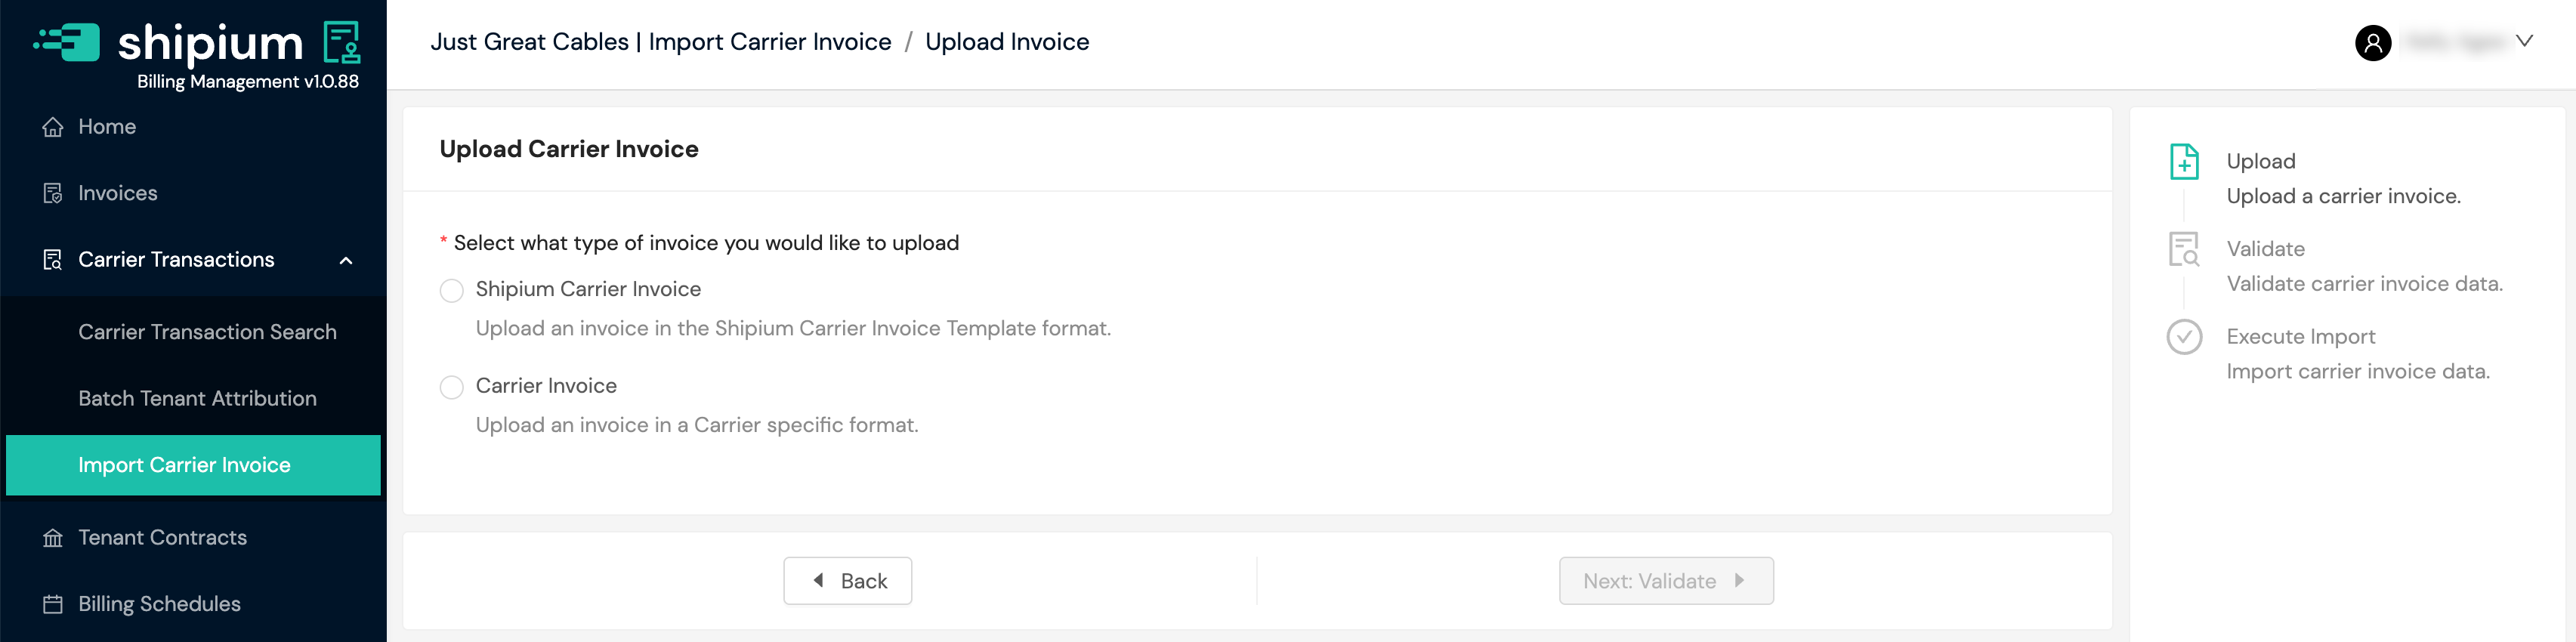
Import carrier invoice
If you would like to manually upload an invoice, you can do so using this feature. You'll choose the invoice format, either a Shipium template or a carrier-specific format, and then upload the file. You will be asked to validate the data in the invoice before the final step of executing it in the system.
Tenant contracts
The Tenant Contracts homepage displays your organization's tenant contracts. Within this feature, you can add new tenants and edit current contracts.
Note: In Billing Management, "Billing Contracts" (visible in partner view) define carrier billing terms at the partner level. "Tenant Contracts" (visible in tenant view) define billing terms for individual tenants. The Billing Errors page references "Tenant Billing Contract," which refers to the billing contract associated with a specific tenant.
With tenant contracts, you can:
- Manage billing contracts for each tenant
- Assign sell rate sheets and billing zone maps
- Configure invoice generation settings
- Set up tenant-specific billing rules and preferences
Primarily for 3PL organizationsTenant contracts are used by 3PL organizations to manage billing relationships with their customers. Each tenant represents a customer for whom you fulfill and ship orders. Enterprise organizations typically do not need to configure tenant contracts.
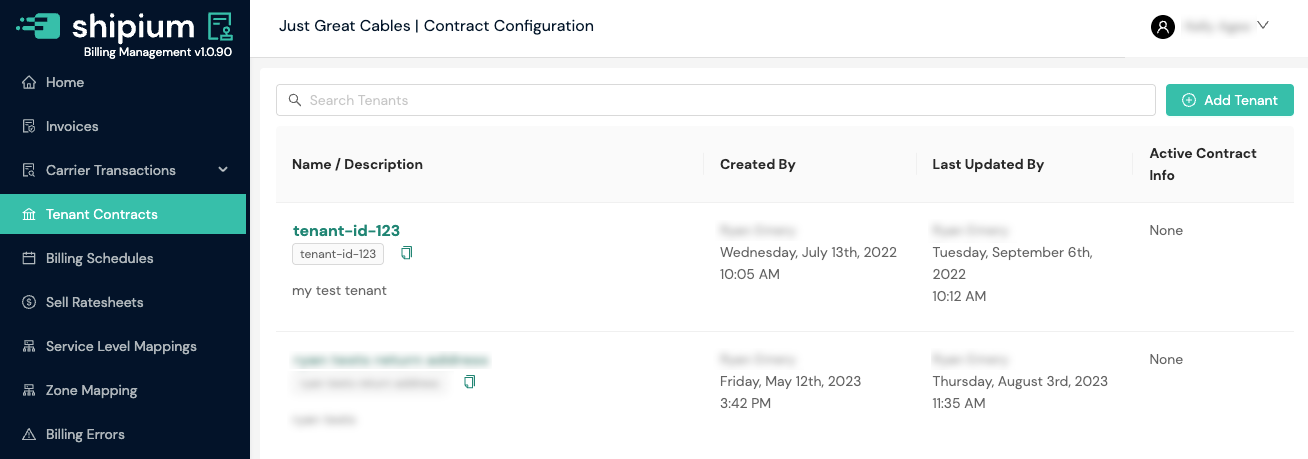
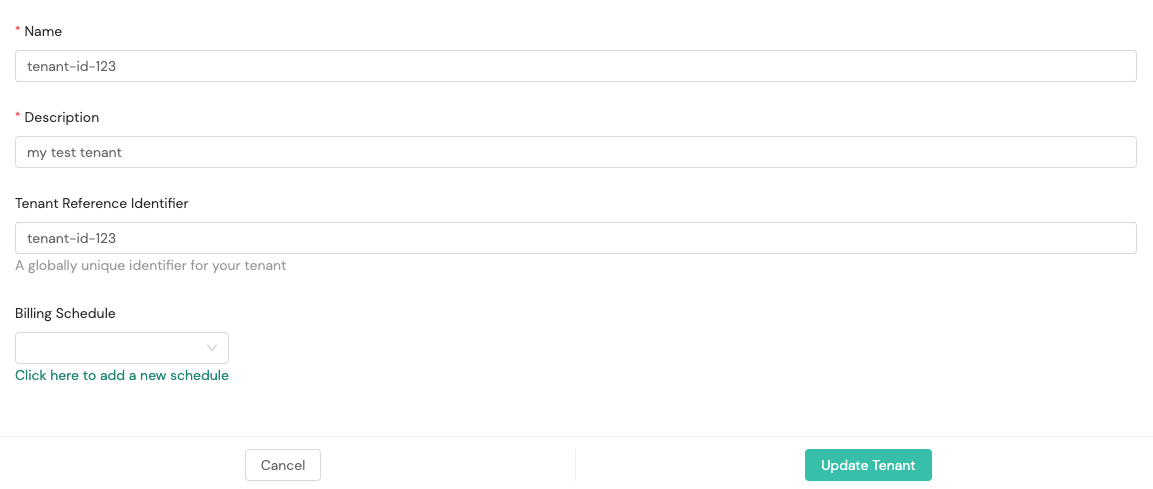
If you select the + Add Tenant button, you'll be prompted to provide a tenant name, description, and optional reference identifier. You also can add a billing schedule by selecting an already configured one from the dropdown menu.

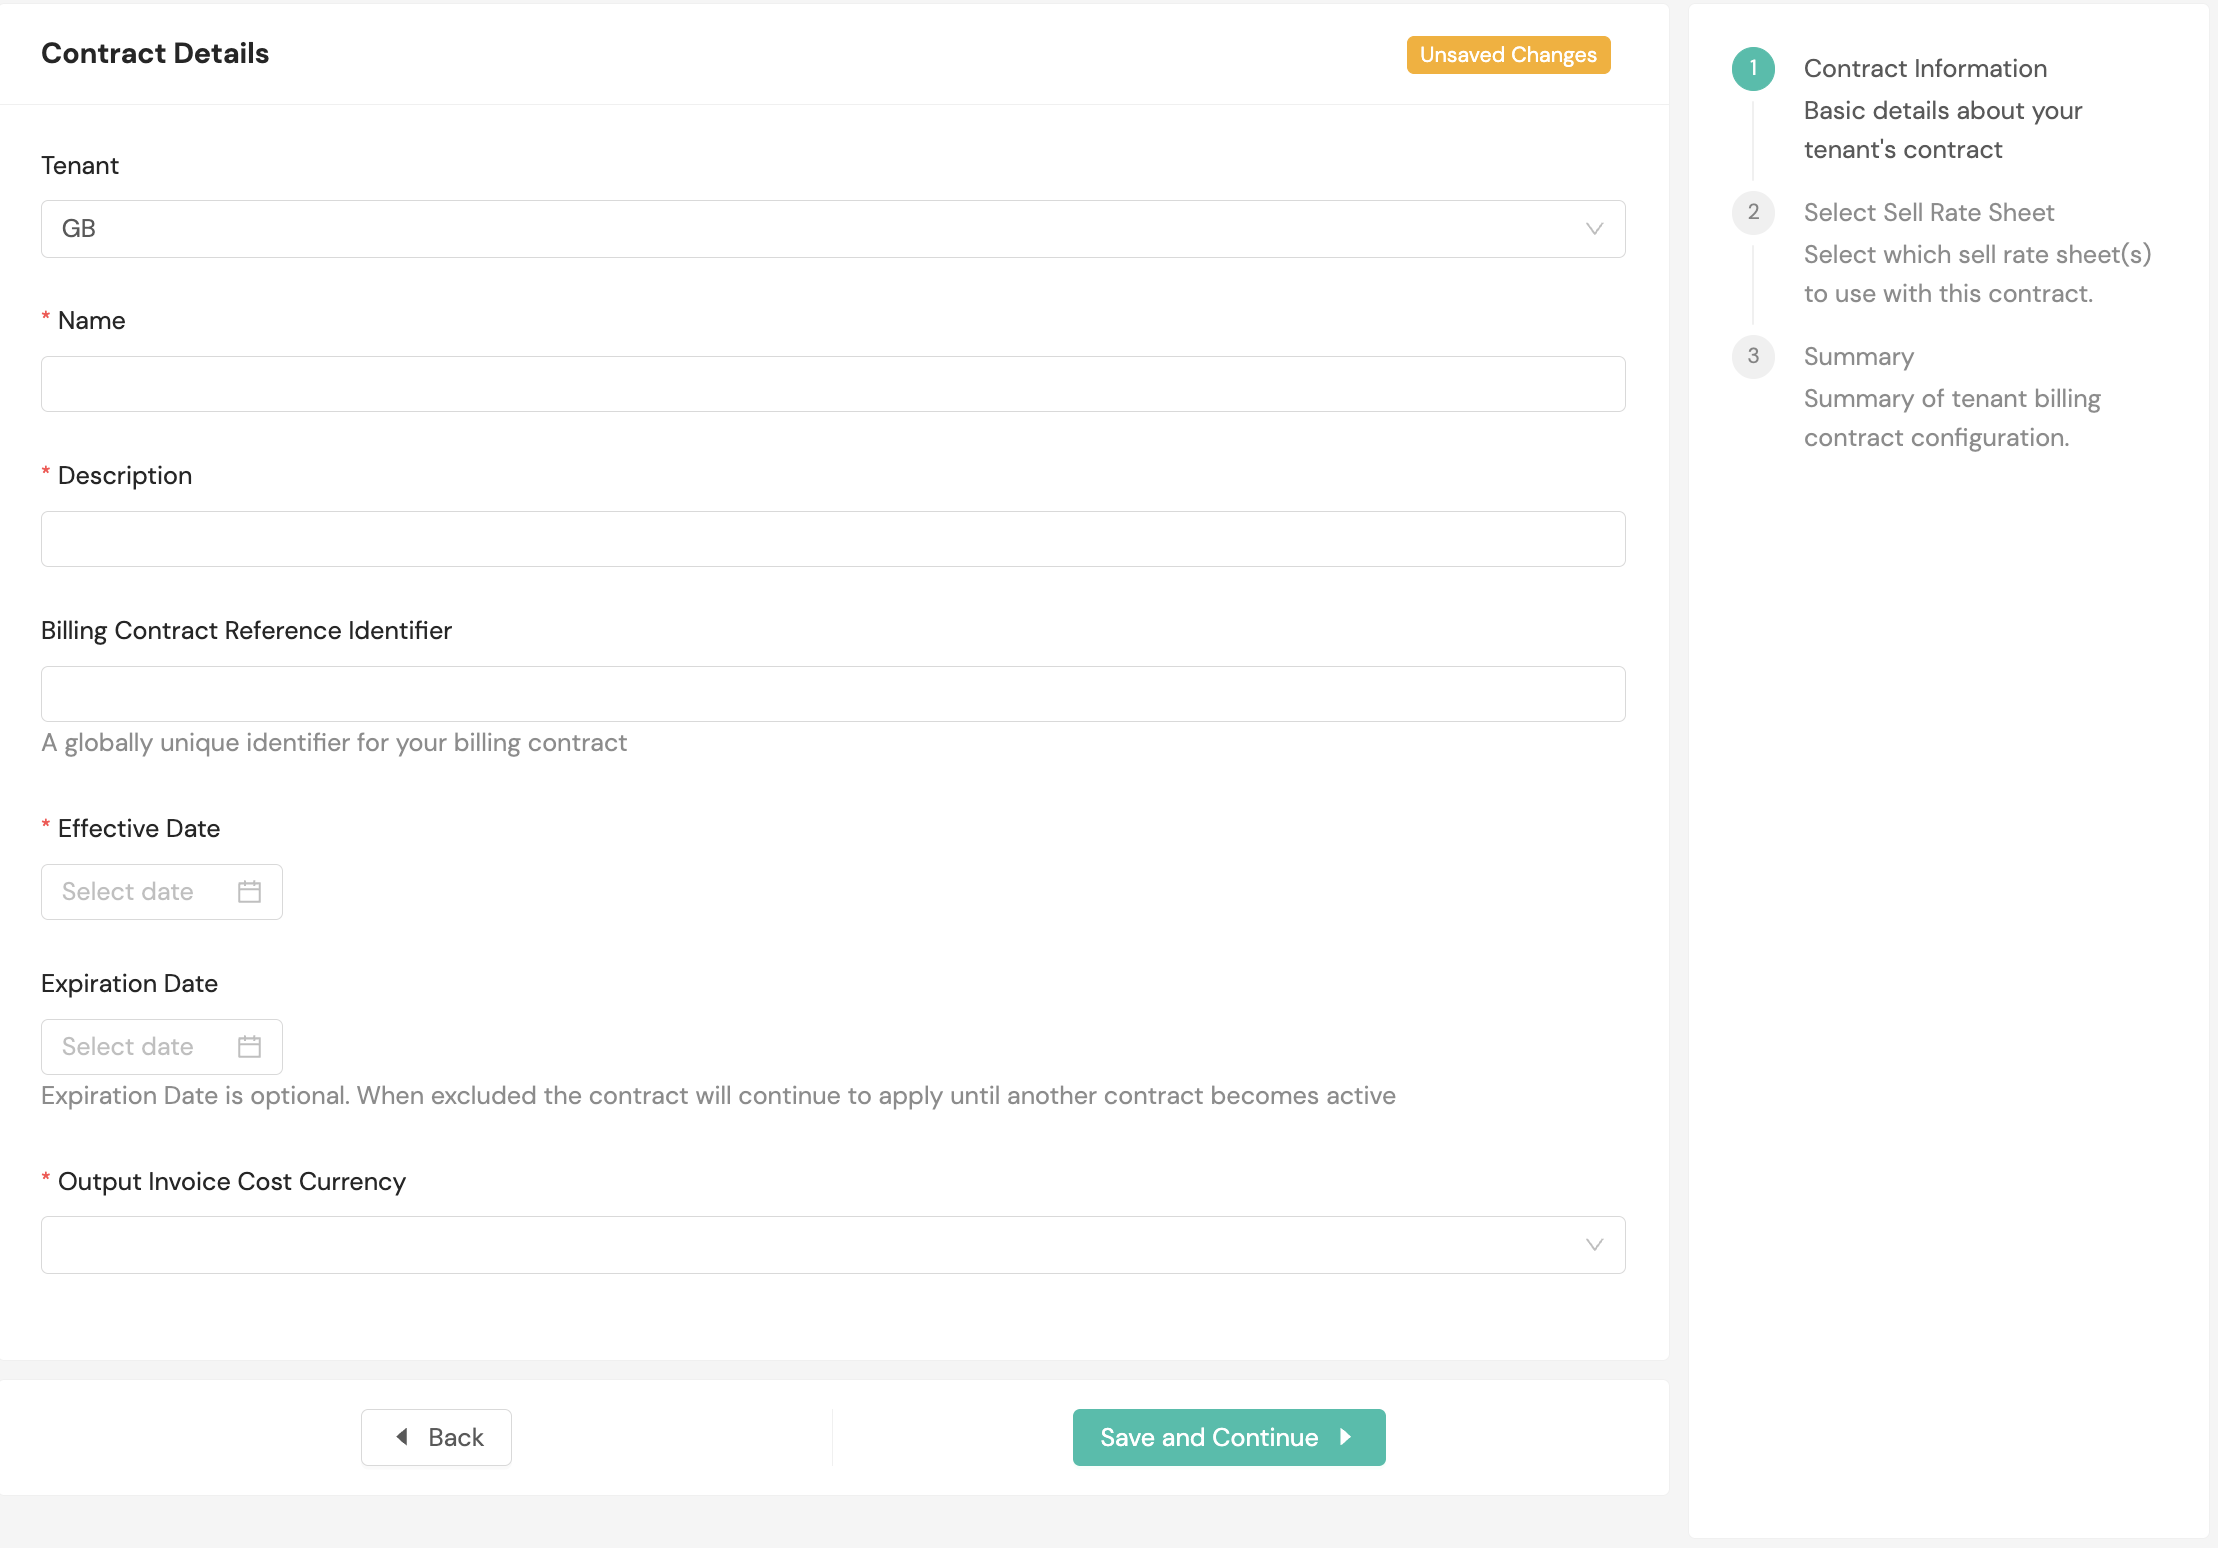
After providing basic tenant details, you'll be prompted to configure the billing contract details. You'll provide a contract name, description, effective date, and output invoice cost currency. You also can enter an optional billing contract reference identifier and expiration date for the contract (if no expiration date is provided, the contract remains active until another contract becomes active).
On the next screen, you'll choose how sell rate sheets apply to this contract:
- Split Sell Rates by Shipment Origin. Link multiple sell rate sheets to this contract and apply them based on the origin of the shipment.
- Split Sell Rates by Carrier Service Level. Link multiple sell rate sheets to this contract and apply them based on the carrier, method, or service level of the shipment.
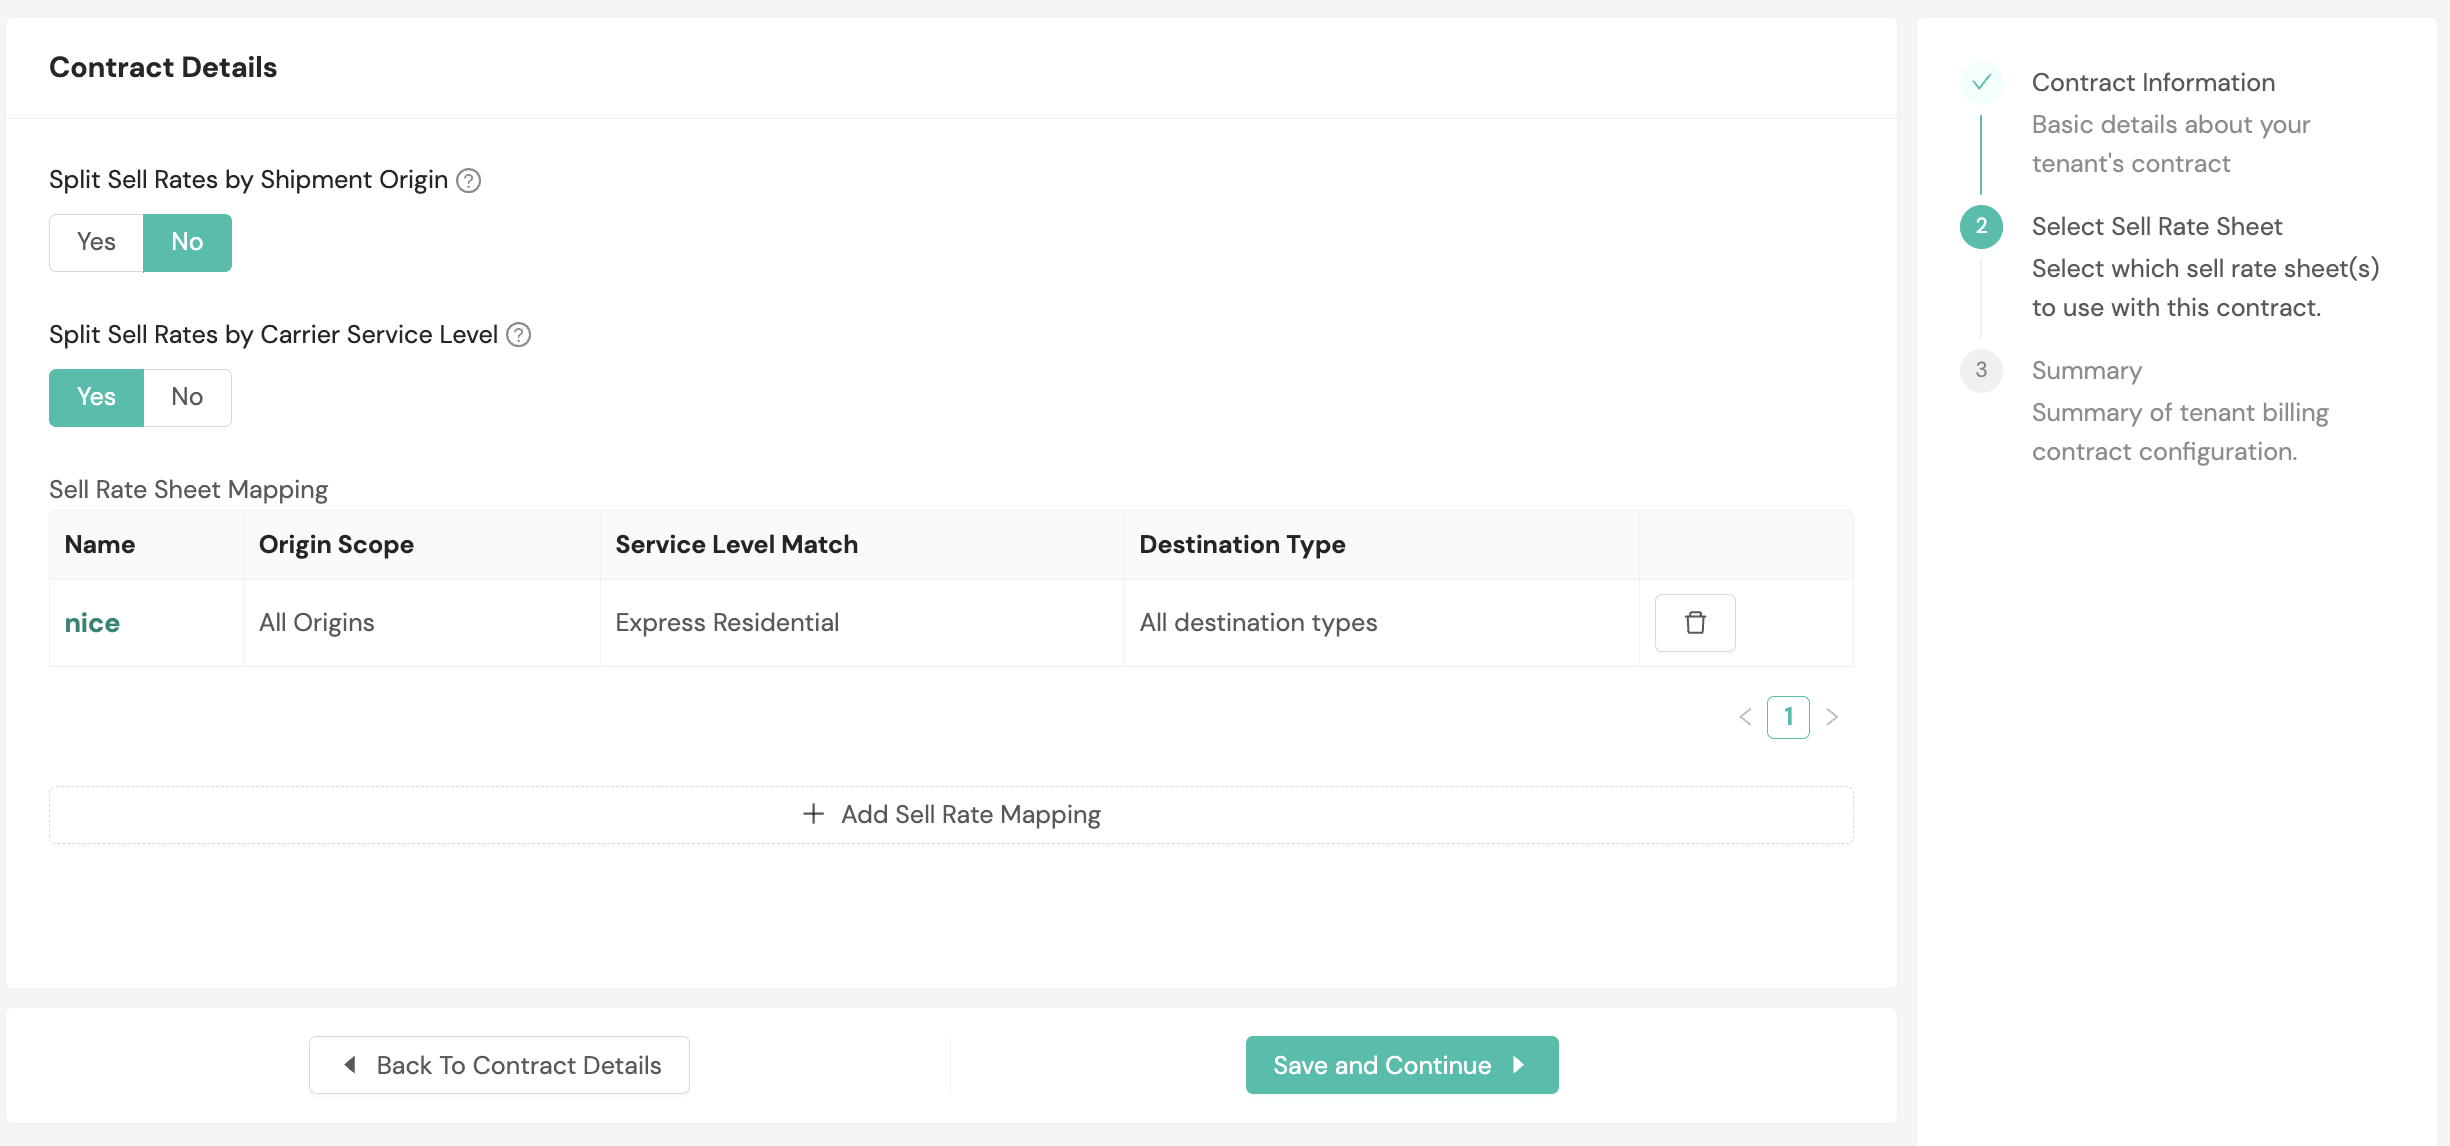
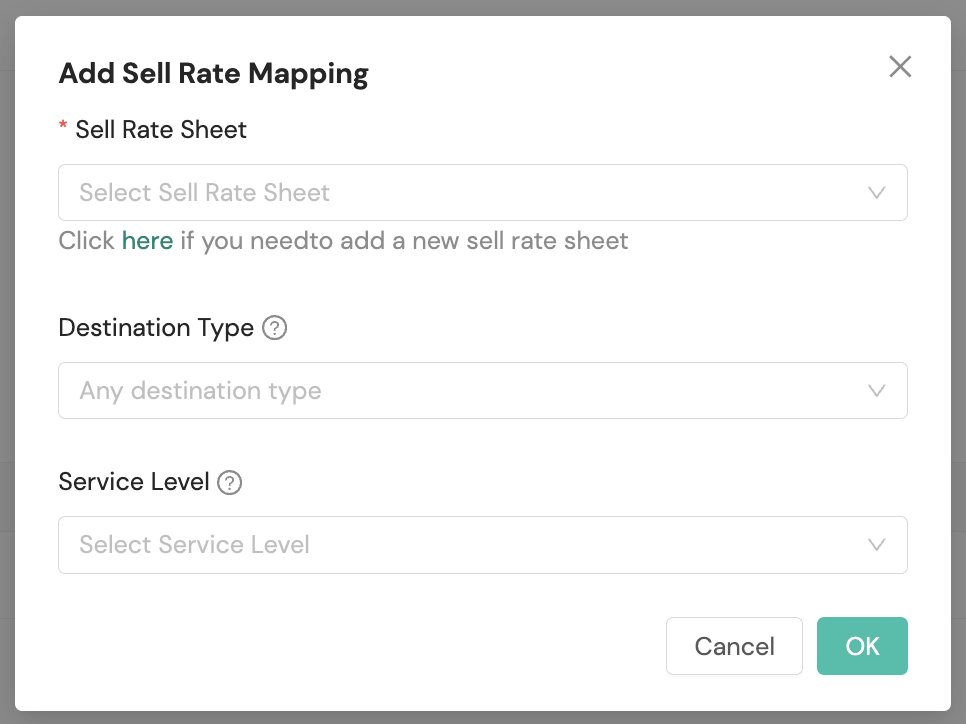
Use the Sell Rate Sheet Mapping table to associate one or more sell rate sheets with the contract. Select Add Sell Rate Mapping, then complete the dialog:
- Sell Rate Sheet (required). Select the sell rate sheet to associate. If you haven't created one yet, select the here link to add a new sell rate sheet before continuing.
- Destination Type (optional). Apply the sell rate sheet only to Residential or Commercial deliveries, or set it as All (any destination type) to match any shipment. A mapping left as Any destination type appears as "All destination types" in the table.
- Service Level (optional). Apply the sell rate sheet to a specific carrier service level.
When Billing Management rates a shipment, it applies the sell rate sheet whose destination type matches the shipment. A mapping set to Residential or Commercial is preferred over one set to All (any destination type), so a general mapping does not override a more specific one. Billing Management determines whether each shipment is residential or commercial automatically. You configure which sell rate sheet applies to each destination type, not the classification itself.
Once you exit the Add Sell Rate Mapping modal, select Save and Continue to proceed.
A summary of the contract configuration will appear for your final review before the contract is saved.
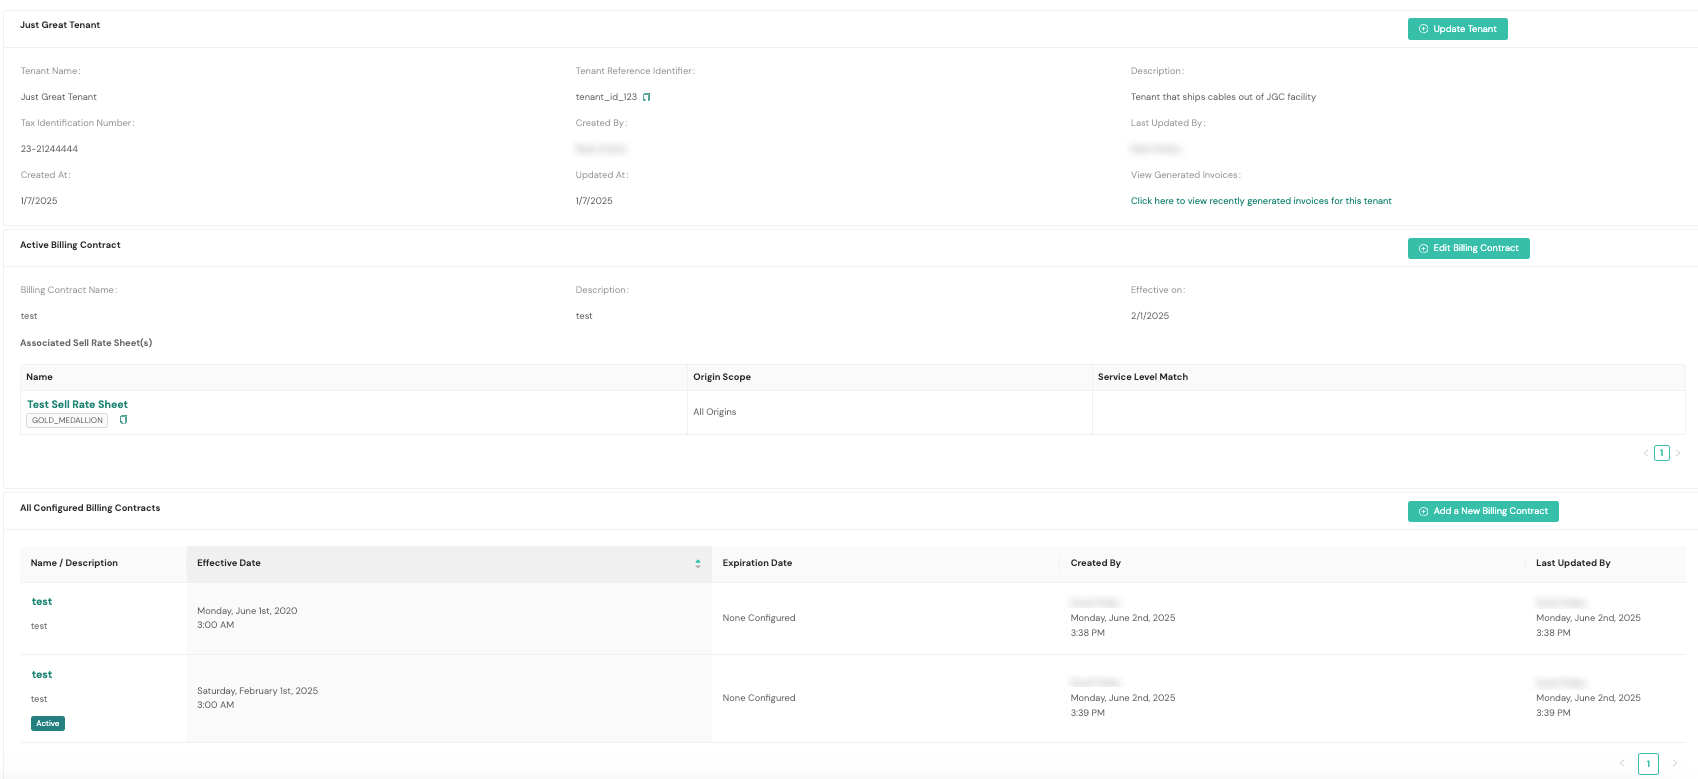
You can select any existing tenant to access its details screen, which provides the opportunity to edit tenant details by selecting + Update Tenant.
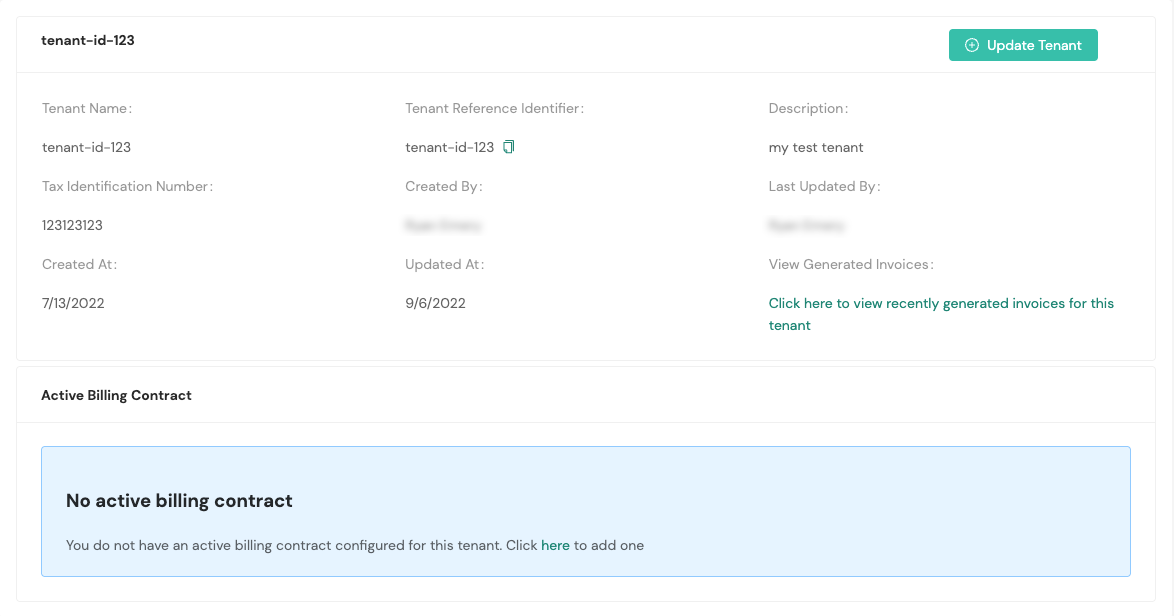
Selecting + Update Tenant prompts you to provide new information for any desired fields for the tenant you've selected.
If there is already a billing contract associated with the tenant, you can edit its properties in this workflow by selecting + Edit Billing Contract. Any associated sell rate sheets and configured billing contracts also will appear on the primary tenant contract screen. You can add new billing contracts by selecting + Add a New Billing Contract.
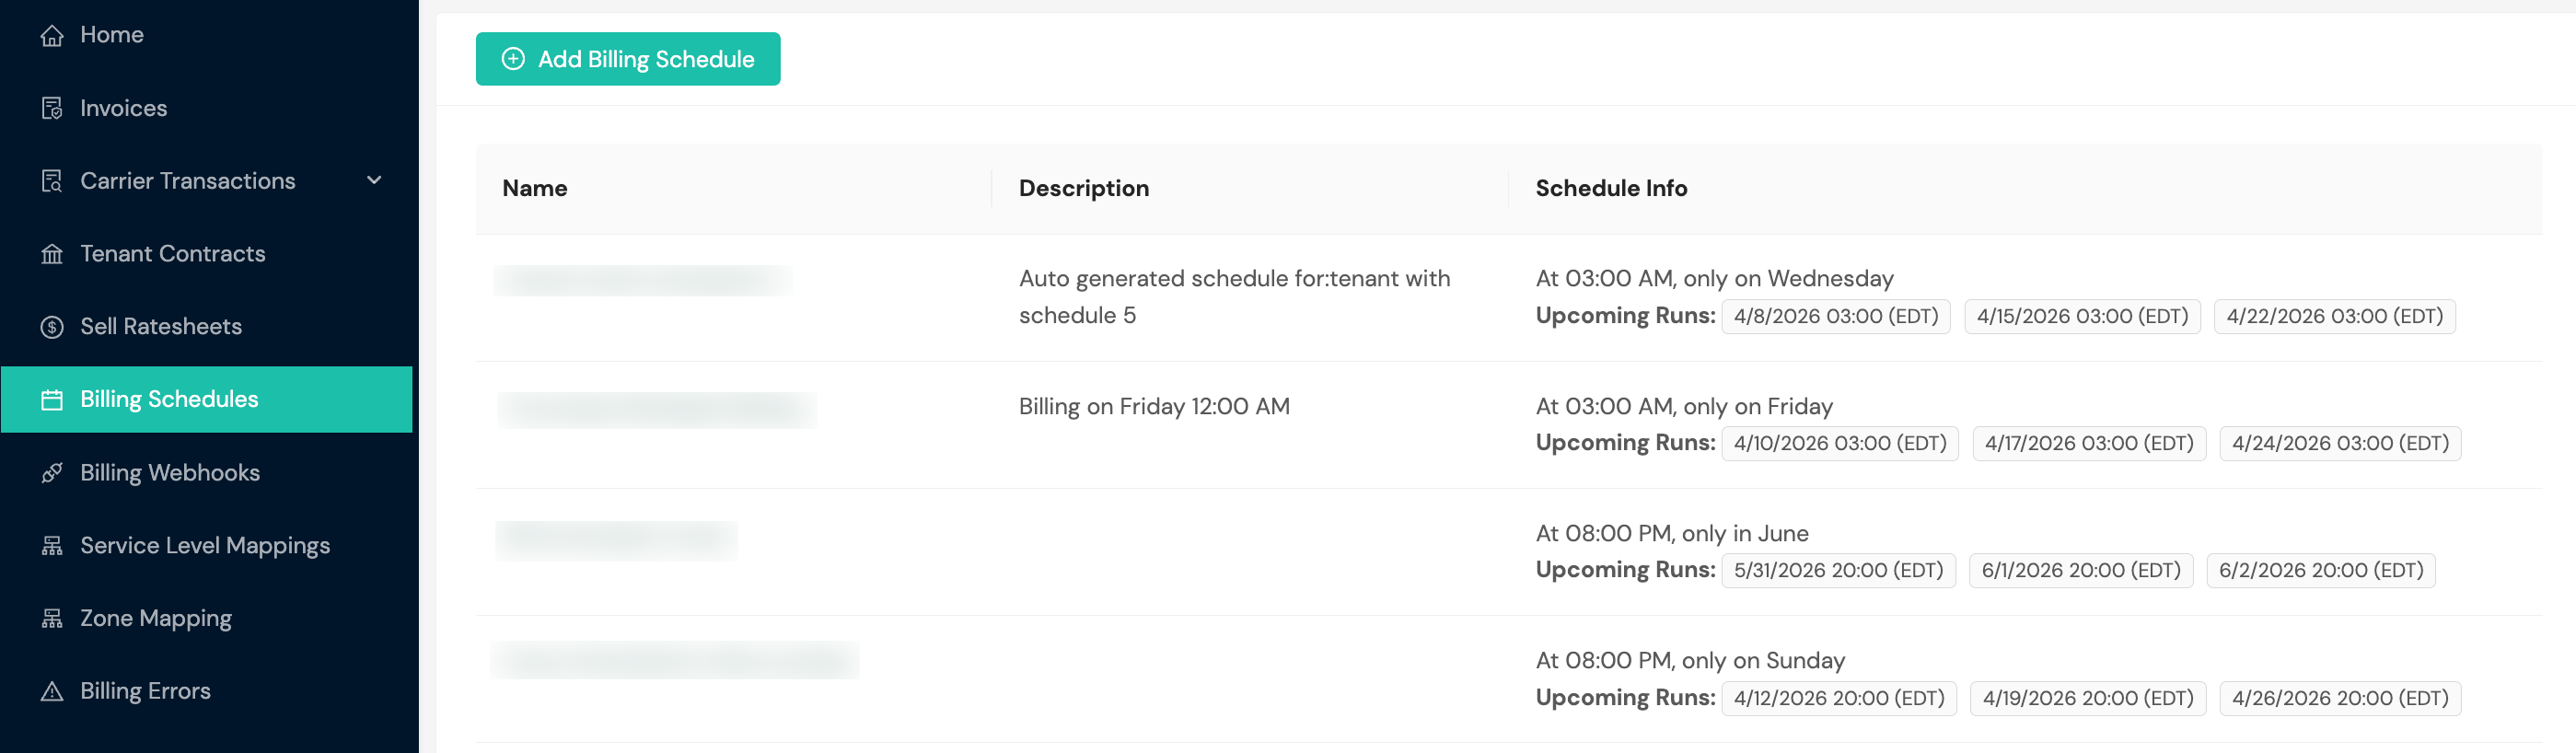
Billing schedules
The Billing Schedules homepage lists any billing schedules your organization has configured. Billing schedules can be configured at the partner level and for individual tenants. You can select existing schedules to edit them, and you can create a new billing schedule by selecting the + Add Billing Schedule button.
With billing schedules, you can:
- Set up recurring billing cycles on a daily, weekly, or monthly basis
- Configure automated invoice generation and delivery times
- Customize billing rules and payment terms for different customers
- Set up notifications and reminders for billing events
Schedule actions
The Billing Schedules page provides several actions for managing your schedules:
- Set as Active. Activates a schedule for automated invoice generation. At the partner level, this sets the default schedule for the entire partner. At the tenant level, this sets or overrides the schedule for a specific tenant. If a schedule is already active, selecting this action on a different schedule will switch the active schedule.
- Edit. Modify the schedule details, including name, description, and timing configuration.
- Delete. Remove a schedule definition entirely. A schedule cannot be deleted if it is currently active for any tenant or partner.
- Deactivate. Remove the active schedule association without deleting the schedule definition. After deactivating, no schedule will be active for that scope until you set a new one.
Tenant-level schedules override partner-level schedules. If you set an active schedule at the partner level and then set a different schedule for a specific tenant, the tenant will use its own schedule rather than the partner default.
Create a billing schedule
If you selected + Add Billing Schedule, you'll be prompted to provide a name, description, and schedule frequency. The schedule frequency builder allows you to define when invoices should be generated using dropdown selectors. You can also enable Auto Cut at this step, which automatically finalizes invoices generated by the schedule without requiring manual approval.
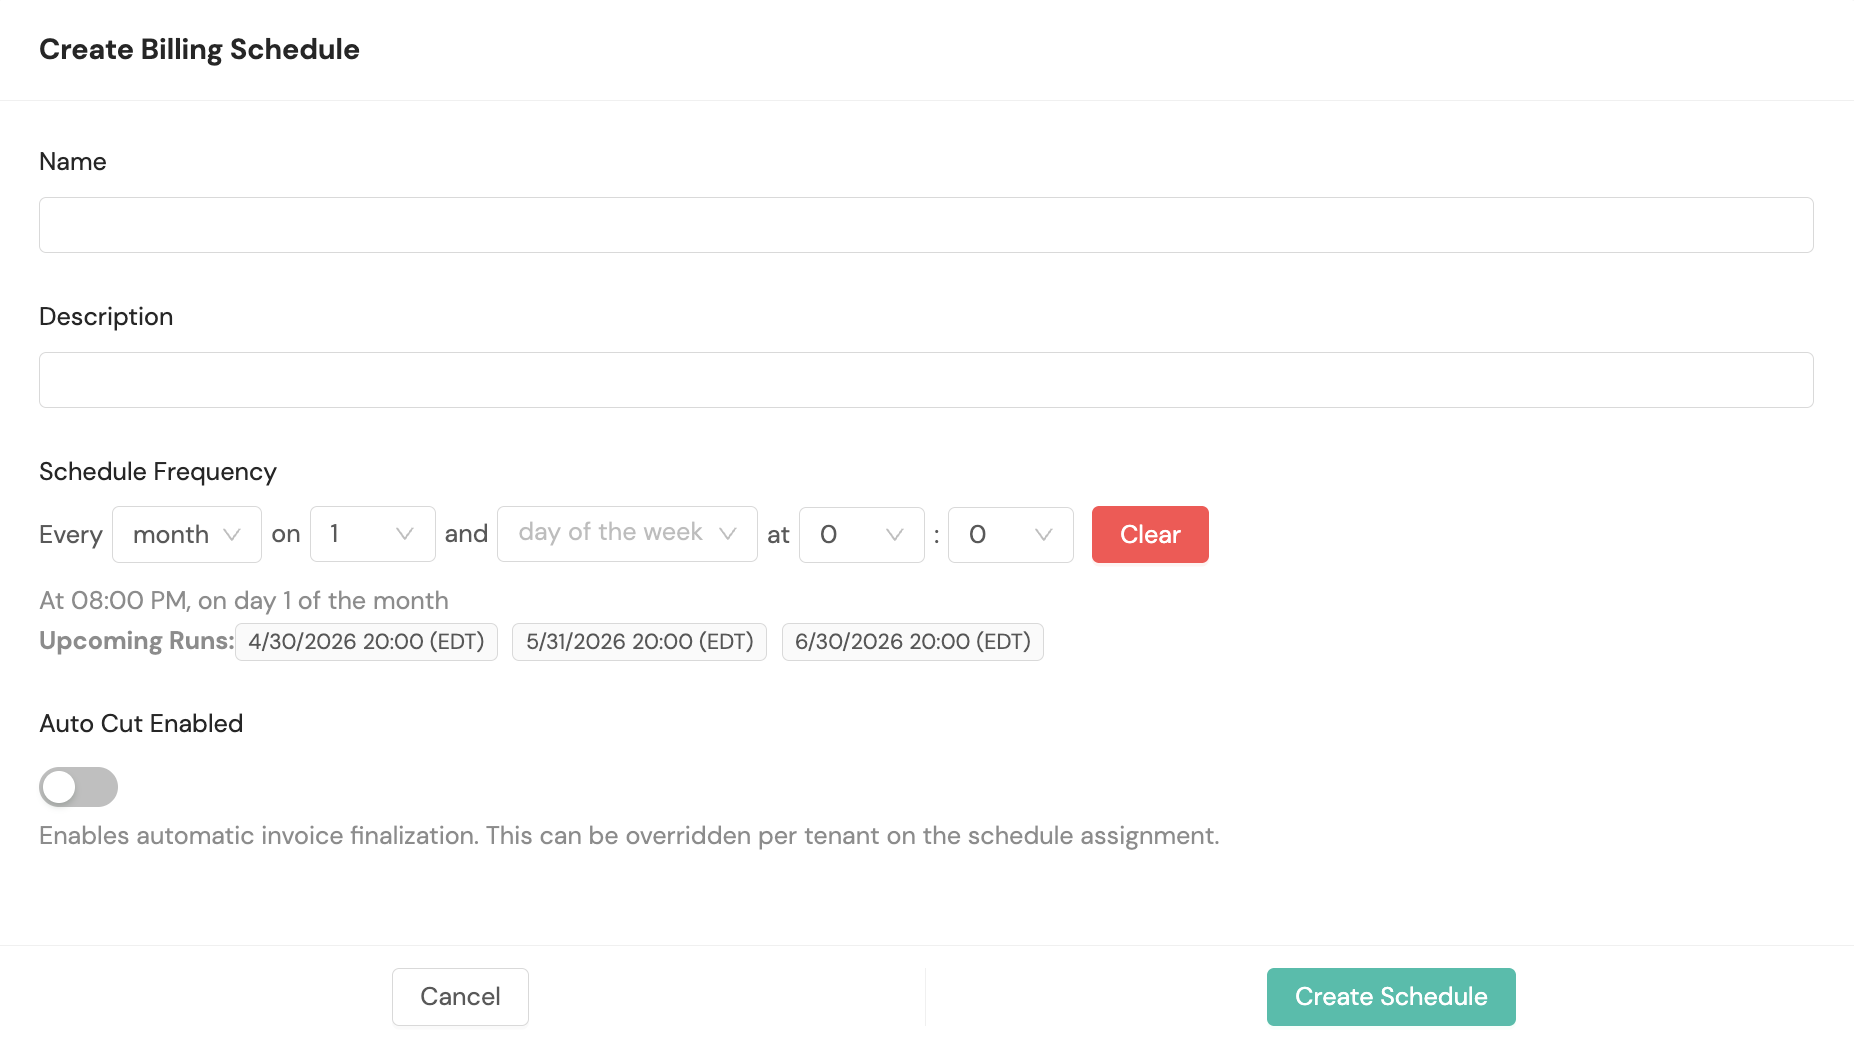
Schedule frequency options:
Select the frequency interval (day, week, month, etc.) and specific time for invoice generation. The system will display a human-readable description of your schedule and show the next three upcoming invoice generation times.
For example, selecting "Every day at 07:00 PM" with additional parameters will display: "At 07:00 PM, on day 15 and the last day of the month" along with the specific dates and times for upcoming invoice generation.
Auto Cut Enabled is a toggle available when creating or editing a billing schedule. When enabled, invoices generated by the schedule are automatically finalized without requiring manual approval, bypassing the standard draft → pending approval → approved workflow. This setting can be overridden per tenant at the schedule assignment level.
Billing webhooks
The Billing Webhooks page displays your configured webhook endpoints. You can filter webhooks by scope using the dropdown (e.g., Global or tenant-specific).
Each webhook shows:
- Name. The webhook identifier.
- Request URL. The endpoint that receives webhook notifications.
- Event Type. The invoice event that triggers the webhook (e.g., Invoice Finalized).
- Enabled. Toggle to activate or deactivate the webhook.
Select + Add Webhook to create a new webhook endpoint.
For detailed information about webhook events and payloads, see Webhooks for Billing Management.
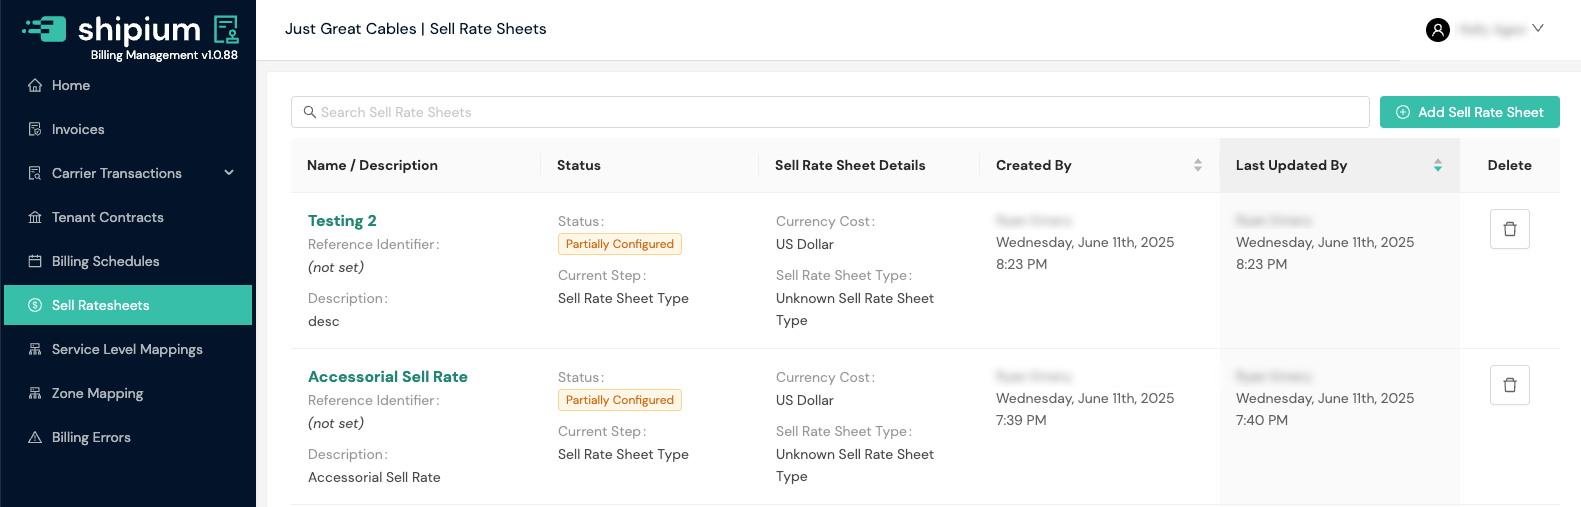
Sell rate sheets
The Sell Ratesheets homepage lists any sell rate sheets your organization has configured. Selecting existing ratesheets enables you to edit them. You also can add a new sell rate sheet by selecting + Add Sell Rate Sheet.
With sell rate sheets, you can:
- Define custom pricing tiers based on shipping zones and service levels
- Set markup percentages or fixed amounts on carrier rates
- Create special rates for specific customers or groups
- Compare and analyze different pricing strategies
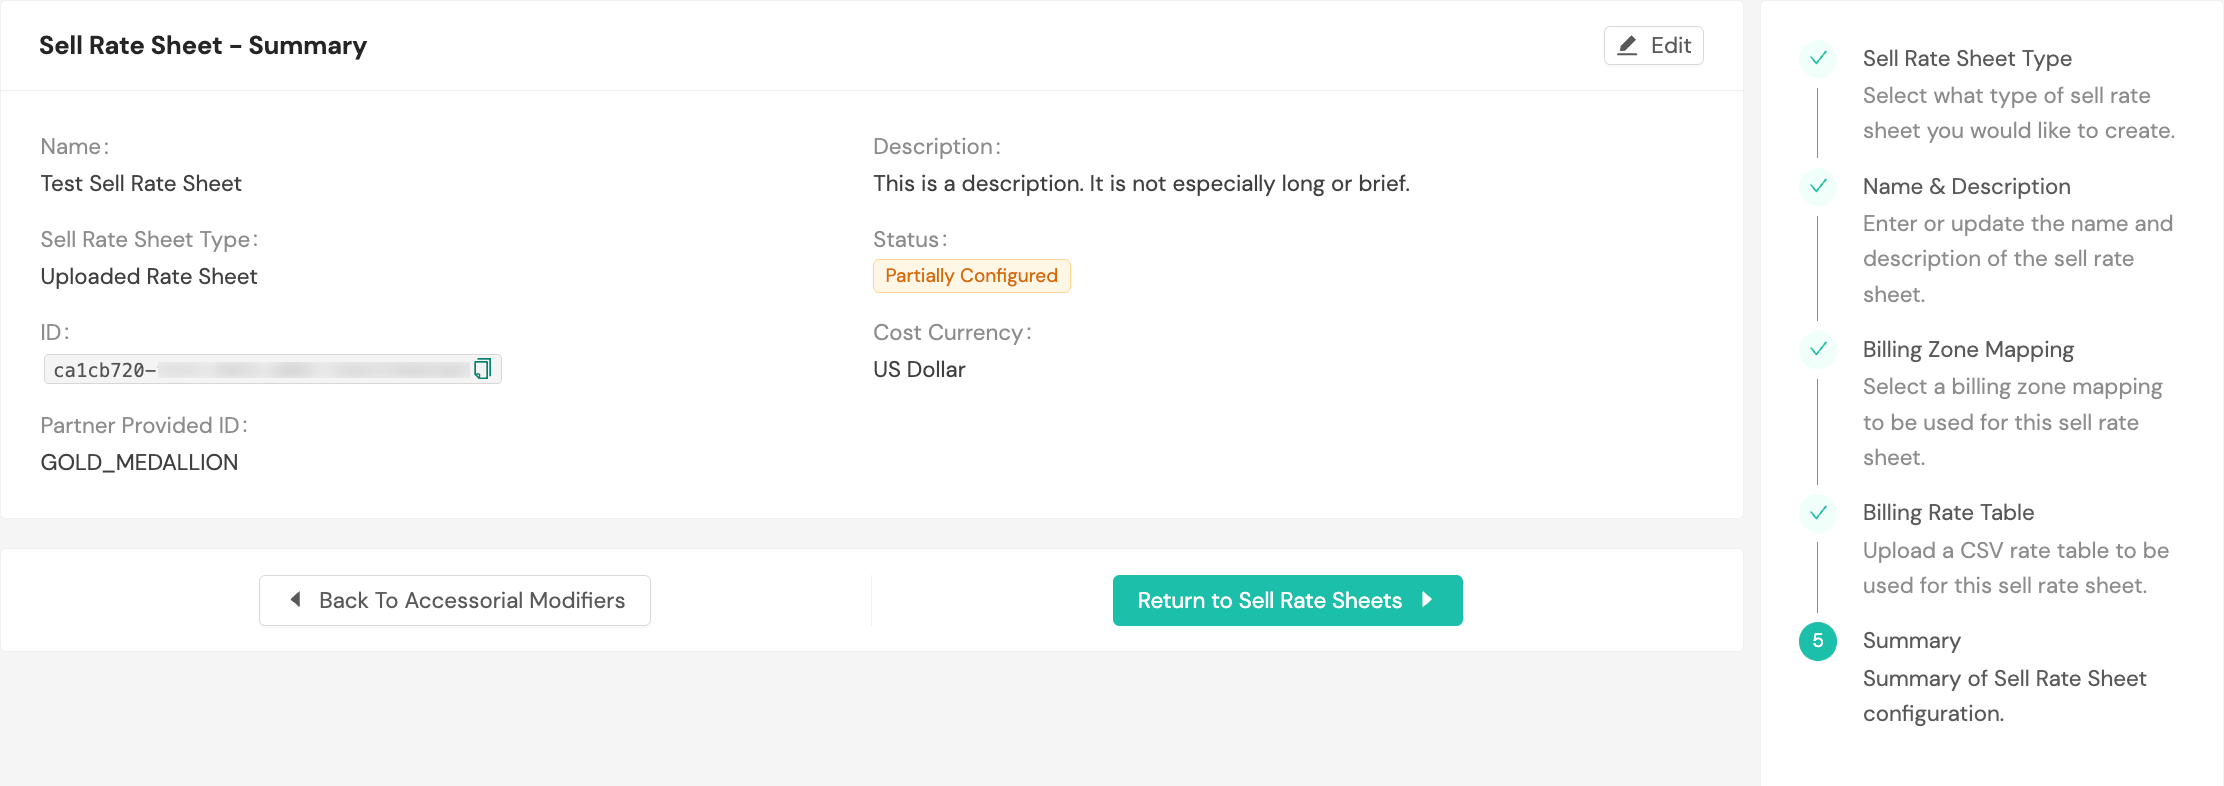
Sell rate sheets require multiple configuration steps. The list view displays each sell rate sheet's current status:
- Partially Configured. The ratesheet setup is incomplete. The Current Step column indicates where configuration stopped.
- Active. The ratesheet is fully configured and available for use in billing contracts.
To resume configuring a partially configured sell rate sheet, select it from the list and complete the remaining steps.
Primarily for 3PL organizationsSell rate sheets define the rates you charge your tenants (customers) for shipping services. These rates can include markup over your carrier costs to generate margin. Enterprise organizations that do not bill customers for shipping typically do not need to configure sell rate sheets.
To add a new sell rate sheet, you first must select the type of sell rate sheet you wish to create: an entire new rate sheet with zones and weights or rate modifications to be applied to the costed rates returned by the carrier.
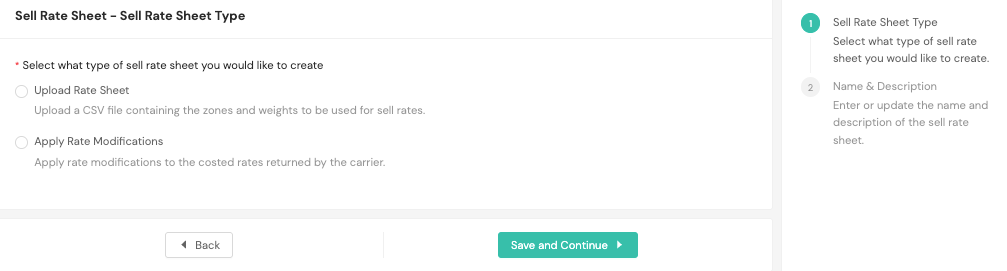
Next you'll provide a name, description, the currency for costing, and an optional reference identifier.

The next step is providing zone mapping for the sell ratesheet.
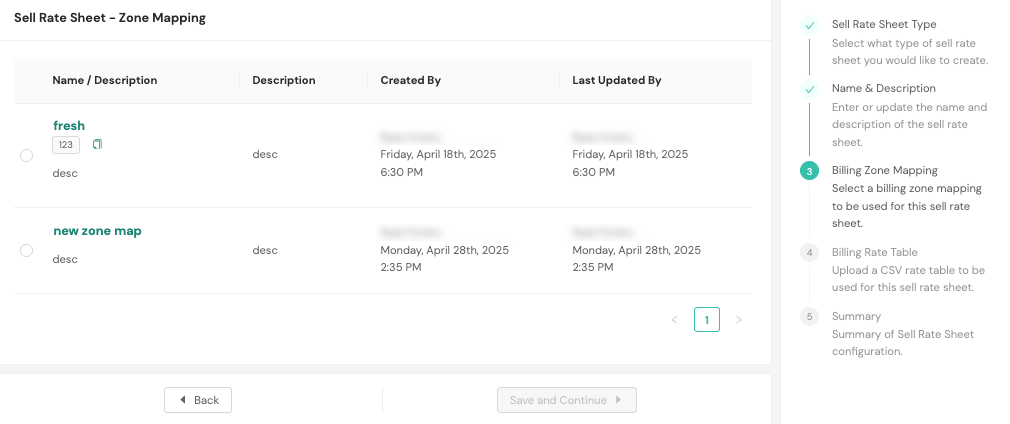
Once you have established zone mapping, you'll select the sell rate sheet currency and weight unit and download a rate sheet template. The template to download will have been created based on the billing zone map you selected in the previous step. The weights in the template are arbitrary and can be replaced with the rates that your rate sheet table should support.
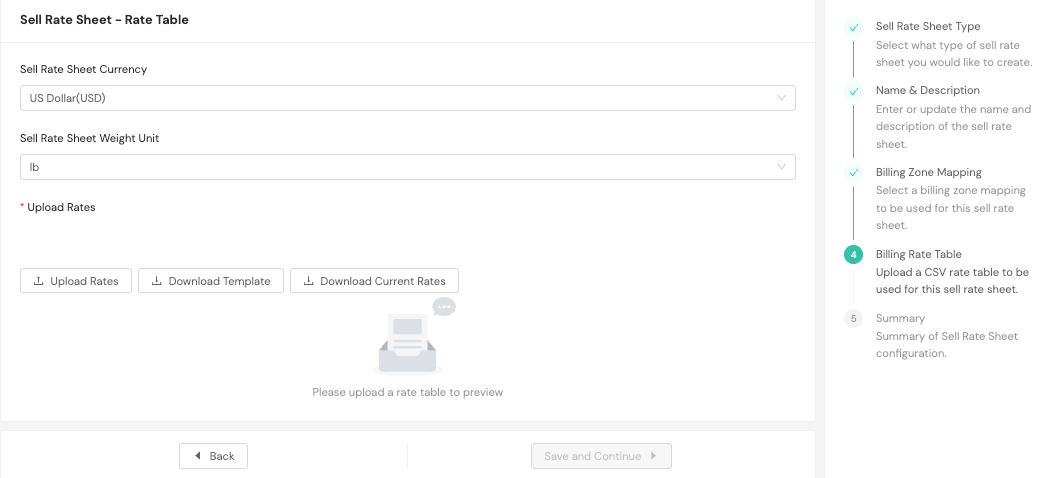
Finally, a summary will be provided for your review.
Service level mappings
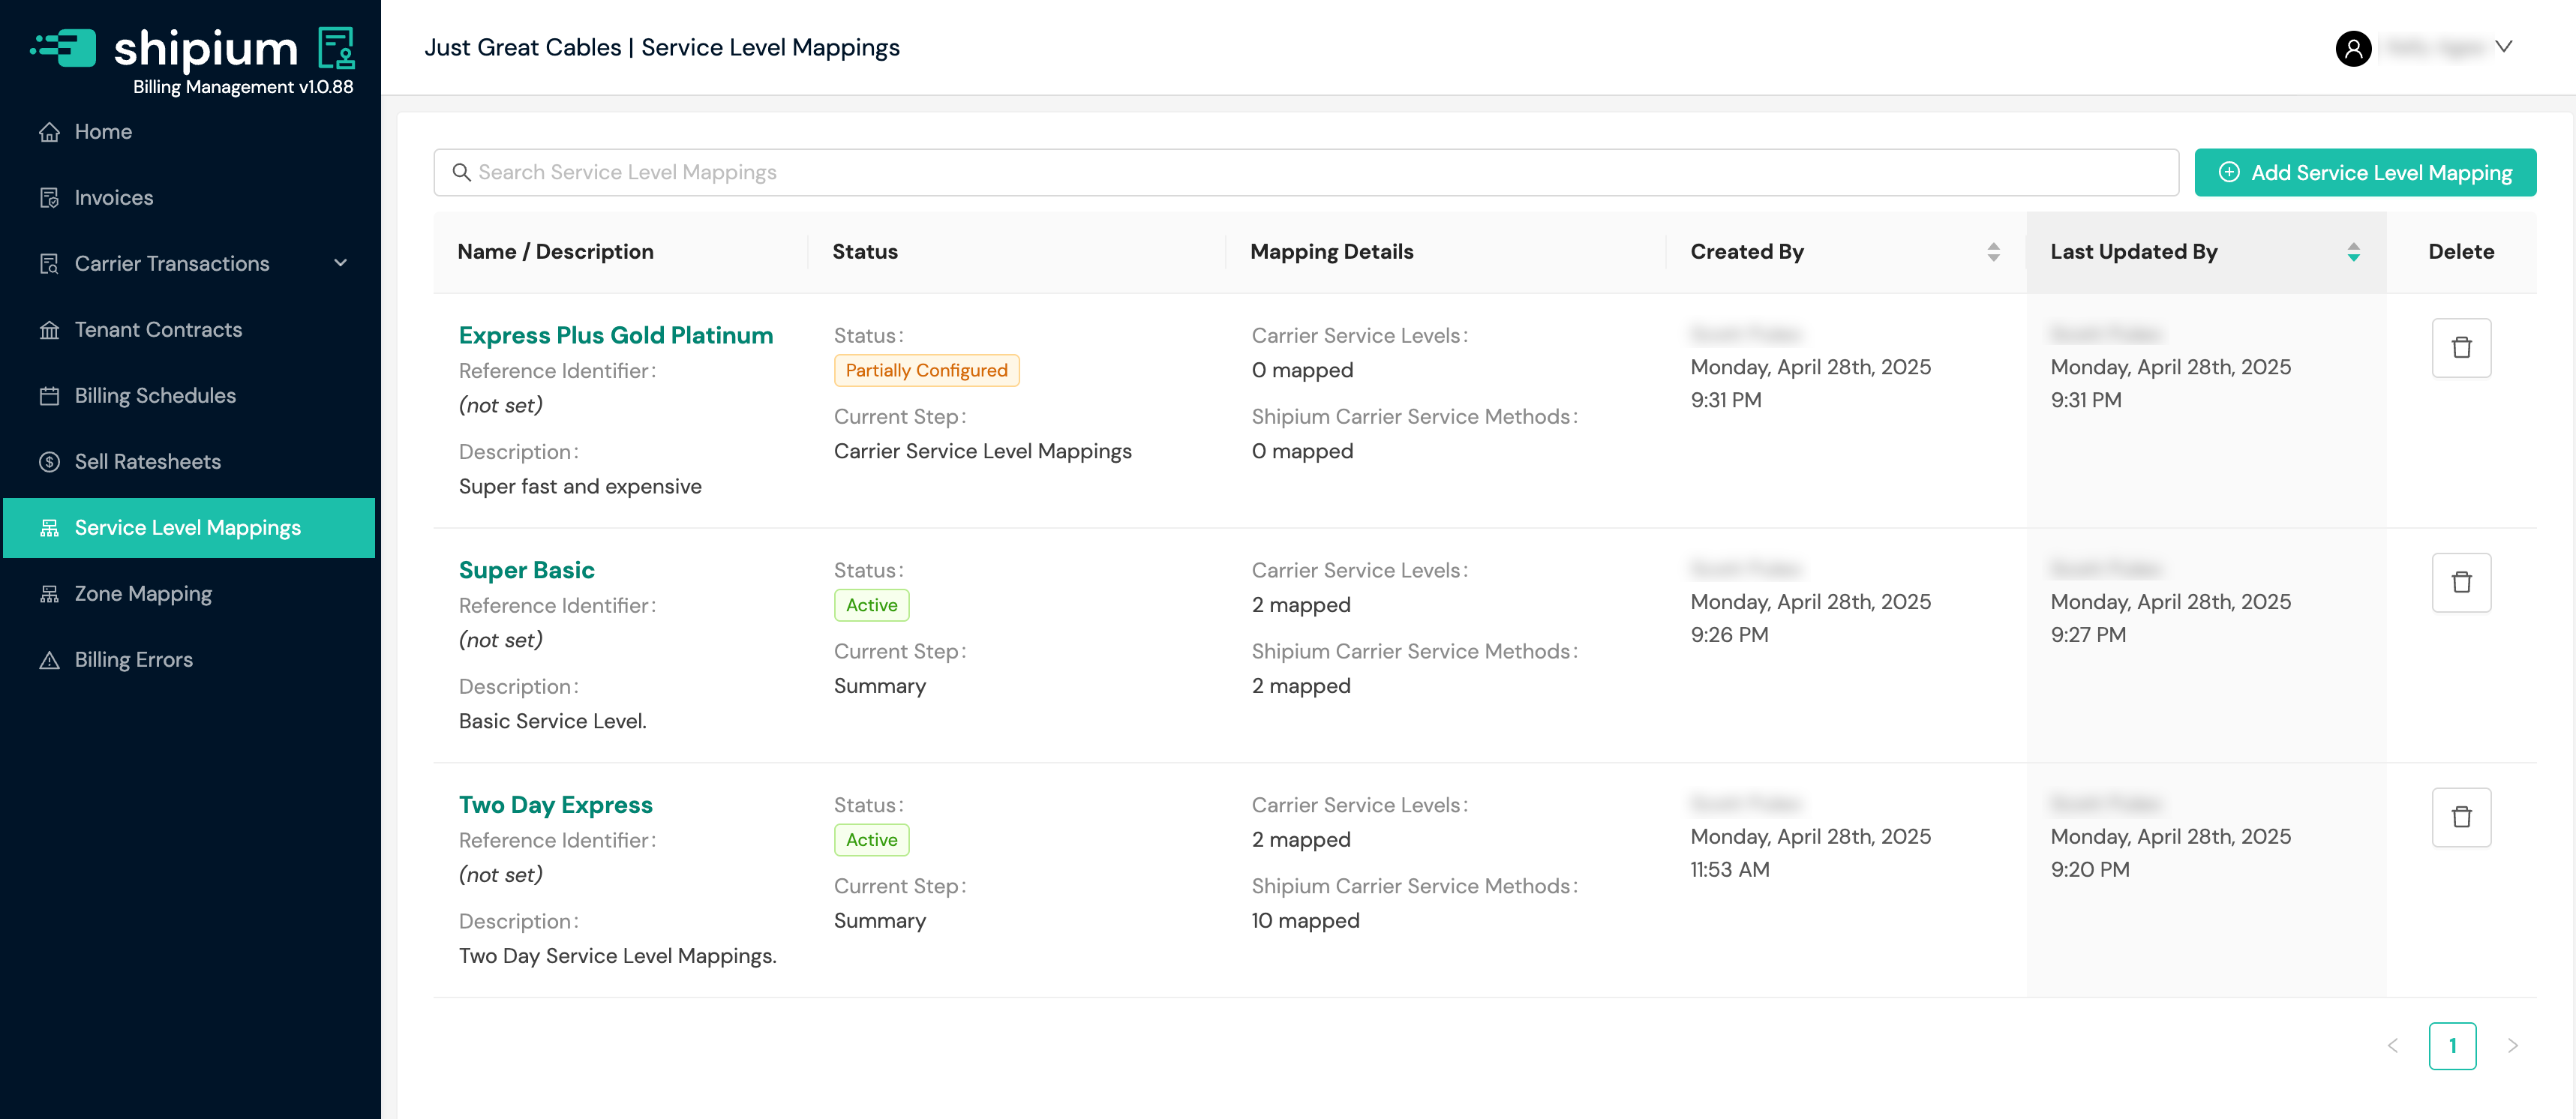
You'll find a list of your organization's carrier service level mappings in the Service Level Mappings homepage. You can select any one of them to view details and edit properties, and choosing the + Add Service Level Mapping button allows you to add a new mapping.
Service level mappings require multiple configuration steps. The list view displays each mapping's current status:
- Partially Configured. The mapping setup is incomplete. The Current Step column indicates where configuration stopped.
- Active. The mapping is fully configured and available for use.
To resume configuring a partially configured mapping, select it from the list and complete the remaining steps.
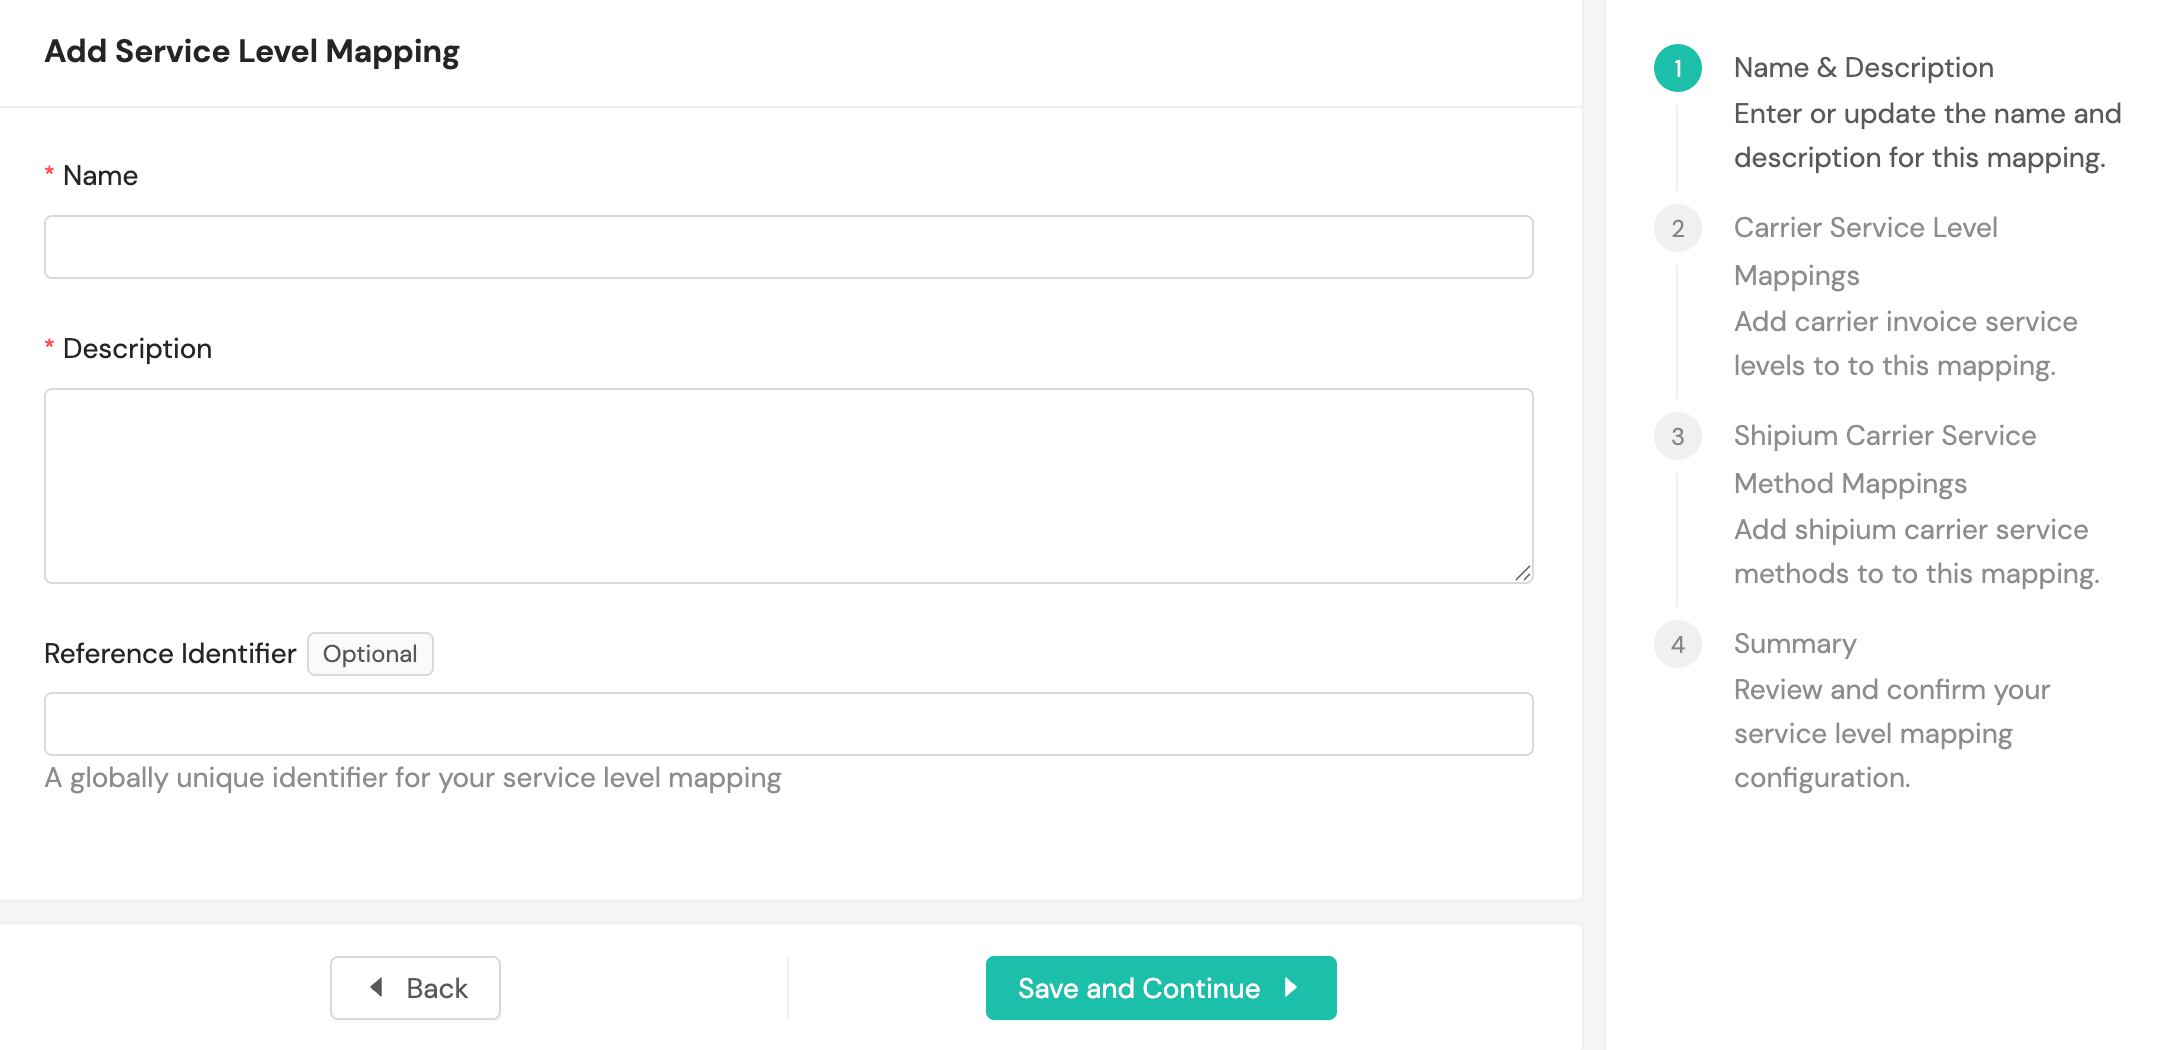
To add a new carrier service level mapping to your settings, you'll provide a name and description. Optionally, you can provide a reference identifier.
Next you'll need to add carrier service levels to define the mappings.
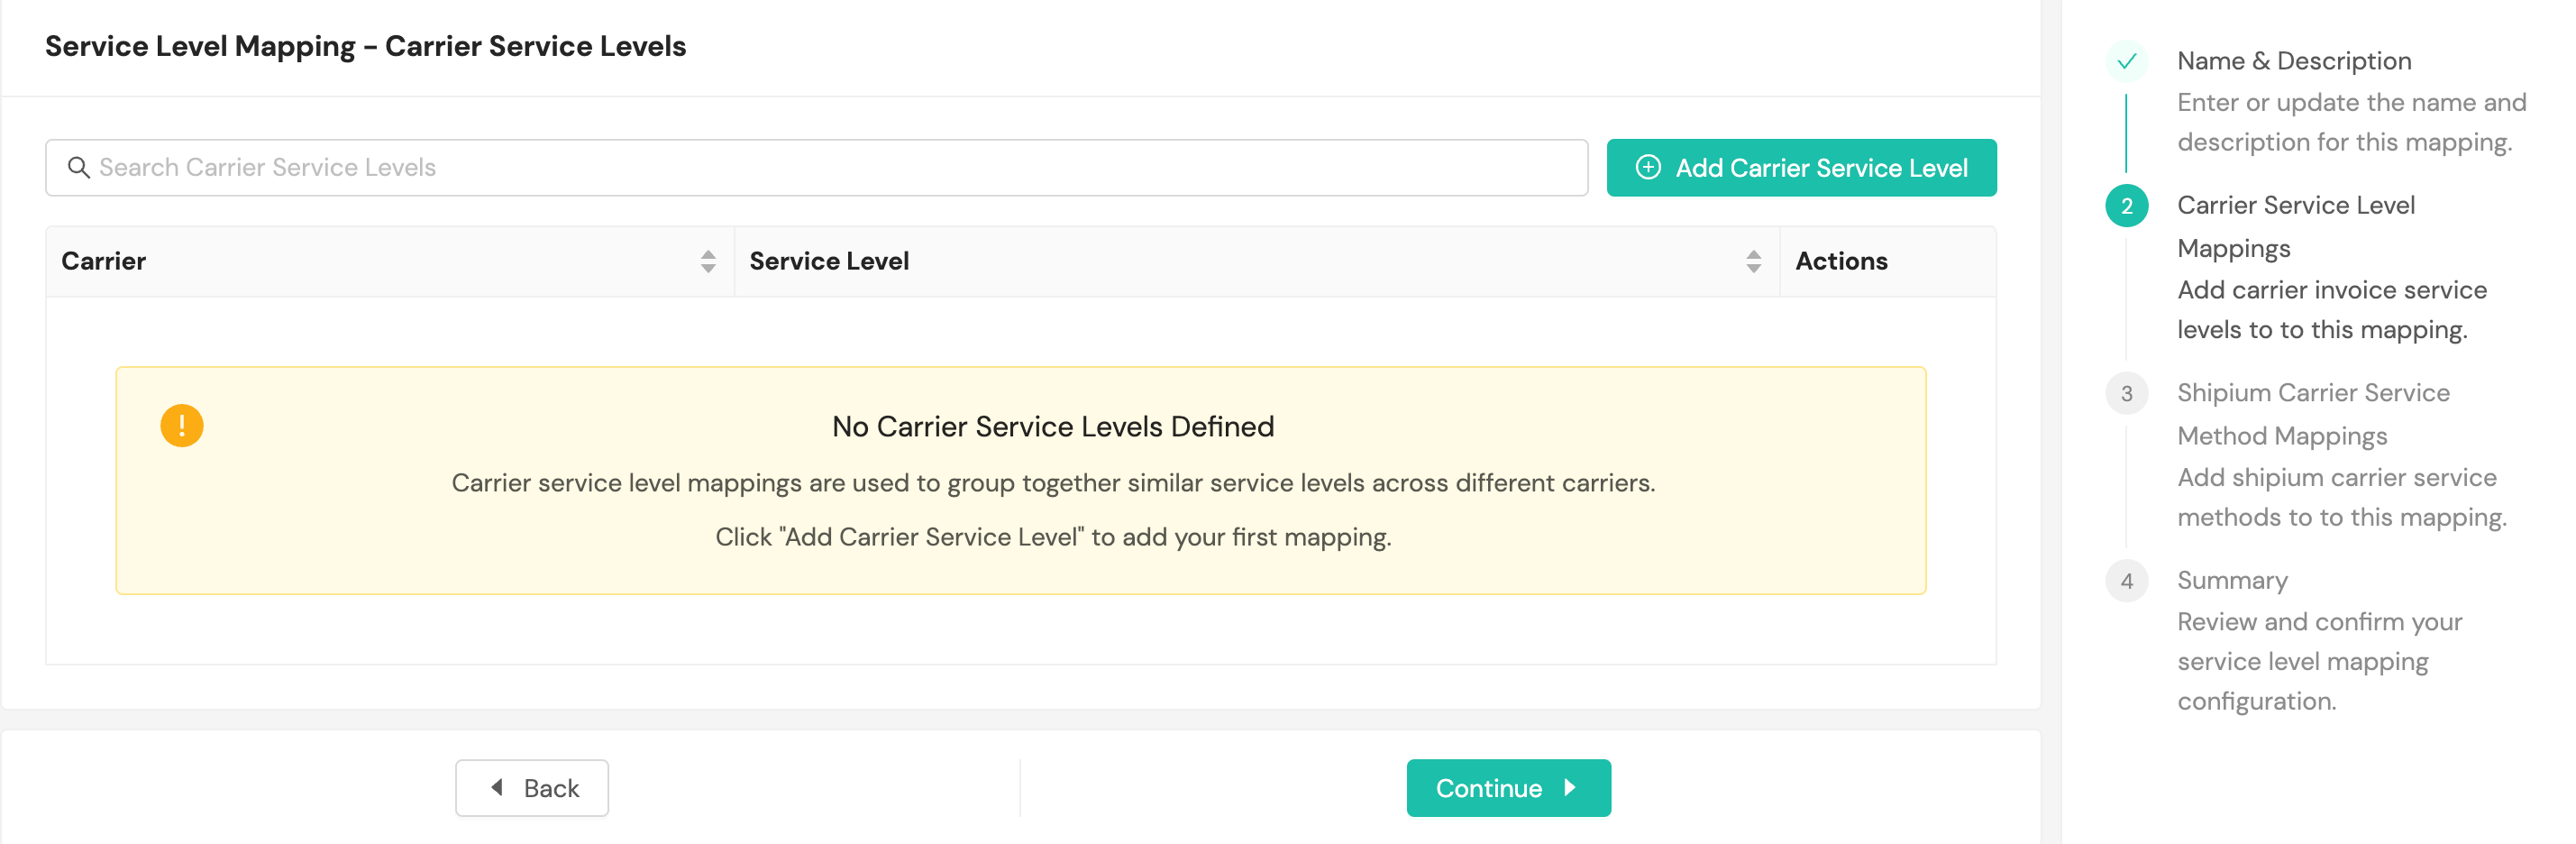
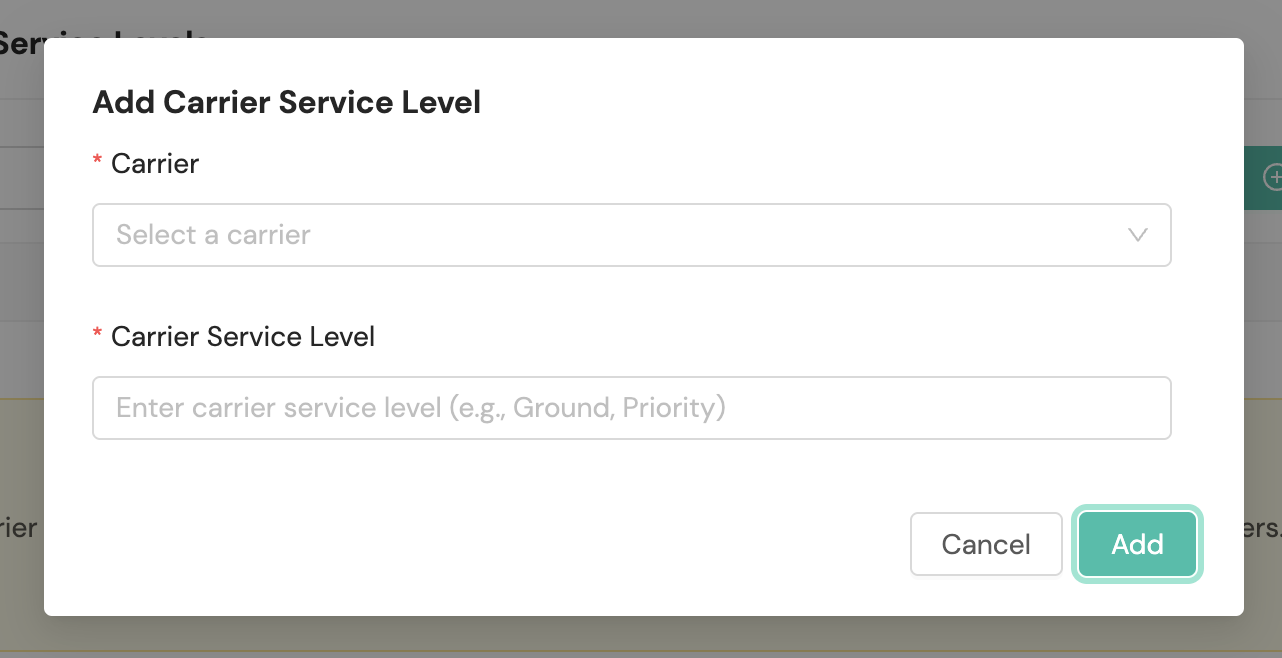
Selecting the + Add Carrier Service Level button prompts you to select the carrier from a dropdown menu and to define its service level.
To map the newly added carrier service level to Shipium's carrier service methods, you'll add a Shipium carrier service method to your service level.
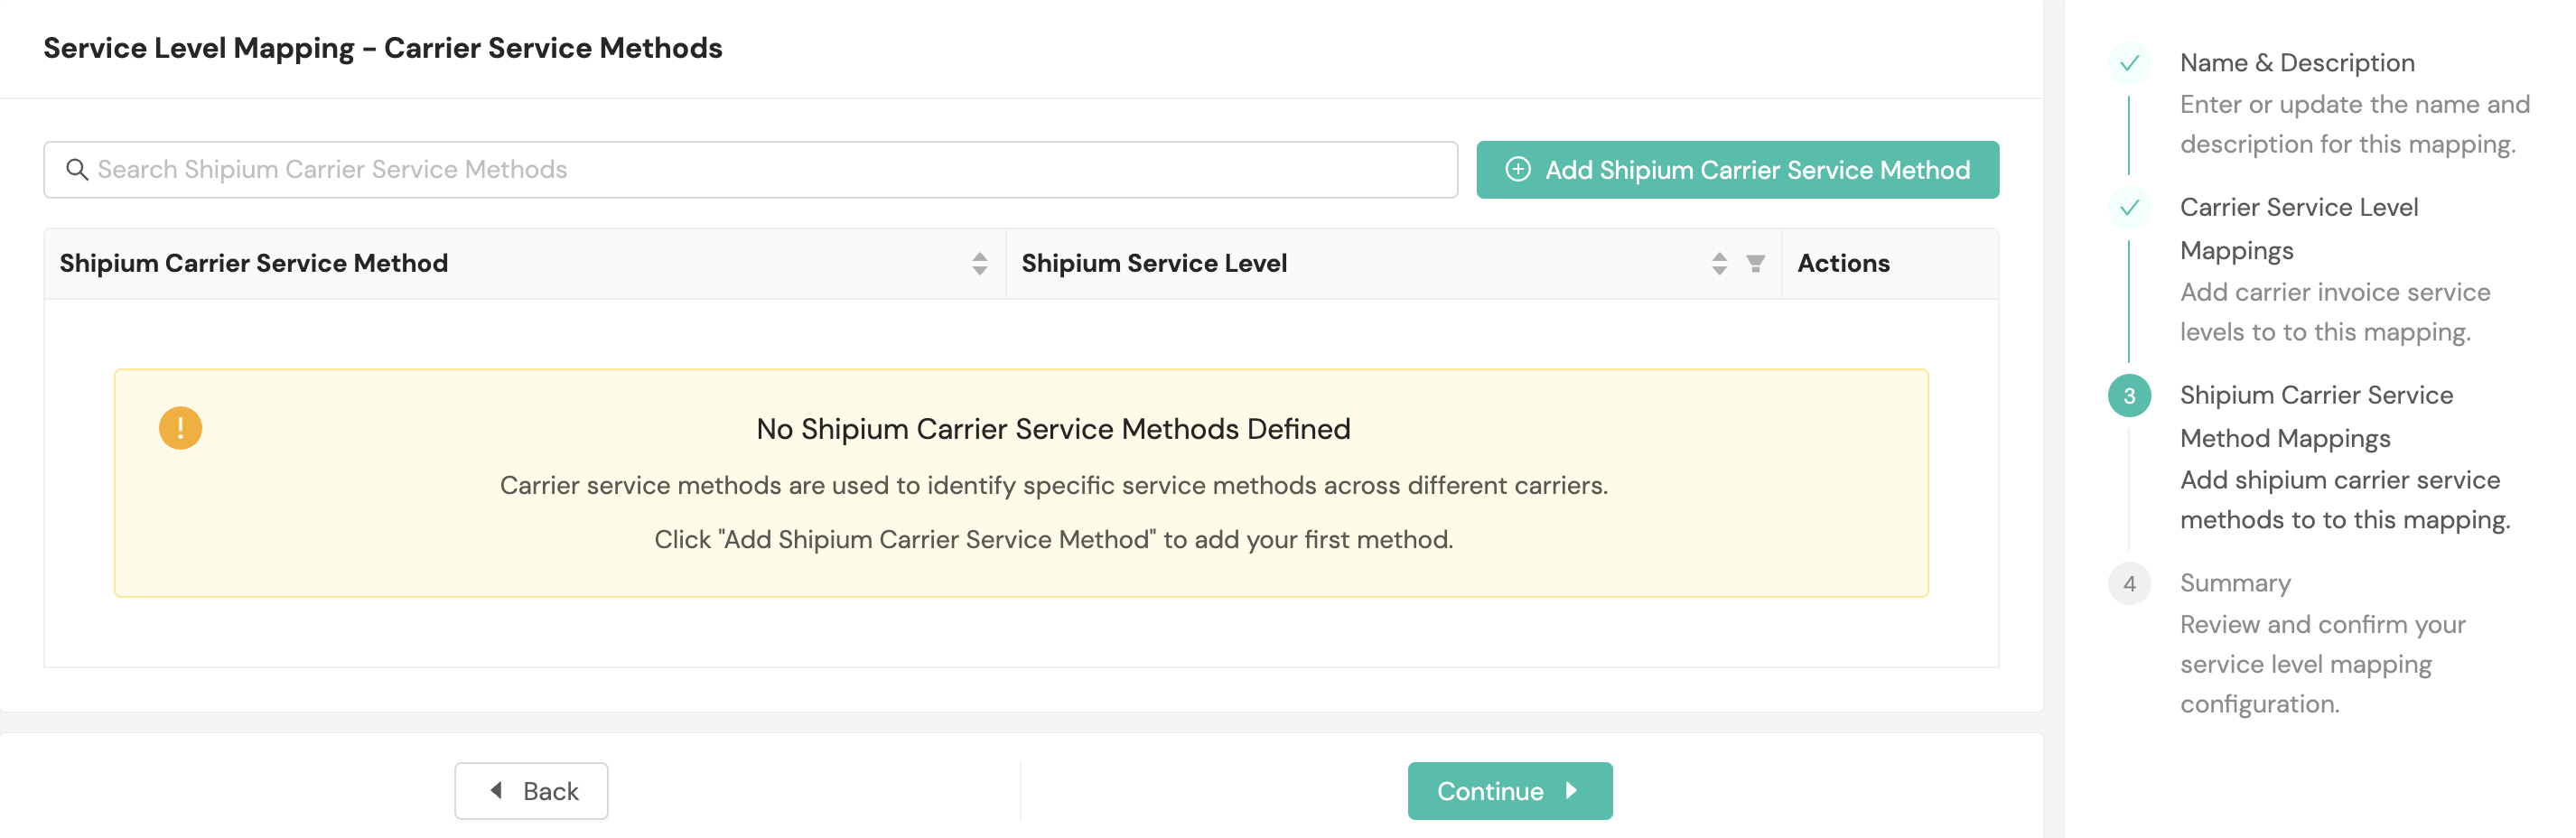
Selecting + Add Shipium Carrier Service Method prompts you to choose to apply to all carriers and methods or only the ones that are configured before selecting the carrier.
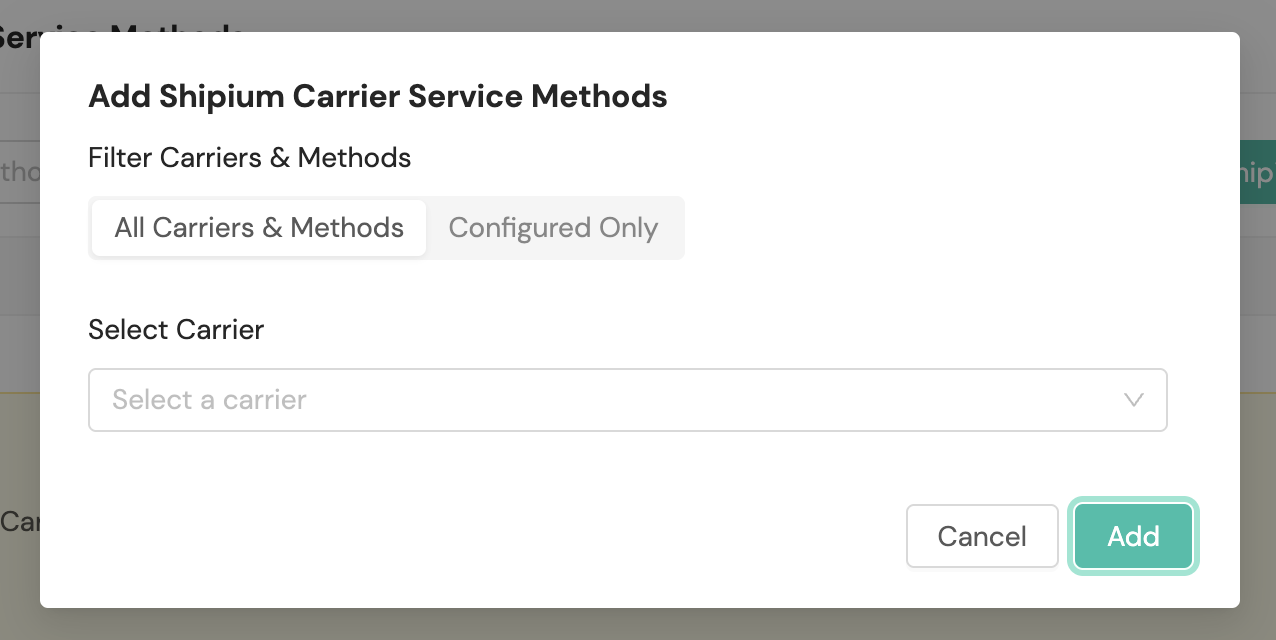
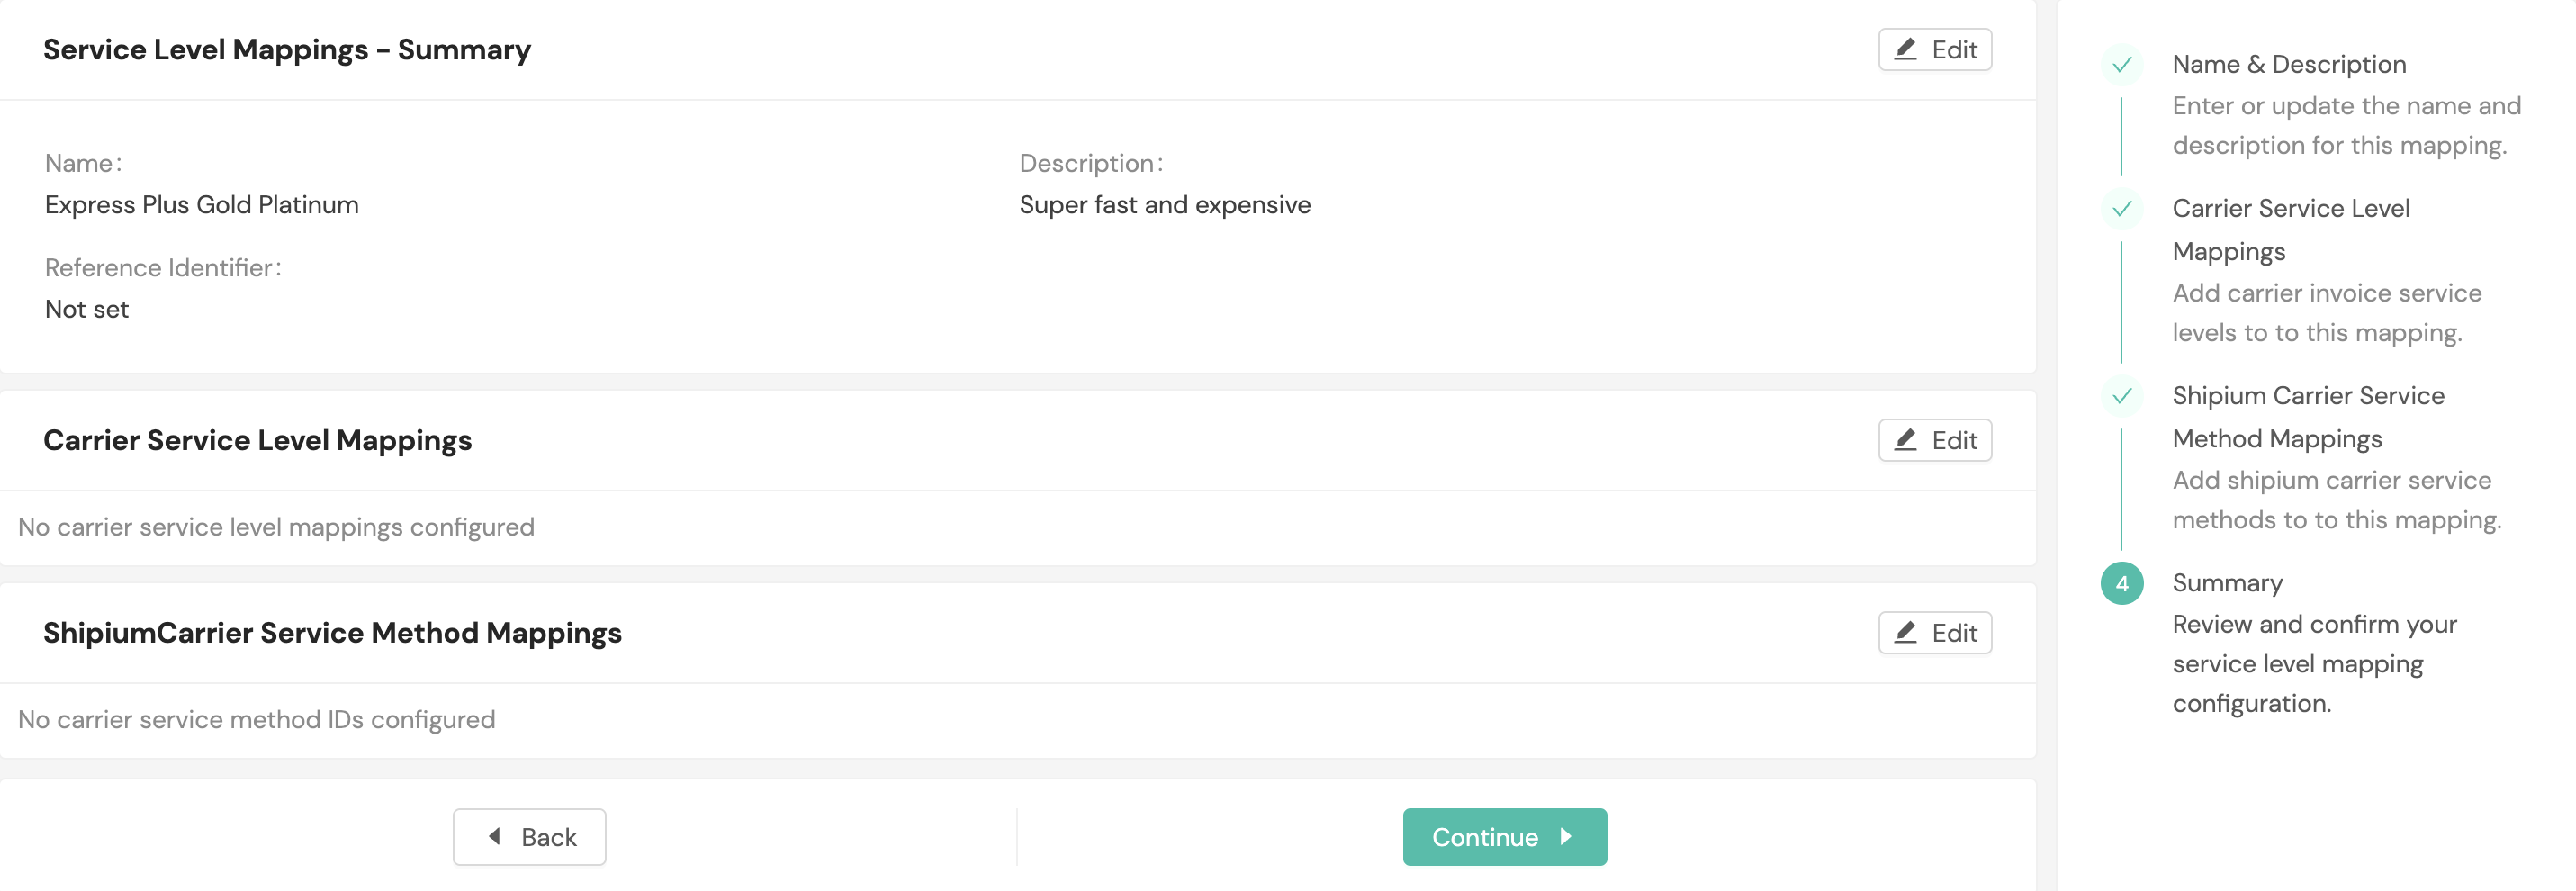
A summary of the mapping will appear for your review before you continue.
Zone mapping
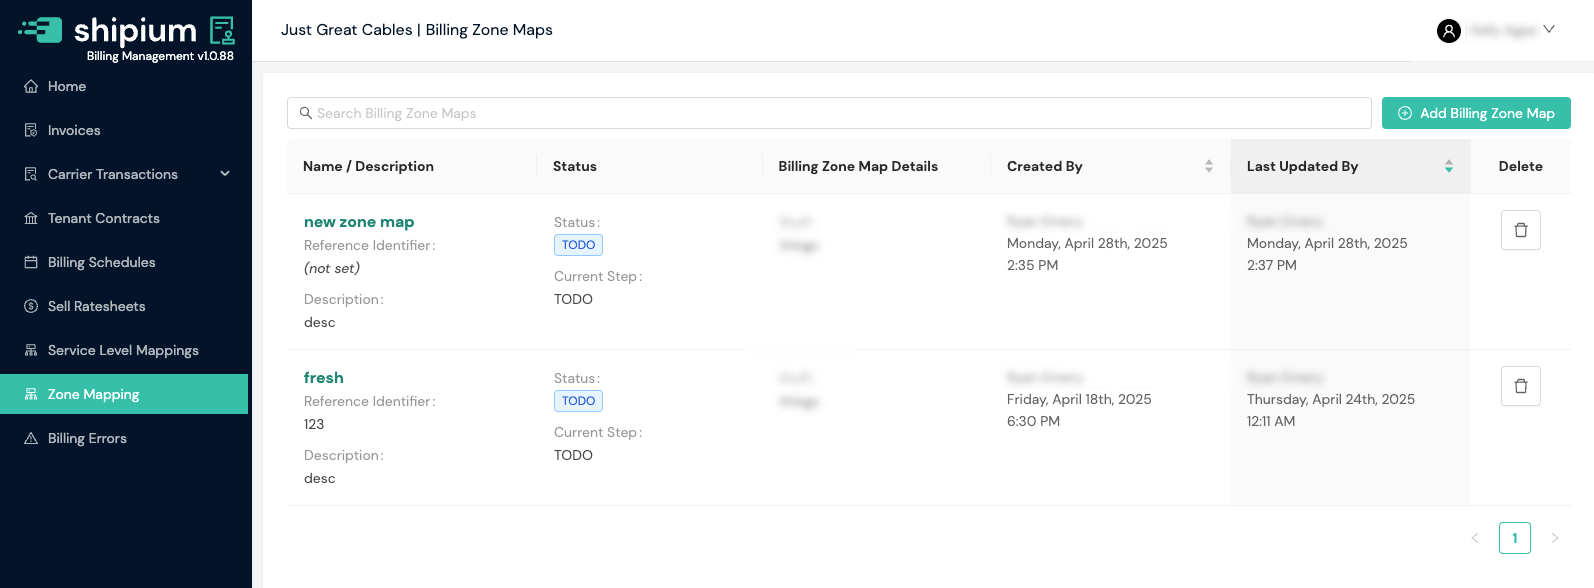
The Zone Mapping homepage lists your configured carrier zone mappings. You can view details for any of them by selecting the name or description. You can create a new mapping by selecting the + Add Billing Zone Map button.
With billing zone maps, you can:
- Map carrier shipping zones to your customer-facing zones
- Create custom zone structures for different regions and markets
- Link multiple carrier zones to a single customer zone
- Streamline rate table creation with pre-configured zone mappings
Zone mappings require multiple configuration steps. The list view displays each mapping's current status:
- TODO. The mapping setup is incomplete and requires additional configuration.
- Active. The mapping is fully configured and available for use.
To resume configuring an incomplete zone mapping, select it from the list and complete the remaining steps.
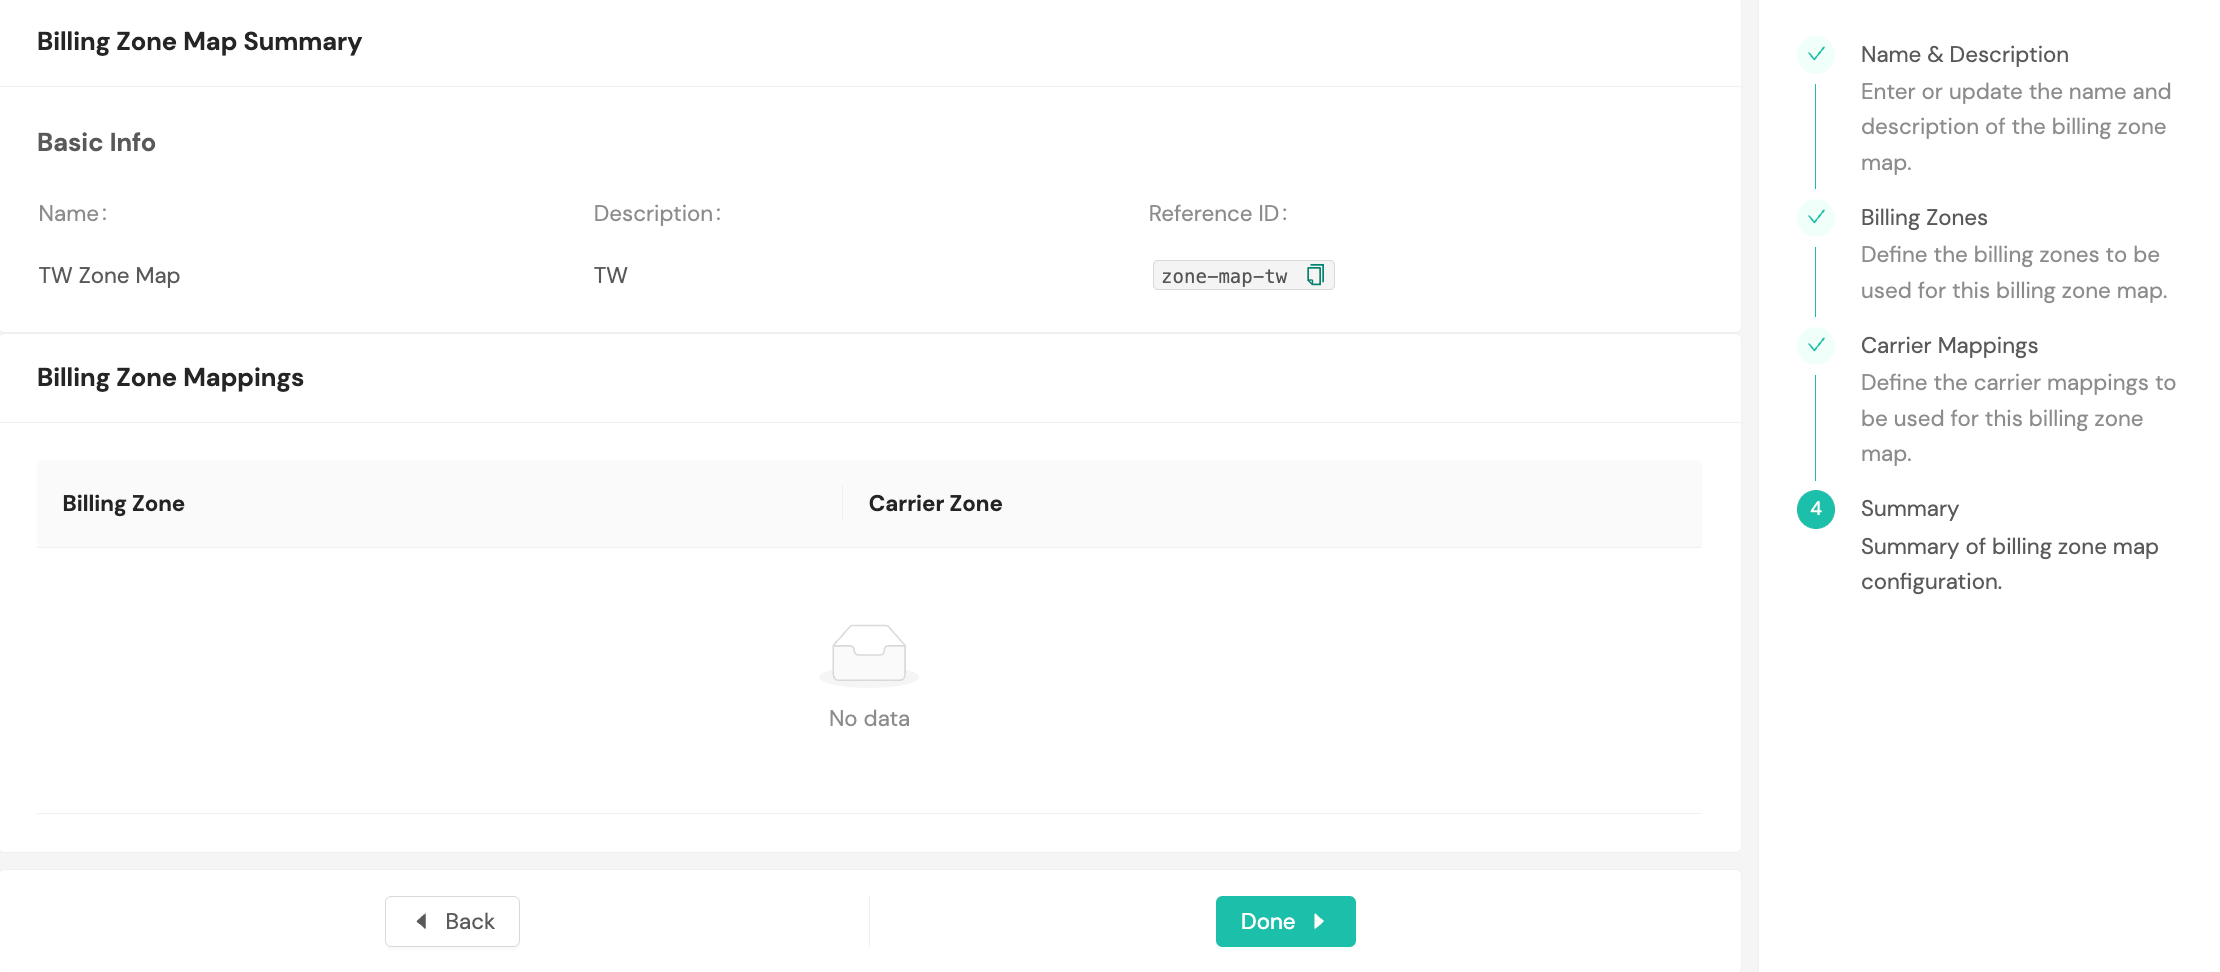
To add zone mapping, you must provide a name and description; you also can provide an optional reference identifier.
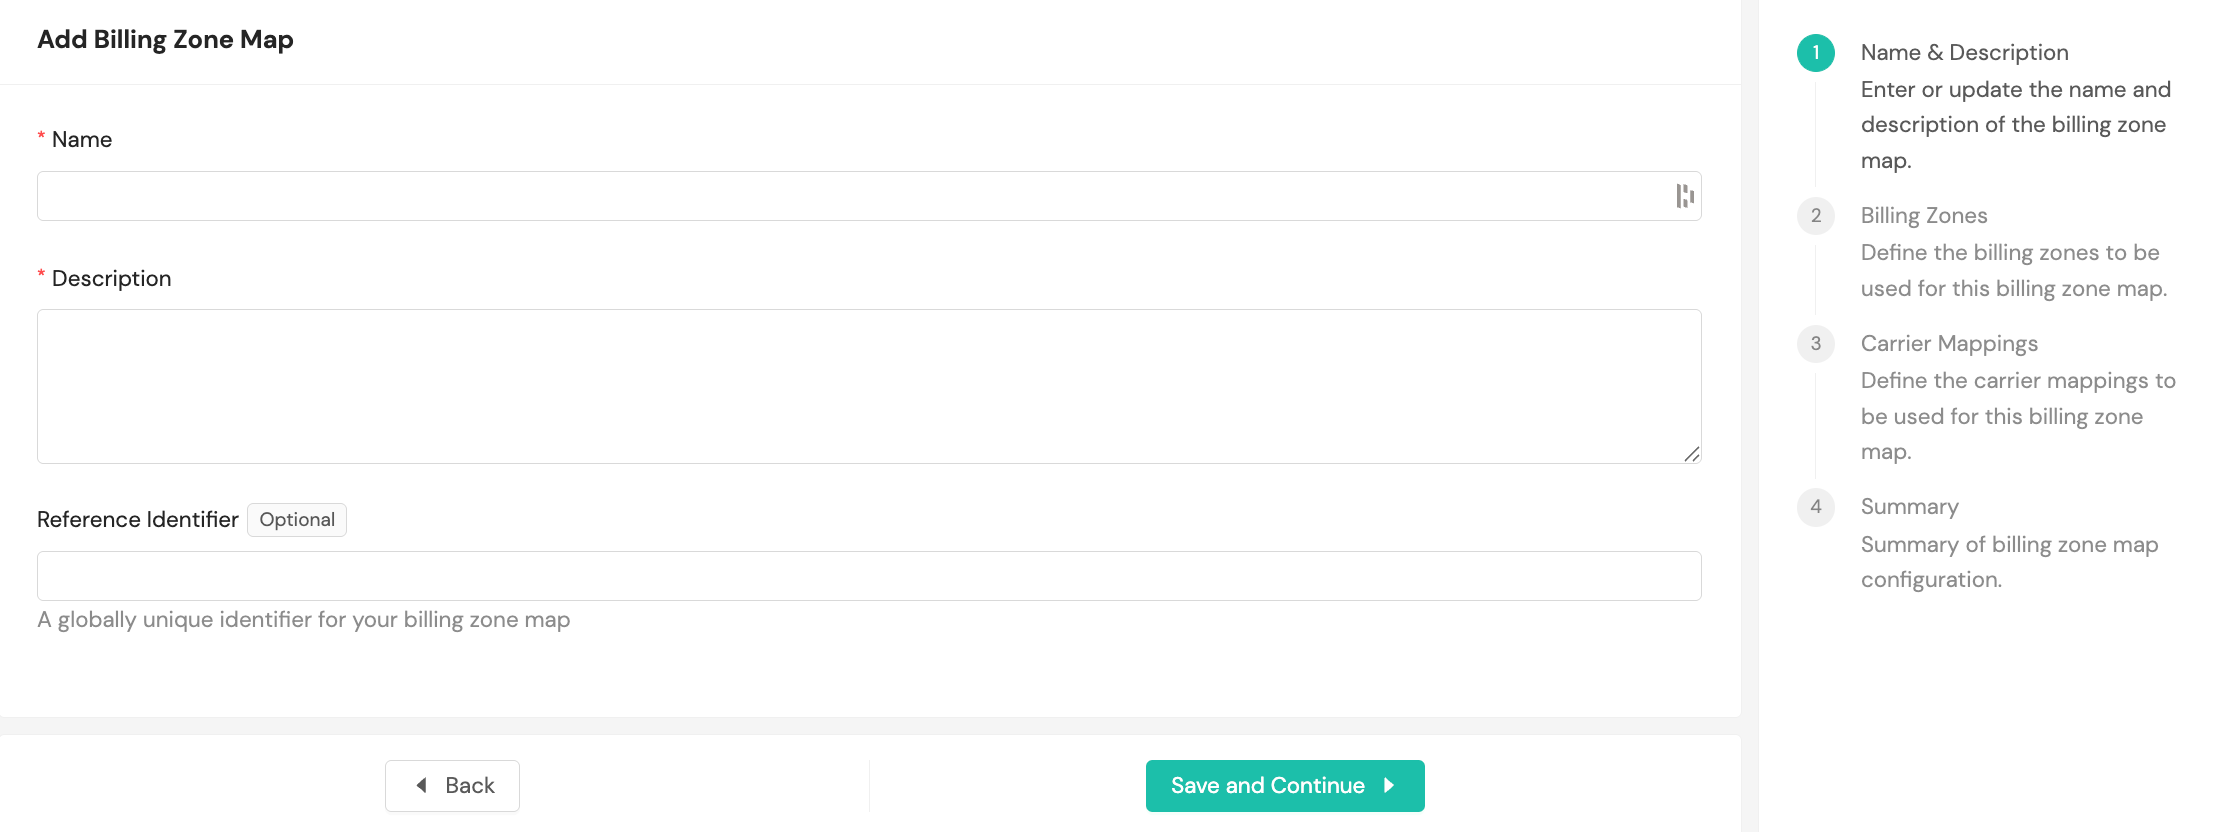
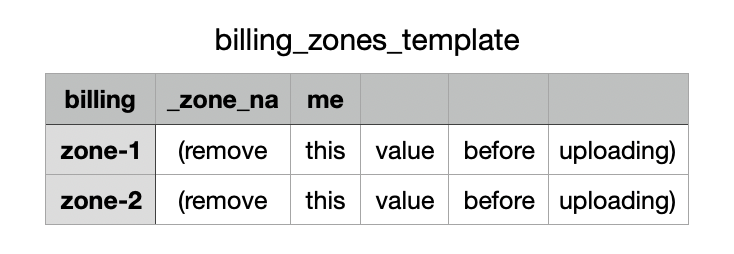
The next step involves downloading the billing zones template and uploading it to the system.
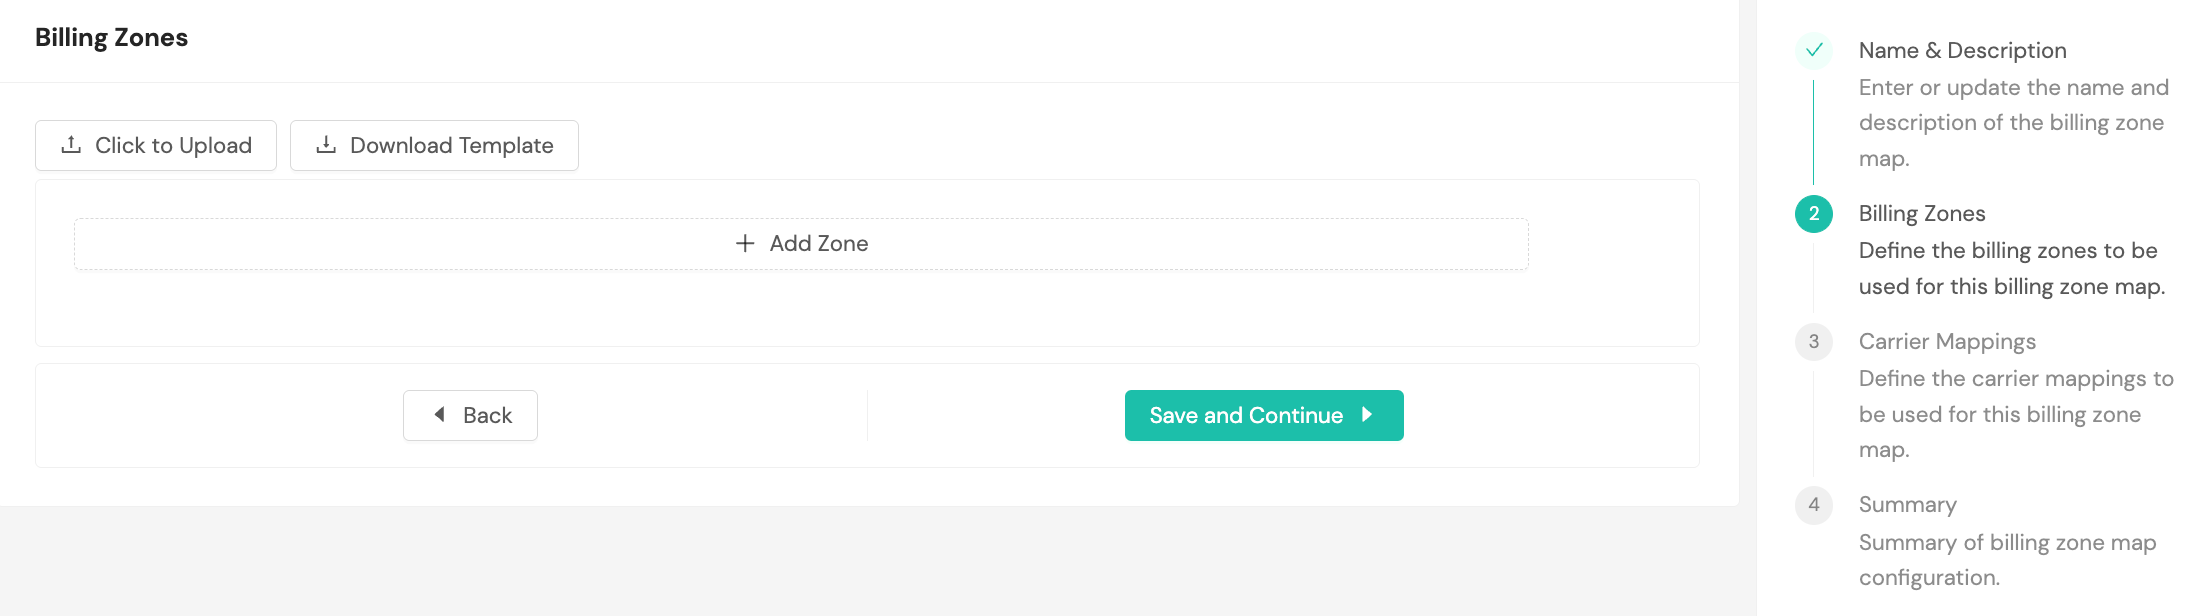
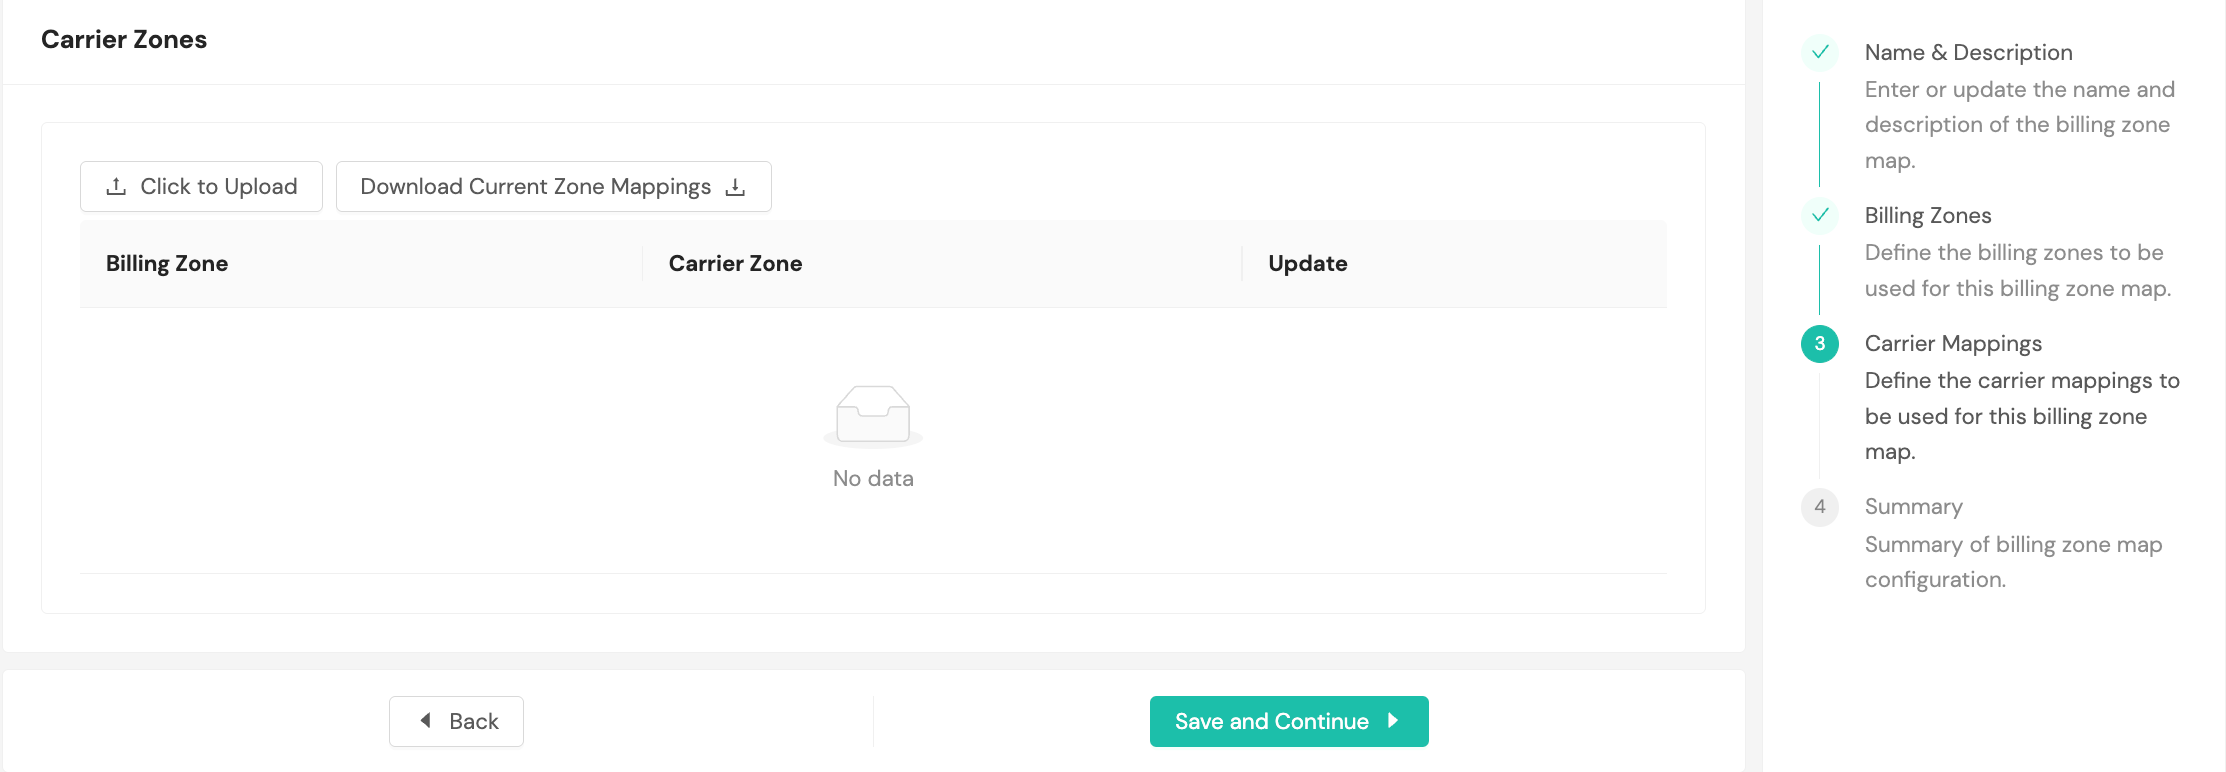
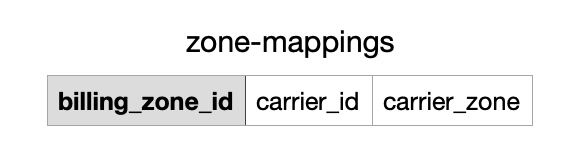
You'll complete a similar action for carrier zones, downloading the template and uploading it with your values populated.
A summary of the data you provided will appear as the final step.
Billing errors
The Billing Errors page displays transactions that encountered issues during billing processing. Use this page to identify and resolve configuration problems that prevent accurate invoicing.
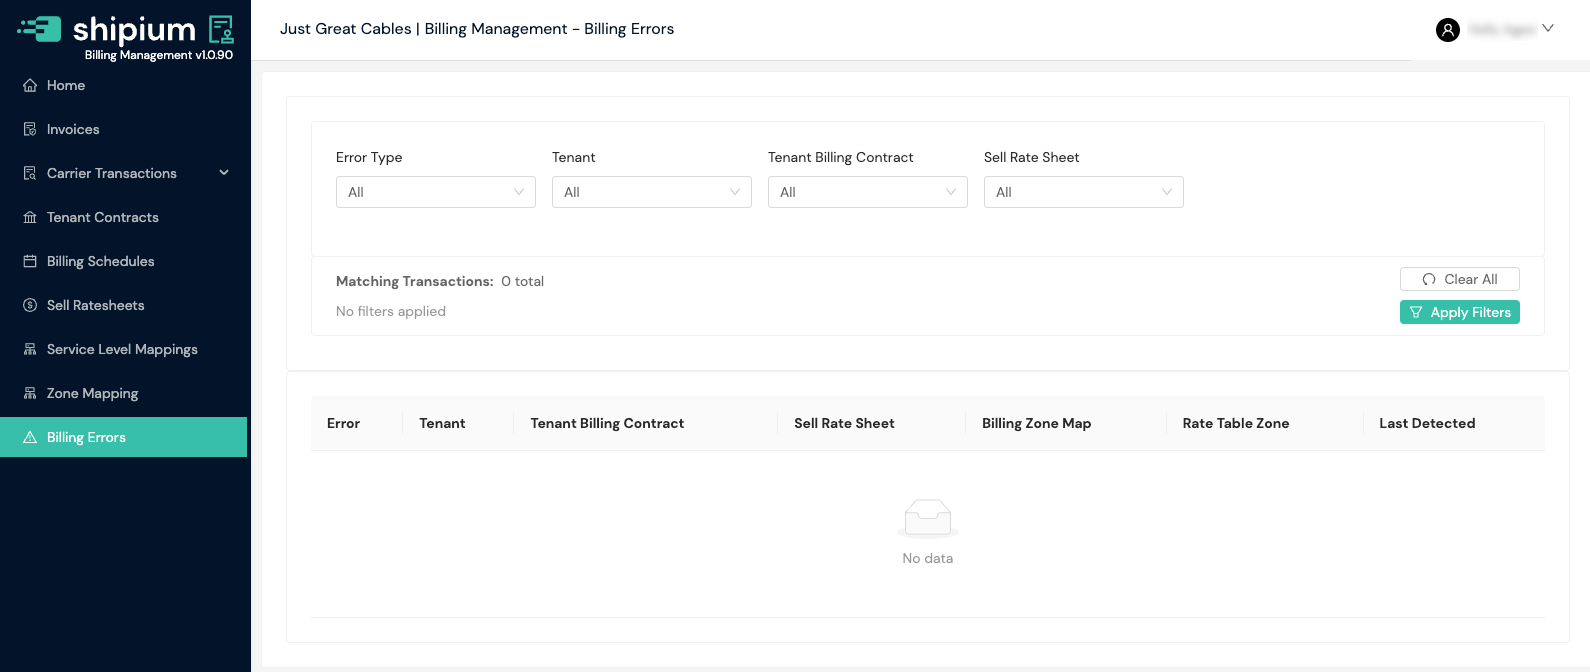
You can filter billing errors by error type, tenant, tenant billing contract, and sell rate sheet.
The error list displays:
- Error. The error type and a detailed message describing the issue. Select the expand icon to view additional details.
- Tenant. The tenant associated with the transaction.
- Tenant Billing Contract. The billing contract linked to the transaction.
- Sell Rate Sheet. The sell rate sheet that applies to the transaction (if applicable).
- Billing Zone Map. The zone mapping configuration (if applicable).
- Rate Table Zone. The rate table zone (if applicable).
- Last Detected. The date and time when the error was last detected.
Error types:
- Weight Out of Range. The shipment weight exceeds the configured rate table limits.
- Failed to Find Tenant Billing Contract. No active billing contract exists for the tenant.
- Failed to Map Zone. The shipment origin or destination could not be mapped to a billing zone.
- Missing Billing Zone Map. No zone mapping is configured for the billing contract.
- Missing Line Details. The transaction lacks required line item information.
- No Billable Weight. The transaction does not have a billable weight value.
- No Sell Rate Sheet for Service Level. No sell rate sheet is configured for the shipment's service level.
- Rate Table Not Found. The configured rate table could not be located.
Resolving billing errors typically requires updating the relevant configuration (such as adding zone mappings, extending rate table weight ranges, or configuring sell rate sheets for additional service levels).
FAQ
Q: Why is a delivery classified as commercial when I expected residential?
A: Billing Management classifies each shipment as residential or commercial automatically, then applies the sell rate sheet that matches. When a shipment is classified as commercial, a residential sell rate sheet does not apply to it, even for a delivery to a home address. If a shipment's classification looks incorrect, contact your Shipium representative so the shipment can be reviewed. Also confirm your tenant contract has a sell rate sheet mapped for the destination type you expect, since a shipment with no matching mapping falls back to your All destination types sheet.
Related documentation
Resources
Your Shipium team member is available to help along the way. However, you might find these resources helpful:
Updated 3 days ago